1. The wingtips are never right. Never. Never use the wingtips as any kind of reference. Make THEM match the ailerons. (split the TE and up the sides and re-glass)
2. On both 8's I've built, with the wings (I use Starrett machinist levels) and ailerons rigged properly (tip rib tooling holes), flaps aligned to the ailerons, the flap fairings were off quite a bit. I had to fabricate new ones to maintain edge distance to the pre-punched fuselage holes. And also had to bend up the flap skin under the belly. If I had just attached the flap fairings, lined up the flaps to them, I would have had reflex in both the flaps and ailerons. Lots of folks do it that way, which is backwards. I had a heavy wing, but it was an aileron TE radius issue, not a rigging issue.
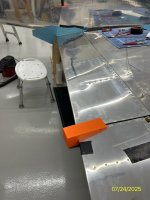
Photos are Thing 1, which is a QB wing, but Excelsior was a SB and matched in this aspect.
I have been an A&P for over 25 years working mostly on transport category aircraft.
I purchased a previously flying project with a series of problems from the widow of the builder.
One of the known issues was that it flew with a heavy right wing. Another was, as built, there were zero lights or wires on the aircraft for lighting whatsoever. There were other issues like a wooden prop with a split, a day VFR only panel, and more.
I purchased a set of the new VXI wingtips with all the bitchin lighting. While I was trying to fit the new wingtips on the wings with the bell crank jig installed, and I figured out pretty quickly that I had issues when I couldn’t follow either the Aerolleds VXI wingtip installation instructions or Van’s instructions.
I spoke with the builders son and he was able to verify that at some point, the ailerons had been miss rigged to make the right wing heavy issue less bad.
Van’s instructions are great when everything is perfect. If they aren’t, you have to have a plan to measure and verify so your fix isn’t just a wild guess.
I asked questions here and Carl Froehlich here on VAF was kind enough to provide some guidance.
After reinstalling the wings and spending a couple days documenting everything, verifying angles with a digital inclinometer, straightness, with a 4 foot straight edge, and mapping out the actual distances from the extended line of of the wing to the surface of the flight controls with calibrated tools. It became apparent that the left flap was the culprit, and hadn’t been made quite right.
If you slap a straight edge on the last rib on the wing and line it up with the holes and make the trailing edge of the aileron match, then adjust the flaps to match the aileron you are making a series of assumptions that may not be true.
After going deep down this rabbit hole. I am quite certain that this issue is resolved.