Deburring the inside of flanges with the speed deburring tool
So, I was struggling to figure out how to use the speed deburring tool from Aircraft Spruce on the inside flanges of ribs and spar channels. It is difficult to keep a perpendicular angle in tight spaces. Without the perpendicular angle you risk getting an oblong hole instead of a circular one. Came up with the idea of installing the bit into the end of the 90 degree angle attachment (which comes in the Aircraft Spruce RV Tool Kit as well) and hand turning the shafts that would otherwise be inserted into the air drill. This works out really well. Dunno if someone else already posted this idea or not, but it seemed too "Eureka!" not to share.
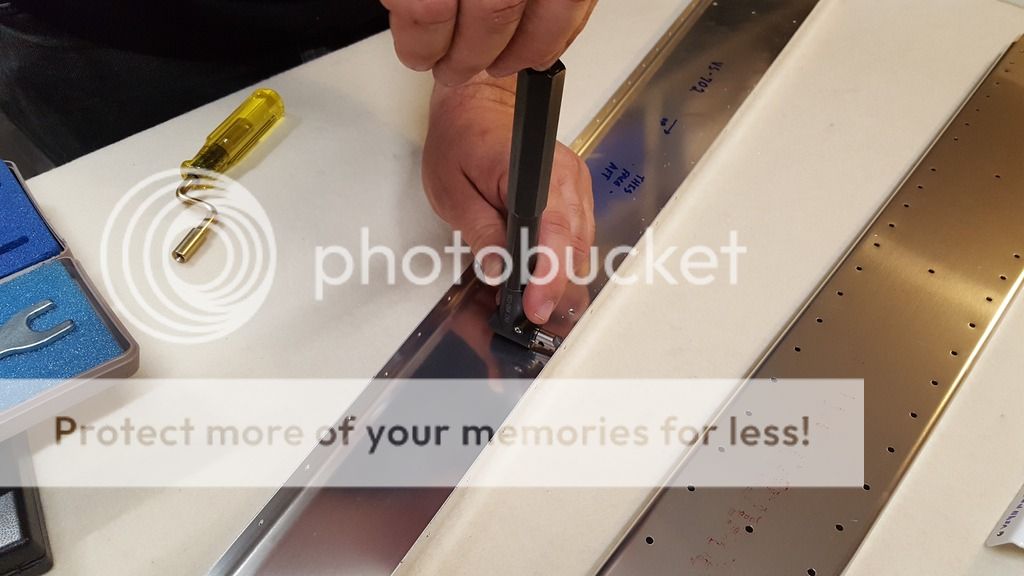
So, I was struggling to figure out how to use the speed deburring tool from Aircraft Spruce on the inside flanges of ribs and spar channels. It is difficult to keep a perpendicular angle in tight spaces. Without the perpendicular angle you risk getting an oblong hole instead of a circular one. Came up with the idea of installing the bit into the end of the 90 degree angle attachment (which comes in the Aircraft Spruce RV Tool Kit as well) and hand turning the shafts that would otherwise be inserted into the air drill. This works out really well. Dunno if someone else already posted this idea or not, but it seemed too "Eureka!" not to share.
Last edited:

")

![20220827_093438[1].jpg](/data/attachments/17/17933-2ff1aa12446a02d876324e938944bcbc.jpg)