VansAirForceForums  
Home > VansAirForceForums

-POSTING RULES
-Advertise in here!
- Today's Posts | Insert Pics

Keep VAF Going
w/a Donation


VAF on Twitter:
@VansAirForceNet


Go Back   VAF Forums > Main > RV Ongoing Maintenance Issues
Register FAQ Members List Calendar Search Today's Posts Mark Forums Read

Reply
 
Thread Tools Search this Thread Display Modes
  #21  
Old 03-11-2023, 02:10 PM
plehrke's Avatar
plehrke plehrke is online now
 
Join Date: Sep 2006
Location: Defiance, MO
Posts: 2,097
Default

I ordered a 6 non prepunched power coated and i got it yesterday. I will definitely use solid rivets. Drilling out the skin rivets is easy and only takes a minute. Even easier to re-rivet the skin with the squeezer.
__________________
Philip
RV-6A - flying 1000+ hours
Donated to VAF yearly since 2007. Why? Because it is worth every penny and more.

There is something fascinating about science. One gets such wholesale returns of conjecture out of such a trifling investment of fact. —MARK TWAIN
Reply With Quote
  #22  
Old 03-11-2023, 03:05 PM
megerj megerj is offline
 
Join Date: Jul 2020
Location: Tucson, AZ
Posts: 12
Default Access to accomplish SB-00036

Not a builder...patience please. Also I tried, really...to find a thread about opening another access point to evaluate SB-00036 (rear outboard elevator hinge bracket area on rear spar).

Question - Can you drill out a new hole closer to the mid point for easier access than the current tooling hole? If yes...any engineering analysis and directed location?

Thanks
Meegs

RV-8
Reply With Quote
  #23  
Old 03-11-2023, 04:58 PM
bhester's Avatar
bhester bhester is offline
 
Join Date: Jan 2005
Location: Hopkinsville, KY
Posts: 1,095
Default This is all I can say!

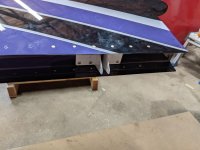
Mine!
Click image for larger version

Name:	5407C80D-12BE-4148-8514-7337FB666FC9.jpg
Views:	194
Size:	268.8 KB
ID:	39540
__________________
Bobby Hester - Builder/Pilot/A&P
Surfing the web from Hopkinsville, KY
N857BH RV7A XP-O360 - Garmin G3X ADS-B IN/OUT 2020 Compliant
Web site: http://www.newtech.com/bobbyhester/RVSite.htm
Dec. 2022 VAF donator - a lot better than any magazine subscription
Reply With Quote
  #24  
Old 03-11-2023, 06:01 PM
greghughespdx's Avatar
greghughespdx greghughespdx is offline
 
Join Date: Nov 2011
Location: Aurora, OR
Posts: 1,351
Default

Quote:
Originally Posted by megerj View Post
Question - Can you drill out a new hole closer to the mid point for easier access than the current tooling hole? If yes...any engineering analysis and directed location?
Yes. Referenced in Step 1 in the service bulletin and Figure 15 on the last page. Describes the options to enlarge the existing tooling hole, but you can also add another hole if needed for inspection in the outboard rib. Just be sure to put it the new hole on the centerline and leave sufficient material from an edge-distance perspective when choosing where to drill on the centerline.
__________________
Greg Hughes - Van's Aircraft
Van's web site | Instagram | Facebook
Opinions, information and comments are my own unless stated otherwise. They do not necessarily represent the direction/opinions of my employer.

Building RV-8A since Sept 2014
Dual AFS 5600, Avidyne IFD 440, Whirlwind 74RV, Superior XP IO-360
VAF build thread - Flickr photo album - Project Facebook page
Aurora, OR (EAA Chapter 105)


Last edited by greghughespdx : 03-11-2023 at 09:51 PM. Reason: Clarified how to add a second hole if needed
Reply With Quote
  #25  
Old 03-11-2023, 08:49 PM
rvsxer rvsxer is offline
 
Join Date: May 2007
Location: Inver Grove Hgts, MN
Posts: 379
Default

Quote:
Originally Posted by Webb View Post
Parts arrived in mail today. I’ve already primed and will let the primer cure for a few days unless I put the parts on top of the heater and bake them.
Not to ignite a new primer war but what primer did you use?
__________________
Mike Hilger
RV-6 N207AM w/G3X, 2000 hours
South St. Paul, MN (KSGS)
A&P, EAA Tech Counselor

We're all here because we're not all there...
Reply With Quote
  #26  
Old 03-11-2023, 10:21 PM
Webb's Avatar
Webb Webb is offline
 
Join Date: Oct 2007
Location: Jackson, MS
Posts: 1,586
Default

Quote:
Originally Posted by rvsxer View Post
Not to ignite a new primer war but what primer did you use?
SEM Self Etching
__________________
Webb Willmott
Jackson, MS
RV8 - Current Build
N414WW Reserved
V35B - Flying
RV7A - N32WW (Sold)
Reply With Quote
  #27  
Old 03-12-2023, 08:17 AM
Glen P Glen P is offline
 
Join Date: Jun 2017
Location: Toronto, ON
Posts: 85
Default

What's the method for ordering a kit? An email to support or some other method?
__________________
Glen Palmer
Toronto, Canada
RV7 C-GCPM (first flight April 28, 2022)
Dues paid August 2022
Reply With Quote
  #28  
Old 03-12-2023, 08:23 AM
Dad's RV-10 Dad's RV-10 is offline
 
Join Date: Jan 2005
Location: FL Gulf Coast
Posts: 399
Default

...........
Quote:
Originally Posted by Glen P View Post
What's the method for ordering a kit? An email to support or some other method?
Quote:
Originally Posted by greghughespdx View Post
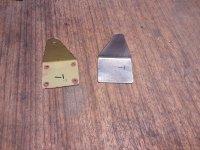
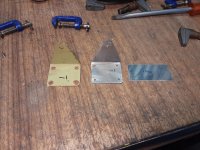
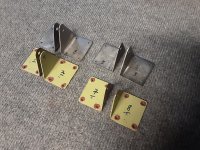
New kits are available on the Van's online store for the following kits (each link below will display the kits for that model(s). NOTE that we are currently shipping ONLY the non-powder-coated brackets (you will prime with a self-etching primer of your choice). If you order a powder-coated kit, we will not ship a kit to you until the parts are available, and we do not yet know when that will be. If you need to repair an airplane now, order the non-powder-coated kit.
Reply With Quote
  #29  
Old 03-12-2023, 05:42 PM
rvsxer rvsxer is offline
 
Join Date: May 2007
Location: Inver Grove Hgts, MN
Posts: 379
Default

Quote:
Originally Posted by Webb View Post
SEM Self Etching
Thanks, Webb!
__________________
Mike Hilger
RV-6 N207AM w/G3X, 2000 hours
South St. Paul, MN (KSGS)
A&P, EAA Tech Counselor

We're all here because we're not all there...
Reply With Quote
  #30  
Old 03-12-2023, 05:55 PM
Webb's Avatar
Webb Webb is offline
 
Join Date: Oct 2007
Location: Jackson, MS
Posts: 1,586
Default

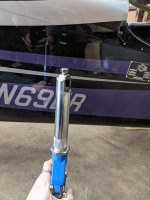
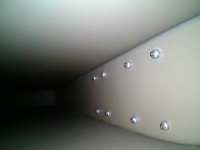
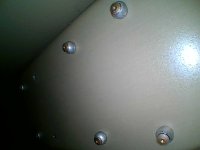
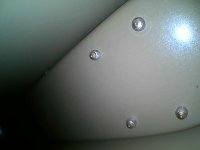
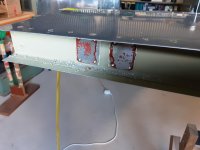
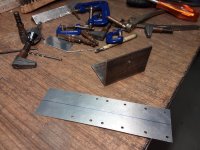
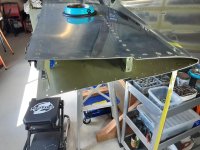
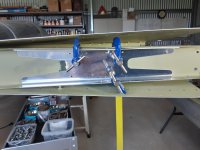
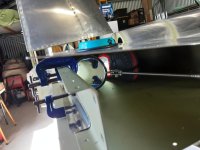
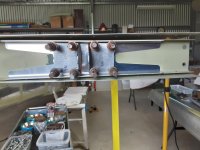
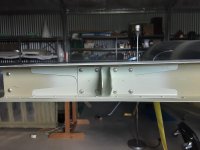
One side done. Time was 2 hours. Not a big deal. Solid rivets installed. Should take about an hour on other side due to learning curve.

Helpful notes for others:
- Remove rivets on the top or bottom skin all the way to the middle rib and front spar to allow room to get hand in. I used a #42 drill and drill stop. Rivets came out with no damage to skins.
- Brackets were easy to remove. Use a #40 and drill all the way thru the rivet.
- Break the rivet tail/head off.
- Use a punch and lightly tap the rivet out. If stuck, use a #30 drill and drill a smidge out and re-punch. All came out and the holes in the spar all looked good.
- After buggering up 2 heads trying to squeeze and drilling out, the rivet gun was superior to the pneumatic squeezer due to clearance.

With 32 cherry max rivets for later use, the kit was a great bargain.
Attached Thumbnails
Click image for larger version

Name:	D0874259-9854-4092-8319-AB74D44FF078.jpg
Views:	83
Size:	223.1 KB
ID:	39578  Click image for larger version

Name:	3CAF22C3-DB48-43D5-AD20-D3A1BCC778BE.jpg
Views:	106
Size:	101.0 KB
ID:	39579  Click image for larger version

Name:	B03E47B6-8C04-4DC5-9C0C-2356EFE2FAD4.jpg
Views:	118
Size:	238.7 KB
ID:	39580  
__________________
Webb Willmott
Jackson, MS
RV8 - Current Build
N414WW Reserved
V35B - Flying
RV7A - N32WW (Sold)

Last edited by Webb : 03-13-2023 at 03:44 AM.
Reply With Quote
Reply


Thread Tools Search this Thread
Search this Thread:

Advanced Search
Display Modes

Posting Rules
You may not post new threads
You may not post replies
You may not post attachments
You may not edit your posts

vB code is On
Smilies are On
[IMG] code is On
HTML code is Off
Forum Jump


All times are GMT -6. The time now is 03:45 PM.


The VAFForums come to you courtesy Delta Romeo, LLC. By viewing and participating in them you agree to build your plane using standardized methods and practices and to fly it safely and in accordance with the laws governing the country you are located in.