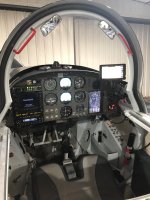
Last year my RV-6 wingman and good friend Steve and I worked together to design and install similar panels. We spent several months focused on human factor and user experience issues by creating detailed mockups which we used to evaluate common scenarios. Emphasis was placed on improving operations, situational awareness, and maintainablilty.
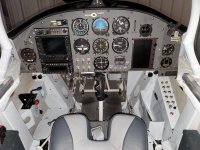
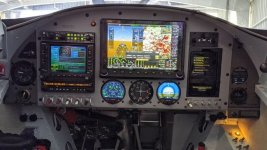
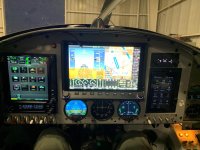
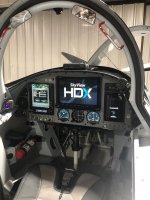
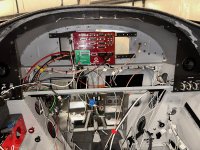
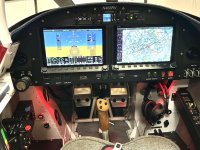
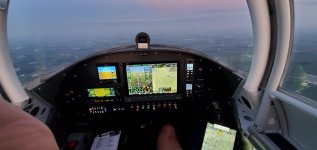
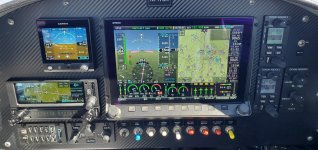
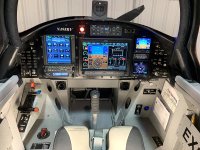
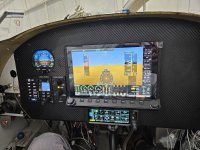
We both chose to install dual 10 inch Dynon HDX Skyview screens with the Skyview Intercom, Knob Panel, Xponder, ADSB, GPS, Com Panel and ECB. After much consideration we chose to work with Advanced Flight Systems Advanced Panel team. We are glad we did! The Advanced Panel team handled much of the heavy lifting. They were good to work with. They took our designs, created CAD drawings for our review and helped us select the required switches. They then built out and bench tested the system. The Advanced Panel Advanced Control Module (ACM) acts as both a data hub and ECB. This simplifies wiring significantly. In addition to the ACM, I installed a small fuse box to handle my PMAGs, seat heaters, and a few other items. It was fun teaming up with another builder on the design and install. It definitely helped with brainstorming designs and troubleshooting installations.
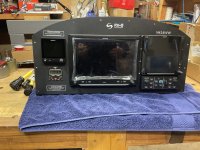
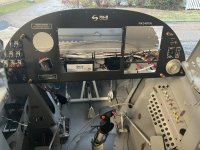
I took advantage of Dynon's new universal mounting tray kit which attaches to the back of the HDX screen. The mounting tray kits are perfect for the RV-8. With one on each screen, all components, with the exception of the ADAHRS, were mounted behind the screen. The ADAHRS was mounted in the aft fuselage.
I also took this opportunity to upgrade my nav, strobe and landing lights. I chose the FlyLed works. They work well with Advanced Flight Systems ACM. You can see the green daughter board that plugs into the ACM. They were fun to build, but a bit of a bear to retrofit into the RV-8 batwing tips.
I have about 3 hours on the panel. No squawks and it is a pleasure to fly.