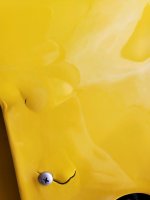
Ever seen a cowl go through puberty and get some serious acne zits? Click on the photo and zoom.
I've never seen anything like that...except when warming wet micro to make it flow, rarely a good idea.
Micro is for contour. Contouring (shaping ) should be long gone done before any applications of neat epoxy. Heck, micro brings new pinholes to the party, as it almost always traps some tiny air bubbles during mixing, and the glass bubbles themselves are hollow. Sand them open and each forms a microscopic pinhole.
In order:
1. bare glass structure
2. dry micro, block sanded to bring contour within a few thousandths of the desired surface profile.
3. neat epoxy to seal the surface, sanded just enough to remove drag marks and orange peel. Do not break through.
4. Two cross coats of a good epoxy primer. Use a color which will contrast with the next material, which for something like a cowl is...
4. Acrylic urethane high build primer surfacer, sprayed before the epoxy primer crosslinks. Block sand wet. This is where the surface becomes optically flat...no waviness to be seen in the finished, painted surface. Block until the contrasting epoxy primer starts to show through the high spots. If still bridging lows, shoot two more cross coats and sand again. Repeat until perfect.
5. Now it ready for paint, or the paint shop.
Blocking high-build requires fewer rounds if the earlier micro work was done right, and it takes less micro if the structural glasswork was done right, which usually means time spent on perfect forms and molds is time well spent.
Note acrylic urethane high build, not polyester. Polyester primer-surfacers were once the body shop standard, and there is a lot of it still used when cheap and fast are priorities. It very often does not stay stuck on epoxy glass, in particular the concave places, the only variable being how long it takes...months or years. Shrinkage and big blisters where it releases. The VariEze guys lived that one years ago. No point in re-inventing the square wheel.
-