![]() |
another paint booth
I'm feeling that a saga is beginning but I'm not sure how it's going to end.
I have a small T-hangar. My plan is to learn how to paint with HVLP: 1) piece parts , 2) then paint fuselage and empennage, 3) then one wing, 4) then the other wing. Paint booth to be moved around and expanded when needed. This is the piece part size booth. Seems narrow.... 7 ft. ![]() ![]() ![]() ![]() ![]() |
Make sure you have good filters on the exhaust. I've had to buff my airplane out twice due to careless neighbors (one of whom had a booth).
Oh, and however many lights you have, buy more. Finally, buy some scrap aluminum sheets and try your spray gear and materials out in your backyard. You can learn a lot without having to go all the way to the airport. <This advice from a guy who taught himself to paint on his airplane's tail feathers. I learned a lot about sanding and buffing paint defects too.> |
yes, I'm concerned about over spray on neighbors. I'm pulling air thru these, doubled. Any experience?
and yes, I probably need more lights. ![]() |
Quote:
|
Exhaust filtration
The filters will get coated with paint very quickly and require replacement. Consider cheap glass filters and cover them with disposable non woven fabric. A little tape will old the disposable fabric in place til fan suction nails it to the filters.
My experience says you don't need a "wind tunnel". Go easy on the fan. |
thanks for that comment. I was concerned about air change rate. with the exhaust filter in place, the fan should change the air once per minute for a booth this size. will that be enough? I may need to experiment with the filters.
|
Fan type
Hello Steve,
I am considering building a paint booth similar to yours in my detached garage. I don't have the room you have, so mine will need to be more portable. I will mostly use it for spraying AKZO primer. I've heard different views on exhaust fan selection..i.e, box fan vs explosion proof. I noticed your fan in the bottom left of the first picture. That looks like a nice set up. What type and where would I find one? Thanks, Shawn |
that's a harbor freight vent fan 8 inch and flex ducting, 1500 high and 1300 low cfm. I'm thinking of cutting a square hole in my door for the adapter for Winter painting.:)
I've been watch stuff like this on youtube, do not put O2 in there, yikes! https://www.youtube.com/watch?v=wMVULIjRd4Y |
Quote:
|
For professional booths, I believe that the air velocity should be around 100 ft/min throughout the booth. Higher than that and you may get the spay pattern blowing around and less you will tend to get overspray on the areas you have already painted. So if the end of the booth is 7X8 that would require 5600 CFM.
The 100 FPM is also in the fire codes. |
this booth will have some air dead zones. all the parts will be hanging, fairings, wing tips, cowl halves (upside down). the flow over these parts at eye level may be enough with 1500 cfm. if not, add another fan.
|
Cant wait to see how you progress with this project!
Try and keep us updated. Im very eager to see what you learn and how you make out. Planning to do the same someday for myself if i ever get that far :roll eyes: What paint products have you chosen? |
well, I've been reading about paint... so I'm doomed. Jet GLO Express sounds cool, I like the name "Jet". PPG? that doesn't sound exciting but there may be a store close to me. One guy says to use a high build primer. Why do I need high build primer on a clean alum surface? The other guy says I'm doomed. Hey, an eclipse jet took the runway when I was on short final on my last flight before I put the aircraft down for paint. Maybe that's a sign, "Jet". Any other ideas?
|
Quote:
High build primer is what you use as the final coat over fiberglass and/or other areas you plan to sand. Otherwise, it is just excess weight. On most of the airplane, you need a primer which will stick to aluminum and is compatible with your finished paint system. As to whether you're doomed, that's up to you. Just like building an airplane, there is a process to follow. Follow it well and you'll be happy. As I wrote yesterday, paint something else first. A trash can, a few sheets of aluminum flashing from Home Depot, etc. Far better to make your mistakes on throw-away items than airplane parts. Also, unlike airplane parts, you don't have to strip or sand throw-away items when the paint quality is awful. |
ok, PPG it is.
|
paint booth ideas...
Steve, Looks like a good start!
Paint spray droplets and volitiles are denser than air and will settle to the floor. Sucking the air out at the lowest level will suck out the dirtiest air. 
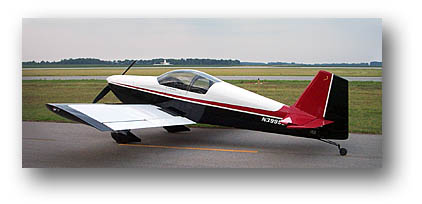
You might consider making a 4' x 8' (or larger) floor of 3/4 plywood on 2x4 joists, placed on top of your concrete floor. Drill about 400 3/4 inch diameter holes thru the floor, radius the edges of the holes with a 1/4 inch radius corner round router bit, then put a header box on one end with fiberglass hammock filter inside. Suck the air down thru the plywood floor holes, thru the joist spaces under the floor to the header, then draw the air out of the header above the fiberglass filters. Low air velocity in the headers will allow some of the paint droplets to drop out of the airflow before getting to the filters. A hinged cover allows easy access to inspect and change filters. 1/4 inch hardware cloth screen supports the hammock filter material, but chicken wire might work. I used two hammock filters in series. Changed them three times in the course of painting an RV-7A. No sign of overspray on the white exhaust outlet grill in the sidewall of the hanger. Providing lots of filter area makes the airflow velocity low as it passes through the filter, maximizing the likelihood that sticky particles will stick to the filter and not to the neighbor's Mooney. A simple tygon tube manometer measures the pressure drop across the filters, alerting to filter change time. I used a furnace blower with good results. Quiet, low amperage, reliable, cheap. Exhausting the outlet air high through the sidewall or roof of the hanger on the downwind side makes the air safer in the hanger. I made a simple plywood chimney out of 1/2 inch plywood for the exhaust air. A gable vent grill dresses it up outside, keeps the rain and robins out. Need to provide a filtered inlet for the air that is replacing the air that is getting sucked out, I used 20 sq ft of hammock filter up high, in the ceiling. Place your breathing air unit high on a shelf so that it isn't picking up the volatiles that collect at floor level in the hanger. Nasty, nasty stuff, paint fumes. Pilots need all the brain cells they can retain. Start the air flowing before starting spraying so that the concentration of flamables never gets up to the LEL (lower explosive limit). Leave blower running until volatiles are evaporated out of paint. Run a grounded bare copper wire through the airflow path to provide a ground for static. Evaluate each electrical light for safety / integrity, once read about a guy who dropped a trouble light while spraying and torched his just-freshly-painted fuselage. I use LED lights on an 18 inch wand as a hand light while spraying to be able to see reflections and gage coverage / sheen in remote corners of complex shapes. Practice a bunch before painting real parts. Find a local expert/professional and make him a friend. Good advice is better than learning it all the hard way. Expect your hanger floor inside the paint booth to change color... ...each time you change colors. I repaint mine with cheap white floor paint every so often to keep things bright. Painting is hard work, I discovered a hundred ways to screw up a paint job. A good paint booth makes a difficult task easier to master and enjoy. Maybe most of this is common sense or common knowledge, hope some of it was helpful. It's an adventure! Best of luck! - Roger |
Kyle, the PPG aviation website pictures are not impressive. what's up with that? where's the marketing? especially that lower picture on the left.
![]() |
Hey Roger, do you have any photos of your paint booth you wrote about?
-Gordon |
Good luck Steve
I bought the 8" inch duct fan and 20ft ducting from Northern Tools (which I would like to sell). The paint booth I built was 10 X 20. It wouldn't clear the area that well. I then went to two 20" box fans with two 16 X 25 filters in my doors. That went better but still doesn't clear the booth as fast as I need. You will need some filters for input air as well. I sprayed my plane using Kirker products due to Smart Shoppers being close to me and supposedly cheaper. I used way more paint than I anticipated. On the RV12, my brother and I are building, I am spraying with PPG Concept. On some areas I get good coatings and on the same part in other areas I get more orange peel. It doesn't seem to matter if it was the Kirker or the PPG paint I am getting the same results on the parts so my shortcomings must be attributed to painting technique, booth and/or paint tools. I am using a DeVilbiss FG4 gun to shot things. I am following the paint tech sheets. Shooting primer is a no brainer. It's the color that things get complicated. My plane results is probably a two footer. I have seen some planes painted by so called professionals that don't look any better than mine. So far I have only painted one part on the 12 and that was a flaperon and I wasn't fond of the overall results. Most importantly is using a respirator system. I am using a BreatheCool hooded system from Turbine Products when spraying. I use a regular respirator when mixing paint.
|
I am using a full-size dust collector that wood-workers hook up to suck up the sawdust as they are planning/etc. It has a 4 inch hose on it that really sucks it in. I put a T on it and have 2 4 inch hoses on one end of the booth near the floor, and on the other end are cheap furnace air filters up high. So I get a very nice sweep of air, and it really works great.
|
Quote:
I have just the guy for you to talk to! I have spent lots of time on the phone with PPG tech support. I just switched from akzo over a primer debacle to PPG super K and needed lots of info from them They were so great to deal with! Even as a consumer i got direct contact to tech support (unlike akzo who refuses to speak to consumers) and they answer the phone right away. Same person every time and he is like my own personal support line. He can make recommendations on products and procedures. Ill PM you. I have just the guy for you to talk to! |
what about PPG Concept paint, single stage? urethane! Linen white color, like a Chevy truck. the guy here says he has both grey and white primer. which primer color?
|
|
Quote:
As far as primer color goes, it is best (IMO) to use a contrasting primer (grey, in this case) so you'll have a good indication as to whether you're getting good coverage with your finish coats. OTOH, if you're sure you can lay down even coats, you'd be able to get away with a little less paint over white primer. |
Blower / fixtures / primer
I used a furnace blower for 10x7x16 booth. It was a lot of velocity. R Kellogg has some elegant analysis. Kyle is correct o primer coor, white over gray can be sensitive to coating weight consistency,ask me how I know. Last, spend the time fixture little parts, don't hang them on wire. They fly and flutter and make things stressful. Fixture as many things as possible to spray down hand not verticals.
Fuse rotisory is a must. I used 3" pvc pipe in wing holes behind the spar for good balance and set them on simple wood stands to rotate. Very simple and makes wings an easy 45 degree application. If you overdo it just rotate to level the paint. Pics by email if desired. |
I'm currently setting up a booth in my garage (21x12x9h, studs & 6 mil, 2 2'x2' inlet filters, pull thru furnace fan in the booth, interior florescent lights, using PPG polyurethane on my RV-8. I have used a furnace fan in previous paint booths and have had good ventilation & no appreciable fumes in the booth. Since this paint job will probably be more "intense" than previous jobs I'm a little concerned about the fan motor not being explosion proof. What do you think? Are 1/3 hp explosion proof motors available - used, cheap? Hope I'm not hijacking this thread since it seems to be covering various pb issues.
|
Explosion potential
Dennis,
I have painted 3 airplanes with solvent based paint. Fans ranged from Walmart plastic fan to furnace blower. The issue is Lower Explosin limit of suspended solvent. There s no practical way to know what your solvent density is. But, no explosions! This last plane as Stewart water based. No concern. |
Quote:
|
Quote:
Sixteen years on PPG Concept single stage white, black, and red (some of the hardest colors to paint) and the plane is still glossy. ![]() My experience painting with Concept in my backyard shop And...over a dozen years of white Concept on the '85 S-10, and it still shines very nicely: ![]() And the '74 Beetle painted in my shop with Concept single stage eight years ago (still shines like new): ![]() Unless Concept has gone totally to pot lately, the "guy on the internet" is blowing smoke. |
Concept DDC
Steve,
We are using Concept DDC Acrylic Urethane on the RV-12 - Brand Code 3800 - Olympic White. It is a lighter shade of white then the Kirker Pure White I used on my 9A. We are using the DCX61 Hardener and DT870 Reducer. The other poster was right on about not hanging things on wires. Also if painting things flat (access panels) try to pin them so they can't get blowed around from the spray blast. |
Sam and Mike, thanks for the info on Concept paint. that gives me some confidence. Steve
|
well, it sucks, but not much. need more flow. maybe add another fan, change those heavy duty intake filters or improve the door seal.
![]() ![]() that is a big prop hub for a small engine. no leaks. no grease streaks. I like it. after the withdrawal of putting the airplane down for paint subsided, I think I'll like getting into the finishing mode. 370 hrs, 2 years of great flying. the only repair was cleaning grease from the flap motor at about 200 hrs but it happened one time again just before I put the aircraft down (edit: and I almost forgot, I had to repot the hall rmp sensor pickup on the mag and a couple of weeping rivets). so it seems I'm getting ~200 hrs between flap motor cleanings. ![]() |
Steve, a negative pressure booth tends to pull dirt and bugs in through every crack, under the edge at the floor, etc. They're common enough, and they work fine, but they depend on being very airtight.
A positive pressure booth (blow in rather than suck out) doesn't bring bad stuff in through the leaks. A really good booth moves the air while maintaining just slightly more interior pressure than exterior pressure. Try two fans...one to pressurize a plenum that feeds the intake filters, and another to pull on the exit filters. Wire them together so they come on at the same time. |
Quote:
|
Steve,
I've purchased PPG paints for my plane at Smyth Automotive over in Pisgah - near Bob's Braided Lines. PPG has an aerospace paint product as well as automotive. I believe they bought PRC Desoto several years ago. Delta started painting their jets with PRC paint (not single stage) several years ago when DuPont had to change their Imron make-up because of health reasons. I used the single stage PRC aerospace paint on my RV6 15+ years ago. It still looks good. Anyway, the white on my (and Jon's) RV8 is PPG aerospace (formerly PRC) single stage. The red is Imron ($$$). I just painted some areas of my wheel pants with the PPG concept a couple days ago if you want to see what it looks like. |
Glad to hear people are having success with the ppg concept.
Might be just the ticket for me in the future since I'm using ppt products |
I need the negative pressure booth to be sure I don't get any overspray on other planes. I've sealed the hangar with expanding foam where I could but there will always be gaps. I have the intake filters mounted high to pull in as much warm air as possible for Winter painting. The hangar will be heated with kerosene since I don't have much amp to the hangar. Hence the heavy duty intake filters for any stray kerosene particles. Maybe I'll get lucky and have a couple of nice days. I added another fan in series (edit: latter changed to parallel) to increase the vacuum since the 10" x 10" exhaust filter seemed to be a significant restriction. It helped. I may try some different exhaust filters. I'll give it a try and shoot some test panels. It's time to cut a hole in my door for the exhaust duct, buy some paint and disassemble the plane.
And Scott, I'll stop by to look at the PPG Concept you painted. I found some more info on the "internet" guy that said his white Concept paint turned to chalk. He may have been the guy that immediately waxed his paint after painting. Something about the wax trapping the out gassing and ruined it. So, no wax for me immediately after painting. I don't know how true this is but why take a chance. |
Painting
I highly recommend the Sherwin Williams class in Wichita. I took this summer. Just finished painting some piper parts and now I'm starting to paint my RV. Elevators are first. I'm using single stage urethane auto paint. Couldn't find a local source for aviation paint. Plus auto urethane offers metallics in single stage.
|
I had two fans pushin
![]() and 1 fan pullin ![]() This worked out great! When I turned them all on, the plastic walls would bulge out slightly. |
All times are GMT -6. The time now is 10:50 AM. |