What's new
Van's Air Force

Don't miss anything! Register now for full access to the definitive RV support community.

Xmas Early this year

RudiGreyling

Well Known Member
Xmas Father visit my Garage last night, he dropped off the QB fuse. Guess my namesake Rudolph, the Red-Nosed Reindeer and his friends was glad to get rid of this load off the shed.

PS: Without looking at the plans, how many hours of work is there on the QB fuse before I can join it to the tail in the background??
fuse_002.jpg


PPS: Can you see I am practicing my RV10 grin already??

Regards
Rudi
 
Last edited:
There is very little that needs to be done to the front half prior to joining, but there is some stuff that is going to be easier to do before you join them.

I would make all the electric conduit runs now, it is much easier to get them under the rear floor boards.

Take a while to analyze what you are going to install in the tail cone------see the thread about ahrs mount for instance, and make any necessary provisions before you join the halves.

A little planning now could save a few headaches later.
 
Rudi,

You are my hero! I need to change careers and do what ever it is that you do for a living.....

Awesome work as usual!
 
I just went through this process on mine. Congrats!

I would expect 50-60 hours of work, QB factory rework, and inspection. When I got the tailcone joined though, I have to admit it wasn't that big of a deal.

I was expecting fireworks, confetti, and girls jumping out of cakes though; so that's probably the reason I wasn't to wow'd by the experience. The process of joining the tailcone took nearly a week to complete and it fit pretty well.

To be honest though, I'm now in Chapter 33 and I've spent more time re-doing the factory's work than I have spent actually building an airplane. Now I'm in the middle of a month long corrosion removal program to scrub out filiform, alodine, and prime. They did a pretty poor job of prepping the aluminum before applying their wash primer. The wash primer does a pretty good job, except for the places where they didn't bother to remove hand and finger prints. :mad: :mad:

In the areas with 'prints, I now have filiform forming between the aluminum and wash primer. These appear as darker areas on the surface of the aluminum, so I'd keep a close eye on those.

Here's my summary of the inspection. I've since found other items wrong and missing. I'll post those a little later, so you can keep an eye out for them too.

Phil


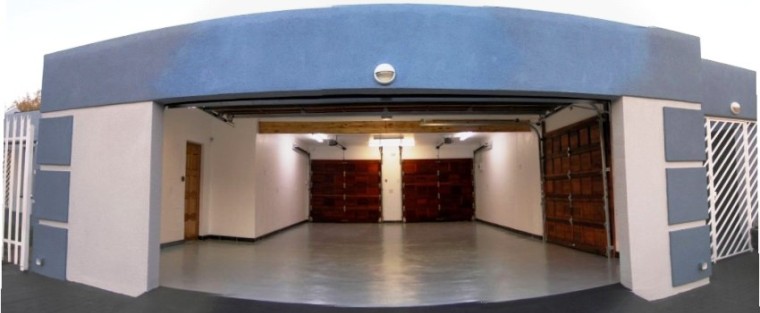
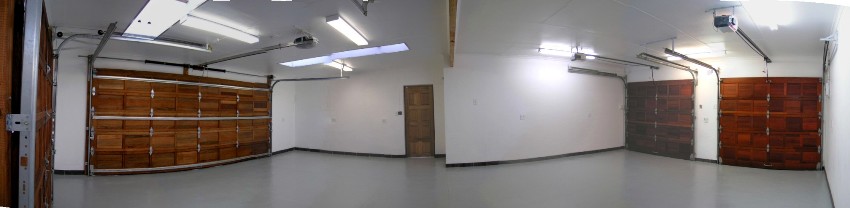
My QB Fuselage (40750) arrived a couple of weeks ago and I thought I´d share some feedback and some inventory discrepancies.

I´ve spent the past couple of weeks walking through the steps and I have currently made it through section 29. Generally speaking, the quality of the work is actually quite nice and the kit was well work the wait. Rivet work looks good and it´s generally deburred quite well.

I have found a few issues with their attention to detail.

These are the most concerning areas of workmanship:

28-4 Step #1) "Radius the corners and remove material from the middle of both control column mounts."(Remove hatched area).

This step was completely ignored. The control column mounts were deburred and simply bolted into position.


29-6 Step #7) "Draw a line on the flange of the F-10102A and B
Baggage Door Seal Angles 3/8" from the lower face of the F-1046-L Mid Fuse
Longeron as show in Figure 4.Remove the baggage door seal angles and trim
off the portion of the flange below this line. Note that once trimmed, the
flange on the F-10102B will be shorter than the flange on F-10102A"

This step was completely ignored. They just riveted the piece into
the airplane and left it. Now I´m trying to figure out the best way to trim the part per
the plans. I wish they had paid attention and trimmed the part before riveting, or not
riveted it at all.


29-9 Step #5) "Check the distance between the aft most rivet hole and
the aft end of the F-1013-L and -R Fwd Fuse Longerons per the dimensions in
Figure 3. Pull away the F-1070L and -R Mid Side Skins and trim the
longerons if necessary (or wait until fwd fuselage longerons are
disassembled, but don´t forget)."

This step was ignored and the longerons were just riveted to the
skin. They´re not slightly long, but way too long. So long that the left one sticks into
the baggage door opening. Now I´m drilling rivets in the skin/longeron and trying to
slide a piece of stainless between the two so I can cut them to the proper length
before riveting them again. If they wanted to leave them long, they should have
never riveted them.


Torque Wrench Use:
Upon checking the torque value of the AN-3 bolts, it´s quite obvious
that they don´t have one on the floor. All of the bolts are over torque by 2X.
I´m now backing off all of the nuts to neutral and re-torquing them to 25
inches.

===============================================================
===

Other items of omission.....

25-5 Step #7) The Snap Bushings were not installed - And not included in
the kit.

25-6 Step #4) The Snap Bushings were not installed - And not included in
the kit.

25-6 Step #5,6,7) The UMHW plastic was not installed - And not included in
the kit.

27-6 Step #4) The Snap Bushings were not installed and not included in the
kit.

29-19 Step #8) The 5610-90-31 washers were not included in the kit.

28-6 Step #2) None of the F-1084B´s were shipped with the kit. The A´s are
riveted to the floor but they didn´t include the other half (B)´s.

30-4 Step #2) The AN3-20A´s for the steps was not included in the kit. They
shipped a 24 with a stack of AN960-10 washers.

Many other sections) They completely ignored dimpling/countersinking and
chose to install pan head interior screws as opposed the flush. I cannot speak to
the problems this might cause right now - but I´m sure I´ll have a better understand
of it as I go forward.

===============================================================
===

Inventory omissions (summarized above):

SB750-10 QTY 8
SB625-8 QTY 2
UHMW-125X1/2X5 QTY 1
Washer 5610-18-31 QTY 2
F-1084B QTY 4
AN3-20A QTY 2
MS21042-3 QTY 2

===============================================================
===
 
Here's a couple that I recall.

31-2
Steps #1 and #2

Should have been installed at the factory (since it wasn't included in the inventory list). It wasn't and I had to fabricate my own.

==================

My steps came pre-drilled. I have one that's properly swept backward. The other hangs closer to straight down.

===================

31-4
Steps #1 and #2 - Not done.
Good luck, that's a hard one!! :)

=======================

I'm currently running conduit (or was - until i found the corrosion) and it doesn't appear to be that difficult to run with the tailcone joined. I think it would be easier to run the conduit after the join, so you don't have to secure and work around multiple lines of spaghetti.


=====================

I'm sure I'll find more later. When I do, I'll share so you can check on yours too and see if they missed it too.

Good luck! This part of the kit is fun, even with all the issues I'm working through on my side.

Phil
 
Thought of another.....

32-5
Step 14

The aft end of the F-1019's and 20's were not dimpled and their corresponding holes on the bottom skin were not either.

It is impossible to dimple that much material.

Van's suggested countersinking the skins for flush rivets on the bottom side.

Phil
 
WOW Phil thanks for the detailed write up.

Brantel thanks for the kind compliment.

MikeS thanks for the tip about the wiring!

Regards
Rudi
 
Rudi,

I thought you were building a 12? Are you doing both at the same time? What a man!
 
re: joining

Actually, when I joined the tailcone to the fuselage, I found it to be really easier than some of the other things. It was kind of like......I'm not doing something right, this too easy. But I think I 'd do the baggage door before joining, seems like it would just be easier being able to work on it from all sides. If I remember correctly (remember, I've sold mine) this comes later in the instructions.

Marshall Alexander
 
That is one of the cleanest "workshops" I have ever seen. Do you actually work there or do you import the finished pieces?
 
You're looking toward the door. Behind the camera POV is probably an environmentally condemned space where all the real work gets done... :p

Seriously, enjoy the new arrival. The shop (and that tail section) look very nice.
 
QB quality

Its certainly unfortunate that someone received a kit with a few problems. I however must say my experience with Van's QB kits has been terrific. I have built two RV8's and I am currently nearing the end of a RV10. All three QB kits were outstanding quality. I am also an A&P an Engineer and have worked in the aircraft maintenance industry for the past 30 years. Point is I have seen a few airplanes both good and bad. The only reason not to buy a QB is money, if you want to get it in the air quick and have a high quality airframe, buy the QB.

My 2 cents,

Pat
 
Peter, no I sold the RV12 cause I need a 4 seater.

RE: CLEAN: He He :D you guys make me laugh. As you can see from the pics above there are no tools in the garage. The real manufacturing tasks take place in a small garage/hobby/room off to the right. Now that the QB is here the main garage is going to look very different very quickly. :p

Here are the link and some more pictures when I extended the garages in 2005 for the RV7 build:
http://www.rudigreyling.com/rv_garages.html

xpan11.jpg

xpan10.jpg


I made a quick dolly from the crate wood to maneuver the QB around.
fuse_006.jpg


PS: I love my GARAGE!

Regards
Rudi
 
And well you should. That's a great man cave. To answer Todd, my garage is a total disaster. But I don't work on my airplane there. My hangar, other than a persistently recurring floor coating of dust and aluminum shavings, is very neat. Don't ask about the hangar for the -6A, which got a bit crowded with a pickup restoration as well as the -10 before I got the new hangar. The old hangar is slowly recovering as I reorganize so I can proceed on the truck.
 
Gents,

just some feedback...I have been at it a month now and it looks like mine and Phils were from the same batch from the QB. I am finding almost exactly all his problems on mine as well. PITA :mad:

Rudi
 
Back
Top