What's new
Van's Air Force

Don't miss anything! Register now for full access to the definitive RV support community.

Tool for cutting control sticks?

Majorpayne317641

Well Known Member
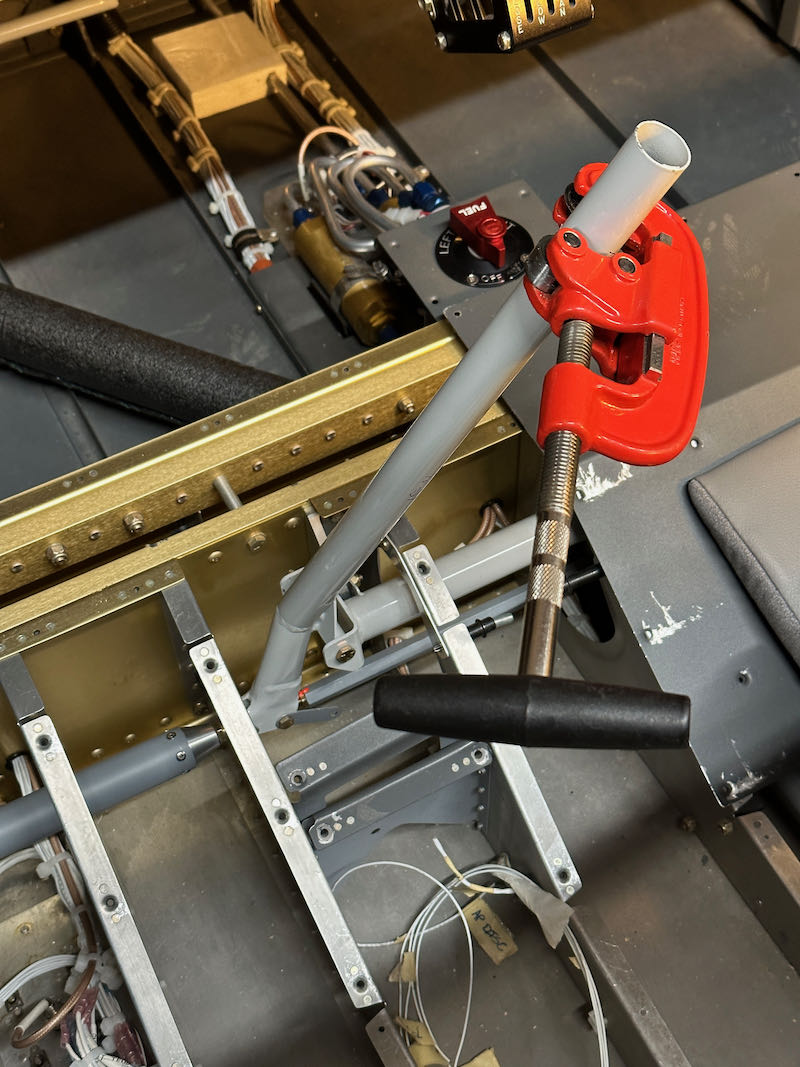
What did you use to cut your control stick? I only have a wood working band saw, hacksaw, steel chop saw, wood miter saw, wood table saw, jig saw…

The chop saw would be my choice IF it wasn’t already power coated. Now to keep it looking good I’m forced to use a cold cutting/saw blade technique.
 
I used a pipe/conduit cutter. Made for easy and precise cut, but did leave a pretty good burr on the inside that had to be filed to get my stick grip to fit.
 
I just used an old plumbing tube cutter. The steel will dull the cutting wheel so you don't want use a good one that youre going use for your fuel lines or whatever, but if you go slow it will do a nice square cut and not destroy the powder coat. The added benefit is that you can do it with the stick already installed if needed.
 
Cutting down the control stick is one of the greatest errors you can make during your build. You will wonder why the airplane never quite feels a good to fly as others have said. If you cut too much it will feel really horrible...
 
Wrap it with blue tape first. The cutter will cut through they tape no problem, but the tape will somewhat protect the powder coat. You may get some slight marking, but as long as the rollers are clean and you don't crank down the knob it won't be very much. I don't think I have a great picture, but you can kinda see what I did in my build log entry June 7th, 2022

Also, noahhl is correct, it leaves a pretty good burr on the inside. I just ran a chainsaw file in there to knock that down after
 
The last question is on the notorious wire bundle hole. I am upgrading to tosten grips with a good amount of wires. Can it fit through the vans accepted tiny hole at the base of the stick?
 
Cutting down the control stick is one of the greatest errors you can make during your build. You will wonder why the airplane never quite feels a good to fly as others have said. If you cut too much it will feel really horrible...

At least on the -8 you have to cut the control stick down to fit under the panel. It states that in the build manual. Also, if you are adding a grip, the grip itself adds length to the stick so the stick needs to be cut down just to keep the same overall length.
 
Yup, a pipe cutter can be used in situ... file away the burr and you're good to go.

20230527_stick_cutting.jpg
 
The last question is on the notorious wire bundle hole. I am upgrading to tosten grips with a good amount of wires. Can it fit through the vans accepted tiny hole at the base of the stick?
I just ran mine through the bottom of the tube. Put some protection around the bundle at the tubes edge area and then tie wrap the bundle to the sick near the base (need protection here also) so that the wire is not constantly trying to get sawed by the tube edge.
 
Cutting down the control stick is one of the greatest errors you can make during your build. You will wonder why the airplane never quite feels a good to fly as others have said. If you cut too much it will feel really horrible...
Thats all well and good, but if you're adding a stick grip on top then you must cut it down by the height of whatever grip you're using just to end up at a net zero change in length and so that you can achieve full flight control travel without hitting the panel or throttle sector knobs.

To be able to add a tosten military grip I had to cut about 6.5" off so I could end up with the same length as where I started.
 
The last question is on the notorious wire bundle hole. I am upgrading to tosten grips with a good amount of wires. Can it fit through the vans accepted tiny hole at the base of the stick?
That's what I have, and yes they fit through the bottom of the stick, but not much extra room for sure. Run a piece of sleeve or a wrap or two of tape around the wire bundle where it exits the bottom of the stick to prevent it rubbing itself to death there, and then I ran the wire bundle into a DB9 connector right there at the bottom of the stick for easy access for troubleshooting later.

Not shown in the photo is the pinout of the wires that I wrote on the bottom aircraft skin in Sharpie, saying which DB9 pin was for which stick function. Make it easy on yourself for later. :cool:
 

Attachments

  • 000_0152.jpg
    000_0152.jpg
    2.1 MB · Views: 73
Last edited:
Back
Top