claycookiemonster
Well Known Member
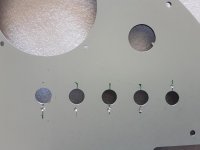
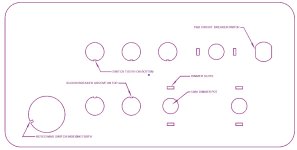
Many of my recently delivered switches included a washer which has a small extension "key" to engage with the groove in the threads of the switch. The opposite side of this washer has another extension which must be intended to be held by the instrument panel?
Question: how did you create the small slot/groove/hole in the instrument panel to receive the extension on the washer?
Question: how did you create the small slot/groove/hole in the instrument panel to receive the extension on the washer?
")