

The Odyssey of N905AD
As with many endeavors, this story begins with much musing about whether building an airplane was even possible by someone without any experience in aircraft construction. With this in mind, my potential building partner Andy Rux and I made a trip to visit a retired Van?s aircraft employee Art Chard at his home in Stevensville, MT. Art was instrumental in several of Van?s prototypes and is an accomplished builder who still keeps busy with various aircraft projects. His advice: ?Get to it! I know you can do it!? So with these words of encouragement and a sense of pioneering, I put down the money for an RV-9A empennage kit and got in line for the full Quick Build kit.
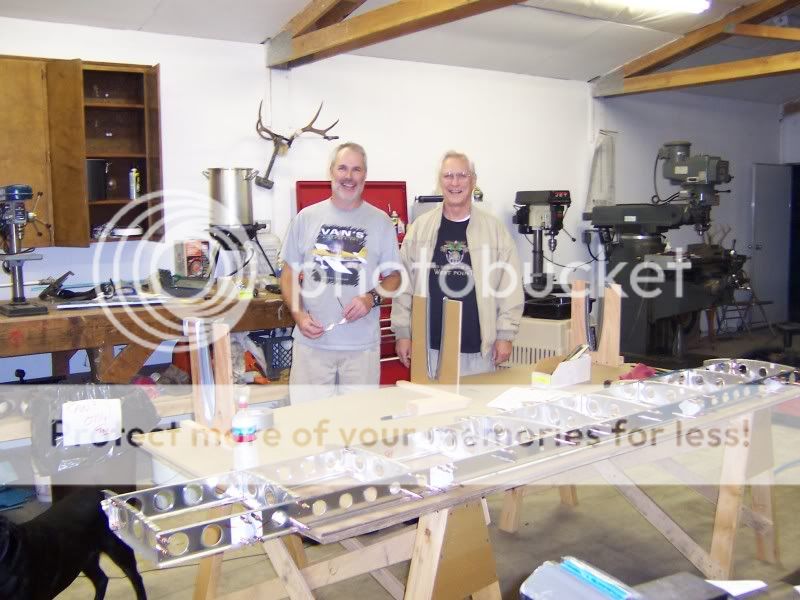
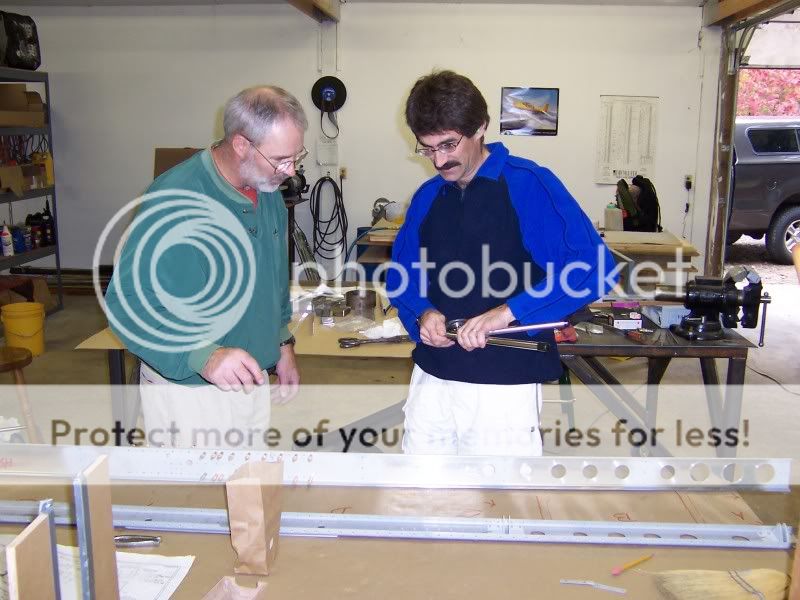
The empennage kit arrived in October of 2005 and we threw ourselves into learning the basics of aluminum fabrication. We were lucky to have Ken Kreuger stop by and show us the basics of riveting, and we practiced his instruction advice throughout the remainder of building. Thanks Ken! Our construction took place in my shop building which is a 36 foot by 48 foot open shop with plenty of tables and space for building an aircraft. The empennage took us until mid December to complete and we were done just in time as the Quick Build kit arrived just before Christmas of 2005. And that?s how we came up with our N number: It?s an RV9 started in 2005 by Andy and Daryl, N905AD ? Get it? OK, so it?s lame, but it works for us!
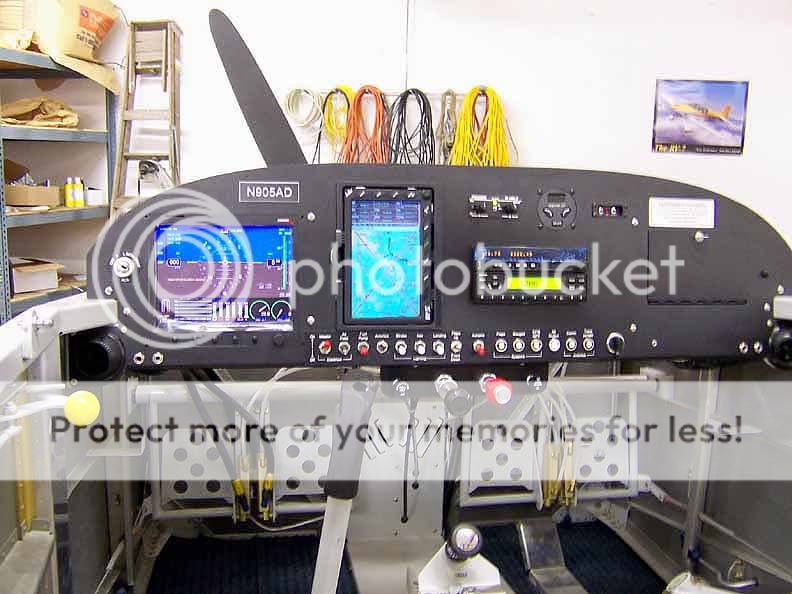
Thus began our work in earnest on the fuselage and much discussion centered on the panel and what should be included and how it should be configured. We quickly zeroed in on this being a VFR only bird with limited night flying capability. And Rob Hickman of Advanced Flight Systems had just come out with their new combined EFIS/EMS system which really appealed to us. The GPS system was a little tougher to decide and we first thought of using a Garmin 396/496 but decided to go with the larger display found in the AvMap EKP-IV. It?s main drawback is the lack of in-flight weather, but they continue to claim that they will offer this option ?soon?. We combined these main items with Van?s standard electrical package, Garmin?s SL-40 comm radio, GTX-327 transponder, PS Engineering intercom, and a Digitrak single axis autopilot. The result is a panel that?s clean and efficient and has everything within easy reach. By deciding on our configuration early on and staying with these choices, we were able to avoid any time delays from changing things as we progressed with our building.
By this time we had fallen into our building routine that would last until we completed the project. During the week we would usually put in a couple of hours of work after dinner (from about 7PM until around 9PM) and work Friday and Sunday afternoons. Our records show that we averaged about 70-75 hours a month of actual building time and totaled about 1750 hours by the time we completed the project.
Throughout the building we had some great assistance by my fellow employees here at Van?s. First we had Ken Krueger who helped us get started with the riveting, then helped with the painting and flew the aircraft on its first flight. Scott McDaniels was also a great help with a myriad of issues and advice. He probably got tired of me asking him all sorts of questions about everything! He also spent time with us to show us how to do the canopy transition fiberglass and we used his techniques to lay up the rear canopy strip. Scott was also instrumental in helping us re-drill the canopy hinge pins to get a nice tight fit on the canopy. And don?t forget the work of Gus Funnel. He helped us install the wings and make sure the incidence was properly set. With my large shop we were able to put both wings on the airplane inside the shop and still have room to move around. Gus also helped close up the wings and final install of the wings once we moved to the airport. Many thanks have to go to all these people for their help throughout the building process.
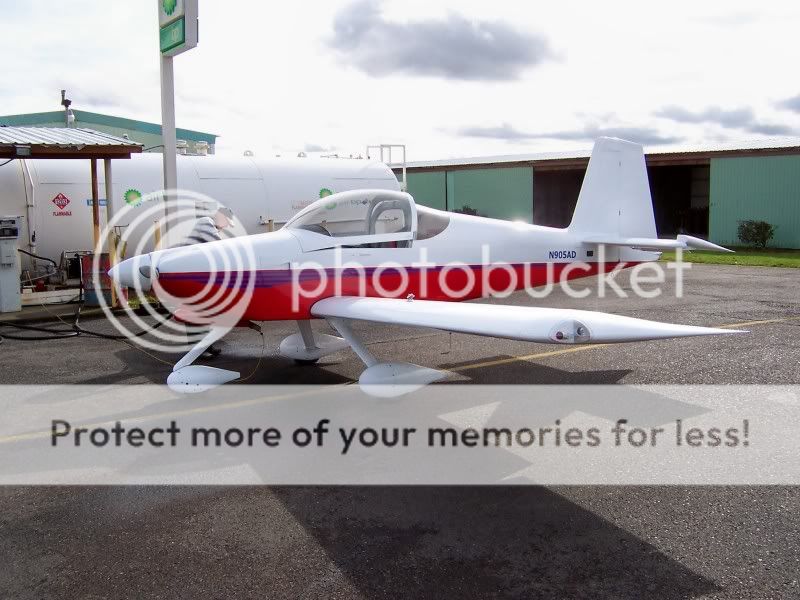
I had decided early on to purchase my engine from Aerosport engines (an O-320) and after much debate decided to go with a fixed pitch prop (Sensenich 78 pitch cruise prop), but have the engine setup to allow for use of a constant speed prop if I later decided to go that route. I drove up to Canada in October of 2006 to pick up the engine and meet with the experts at Aerosport. The engine is setup with dual magnetos and is a carbureted engine with no frills. When the engine arrived, we started on the baffling and completed the rear baffles with the oil cooler mounted. The modifications we made were to run the baffle seals straight across by the oil cooler and to add extra bracing to the rear baffling. By the time we mounted the engine the kits for the new baffling were available, so we used those parts for the forward baffling and that gave us a nice baffle system.
On to part II...
As with many endeavors, this story begins with much musing about whether building an airplane was even possible by someone without any experience in aircraft construction. With this in mind, my potential building partner Andy Rux and I made a trip to visit a retired Van?s aircraft employee Art Chard at his home in Stevensville, MT. Art was instrumental in several of Van?s prototypes and is an accomplished builder who still keeps busy with various aircraft projects. His advice: ?Get to it! I know you can do it!? So with these words of encouragement and a sense of pioneering, I put down the money for an RV-9A empennage kit and got in line for the full Quick Build kit.
The empennage kit arrived in October of 2005 and we threw ourselves into learning the basics of aluminum fabrication. We were lucky to have Ken Kreuger stop by and show us the basics of riveting, and we practiced his instruction advice throughout the remainder of building. Thanks Ken! Our construction took place in my shop building which is a 36 foot by 48 foot open shop with plenty of tables and space for building an aircraft. The empennage took us until mid December to complete and we were done just in time as the Quick Build kit arrived just before Christmas of 2005. And that?s how we came up with our N number: It?s an RV9 started in 2005 by Andy and Daryl, N905AD ? Get it? OK, so it?s lame, but it works for us!
Thus began our work in earnest on the fuselage and much discussion centered on the panel and what should be included and how it should be configured. We quickly zeroed in on this being a VFR only bird with limited night flying capability. And Rob Hickman of Advanced Flight Systems had just come out with their new combined EFIS/EMS system which really appealed to us. The GPS system was a little tougher to decide and we first thought of using a Garmin 396/496 but decided to go with the larger display found in the AvMap EKP-IV. It?s main drawback is the lack of in-flight weather, but they continue to claim that they will offer this option ?soon?. We combined these main items with Van?s standard electrical package, Garmin?s SL-40 comm radio, GTX-327 transponder, PS Engineering intercom, and a Digitrak single axis autopilot. The result is a panel that?s clean and efficient and has everything within easy reach. By deciding on our configuration early on and staying with these choices, we were able to avoid any time delays from changing things as we progressed with our building.
By this time we had fallen into our building routine that would last until we completed the project. During the week we would usually put in a couple of hours of work after dinner (from about 7PM until around 9PM) and work Friday and Sunday afternoons. Our records show that we averaged about 70-75 hours a month of actual building time and totaled about 1750 hours by the time we completed the project.
Throughout the building we had some great assistance by my fellow employees here at Van?s. First we had Ken Krueger who helped us get started with the riveting, then helped with the painting and flew the aircraft on its first flight. Scott McDaniels was also a great help with a myriad of issues and advice. He probably got tired of me asking him all sorts of questions about everything! He also spent time with us to show us how to do the canopy transition fiberglass and we used his techniques to lay up the rear canopy strip. Scott was also instrumental in helping us re-drill the canopy hinge pins to get a nice tight fit on the canopy. And don?t forget the work of Gus Funnel. He helped us install the wings and make sure the incidence was properly set. With my large shop we were able to put both wings on the airplane inside the shop and still have room to move around. Gus also helped close up the wings and final install of the wings once we moved to the airport. Many thanks have to go to all these people for their help throughout the building process.
I had decided early on to purchase my engine from Aerosport engines (an O-320) and after much debate decided to go with a fixed pitch prop (Sensenich 78 pitch cruise prop), but have the engine setup to allow for use of a constant speed prop if I later decided to go that route. I drove up to Canada in October of 2006 to pick up the engine and meet with the experts at Aerosport. The engine is setup with dual magnetos and is a carbureted engine with no frills. When the engine arrived, we started on the baffling and completed the rear baffles with the oil cooler mounted. The modifications we made were to run the baffle seals straight across by the oil cooler and to add extra bracing to the rear baffling. By the time we mounted the engine the kits for the new baffling were available, so we used those parts for the forward baffling and that gave us a nice baffle system.
On to part II...
")

