

This is a report on builder-applied vinyl wrapping on a just-completed RV9A.
The poster is Bill_H (for picture help) but the builder is S. Helton, VAF ID N115SB, email shelton267 AT msn DOT COM and all questions should be directed there. Pictures are after the text.
++++++
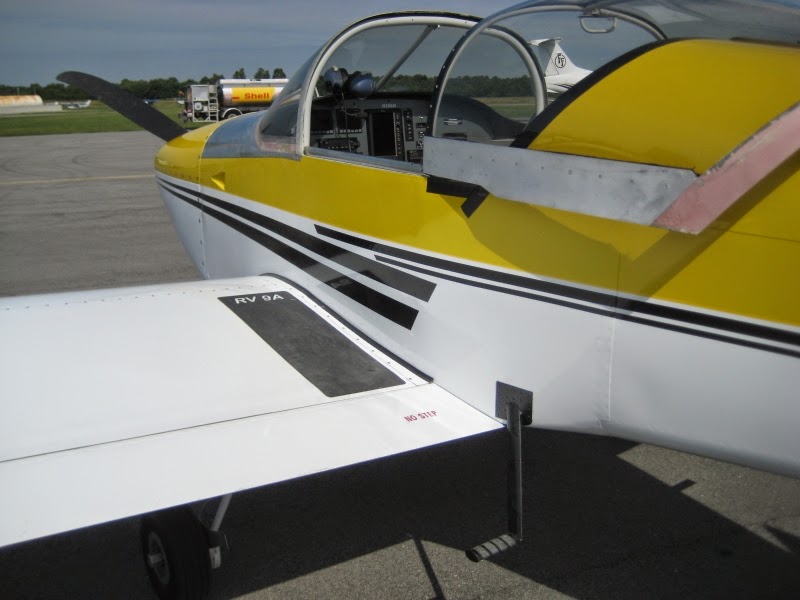
Helton: After a lot of thought and study, we decided to wrap our RV9A with vinyl instead of painting it. Race cars, boats, buses, cars and tractor-trailers are routinely wrapped with vinyl, why not airplanes? Vinyl accent stripes and decals have long been common on planes. There are other threads on VAF about this.
Our difference is that we decided to do the wrapping ourselves.
We think the best wraps come from 3M and Avery. We chose Avery, the top quality “cast vinyl” like this.
http://averyvinyl.com/A9-900-SUPERCAST-OPAQUE-12-YEAR-CAST-FILMS_c2.htm
Many colors and even metallics are available. The white is supposed to last 12 years out in the sun, we are hangared. We contacted a local sign company guy who does vinyl signs. He had also done a couple of vinyl-wrapped vehicles, so was very familiar with the process. He came and looked at our project and said he would be willing to help us for $30/hr plus materials. This is in rural Arkansas and I suspect labor cost in other areas could be much higher.
We worked with the him for 5 days doing the wings and fuselage, learning the process, then we have done the rest ourselves. It's not difficult to do, but like painting, there are a lot of tricks and techniques to it. I would NOT attempt it without some knowledgeable instruction. We did not need all of that time to learn the process, but he was available and it was convenient.
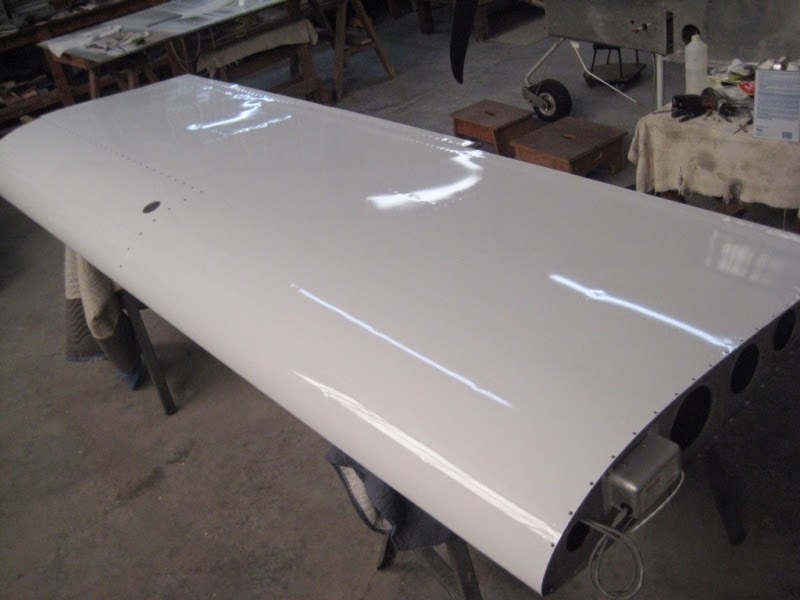
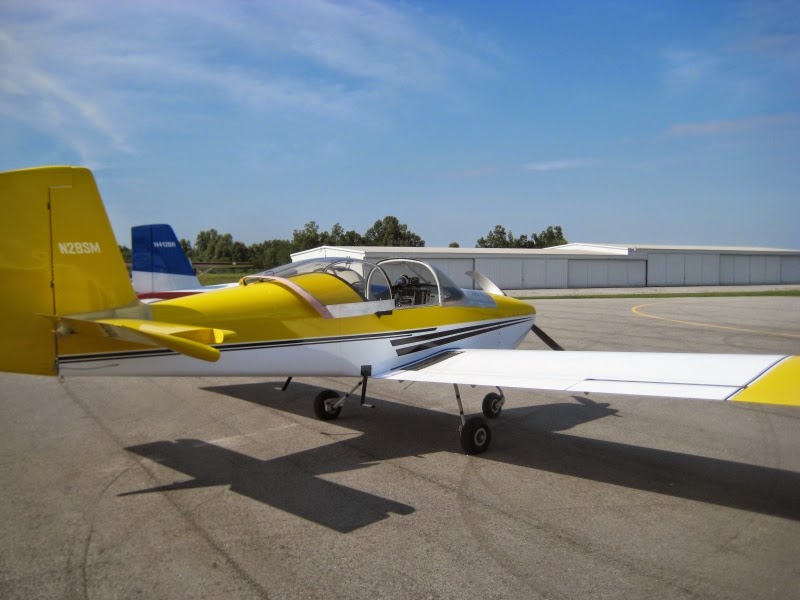
With the wrap complete we are very happy with the process and the appearance. We've had some knowledgeable aircraft people come into the hanger and admire the "paint job" before we tell them its not paint.
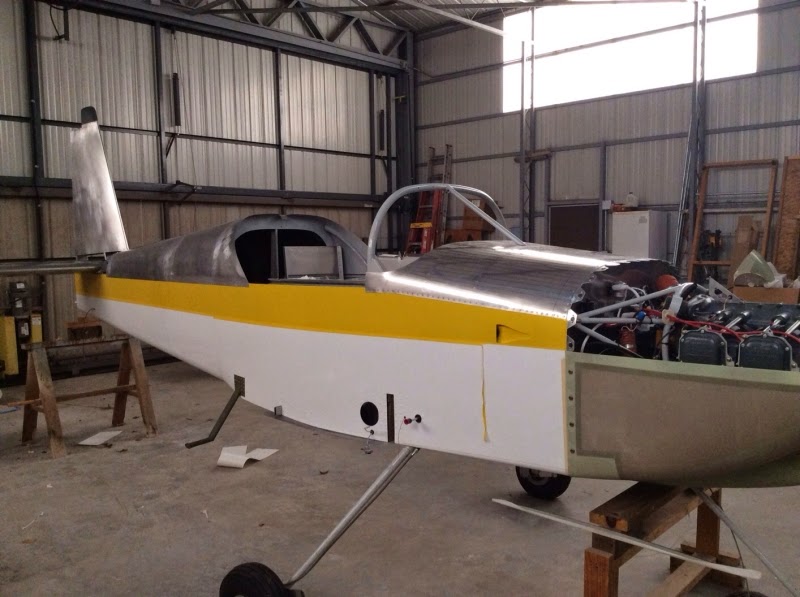
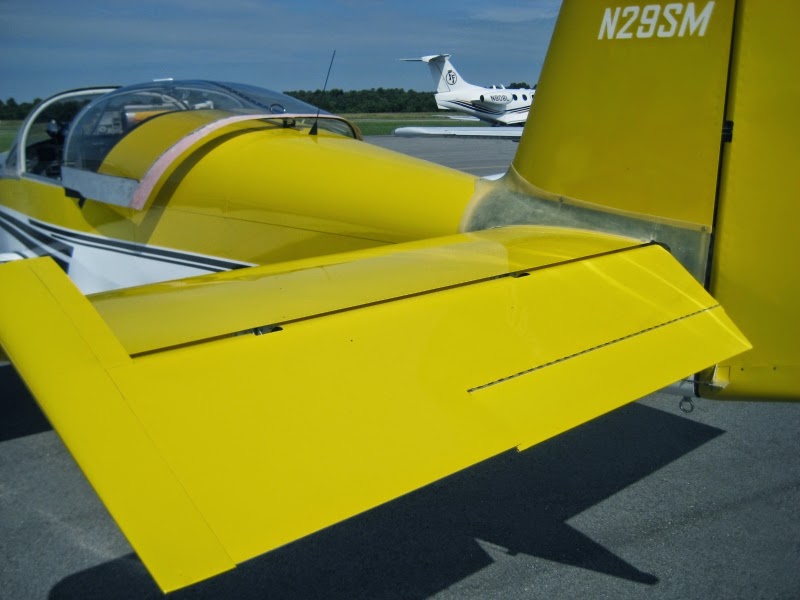
The lower cowl is painted. All of the rest of the plane is wrapped. The wrap is so tight that on the upper cowl you can barely detect, at the right angle, the textural pattern of the fiberglass underneath.
Pros:
Cost: We have about $3500 invested, $2000 labor and $1500 in material. Labor is the big variable. An average paint job is $8-10,000.
Convenience: You can do it all in your own hanger. It can all be done before first flight. You don't have to take it somewhere a have someone else disassemble and paint it.
Cons:
We don't know of any yet. Durability and longevity are obvious concerns.
Some Details:
Tools: No special tools are required. A squeegee, x-acto knife, and hair dryer (NOT heat gun). Two sharp hole punches sized to fit a #6 and #8 countersunk screw head. (More to follow on that.)
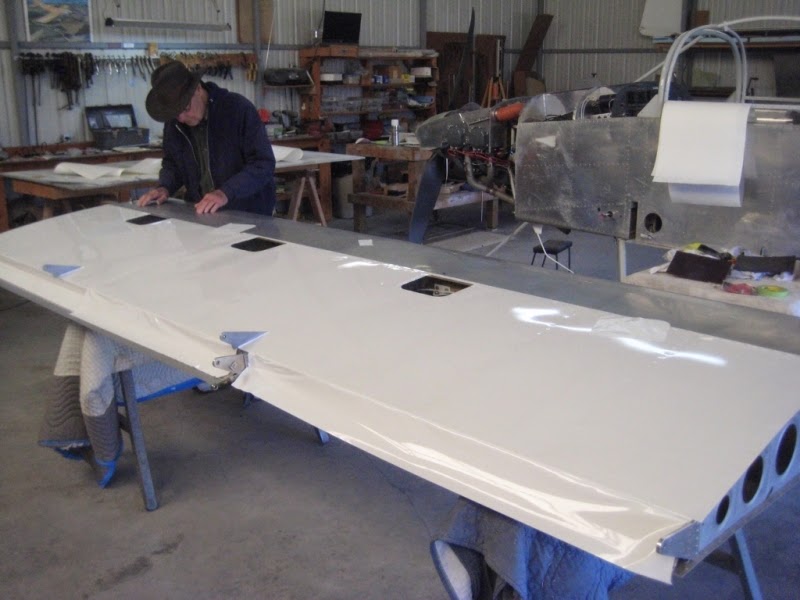
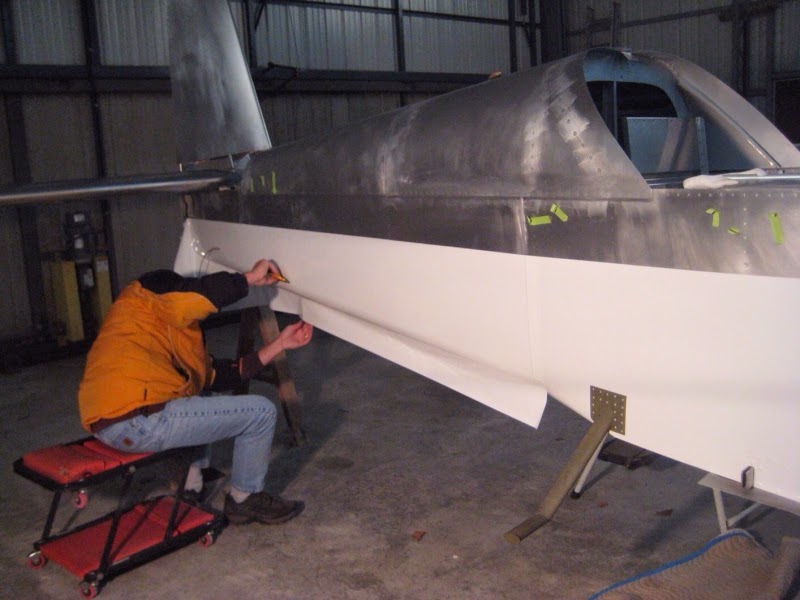
You cut the pieces to approximate size and do layouts along natural skin seams. This means you can easily remove and replace a piece should there be a need. You lay it down with the backing still on, and use tape to hold the center of the piece in place. Then you bend back one side and peel off the backer, and cut the backer off with scissors. You lay it down. The exposed adhesive is pressure activated. You can move it around until you apply pressure. You can squeegie down the center horizontally and then squeegie towards and away from you. By lifting on the edge and slightly pulling as you squeegie you can eliminate wrinkles. Also, because the adhesive is micro-grooved, you can eliminate bubbles by simply pressing down without the typical “working them to the edge or cutting them.” Even on the initial squeegee-ing,it can be relifted up and set down again.
It conforms to some fairly significant curves. A hair dryer on full (not a heat gun) helps for that. There is a limit though – such as a prop spinner and wheel pants. The prop spinner was done in two pieces with a longitudinal split covered by matching edge sealing tape. The longer it sits, the more the adhesive holds.
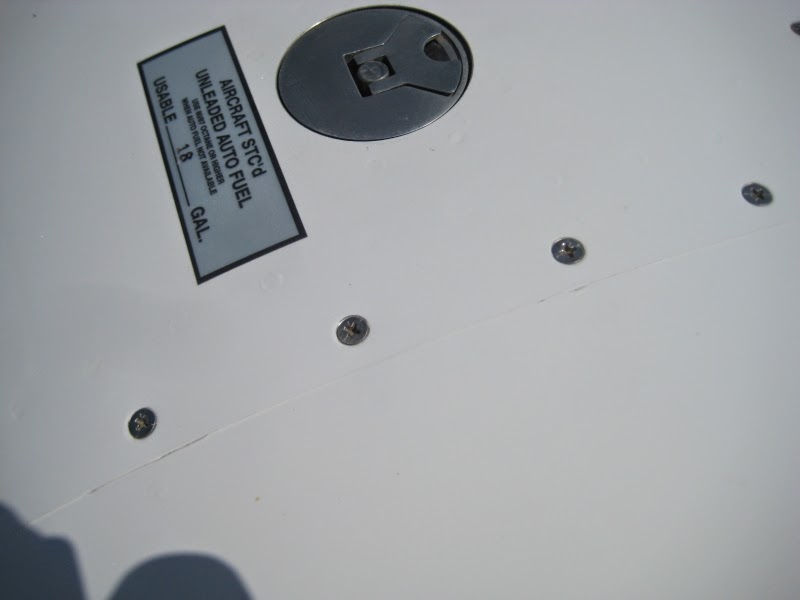
The RV9A had no rounded head or pull rivets to be covered so we have no example of that to show. We did all of the countersunk screws like this: Cover the screw holes. Nick the center and put in the screw (#6 or 8) almost all the way screwed in. Take a sharp hole punch just barely larger than the screwhead, and press down/rotate to cut the vinyl. An x-acto knife can help. The object is to remove just enough so that the screw contacts metal, not vinyl. See the last picture. We had no issues with this technique. We use countersunk washers on all screws holding thin fiberglass pieces, like fairings. I turn them on a lathe to make their OD smaller.
We applied vinyl to the aft edge of the wing forward of the flaps and ailerons, and similarly on the horizontal stabilizer, but not on the aft edge of the vertical stabilizer forward of the rudder. That was better to be painted. Small pieces to cover small areas are easy to do.
We think that the weight of the applied vinyl is about 15 pounds but did not measure it. A paint job would be twice as much or more. We hope to get some per-square-foot values of the vinyl weight with and without the backing peeled off and can post them later.
Some pictures:

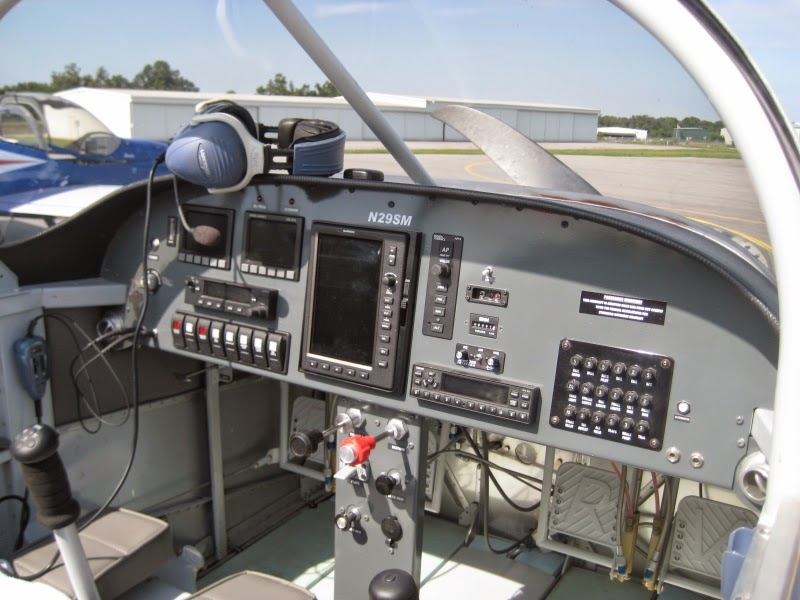
OH! The panel!
The poster is Bill_H (for picture help) but the builder is S. Helton, VAF ID N115SB, email shelton267 AT msn DOT COM and all questions should be directed there. Pictures are after the text.
++++++
Helton: After a lot of thought and study, we decided to wrap our RV9A with vinyl instead of painting it. Race cars, boats, buses, cars and tractor-trailers are routinely wrapped with vinyl, why not airplanes? Vinyl accent stripes and decals have long been common on planes. There are other threads on VAF about this.
Our difference is that we decided to do the wrapping ourselves.
We think the best wraps come from 3M and Avery. We chose Avery, the top quality “cast vinyl” like this.
http://averyvinyl.com/A9-900-SUPERCAST-OPAQUE-12-YEAR-CAST-FILMS_c2.htm
Many colors and even metallics are available. The white is supposed to last 12 years out in the sun, we are hangared. We contacted a local sign company guy who does vinyl signs. He had also done a couple of vinyl-wrapped vehicles, so was very familiar with the process. He came and looked at our project and said he would be willing to help us for $30/hr plus materials. This is in rural Arkansas and I suspect labor cost in other areas could be much higher.
We worked with the him for 5 days doing the wings and fuselage, learning the process, then we have done the rest ourselves. It's not difficult to do, but like painting, there are a lot of tricks and techniques to it. I would NOT attempt it without some knowledgeable instruction. We did not need all of that time to learn the process, but he was available and it was convenient.
With the wrap complete we are very happy with the process and the appearance. We've had some knowledgeable aircraft people come into the hanger and admire the "paint job" before we tell them its not paint.
The lower cowl is painted. All of the rest of the plane is wrapped. The wrap is so tight that on the upper cowl you can barely detect, at the right angle, the textural pattern of the fiberglass underneath.
Pros:
Cost: We have about $3500 invested, $2000 labor and $1500 in material. Labor is the big variable. An average paint job is $8-10,000.
Convenience: You can do it all in your own hanger. It can all be done before first flight. You don't have to take it somewhere a have someone else disassemble and paint it.
Cons:
We don't know of any yet. Durability and longevity are obvious concerns.
Some Details:
Tools: No special tools are required. A squeegee, x-acto knife, and hair dryer (NOT heat gun). Two sharp hole punches sized to fit a #6 and #8 countersunk screw head. (More to follow on that.)
You cut the pieces to approximate size and do layouts along natural skin seams. This means you can easily remove and replace a piece should there be a need. You lay it down with the backing still on, and use tape to hold the center of the piece in place. Then you bend back one side and peel off the backer, and cut the backer off with scissors. You lay it down. The exposed adhesive is pressure activated. You can move it around until you apply pressure. You can squeegie down the center horizontally and then squeegie towards and away from you. By lifting on the edge and slightly pulling as you squeegie you can eliminate wrinkles. Also, because the adhesive is micro-grooved, you can eliminate bubbles by simply pressing down without the typical “working them to the edge or cutting them.” Even on the initial squeegee-ing,it can be relifted up and set down again.
It conforms to some fairly significant curves. A hair dryer on full (not a heat gun) helps for that. There is a limit though – such as a prop spinner and wheel pants. The prop spinner was done in two pieces with a longitudinal split covered by matching edge sealing tape. The longer it sits, the more the adhesive holds.
The RV9A had no rounded head or pull rivets to be covered so we have no example of that to show. We did all of the countersunk screws like this: Cover the screw holes. Nick the center and put in the screw (#6 or 8) almost all the way screwed in. Take a sharp hole punch just barely larger than the screwhead, and press down/rotate to cut the vinyl. An x-acto knife can help. The object is to remove just enough so that the screw contacts metal, not vinyl. See the last picture. We had no issues with this technique. We use countersunk washers on all screws holding thin fiberglass pieces, like fairings. I turn them on a lathe to make their OD smaller.
We applied vinyl to the aft edge of the wing forward of the flaps and ailerons, and similarly on the horizontal stabilizer, but not on the aft edge of the vertical stabilizer forward of the rudder. That was better to be painted. Small pieces to cover small areas are easy to do.
We think that the weight of the applied vinyl is about 15 pounds but did not measure it. A paint job would be twice as much or more. We hope to get some per-square-foot values of the vinyl weight with and without the backing peeled off and can post them later.
Some pictures:
OH! The panel!
Last edited:


