What's new
Van's Air Force

Don't miss anything! Register now for full access to the definitive RV support community.

RV-7 Rear Skirt Fiberglass

f14rio

Member
Howdy all!

Got a quick question on the rear skirt of a slider. I am about to layup some fiberglass to form both skirts (left and right side) and was wondering if I should interleave the layers up near the doghouse/slider rail or have the two sides meet but not overlap? If I just have them meet then do I layup a joining piece that would overlap both sides?

I would think the latter but just want to confirm...
 
Here's how I did..

Hope it helps.
1264640687.jpg
 
1 piece here

Larry,

My slider fairing is one piece. I used 6" fiberglass tape to construct the entire thing. Due to the curvature of the aft section I had to cut and use 2 pieces of glass, offsetting the split at each layer. The first layer wrapped around the pilot side and about 6 to 8 inches past the dog house. I then used a short section to continue down the PAX side. I reversed this for the next layer and then offset the split by a couple of inches for the subsequent layers. Again, I was forced to do this because I was using 6" tape. If you were to cut it out of a sheet of glass (on a 45 degree bias) I don't think you would have the problem meeting the contour.

As far as the dog house. I covered the entire gap and overlapping areas with clear packing tap. When I was doing this I placed the plastic dog house seal (C-679) in position and taped it there. I then laid the 4 layers of glass. Once cured I went back and faired in the doghouse section with flox and 1 more layer of light glass.

As a note: I wasn't sure how to hold the canopy in place against the slider frame while do this. What I ended up doing was cutting thin strips of AL to mimic the C-680 canopy side. I then riveted this and the C-791 canopy skirt brace (the 2 of these sandwiched the plexi itself keeping aligned with the slider frame) to the slider frame itself using MK-319 rivets. I also temporarily riveted the plexi to the after slider bow (using the AACQ-4-4). After these were riveted I used a center punch on all these rivets to knock the mandrel out. I'll explain why in a minute. I then covered the entire gap and overlapping areas with clear packing tape and hit it with a heat gun until it was tight. I could now lay the glass but the problem I was having was that once I popped the fairing off to sand and finish I would not have any holes drilled in it to line up with the slider frame. After the glass was laid down I could see the temporary rivets. I took round wood toothpicks (bought from a local craft store) and stuck them thought the glass (still wet of course) and into the hollow section of the blind rivet (vacated by knocking the mandrel out). Once everything was cured I broke the toothpicks on by hand and drilled the toothpick out. Removed all temporary rivets and the canopy came off.

It turned out really well (lot of sanding though).

I might have pictures; shoot me your email address if you want them.

Hope this helps

Eric
Boise ID
RV-7 Cowling
 
I did mine overlapping in the middle. My glass layup skills were not good enough to do it any other way.

Mine did not come out quite as nice as the carbon fiber one in previous post
 
This is how I did it. I wanted a stiff fairing that would resist bowing or blowing out during flight, but I didn't want the hassle of aluminum (like fiberglass isn't a hassel ????). To make the layup even stiffer, I used carbon fiber. An internet searched provided several sources and some offered discounts on "leftovers" which saved a bunch of money and worked great. As you can see from the pics, the epoxy is black. I added black coloring pigment to the epoxy because I wanted the inside of the layup to match the black sikaflex (I know, my canopy will blow off).
So okay:
1. Cover everything that you don't want glued down with clear packing tape. Also apply strips of packing tape from the canopy to the fuse skin. Make the tape as tight as possible. This will provide the transition from canopy to fuse and will actually be the shell for laying down the glass. I then put a coat of car wax on that. It helps "release" the lay-up once cured. An air gun helps also.
You can kind of see the strips of clear tape in the first pic. Don't worry if it isn't perfectly tight. That's what microballoons are for. Cover everything you don't want glue on with newspaper or something.
2. Put on your respirator. Carbon fiber is nasty stuff. It itches my skin like crazy so imagine what its doing to the lungs. Another caution. DO NOT get carbon fiber on aluminum. It WILL cause it to corrode. I laid up one layer of fiberglass, one layer of carbon fiber, one layer of fiberglass, one layer of carbon fiber, and two layer of fiberglass. This way, the fiberglass will be next to the aluminum and the top two layers of fiberglass are for sanding down. It kind of gives me a bit of a hedge so that I don't sand into the carbon fiber and send carbon dust all over the aluminum. Okay, having said all this, there is no doubt lots of carbon fiber floating around in the air just from the process of unrolling the roll, cutting the stuff, caring it around, brushing on the epoxy, etc. etc. I just tried to be as careful as I could. Hey, it's not a perfect world.
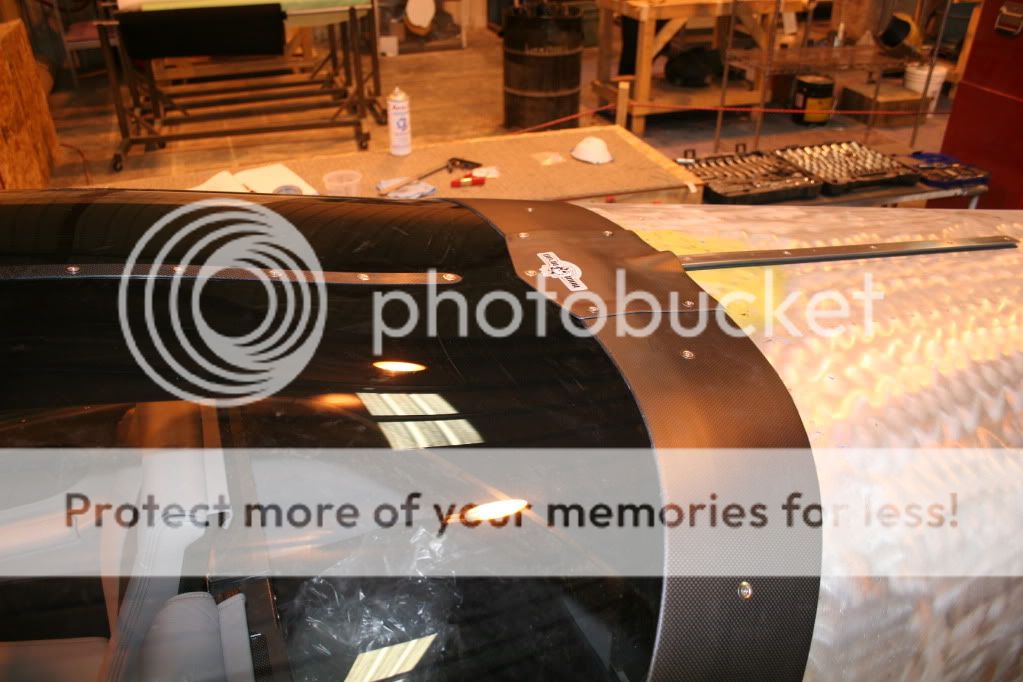
3. I did the entire fairing including both sides and rear in one big layup. I did overlap the glass a couple of inches and tried to space the overlaps in different places to avoid a lump - but sometimes thats kind of hard to do. You can kind of see the overlaps in the corners of the fairing in the next to the last pic.
4. The dog house. I took the little pre-formed aluminum dog house thingy and tack glued it in a couple of places to the fuse and then put a couple of layers of saran wrap over it. Then I just layed the class over that. It turned out okay, but, unless that seal between the nylon slider thingy and the dog house thingy isn't perfect, you will feel the air on the back of your neck. Once done, you can throw the aluminum thingy away. Again, you can see from the pic that the layup in this area isn't perfect but like I said, that's what epoxy and micro-balloons are for.
5. As you can see, I'm not the neatest builder in the world, but it does all clean up, except the concrete. Epoxy will soak into concrete (and your clothes) faster than you can grab the acetone, so like said, if you don't want epoxy on it, cover it.
6. Once you're done with the layup, go get a cold one. Then get another. This took most of the afternoon.
7. Don't get in a hurry to pop off the layup. It's way easier to do the filling and sanding now. I didn't use microballoons but I wish I would have. I can't remember what I did use as a sanding sealer, but as I recall it was one part white goo, one part blue goo, and a few drops of a clear activator. It was expensive as thunder and didn't go that far and was incredibly hard to sand.

I used West Systems epoxy with the fast hardener, 8.8 oz bid fiberglass http://www.aircraftspruce.com/catalog/cmpages/rutan.php
and about the same weight carbon fiber. This weight cloth is easy to layup and saturate and the bid or bi-directional allows you to contour curves like the doghouse thingy real easy. After the initial layup cures, be sure to sand the whole thing with course sand paper prior to filling.

Finally, I just saw Chris Frisella's work and am wondering why I'm posting all this non-sense.

DSCN3023.jpg


DSCN3026.jpg


DSCN3029.jpg


DSCN3031.jpg


DSCN3034.jpg


DSCN3039.jpg


DSCN3042.jpg
 
Thanks for the responses! The way you all did it will give me some ideas to work with.

I did a layup last night on the right side. Packing tape bridging the gap between canopy and skin, electrical tape as the outline of the skirt. 4 layers covered by dacron tape. It was easily popped off this morning after about 14 hours of cure time. I will do the left side tonight and then put 4 layers over the dog house area.

I did not cover everything that I didn't want goo on... I quickly noticed this after pouring a bunch of epoxy on the cloth!! Lessons learned... the left side will be completely covered in tape and newspaper to soak up the drips.

Will see how it all works out! Thanks again fellas!

Oh, by the way, I held the canopy to the frame with #6 screws. They had just enough bite in the #30 drilled canopy frame to hold it down nicely. Also left an impression in the fiberglass to aid in drilling.

Larry
 
Back
Top