What's new
Van's Air Force

Don't miss anything! Register now for full access to the definitive RV support community.

Rudder trailing edge potential issue

kirkbauer

Active Member
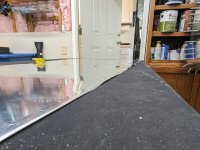
I'm working on my RV-10 rudder and I made a mistake and slightly creased the trailing edge in the wrong direction for one of the two skins. I tried to go back and fix it with the edge forming tool to bend it the other way. Now it is a bit "wavy" and I have a photo of the worst section of that below.

Between the tank sealant and the rivets will this end up working out OK as is? Is there anything else that I can do to fix it? Or will I need a new skin?

2024-02-25 15.09.16.jpg
 

Attachments

  • 2024-02-25 15.09.16.jpg
    2024-02-25 15.09.16.jpg
    2.4 MB · Views: 79
I hate to say it, but that might be too much wave. You can try, but at this point it is easy to just get a new skin and not risk replacing the complete rudder (no much is salvageable after you add the proseal).

I suggest you put the rudder on the shelf for now and build on. At some point you will need to order other stuff from Van’s so you can add this skin to the order and save some money on shipping.

Carl
 
You could try clecoing it to the wedge , skin on each side and see if it lays out or stays wavy?
 
I agree with new skin, not sure how much you are bending and edge forming, but it looks too aggressive. Edge forming is light, like almost not noticeable. Understand you tried to bend it back, but with the roller it looks like it started stretching.
 
The skins are toast
There is no way to un-stretch the edge
Get some training from a tech counselor or class
You don’t want to repeat this mistake
 
Are you using the edge roller tool? There are "tricks" to using that tool, the most important being to get the tension on the vice grip adjustment "just" the right tightness to form the edge but not so tight as to bind/pull/stretch the skin edge. Another is to carefully visualize the direction of the edge bend before using the tool (ask me how I know). Keeping it snug to skin edge is important too - takes some practice but usually mistakes are recoverable if you get the first part (tension) right and go slow. As others said, find an experienced builder to help if unsure. On the plus side, you now have some nice material to practice on. If you're like most builders, you'll have a much larger "scrap bin of shame" after a year or two than you do now! (mine sat in the corner and was a great source of practice parts, shims, material for fabricating avionics trays etc.). One more point - do any edge breaking before dimpling unless the edge tool clearly won't over lap any part of the dimples...
 
Last edited:
I did something similar on my 9A, not quite this bad, and just replaced the skin. IMHO this skin is beyond salvage. Replace it and keep it for practice/scraps.
 
I own both of the popular edge forming tools and have used both successfully but I made the one I use the most.


It's called a "Bob" stick. Bearhawk guys will know.
Buy a cheap hardwood cutting board and cut a length around 7-8" 3/4x5/8. Take a hacksaw and cut your depth desired. When you first use it it will bind a little so I just shoot some wd-40 on it and it works like butter. Never broke an edge the wrong direction with this tool.
1709224237862.png
 
Last edited:
You will use that skin for various little jobs by the time your project is completed, everyone needs some random material in the shop. :)

The key to successful edge forming is to proceed VERY slowly, a small amount of deflection at a time until final shape. There are several forming tools but each requires some practice to attain proficiency.
 
One more point - do any edge breaking before dimpling unless the edge tool clearly won't over lap any part of the dimples...

Further to that point, if you have an edge you think should be broken and the KAI goes right into dimpling, check forward a few steps to confirm. I think it was the elevators on my -10 that had that out of sequence.
 
Back
Top