Yesterday I finished the installation of a PH Aviation flap actuator. This is a short post of the fabrication and installation process. As the website states, it's not a direct replacement. But it was easy nonetheless ")
I first learned about this new actuator by reading this thread on VAF.
Here's the website where I purchased the actuator. First thing I did was email Pat Hatch with some questions. Pat answered really fast and was easy to communicate with.
So the installation... Pat's instructions were for a RV-6. After looking the plans over, I decided the edge distance for the pivot bolt hole in the bracket was a little too skinny for my tastes. So I did a little redesign.
I basically used some of the methods Van's uses for their actuator and combined that with the RV-6 plans...shook it up a little and came out with a nice installation. I kept the geometry the same as the plans for the -6, so I didn't have to reinvent the wheel and could use the rest of their plan guidelines.
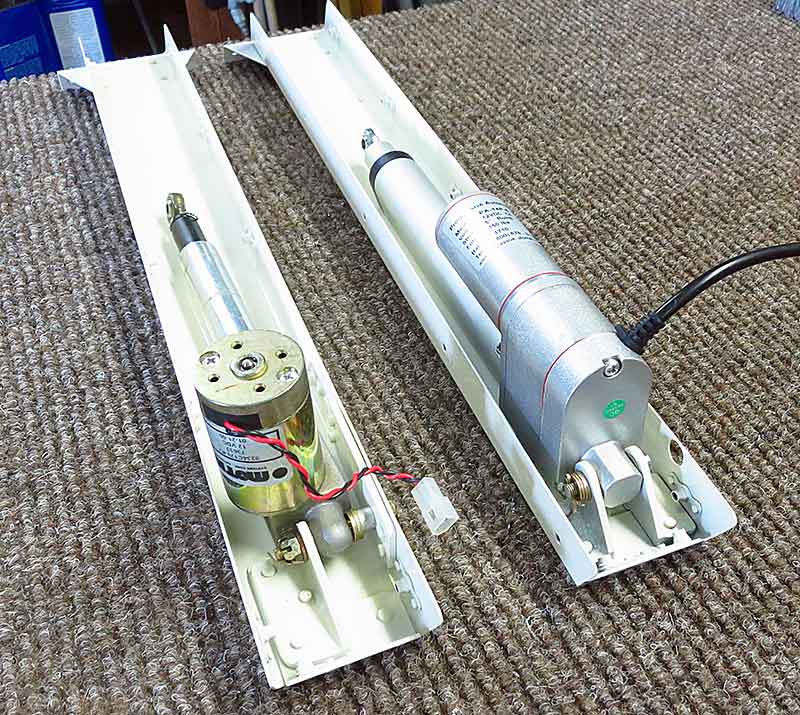
Just to get orientated, here's a photo from Pat's website showing the difference between the Van's installation compared to theirs.
Pat's is on the right, Van's on the left.
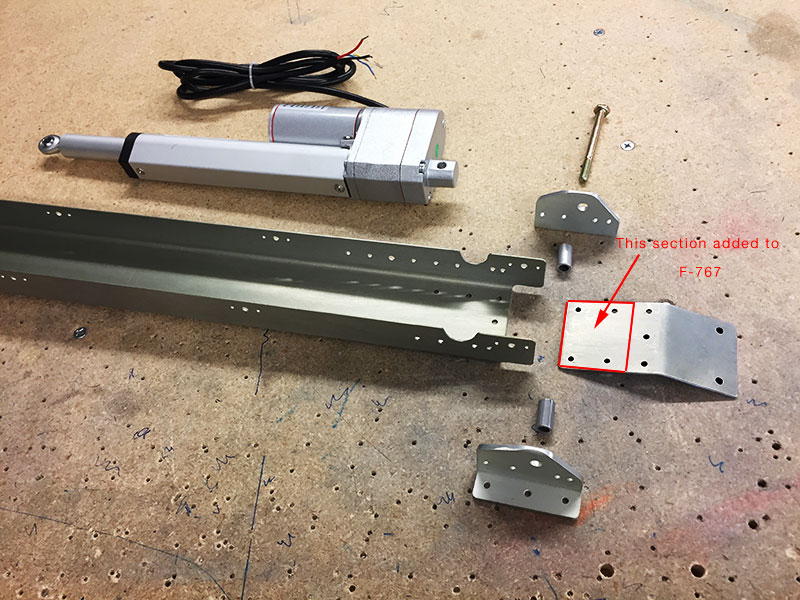
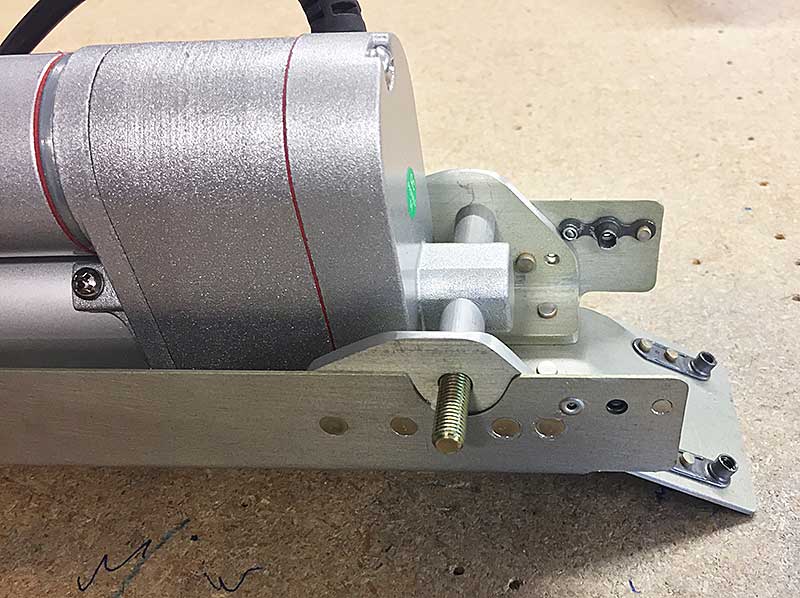
Here's a photo of my assembly laid out with all the parts in the proper orientation. You can see I modified the brackets and eliminated any concern for edge distance. I also made my brackets the same length as Van's. This allowed me to use three rivets and as a bonus the sides of the brackets are secured. Pat's design uses shims to keep the bracket bottoms level with the F-767 attach angle. I just lengthened the F-767 since I hadn't fabricated it yet.
Here's the whole affair assembled.
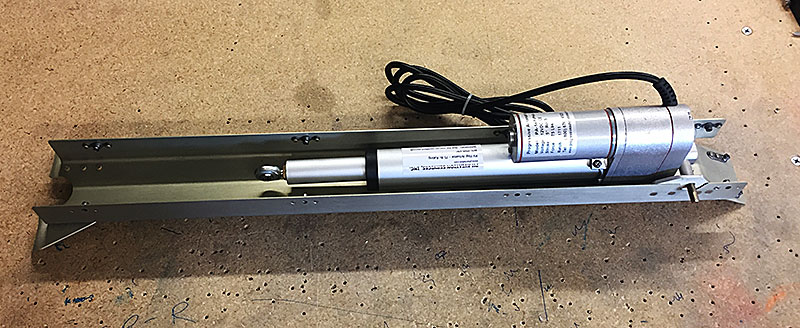
Another view.
Here's a short video of me checking out the geometry in action. My bearing blocks were a little tight so you can hear the motor pitch changing as the friction went up and down...bearing blocks smooth now
It was an easy installation and I'm excited to see it work in the air.
I first learned about this new actuator by reading this thread on VAF.
Here's the website where I purchased the actuator. First thing I did was email Pat Hatch with some questions. Pat answered really fast and was easy to communicate with.
So the installation... Pat's instructions were for a RV-6. After looking the plans over, I decided the edge distance for the pivot bolt hole in the bracket was a little too skinny for my tastes. So I did a little redesign.
I basically used some of the methods Van's uses for their actuator and combined that with the RV-6 plans...shook it up a little and came out with a nice installation. I kept the geometry the same as the plans for the -6, so I didn't have to reinvent the wheel and could use the rest of their plan guidelines.
Just to get orientated, here's a photo from Pat's website showing the difference between the Van's installation compared to theirs.
Pat's is on the right, Van's on the left.
Here's a photo of my assembly laid out with all the parts in the proper orientation. You can see I modified the brackets and eliminated any concern for edge distance. I also made my brackets the same length as Van's. This allowed me to use three rivets and as a bonus the sides of the brackets are secured. Pat's design uses shims to keep the bracket bottoms level with the F-767 attach angle. I just lengthened the F-767 since I hadn't fabricated it yet.
Here's the whole affair assembled.
Another view.
Here's a short video of me checking out the geometry in action. My bearing blocks were a little tight so you can hear the motor pitch changing as the friction went up and down...bearing blocks smooth now
It was an easy installation and I'm excited to see it work in the air.