Funguy
Well Known Member
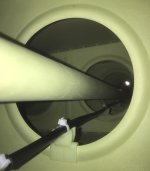
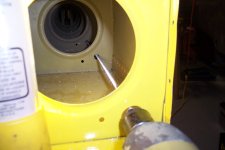
I have a RV6 that I did not build but have owned for 17 years. The builder did not install conduit in the wings but did secure the existing wires very well. I have previously tried to run wires from the fuselage to the access port with no success but have always found other solutions. I am now contemplating adding adsb via a Tailbeacon X and while I am sure I can add a new bottom rudder fairing and make it work there, I thought I would take one more kick at the can to run new wiring to the wingtip. Any thoughts on how to accomplish this? All tips and tricks welcome.
Thanks in advance!
Cheers, Sean
Thanks in advance!
Cheers, Sean
")