

I ended up installing the JDair Canopy Latch in my RV-14A today and figured I would share the experience. Overall I think it is a great upgrade from the stock Van's handle which as others have mentioned seems flimsy. This one is definitely not flimsy. Took about 2.5 hours to modify the side skin rivet line and file out the holes for the handle. Most of that was my slow filing of the two main holes with a hand file so that I got the spacing just right.
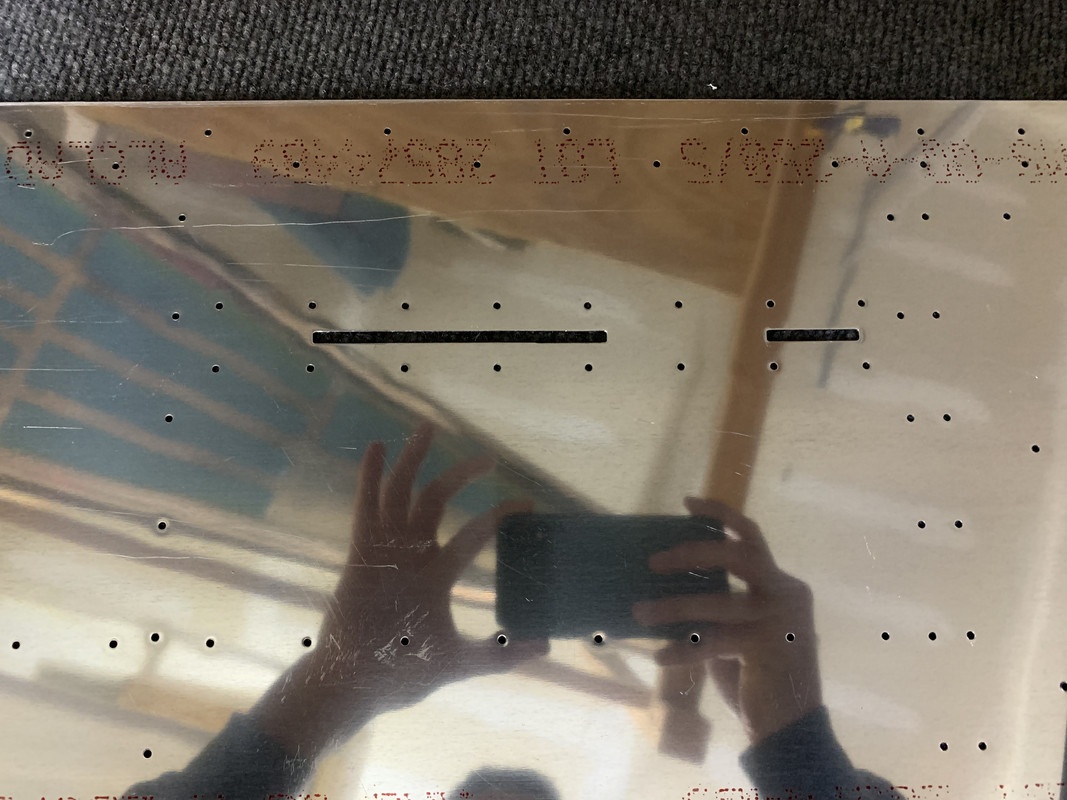
These are the pre-punched holes from Van's
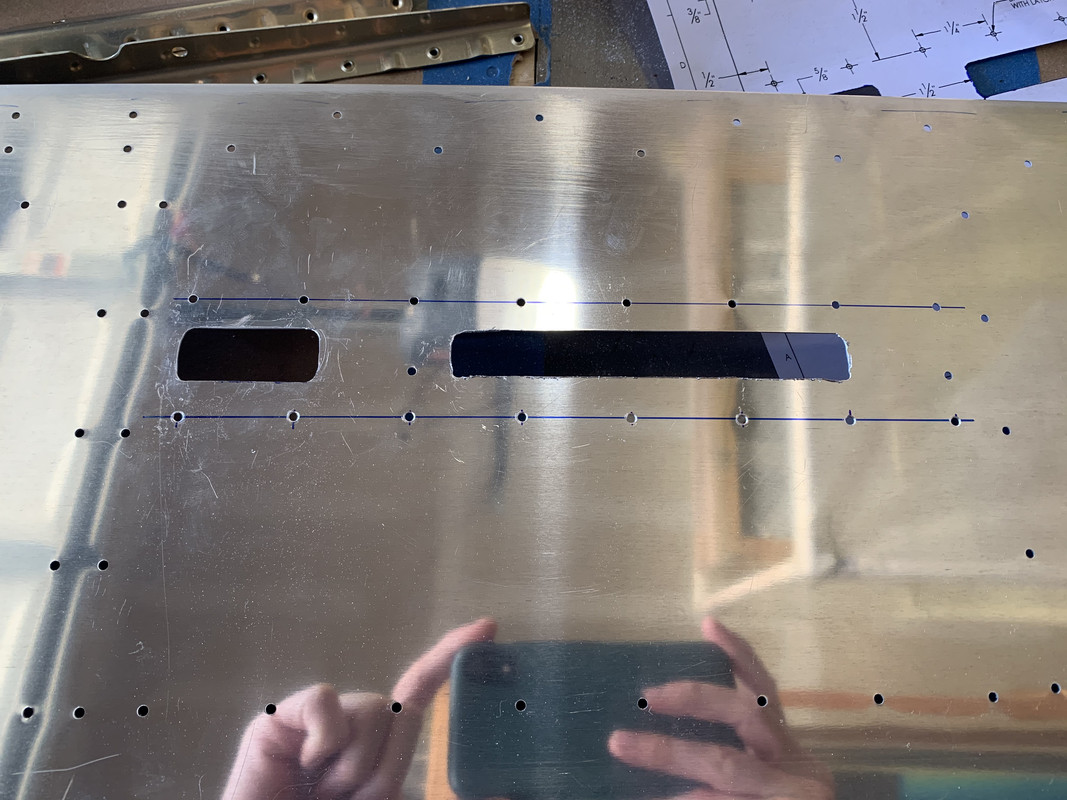
The lower angle had to be moved about 1/2" down towards the floor. This allows for the thicker / taller handle.
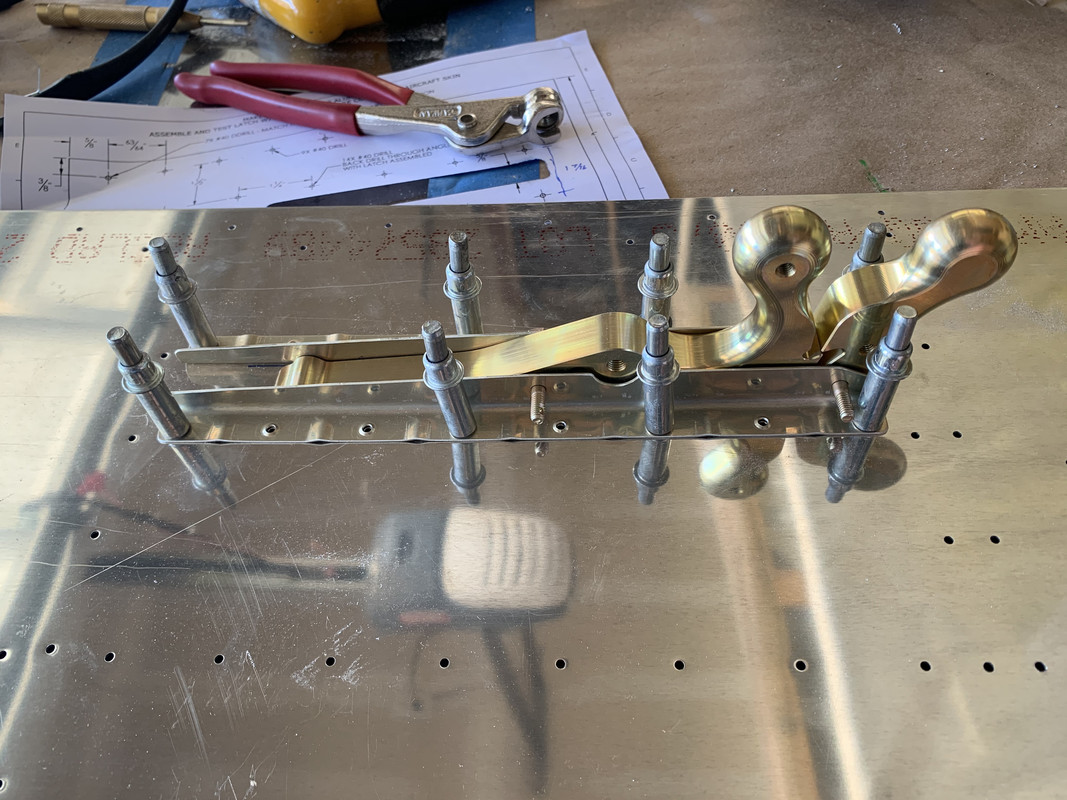
This photo is the finished lower rivet lines and partially filed handle holes.
The template provides for the outlines needed to cut the two holes in which the handle sits flush on the outside, but the best fit is attained by cutting a little at a time and test fitting with the actual handle.
This photo is from the outside of the flush fitting handle
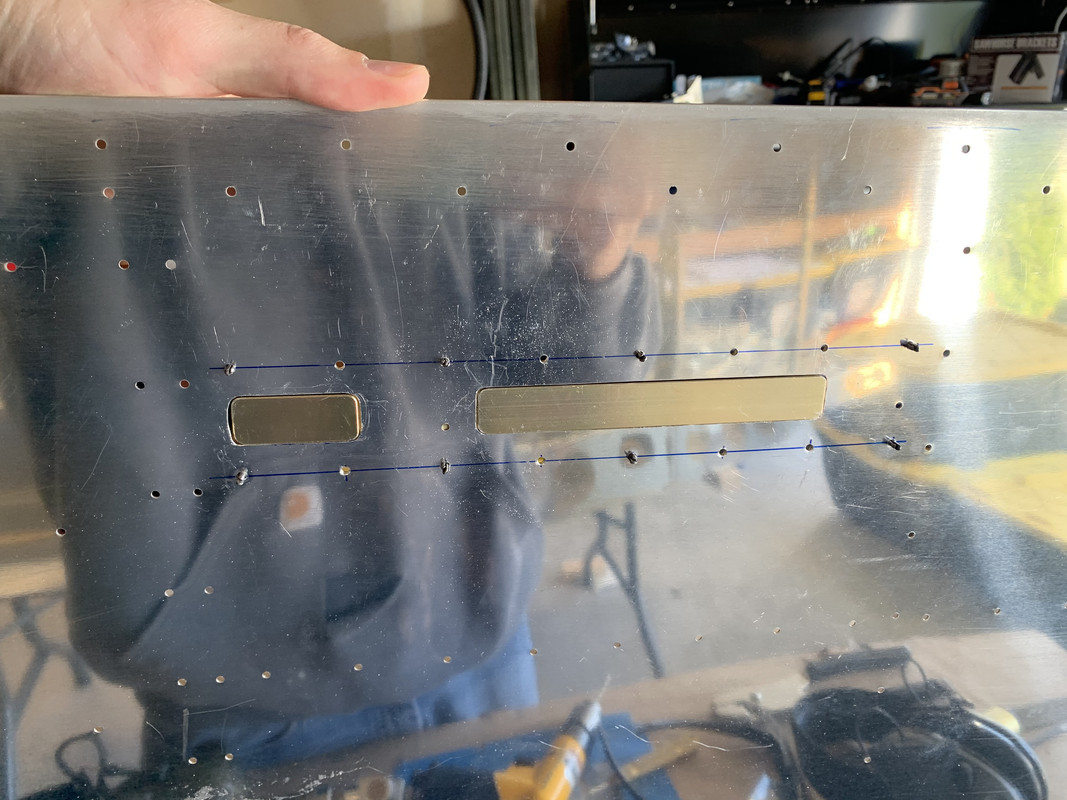
After some final sanding and test fitting the handle fits perfectly flush with very little air gap around the outer edges. I have the aluminum alodined and will paint it at a later time
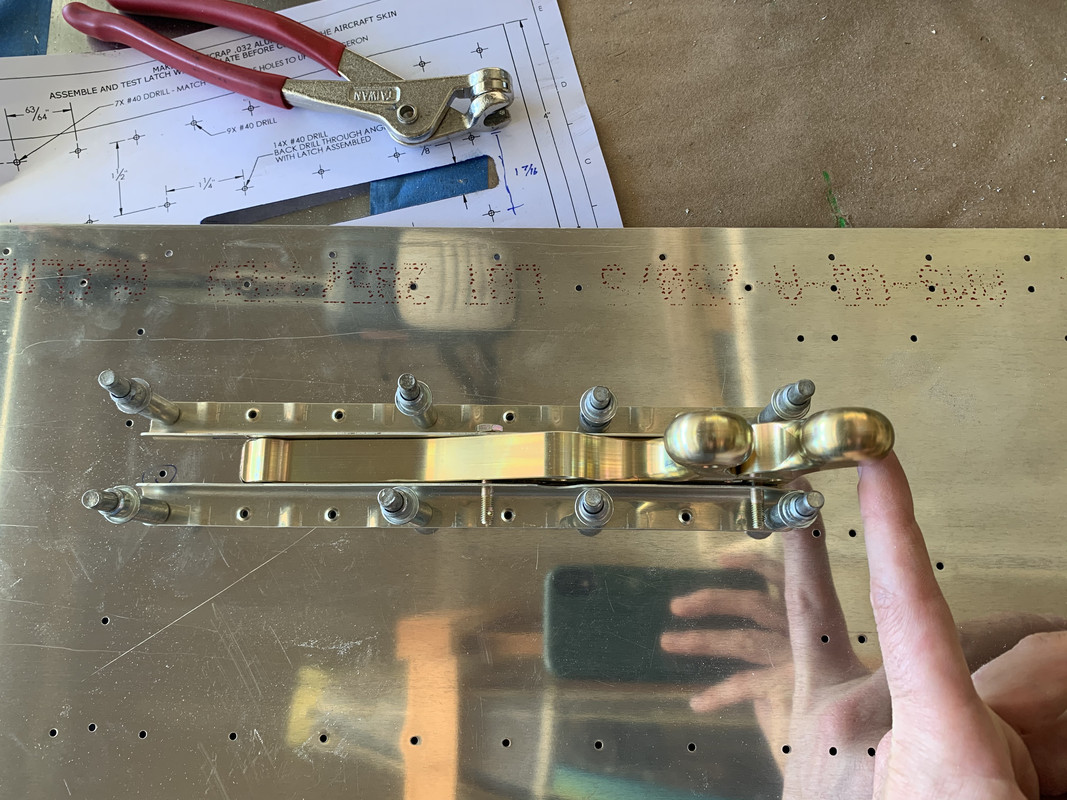
Most the holes from the stock lower angle rivet line get cut out when you make the two large holes with the exception of two #40 holes. One of which is easily filled with a AN426AD3-3 rivet, but the second hole that sits between the two large handles will need to be filled with Bondo or something of the sort. Unfortunately it will have a large piece of metal sitting directly behind it on the inside of the aircraft. So unless you like extra visible holes in the aircraft, something will need to be done.
If I had to redo it, the only thing I would change would be to get the red anodized handle so that I wouldn't have to paint it later.
These are the pre-punched holes from Van's
The lower angle had to be moved about 1/2" down towards the floor. This allows for the thicker / taller handle.
This photo is the finished lower rivet lines and partially filed handle holes.
The template provides for the outlines needed to cut the two holes in which the handle sits flush on the outside, but the best fit is attained by cutting a little at a time and test fitting with the actual handle.
This photo is from the outside of the flush fitting handle
After some final sanding and test fitting the handle fits perfectly flush with very little air gap around the outer edges. I have the aluminum alodined and will paint it at a later time
Most the holes from the stock lower angle rivet line get cut out when you make the two large holes with the exception of two #40 holes. One of which is easily filled with a AN426AD3-3 rivet, but the second hole that sits between the two large handles will need to be filled with Bondo or something of the sort. Unfortunately it will have a large piece of metal sitting directly behind it on the inside of the aircraft. So unless you like extra visible holes in the aircraft, something will need to be done.
If I had to redo it, the only thing I would change would be to get the red anodized handle so that I wouldn't have to paint it later.


