What's new
Van's Air Force

Don't miss anything! Register now for full access to the definitive RV support community.

J stiffner back rivet

jcbarker

Well Known Member
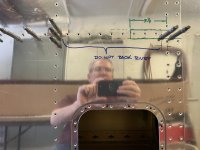
I'm getting ready to install the bottom outboard skin on my QB wings. While match drilling the J Stiffeners (BTW no instructions to indicate you have to do this) a thought occurred to me; maybe I could back rivet the J Stiffener first and then install the skin. I tried it with J stiffener clecoed to the skin. Seemed to work fine as long as I left the inboard bay un-clecoed (see image). Has anyone else tried this?
IMG_1065.jpg
 
Or use a back rivet bucking bar and rivet in place.
 

Attachments

  • IMG_0910.jpg
    IMG_0910.jpg
    438.1 KB · Views: 72
Has anyone else tried this?
View attachment 43997

Yes…but.
There will be a little less access to peel the skin back, not an issue for me.
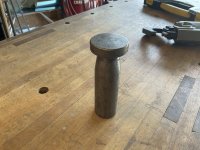
You’ll need a footed bucking bar to set the first rivet on each rib, fwd of the notch. It’ll be obstructed by the j stiffener. My footed bucking bar is 6-3/8” OAL and worked fine.
Pay extra attention to the j stiffener overlap. I seem to remember having to shorten the in board end of the long one to get a nice fit.
I found a reclining office chair to work well. Also used my Teslong borescope a lot.
If you already did your inboard skin then you have a plan for the flap bracket rivets. There’s a recent thread on that. Long sleeve tshirt, lots of padding, pillows, Naproxen etc.
It’s also a good idea to prime under the overlap in the skins.
 
Last edited:
I'm actually doing that step now.

I decided to go by the instructions and rivet the J stiffener as I get down there with the rivets. I left it completely out for the first 4-5 rivets from the rear spar than added it (when I knew it was now or never).

Before riveting the bottom skin, I clecoed the J-stiffener in place just to see how it'd affect moving the skin out of the way for riveting the rivets closest to the rear spar. It locked the skin in place and made accessing the rivets closest to the rear spar even harder than it already is for myself and my short arms.

My advice is to leave the J-Channel on the work bench until you're about 4-5 rivets down the ribs from the rear spar. Then put it in place but don't cleco it until you can easily access the rivets (it does get a lot easier the more you advance toward the main spar. Once convinced that you can reach the rivet tails, cleco it in place and rivet down the length. I have my 96 year old father shooting and I'm bucking but honestly, most of the J channel I did by myself and it looks great. I was about ready to sell my kit riveting the skin to the rear spar (not really, but it wasn't pleasant). Its one row and definitely gets easier as you go. Good luck!
 
Todd:
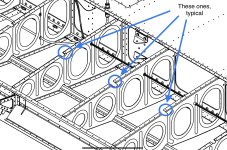
When you say forward of the notch I'm not sure what you mean. My understanding is that you start at the rear spar and work forward. Riveting the six around the flap hinge first of course. Are you talking about the rivet in the rear spar flange?
 
You could back rivet first, or you can easily rivet these in place if you have help. Just be sure to turn the gun down a bit for best results.
 
Ahh, thanks Todd I get it now.
I think I'll leave it out until I get there.
Thanks to everyone for responding.
 
My advice is to leave the J-Channel on the work bench until you're about 4-5 rivets down the ribs from the rear spar. Then put it in place but don't cleco it

You can also leave it out totally until after you do those same rivets I pointed out, then slide the j stiffener in from the end.
 
You can also leave it out totally until after you do those same rivets I pointed out, then slide the j stiffener in from the end.

That’s what I did.

I also reckon if I were to do it again, i’d rivet on all the inspection hole nutplates before the skins left the bench.
 
Back
Top