
Van's Air Force
You are using an out of date browser. It may not display this or other websites correctly.
You should upgrade or use an alternative browser.
You should upgrade or use an alternative browser.
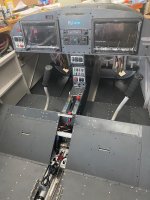
Interior painting
- Thread starter Hangar 26
- Start date

Maybe this is useful... N14VE channel has several videos about their experience this year painting their interior:
https://youtu.be/MhGQArAO_04?feature=shared
https://youtu.be/oPmymgLr8T0?feature=shared
https://youtu.be/QTcJyHboIxo?feature=shared
https://youtu.be/M0elD9egZ9w?feature=shared
https://youtu.be/MhGQArAO_04?feature=shared
https://youtu.be/oPmymgLr8T0?feature=shared
https://youtu.be/QTcJyHboIxo?feature=shared
https://youtu.be/M0elD9egZ9w?feature=shared
Kyle Boatright
Well Known Member
In the spirit of keep calm and carry on I have started working on my fuselage. I do intend to paint the interior of my plane. I am looking for advice if painting parts before assembly is a better option and what challenges that brings with it. Thanks.
Painting before assembly will result in visible (unpainted) rivet heads and paint that gets dinged up in the assembly process. Most people prime, assemble, then paint. An alternate strategy might be to prime the faying surfaces, assemble, prime the whole interior, then paint.
Painting before assembly will result in visible (unpainted) rivet heads and paint that gets dinged up in the assembly process. Most people prime, assemble, then paint. An alternate strategy might be to prime the faying surfaces, assemble, prime the whole interior, then paint.
You can also just assemble everything and then paint. THe paint coating seals everything up so corrosion is not an issue. However, if you are committed to priming everything, you will need to think about which components will not get covered during that process and prime before assembly.
Kyle Boatright
Well Known Member
You can also just assemble everything and then paint. The paint coating seals everything up so corrosion is not an issue.
There are tiny gaps between riveted parts - think about fluted parts. The gaps are plenty big for moisture to get in. I don't believe you can count on paint applied after assembly to corrosion proof those areas (assuming that's the goal).
Carl Froehlich
Well Known Member
I remove all panels, seats and such from the plane. These are primed and top coated outside the plane.
Parts that are to be final assembled are primed before going in. After assembly, and after all the other fabrication is done, the inside of the plane is prepped for paint. Powder coated parts get 200 grit sandpaper followed by a light prime then final top coat. The rest of the interior gets Scotch Brite with Coleman Fuel, primed and top coated.
I use PPG single stage urethane paint for this process - a very durable paint. The first build (20+ years old) still looks like the day it got painted.
Be careful with masking. Overspray can be a real PITA.
Carl
wirejock
Well Known Member
Interior
I chose to prime parts and paint prior. Alliteration intended.
I love the look of the rivets. P60G2 primer was sprayed on everything. Then it gets complicated figuring out which surface shows. I chose no interior parts so those areas needed paint. I only sprayed the parts and areas that show. Bottoms of floors, for example, are P60G2 only.
I sprayed SW Jet Flex SB initially but found that Kirker Enduro Prime 2K epoxy was the same black, more durable and cheaper so I switched. Yes, I know. Primer can't be used as a top coat. Funny because the wheels on my 4x4 are sprayed white and going on five years in CO salty frozen roads.
I did see some wear on floor panels so I fixed those parts and made some cardboard covers. Hasn't happened again.
I painted a couple of parts as installed and it was a lot of work to get a nice-looking job. So everything else has been painted before assembly. I have prepped/primed/painted rivets before assembly and surprisingly they survive being pulled or squeezed. The occasional one needs some touch-up. It is challenging enough to paint separate parts. I would not be able to paint in all those nooks and crannies without runs, orange peel, drips, and overspray everywhere.
I chose to prime parts and paint prior. Alliteration intended.
I love the look of the rivets. P60G2 primer was sprayed on everything. Then it gets complicated figuring out which surface shows. I chose no interior parts so those areas needed paint. I only sprayed the parts and areas that show. Bottoms of floors, for example, are P60G2 only.
I sprayed SW Jet Flex SB initially but found that Kirker Enduro Prime 2K epoxy was the same black, more durable and cheaper so I switched. Yes, I know. Primer can't be used as a top coat. Funny because the wheels on my 4x4 are sprayed white and going on five years in CO salty frozen roads.
I did see some wear on floor panels so I fixed those parts and made some cardboard covers. Hasn't happened again.
I was inspired by your photos to do the same on my -12 build. I'm glad I did it that way. I love the look, and there was something satisfying about seeing it go together with finish. It was also nice to not have a big paint interior process involved at the end, batching and spraying as I went felt like part of the normal parts prep process. The prospect of masking and spraying the assembled interior just didn't seem enjoyable for me personally.
As for some of the wear and dings, I have them. None of it bothers me now that I'm flying and nobody seems to point them out so far. Most of them came along after the stage where it would have been painted anyway.
I'll paint as I go on the next build too.
Attachments
Last edited:
Forgot to include...
The pre-paint allows for a clean 2 tone without the need for masking. Masking almost never works out for me as well as it seems to for others.
I used Rustoleum Self Etching primer on everything. All of my floor surfaces are also Rustoleum charcoal grey. In the locations where I expected contact and wear I also sprayed the textured stuff which should make for an easy and consistent re-spray down the line some day. The rest of it is Jetflex WR.
I even painted areas that would be covered by interior and a few that are inside the structure. Those locations offered a chance to get some practice and figure out my workflow and get familiar with how to apply each of the paint products consistently, as well as get used to handling the painted parts carefully for assembly. I suppose this added some work, but it was a labor of love and once I had a routine it was easy to continue.
I also had consistent and good help from a neighbor who loves spraying paint so that helped.
Thank you all for good input. I do spray primer on all parts before assembly. Have not yet made up my mind which way to go. Judging from responses both alternatives are good. I am using Stewart primer and I have now bought EkoPoly top coat. One benefit of painting before assembling is that I can actually do it in my garage.

There are tiny gaps between riveted parts - think about fluted parts. The gaps are plenty big for moisture to get in. I don't believe you can count on paint applied after assembly to corrosion proof those areas (assuming that's the goal).
Yes, certainly there are things like flutes that will prevent 100% coverage and hence my caveat on the reason for painting. For me, I cared only about 100% covering non-cladded 2000 series aluminum. for the remainder, I was willing to accept small areas like flutes and other limited areas remaining uncovered. I simply don't believe that alcad parts in the interior of the aircraft are at risk of corrosion. No debate here, as we each must establish our own risk profile. While I don't know for sure, I cannot imagine that the QB factory is doing anything but spraying primer AFTER assembly. This was apparent to me when I built the 10, which was a QB. Could clearly see the primer flow from the skins to the rivets.
The tiny gaps are well bridged by the epoxy primer and that coverage keeps the moisture out and prevents corrosion under it's cover.
We could go all the way into the weeds here if we wanted to. Arguably the most critical parts holding the plane together are the rivets. Even if you primed all of the parts first, are you dipping each rivet in primer before setting? Are we concerned about corrosion on the rivets? If not, why? What about the primer that got scratched off the interior of a dimple joint while setting the rivet? My point is that there is no perfect approach.
Last edited:
georgemohr
Well Known Member
I recommend getting to the big join before painting. And I really like Jetflex Water Reducible paint.
-G
-G
Jetmart
Well Known Member
I painted my interior at two different times. I painted the front interior sides before rudder pedals went in. I only painted enough where interior side panels didn't cover. I used the full Classic Aero interior.
The second paint was completed after the empennage joining, canopy and avionics. Again only painting areas that are not covered by carpet or interior panels.
.
The second paint was completed after the empennage joining, canopy and avionics. Again only painting areas that are not covered by carpet or interior panels.
.
Attachments
JonJay
Well Known Member
This would make a good poll.
I primed before assembly and painted after. I think you will find this is typical. Personally, not sure I am a fan of the exposed rivet head look, but if it’s executed well with contrasting hardware, like screws in the panel, it still looks sharp.
If you do paint after assembly, take care to thoroughly scuff the primer and clean. This isn’t difficult or that time consuming but it is important to insure good adhesion.
If you prime and paint pre assembly, and adhere to the manufacturer’s time frames, you will get better adhesion of the top coat as it chemically bonds to the primer.
Good luck. I don’t think there is a right or wrong answer here. Mine has withstood the test of time. I used PPG Concept. PPG’s middle of the road two part paint in the day. Primer was SW wash primer P60G.
N8DAV8R;1730914 I used Rustoleum Self Etching primer on everything. All of my floor surfaces are also Rustoleum charcoal grey. In the locations where I expected contact and wear I also sprayed the textured stuff which should make for an easy and consistent re-spray down the line some day. The rest of it is Jetflex WR. .[/QUOTE said:I used the same approach, and was very please with the result, and when there has been the inevitable scuff and scrape, it was easy to grab a new can and touch it up.
Am I correct in that you used 2K epoxy w/o a top coat? A professional body shop owner told me that the 2K epoxy was durable enough to use w/o a top coat also. That's the direction I'm considering going as a time saver and I like the looks. Has the finish proven durable enough for typical use everywhere but the floors?Interior
I chose to prime parts and paint prior. Alliteration intended.
I love the look of the rivets. P60G2 primer was sprayed on everything. Then it gets complicated figuring out which surface shows. I chose no interior parts so those areas needed paint. I only sprayed the parts and areas that show. Bottoms of floors, for example, are P60G2 only.
I sprayed SW Jet Flex SB initially but found that Kirker Enduro Prime 2K epoxy was the same black, more durable and cheaper so I switched. Yes, I know. Primer can't be used as a top coat. Funny because the wheels on my 4x4 are sprayed white and going on five years in CO salty frozen roads.
I did see some wear on floor panels so I fixed those parts and made some cardboard covers. Hasn't happened again.
View attachment 52256
View attachment 52257
View attachment 52259
2K primer is durable but it doesn't have a smooth surface. It will catch every dirty finger print and your interior will get dirty very fast.Am I correct in that you used 2K epoxy w/o a top coat? A professional body shop owner told me that the 2K epoxy was durable enough to use w/o a top coat also. That's the direction I'm considering going as a time saver and I like the looks. Has the finish proven durable enough for typical use everywhere but the floors?
My RV7A is un primed. I did not build it. Seems like right choice for the desert. No corrosion on 2008 build. Hanger kept.
If I lived elsewhere then I would consider it. Except for coastal regions the air frame would out last the next owner
I put in new interior from South Florida Aviation. It covers 99% of exposed surfaces. I am not sure why anyone would waste time painting on a full interior except for exposed parts.
If I lived elsewhere then I would consider it. Except for coastal regions the air frame would out last the next owner
I put in new interior from South Florida Aviation. It covers 99% of exposed surfaces. I am not sure why anyone would waste time painting on a full interior except for exposed parts.
Some 2K primers can be used as a sealer coat.2K primer is durable but it doesn't have a smooth surface. It will catch every dirty finger print and your interior will get dirty very fast.
Usually it is just diluted will additional reducer.
You might experiment with a dilute second before the first ones drys verses a dry coat and sanding with a 800 grit and a seal coat.
Either way will leave a much smoother surface that should be easier to clean.
wirejock
Well Known Member
Am I correct in that you used 2K epoxy w/o a top coat? A professional body shop owner told me that the 2K epoxy was durable enough to use w/o a top coat also. That's the direction I'm considering going as a time saver and I like the looks. Has the finish proven durable enough for typical use everywhere but the floors?
I'm no expert, but yes, I sprayed Kirker EnduroPrime 2K Black on the floors and a few other parts that took a beating during construction. I sanded them down and sprayed the primer as a top coat. It's identical in color to the high dollar Sherwin Williams Jet Flex I originally used. It's much tougher. I wouldn't hesitate to use it as an interior paint in place of the interior top coat. Two or three coats and call it done. I wash the surface with a clay bar for a nice smooth finish. I doubt anyone can tell which parts are Jet Flex and which are EnduroPrime. I don't notice any finger prints or other issues any different than the flat black Jet Flex. YMMV
As a side line, the steel wheels on my Suzuki Samurai are painted white Kirker EnduroPrime. Five years now in the Colorado road salt, off roading and sun. They still wash up and look like the day I painted them. I don't think my interior will ever see that kind of abuse.
wirejock
Well Known Member
All the EnduroPrime colors (white, gray, black) are flat. Now that I think about it, primers are all flat. I think.Larry, is that a flat? Thought of using the gray.
If you wanted some other neutral shade, you could mix. I recommend buying a quart, catalyst and slow reducer and playing. I prefer the 9085 slow reducer because it gives the paint a little more time to flow. I reduce about 15% by volume for spraying.
Look on my blog (signature below) for the Epoxy & Paint Calculator spreadsheet. It has formulas for all the paints I have used. Plug in dimensions and it spits out quantities. The formulas can be adjusted to suit your style.
Pskluz
Member
I agree, I was pretty sure they are. The reason I asked the only photo of that paint in gray I could see on the internet was a gloss finish. I thought that was very strange.All the EnduroPrime colors (white, gray, black) are flat. Now that I think about it, primers are all flat. I think.
If you wanted some other neutral shade, you could mix. I recommend buying a quart, catalyst and slow reducer and playing. I prefer the 9085 slow reducer because it gives the paint a little more time to flow. I reduce about 15% by volume for spraying.
Look on my blog (signature below) for the Epoxy & Paint Calculator spreadsheet. It has formulas for all the paints I have used. Plug in dimensions and it spits out quantities. The formulas can be adjusted to suit your style.
Both of my planes interiors are coated only with epoxy primer. It is very durable and only needs to be top coated if exposed to UV. Because primer is not expected to see UV rays like the top coats do, the makers do not add UV inhibitors to the mix. I have almost no scratches or wearing, even on the floors (include the heel area in front of rudder pedals) and the 6 has 1100 hours on it. I once put some of this on a rust spot on one of my cars and never top coated. It took over 10 years before that started to change color and get hard from the UV exposure.Am I correct in that you used 2K epoxy w/o a top coat? A professional body shop owner told me that the 2K epoxy was durable enough to use w/o a top coat also. That's the direction I'm considering going as a time saver and I like the looks. Has the finish proven durable enough for typical use everywhere but the floors?
Last edited:
Sorry, but that is not a universal quality. I used SPI epoxy and it lays down just about as smooth as clear coat. It does not have as much gloss. More like a satin or egg shell, which I prefer for interiors to keep down light reflections on the panel. If I want the glossy look as well as UV protection, I shoot two coats of clear over it. I made a bumber with tire holder for my sons cherokee, as well as a front winch bumper. Shot both with black SPI epoxy primer and two coats of clear. Looks exactly like a top coat and 5 years later looks like the day I painted it. The weak link is the base coat to primer adhesion. EP with a CC top is much more resistant to chipping, by eliminating this weak link. Obviously you are seriously limited in color choice by doing this.2K primer is durable but it doesn't have a smooth surface. It will catch every dirty finger print and your interior will get dirty very fast.
A good quality epoxy primer will lay down very smooth. No professional painter is going to use a product like this if it doesn't. Otherwise it just adds more prep work.
Last edited:

