What's new
Van's Air Force

Don't miss anything! Register now for full access to the definitive RV support community.

I decided to put my pants on today....

Phil

Well Known Member
I usually run around naked, but the weather is turning cooler in southeast Texas so I decided to put my pants on. However I quickly realized they don't fit. Must be something from Thanksgiving, Christmas, and all the parties? :D

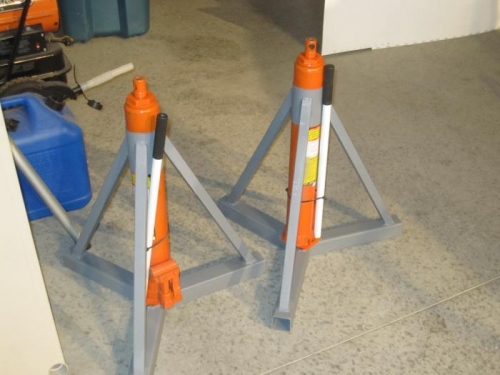
On a more serious note, how have some of you leveled your aircraft for fitting the pants? My airframe has the engine hung and the wings aren't attached. Now I need to lift all 3 wheels off the ground so the airplane thinks it's flying straight and level.

1) What did you use to lift it?
2) What did you use to support it?
3) Where did you locate your supports?

Thanks,
Phil
 
There's some good ideas in there, even if it is Mike!!! :D:D

Now I just have to figure out how to lift all three wheels off the ground. I didn't want to go buy a couple of expensive jacks just for this step. :mad::mad:

Phil
 
Phil,

If you don't have the long-stroke jacks like Mike used, you can lift the plane by the motor mount with an engine hoist. Use two 2 x 2's C-clamped to the spar stubs to hold the fuselage level side to side. Clamp them close to the fuselage, so they don't interfere with the inner surface of the pant. Depending on where on the motor mount you lift from, the fuselage will want to rotate nose high or low. Mine rotated nose high, so I braced the tail up with a shop stand till the fuselage was level fore & aft.

Jim Berry
RV-10 To Grady tomorrow for paint!
 
What I did

Phil -

I did this before engine mounting, so it might not work as well, but I think it should.

I placed a couple sawhorses with wide plywood pieces and padding (to spread the load and protect the skin) under the flat part of the bottom of the plane aft of the main gear and doors. I adjusted the height as needed to accomplish leveling. This might take one iteration.

Then I put a small scissor jack under the big nut just forward of the nose wheel (padded the jack with a block of soft wood) and jacked up the nose to level the plane, using a digital level on the bottom of the door opening. Did not see any impact or damage to bottom skins, worked great. You can get it up high enough to fit the wheel pants. You can level side to side, which shouldn't take much, by just putting a shim (or weight, as the case may be) under the opposite wheel that you are working on.

The additional weight of the engine is a consideration, but since most of that weight is on the nose, and the jack has plenty of poop to handle that, I don't think it should change anything. (other than making you even more nervous with the whole thing up in the air $$$). Just be sure to spread the weight and pad the supports aft of the main gear.

My $0.02.
 
Phil, for some of the basic fitting you'll find that about 2 inches of wood under fully inflated mains will allow you to get level by adjusting the nose tire air. If you have an engine hoist its a pretty convenient and safe way to lift the spar stubs & nose (do not lift from engine hanging loop). You do need the legs dangling though for alignment before drilling. I'd prefer a stack of stuff under the stubs and a hoist up front over jacks given a choice. I bet your knees will thank you for doing it without wings.
 
Phil, the jacks were about $40 each at Harbor Freight, some scrap iron plates were about $5 each.

I used a piece of 2x6" under the spars, drilled a shallow pocket in the wood to capture the top of the jack ram.

Less than $100 total, and always available for use as needed during annual inspection, tire or brake repairs etc.

The tail was tied down to a ring in the floor, and used to counter balance the weight of the nose, to achieve a level attitude.

Take a look here. http://www.vansairforce.com/community/showpost.php?p=444862&postcount=6
 
Last edited:
I did the same as Mike.

FP23102011A00056.jpg


For a tail weight, this is a dolly with a sheet of plywood and an eye ring. Just add a few pounds of concrete.

FP23102011A00054.jpg


A friend of Geoff welded the stand for me. With the 20% off coupons from Harbor Freight, the cost wasn't bad. You're going to need them down the road anyways.
 
Last edited:
Just out of curiosity, what is the min and max height that you need Bob? Height on the gear and height to have the wheels off the ground? I am about ready to put on the gear legs and am not sure what to set the fuse on while I attach them.
 
Bill, the main wheels will just leave the ground when the level aircraft is raised 28.5" above the floor, measured from the low point on the bottom fuselage just behind the spar. I have two padded sawhorses, one in front is 29.5", and one in back is 33". At this height you need to do something with the front wheel, as it rides lower, I took a donut out but it would have been easier/smarter to just let the air out of the tire. Good luck.
 
Really depends on the slope of your floor, Bill.

I've got mine sitting level on blocks and the mains are about 4 inches in the air, the nose isn't quite that high. I'm going to tweak it a bit more tonight before starting to fit the pants.
 
Just out of curiosity, what is the min and max height that you need Bob? Height on the gear and height to have the wheels off the ground? I am about ready to put on the gear legs and am not sure what to set the fuse on while I attach them.

I don't recall the height to place the fuselage to mount the gear. I have standard EAA work benches. I placed my fuselage on one of them to mount the gear. The fuselage was light enough that my wife and I were able to tip on the nosewheel and roll off the bench.

As far as the pants goes, you just need to have the tires off the ground so the gear hangs free. That's in the queue for me right after I finish the panel.

bob
 
It is 14F right now, a good day to put your pants on.

No shorts or floppy flip flops. :)

I am going for my walk anyhow.....its that or the boring tread mill.
 
I believe this gets it.

It appears that I might have a .2 to .3 degree twist in the mid fuse section based on discrepancies between the left and right mid fuses. It's a QB fuse and not enough to worry about. But it is a little frustrating when you have a digital level and you built the tailcone to have 0.0 degrees of twist. :eek:

Now I can get busy putting the pants on in the evenings.

Phil


400532_2764016433501_1650597149_2616367_1027074435_n.jpg


390960_2764015153469_1650597149_2616366_380802884_n.jpg
 
Back
Top