ymc9
Member
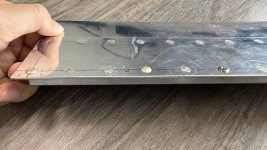
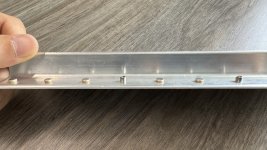
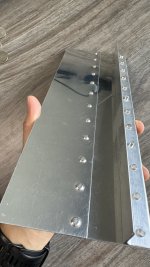
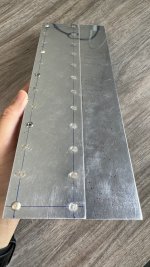
It's a small part of this kit: https://store.vansaircraft.com/rv-control-surface-training-project-rv-training-project-1.html. I completed it in about 2 hours. Love to hear your feedback!
Tasks: drilling, deburring, dimpling, countersinking, riveting (combination of flush, universal, and pop rivets).
Tools: Ryobi drill press, Ryobi bench grinder with scotch brite wheels, main squeezer, Cleaveland dimpling dies, countersink (drill and cage), Milwaukee M12 electric rivet puller.
My main learnings are:
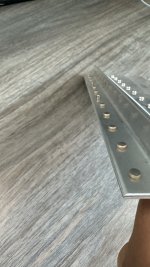
1. Drill press investment was worth it. Holes are cleaner than hand-drilled ones (probably especially since I don't have an air-powered drill).
2. When squeezing, try to make sure only one side of the handle moves relative to the workpiece to avoid bending the piece and having a poor finish.
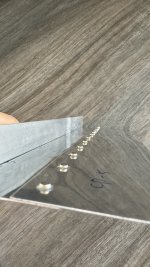
3. It's so easy to dimple in the wrong direction when you move the piece around and change direction you dimple. Double check! Fortunately, it seems OK to fix it by redoing it from the opposite direction. Not sure how much it affects its strength.
4. It's harder to get consistent results for -4 rivets because more squeezing power is needed, which tends to weaken the tool's position control.
5. Don't hit the corner of the piece directly to the scotch brite wheel. It'll bend it easily ...
Tasks: drilling, deburring, dimpling, countersinking, riveting (combination of flush, universal, and pop rivets).
Tools: Ryobi drill press, Ryobi bench grinder with scotch brite wheels, main squeezer, Cleaveland dimpling dies, countersink (drill and cage), Milwaukee M12 electric rivet puller.
My main learnings are:
1. Drill press investment was worth it. Holes are cleaner than hand-drilled ones (probably especially since I don't have an air-powered drill).
2. When squeezing, try to make sure only one side of the handle moves relative to the workpiece to avoid bending the piece and having a poor finish.
3. It's so easy to dimple in the wrong direction when you move the piece around and change direction you dimple. Double check! Fortunately, it seems OK to fix it by redoing it from the opposite direction. Not sure how much it affects its strength.
4. It's harder to get consistent results for -4 rivets because more squeezing power is needed, which tends to weaken the tool's position control.
5. Don't hit the corner of the piece directly to the scotch brite wheel. It'll bend it easily ...