

1001001
Well Known Member
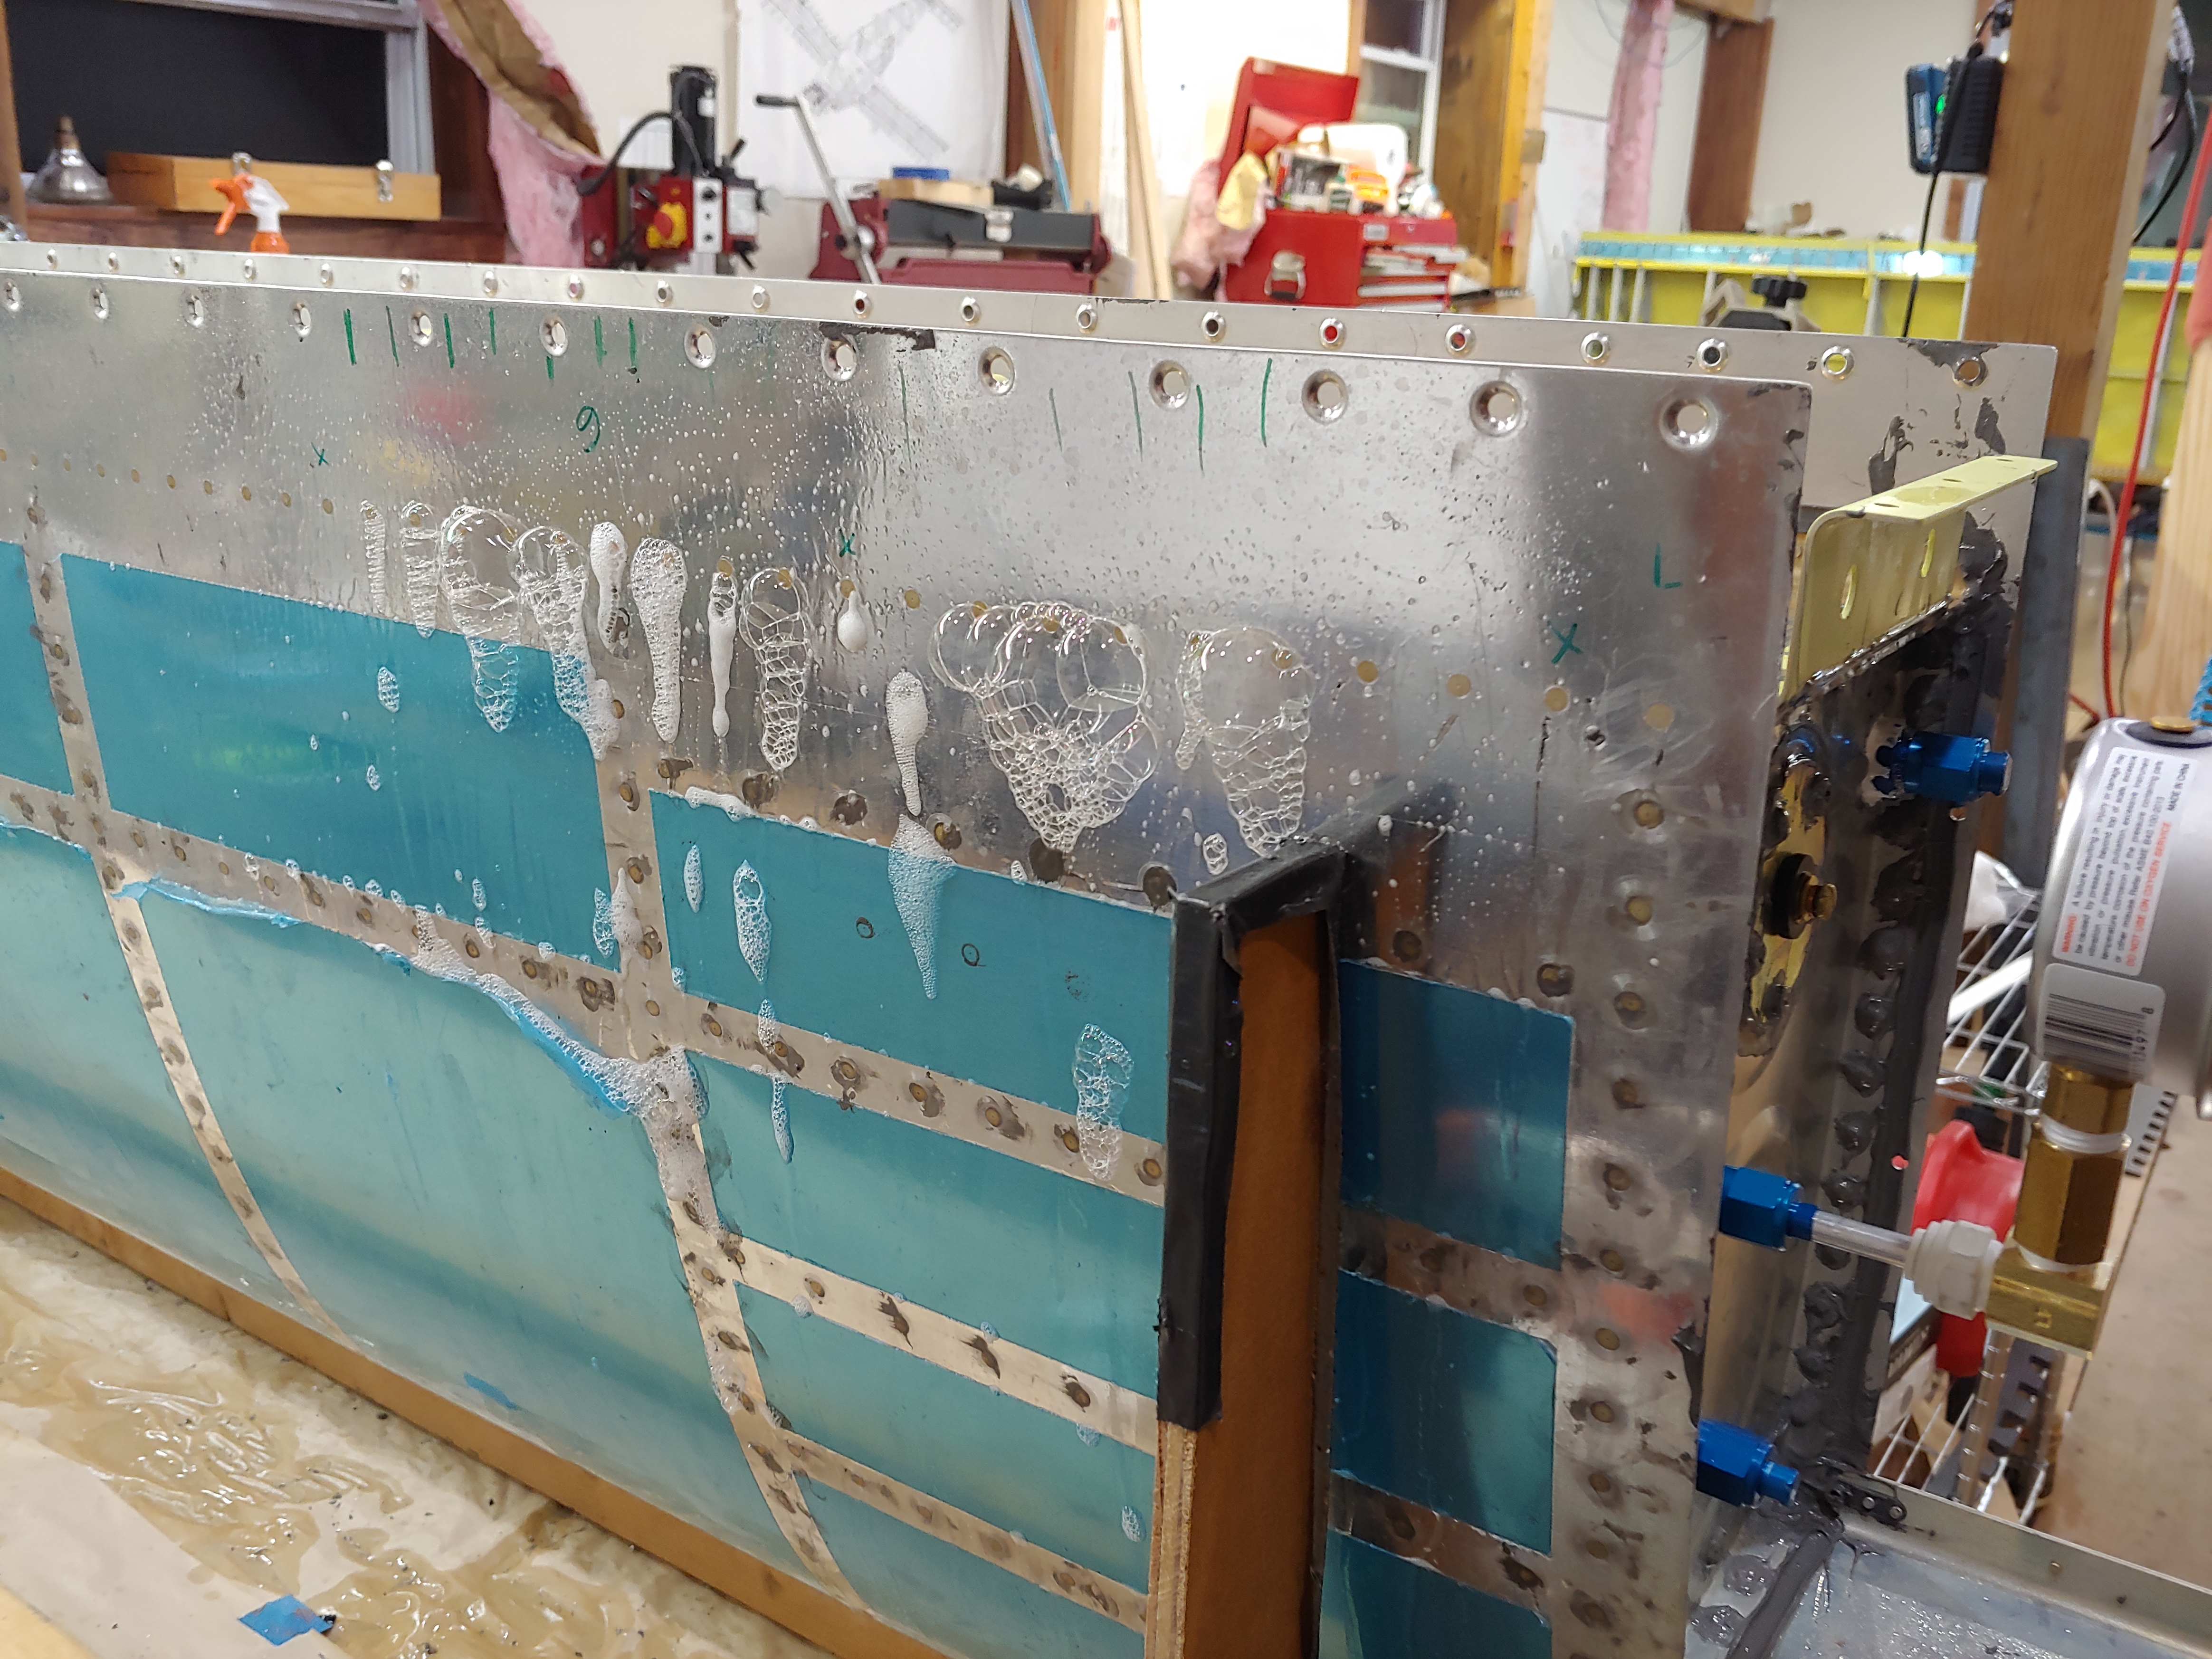
After feeling really good about building one fuel tank that had no leaks upon pressure testing, I confidently undertook to seal and rivet the second one. as a new fuel tank expert, I knew exactly what to do, and it all went swimmingly well.
Until the pressure test.

Fortunately, everything is very well sealed, except for about 15 rivets on the top inboard edge of the baffle (the suds below are just from running down the tank skin). I am at a loss to understand what happened here, but I assume that it was an inadequate bead of sealant on this edge. I don't get why, though, because sealant squeezed out the rear side of this joint when it was assembled. There is a nice bead along the back side, but clearly, air is leaking in the front (internal) side and reaching the rivets.
I can see a few options for repairing, but would like some advice, if you'd be so kind...
1. Drill out these rivets, and reinstall with sealant on the heads (I didn't apply sealant to these rivets originally, assuming the bead inside the tank would be adequate). This would be super easy, but have the greatest likelihood of not working, or failing later in the life of the tank.
2. Drill out these rivets, pry the skin back and clean the faying surfaces of any sealant remaining, squirt some sealant into the gap, cleco it, shoot a few rivets for structural integrity and then try a new low pressure test to see if it worked, then drive the rest of the rivets. This seems like it would work, but there's a chance shooting new sealant wouldn't cover the whole gap. Also, a chance that I could just end up damaging the sealant bead inboard and outboard of the repair. The cleaning part would be really difficult.
3. Drill out the rivets on the entire top of the baffle and try to apply a new bead after cleaning.
4. Pull the level sensor and try to apply sealant from the inside through that hole.
5. Cut a hole in the baffle, reseal from inside, and apply a repair plate.
What would you do? What has the best chance of working?
Until the pressure test.
Fortunately, everything is very well sealed, except for about 15 rivets on the top inboard edge of the baffle (the suds below are just from running down the tank skin). I am at a loss to understand what happened here, but I assume that it was an inadequate bead of sealant on this edge. I don't get why, though, because sealant squeezed out the rear side of this joint when it was assembled. There is a nice bead along the back side, but clearly, air is leaking in the front (internal) side and reaching the rivets.
I can see a few options for repairing, but would like some advice, if you'd be so kind...
1. Drill out these rivets, and reinstall with sealant on the heads (I didn't apply sealant to these rivets originally, assuming the bead inside the tank would be adequate). This would be super easy, but have the greatest likelihood of not working, or failing later in the life of the tank.
2. Drill out these rivets, pry the skin back and clean the faying surfaces of any sealant remaining, squirt some sealant into the gap, cleco it, shoot a few rivets for structural integrity and then try a new low pressure test to see if it worked, then drive the rest of the rivets. This seems like it would work, but there's a chance shooting new sealant wouldn't cover the whole gap. Also, a chance that I could just end up damaging the sealant bead inboard and outboard of the repair. The cleaning part would be really difficult.
3. Drill out the rivets on the entire top of the baffle and try to apply a new bead after cleaning.
4. Pull the level sensor and try to apply sealant from the inside through that hole.
5. Cut a hole in the baffle, reseal from inside, and apply a repair plate.
What would you do? What has the best chance of working?
")


