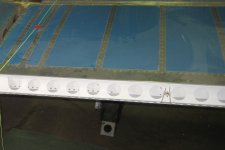
Hello everyone. I'm finishing up the flaps on my 8A and I do not see anything about securing the hinge pin. The only thing I see is a note on the drawing to "drill a hole in the W-413 aileron hinge bracket assembly for insertion of the piano hinge pin." It seems to me like it should be secured somehow. Am I wrong? What did you guys do? Thanks a lot.
Van's Air Force
You are using an out of date browser. It may not display this or other websites correctly.
You should upgrade or use an alternative browser.
You should upgrade or use an alternative browser.
Flap Hinge Pin
- Thread starter Morepower
- Start date
fixnflyguy
Well Known Member
I'm not sure on the -8, but on my -4 I installed my flap hinges in 2 pieces if I recall, inserted from the center outward and inward. The retention was a bent end that was secured by latching into the lightening holes in the spanwise angled upper skin support. This was accomplished with the flaps hanging down and swung forward allowing access over the curved L/E of the flap . After secured, the flap skin is carefully curled back under the upper wing skin. I have pictures, but not handy.
Richard Connell
Well Known Member
Desert Rat
Well Known Member
I did the same as above; instal the pins from the center with a nut plate and a screw thru a couple of single eye sections into a nut-plate to secure them. It's easier to get the shorter pins in and teh bonus is that you can easily install/remove a flap by yourself
For my RV-7 I used the "alternative method" described in the plans:

An alternative method is to remove one hinge eye at the center of the flap hinge and two hinge eyes at the center of
the wing hinge. This will allow you to get two hinge pins in from the center of the flap, one in each direction. Bend a
small portion of the hinge pin at a right angle to grasp with pliers as you slide the pin into place. With the flap
hanging down the hinge is accessible from the opening at the top. Push the bent portion of the pins forward to lie
on the inside of the skin. Drill two small holes in the skin and safety the hinge pins in place.

JonJay
Well Known Member
I followed the plans whereby you simply bend the hinge pin slightly after it’s installed so it can never back itself out. 20 years and the pins haven’t moved nor have I needed to remove the flaps which would require aileron removal also.
So, I agree, split pin would make it easier down the road but I’m not sure when that may be. Nothing to maintain in a flap other than cleaning and lubricating the pin which can be done installed. If needed, you can remove an aileron in a few minutes regardless, it’s just a couple bolts.
So, I agree, split pin would make it easier down the road but I’m not sure when that may be. Nothing to maintain in a flap other than cleaning and lubricating the pin which can be done installed. If needed, you can remove an aileron in a few minutes regardless, it’s just a couple bolts.
One thing about the split pin is the friction is a lot less than the full-length hinge. I tried the full-length install and it was hard after 1/2 length. Knowing I had to remove the hinges multiple times to fit the wings and to paint and other purposes, I elected to use the split hinge so that I don't have to struggle with them in the future. Either way, Vans instructions say the split hing doesn't affect strength.
Carl Froehlich
Well Known Member
I tried the split pin method and did not like it. I went back to the hole in the aileron approach. I use a 1/16” hole drilled into the inboard hinge eye as a way to block the pin from migrating out that direction. I used a small self taping screw in the aileron hole as the pin block on going the other direction.
Carl
Carl


