petehowell
Well Known Member
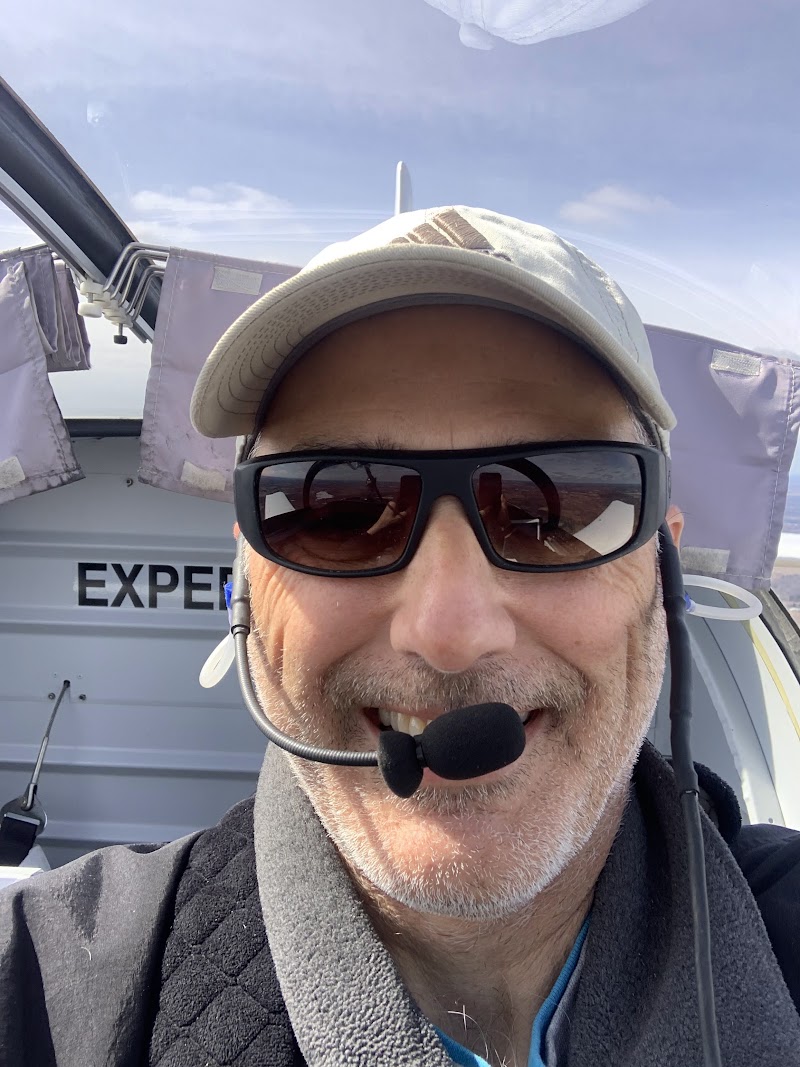
After 16 years and over 2500 hours, the Clarity Aloft headset was getting a bit tired - the right earbud was static-riddden and would cut out if I moved my head the wrong way. It owed me nothing at this point, so i cut the wire and reattached the driver to the wire and mounted the driver the frame with shrink tube - then ran the sound to my ear with a piece of silicone RC fuel line. Worked great! If the other side gives out I'll do the same.
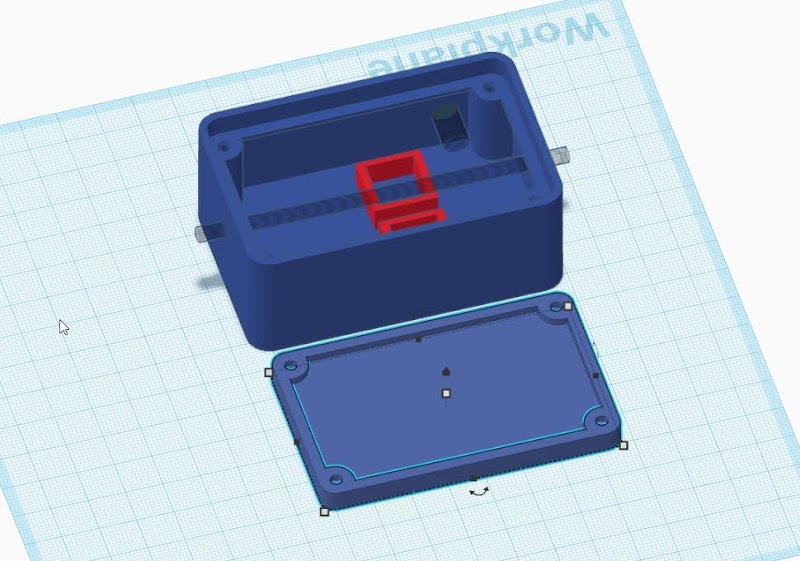
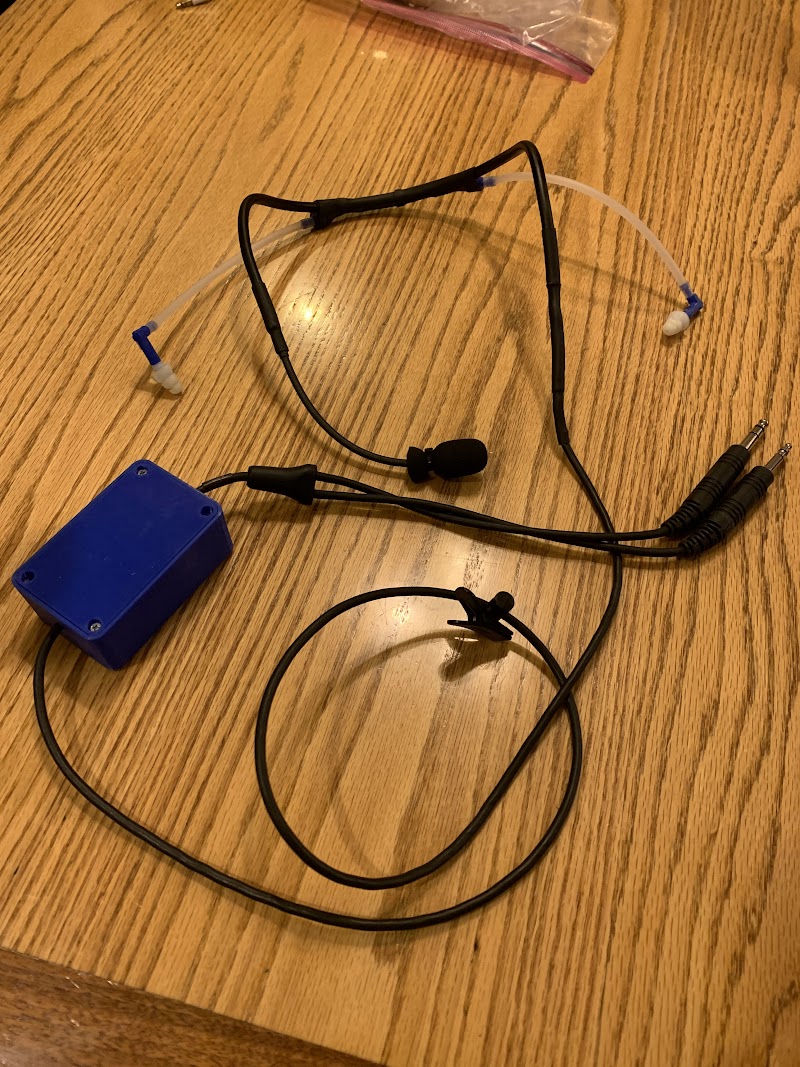
It got me thinking - I could make a pretty nice, cheap backup using the same concept. Kinda like a poor man's CQ-1...... So I did some research. Needed a frame material - found some composite tubing used for fire suppression systems and flower arranging - comes in 1/4" diameter sizes and shapes easily. 3.50/ft Check. Need some drivers for sound - fullish range, small, cheap. Found guys on-line making audiophile in ear monitors for music. Found the drivers they use on ebay - $23/pair - Check. I'll need some custom parts - the kids got me a 3d printer, and I wanna learn CAD. Driver holders, custom box for wiring, elbows for ear tubes - Check, Check, Check. Heat shrink tube holds it all together. The cords and mic were found by putting out the call to the Minnesota Wing - A couple of great guys had some old broken headsets and were happy to donate to the cause. Cords were from a broken Bose, and the mic from a wounded Telex 750, but any mic and cord set should work.
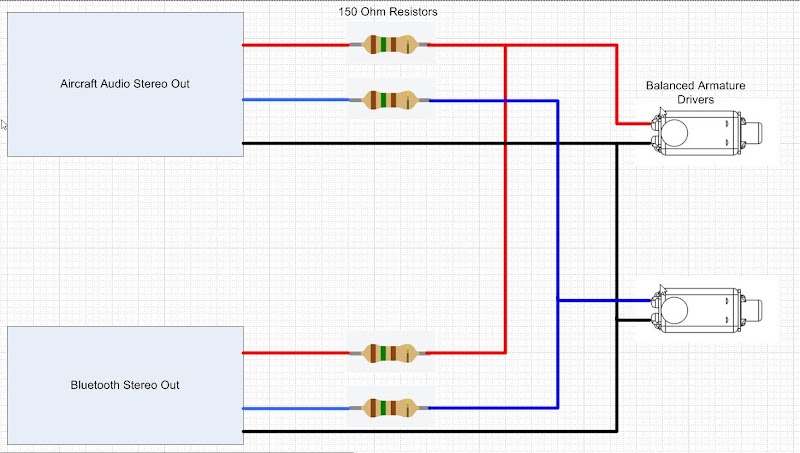
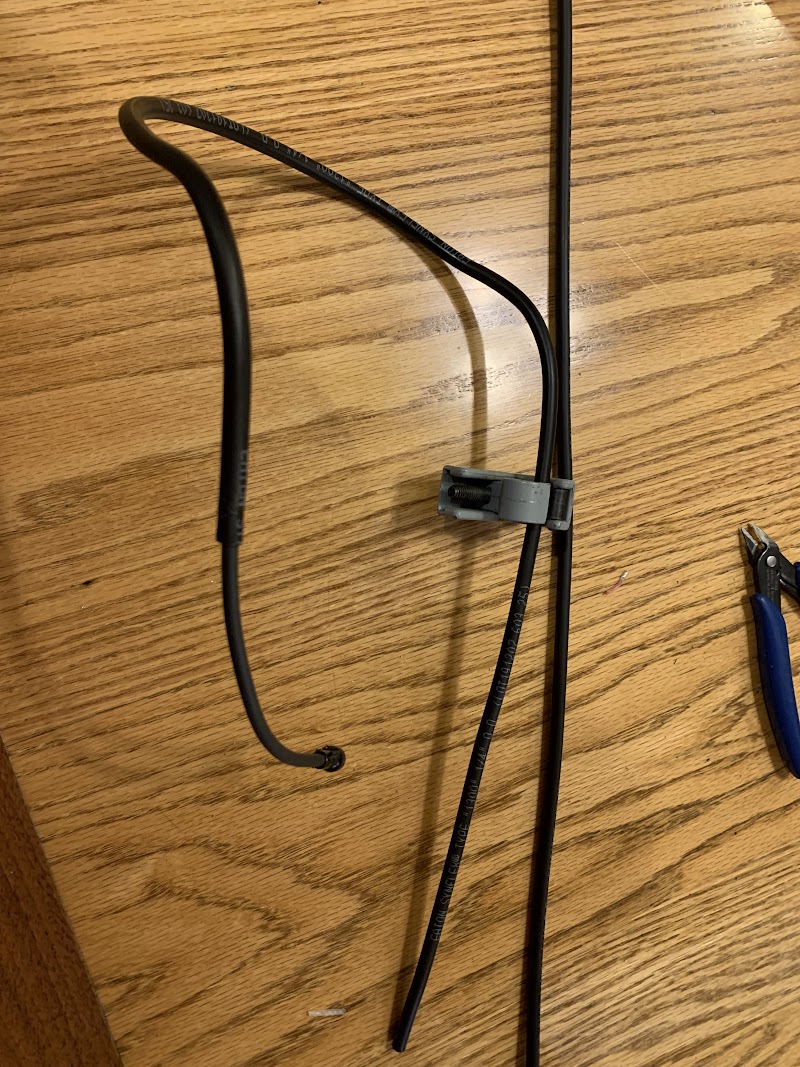
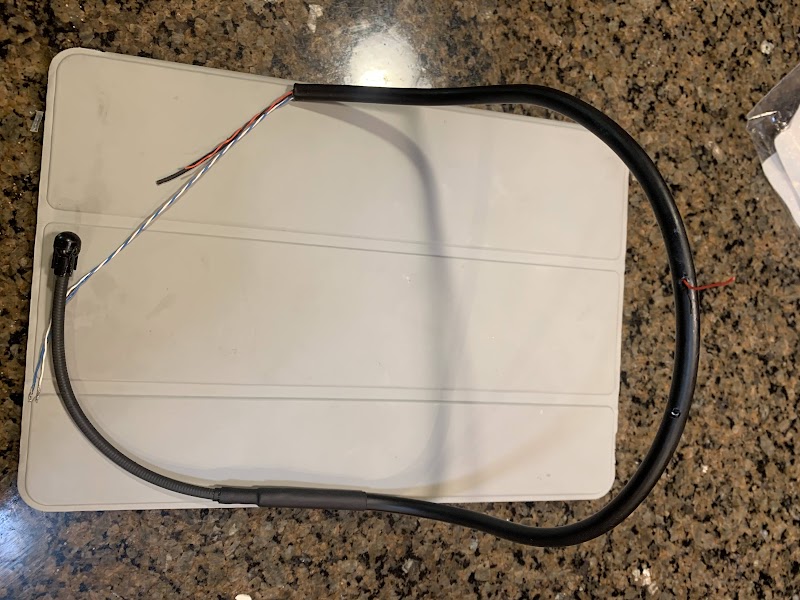
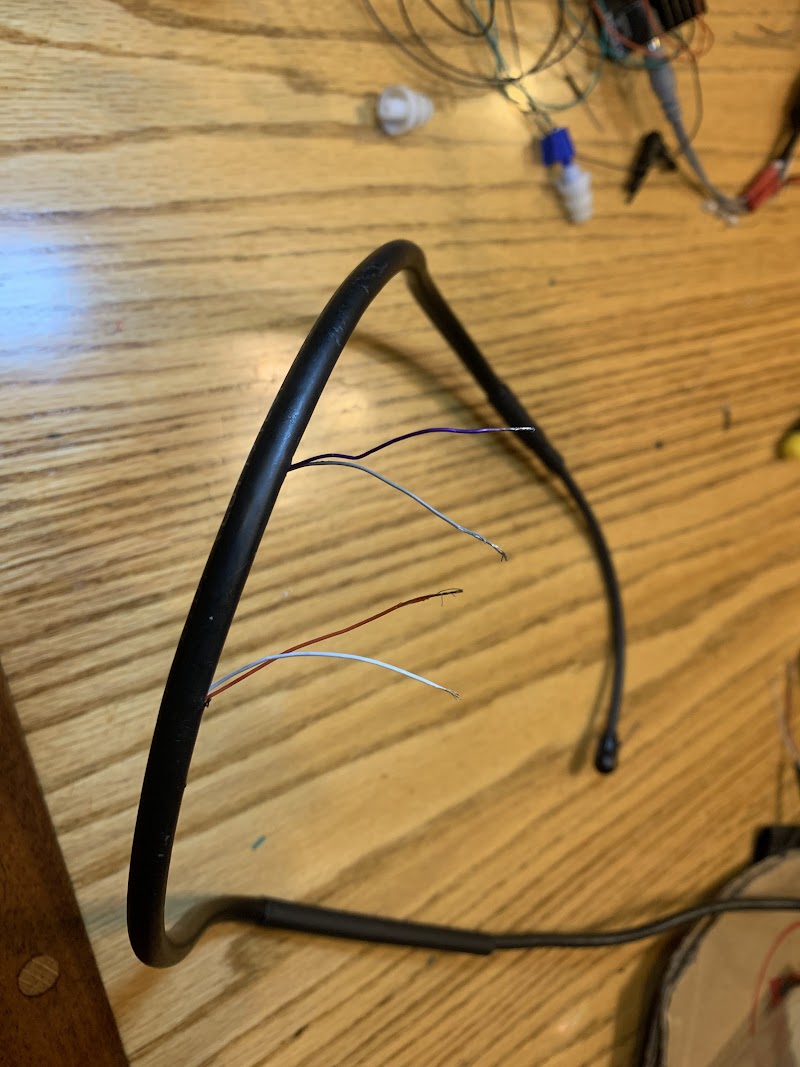
The frame tubing is called Synflex 1/4" OD Metal/Plastic Composite Tubing. Got it on line at Pegasus - get 2 feet. Cuts easily with a small tubing cutter. Ran the wires inside the tube and over to the mic. Drilled holes in the tube and fished out the wires for the speakers near the back of the head.
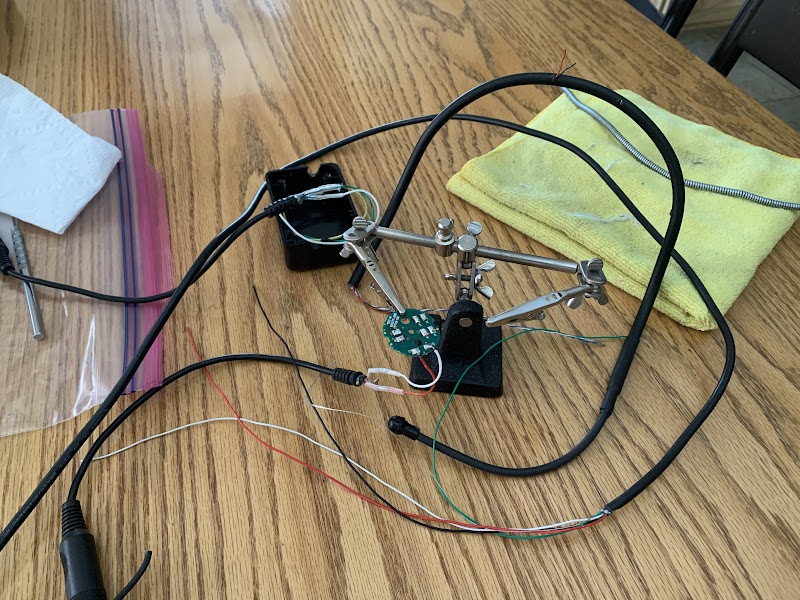
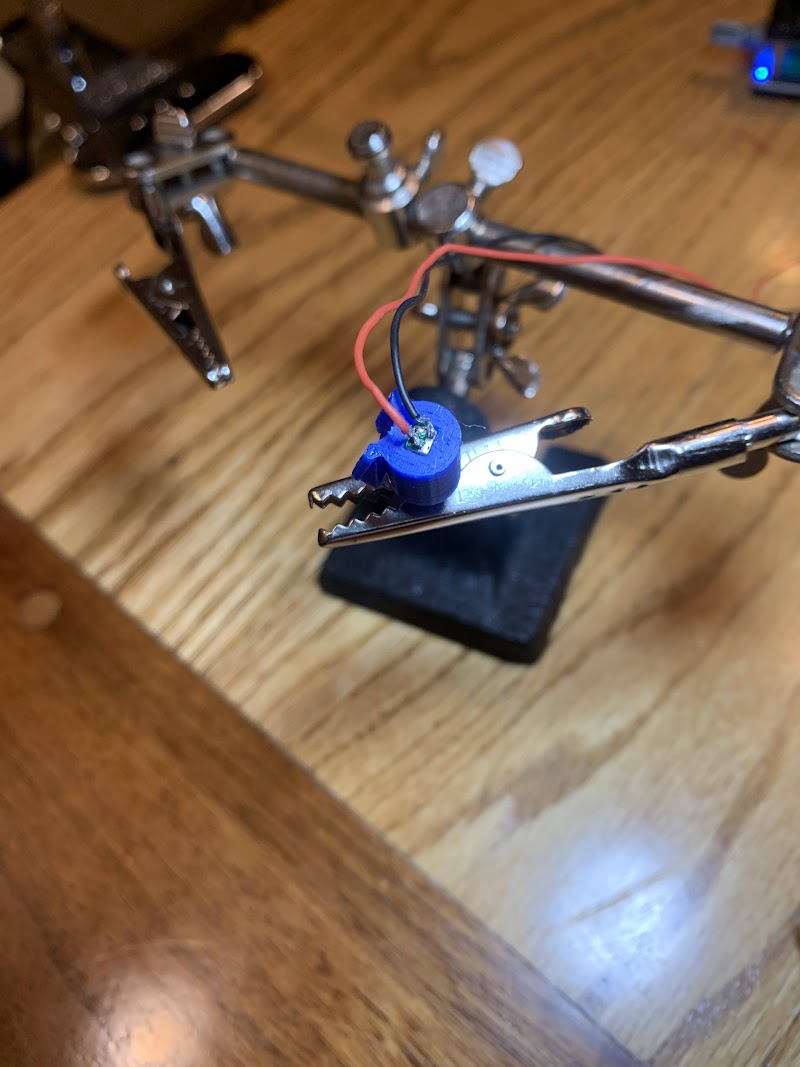
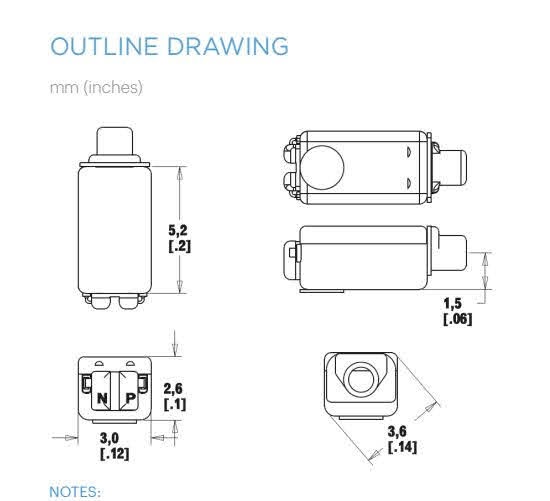
The tiny speakers were next - and I do mean tiny! Razor blade for size. These are Knowles RAB-32257s. Soldering was "sporty" but not as hard as I thought. I designed in a square hole in the custom driver holder I printed, based on the driver datasheet, and I was shocked that I got a piston fit on the first try! Pretty amazing the mfg tolerance of the drivers and the printing tolerances cancelled each other out. I'd rather be lucky than good!

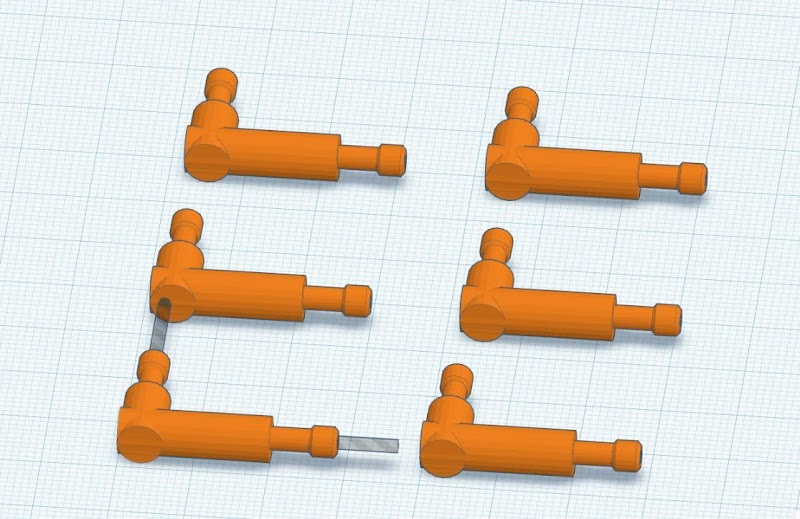
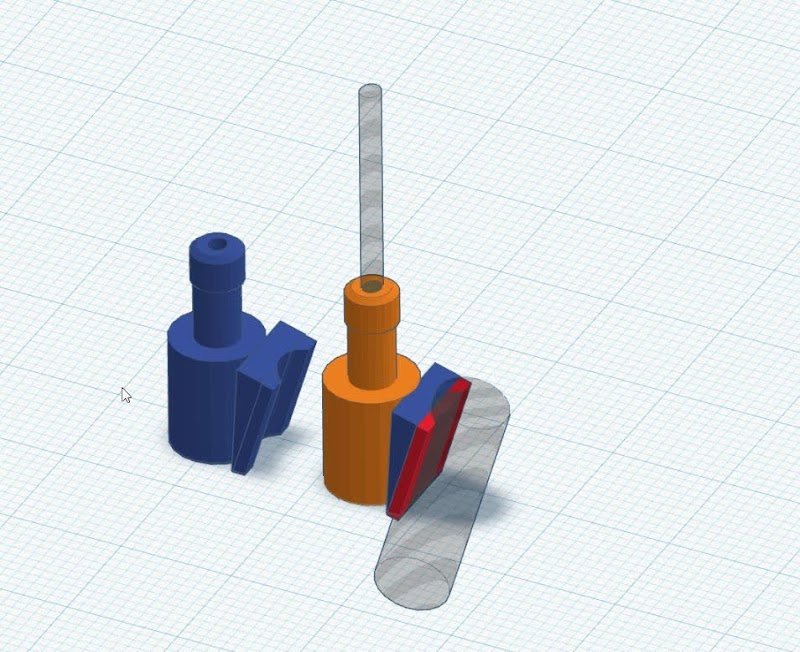
Here's the CAD work on the driver holders - I used Tinkercad - Hey, if grade school kids can use it- so can Pete! It was easy and fun - runs online and the price is right(free). I can export designs right to my 3D slicer and then print!
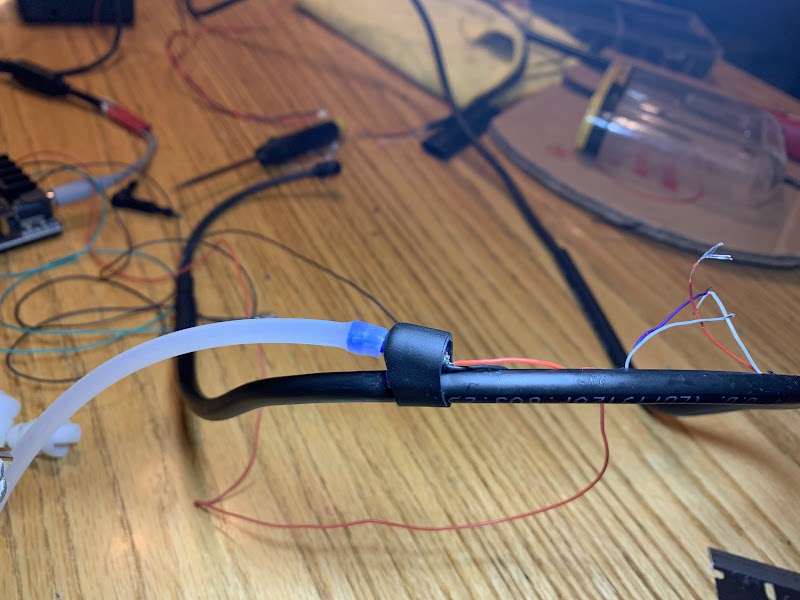
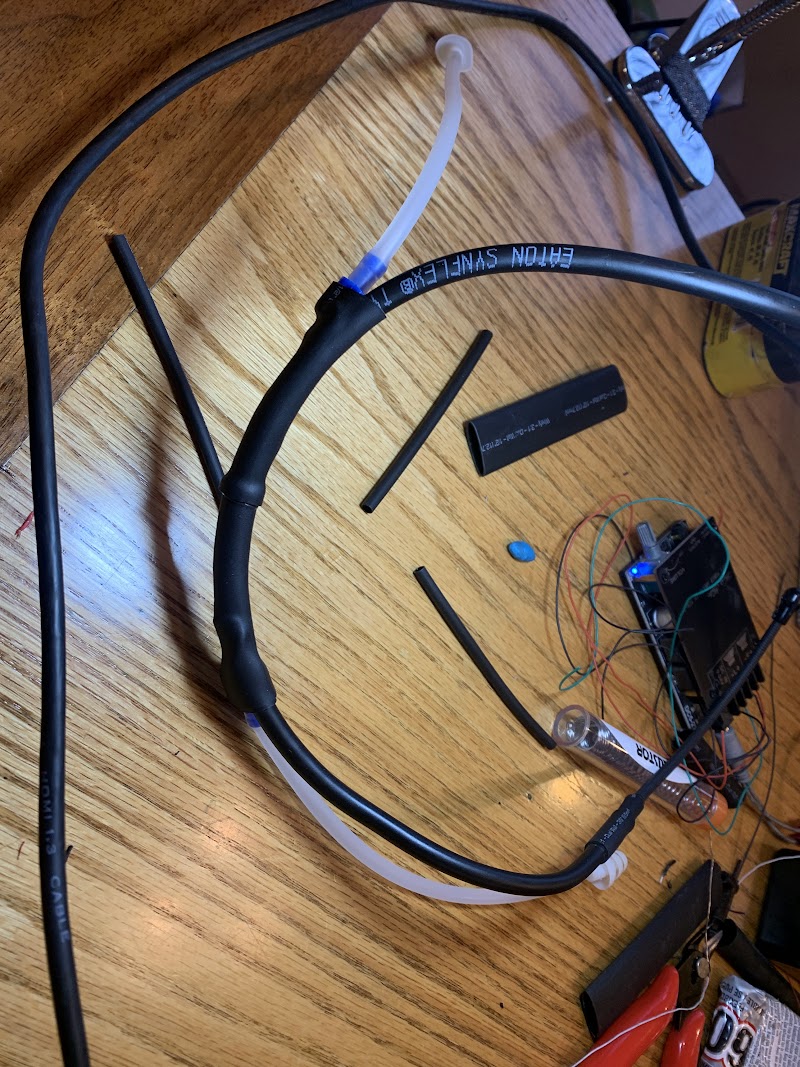
Drivers were mounted to the frame with heat shrink - Triple wall 3:1 shrink stuff. Worked great
Not too bad - I'd clean it up better next time, but this works for now!
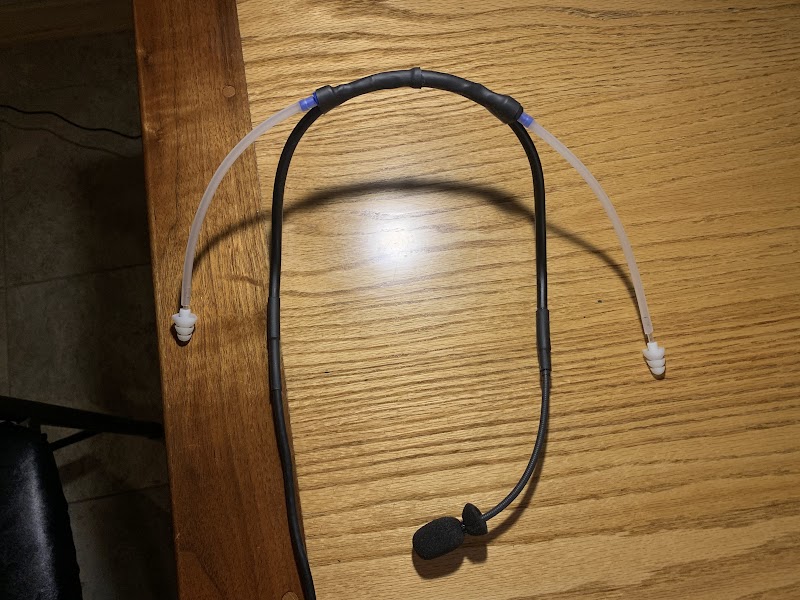
Getting close now! It's simple - I like it.
It got me thinking - I could make a pretty nice, cheap backup using the same concept. Kinda like a poor man's CQ-1...... So I did some research. Needed a frame material - found some composite tubing used for fire suppression systems and flower arranging - comes in 1/4" diameter sizes and shapes easily. 3.50/ft Check. Need some drivers for sound - fullish range, small, cheap. Found guys on-line making audiophile in ear monitors for music. Found the drivers they use on ebay - $23/pair - Check. I'll need some custom parts - the kids got me a 3d printer, and I wanna learn CAD. Driver holders, custom box for wiring, elbows for ear tubes - Check, Check, Check. Heat shrink tube holds it all together. The cords and mic were found by putting out the call to the Minnesota Wing - A couple of great guys had some old broken headsets and were happy to donate to the cause. Cords were from a broken Bose, and the mic from a wounded Telex 750, but any mic and cord set should work.
The frame tubing is called Synflex 1/4" OD Metal/Plastic Composite Tubing. Got it on line at Pegasus - get 2 feet. Cuts easily with a small tubing cutter. Ran the wires inside the tube and over to the mic. Drilled holes in the tube and fished out the wires for the speakers near the back of the head.
The tiny speakers were next - and I do mean tiny! Razor blade for size. These are Knowles RAB-32257s. Soldering was "sporty" but not as hard as I thought. I designed in a square hole in the custom driver holder I printed, based on the driver datasheet, and I was shocked that I got a piston fit on the first try! Pretty amazing the mfg tolerance of the drivers and the printing tolerances cancelled each other out. I'd rather be lucky than good!
Here's the CAD work on the driver holders - I used Tinkercad - Hey, if grade school kids can use it- so can Pete! It was easy and fun - runs online and the price is right(free). I can export designs right to my 3D slicer and then print!
Drivers were mounted to the frame with heat shrink - Triple wall 3:1 shrink stuff. Worked great
Not too bad - I'd clean it up better next time, but this works for now!
Getting close now! It's simple - I like it.
Last edited: