What's new
Van's Air Force

Don't miss anything! Register now for full access to the definitive RV support community.

Building radio stack

vmirv8bldr

Well Known Member
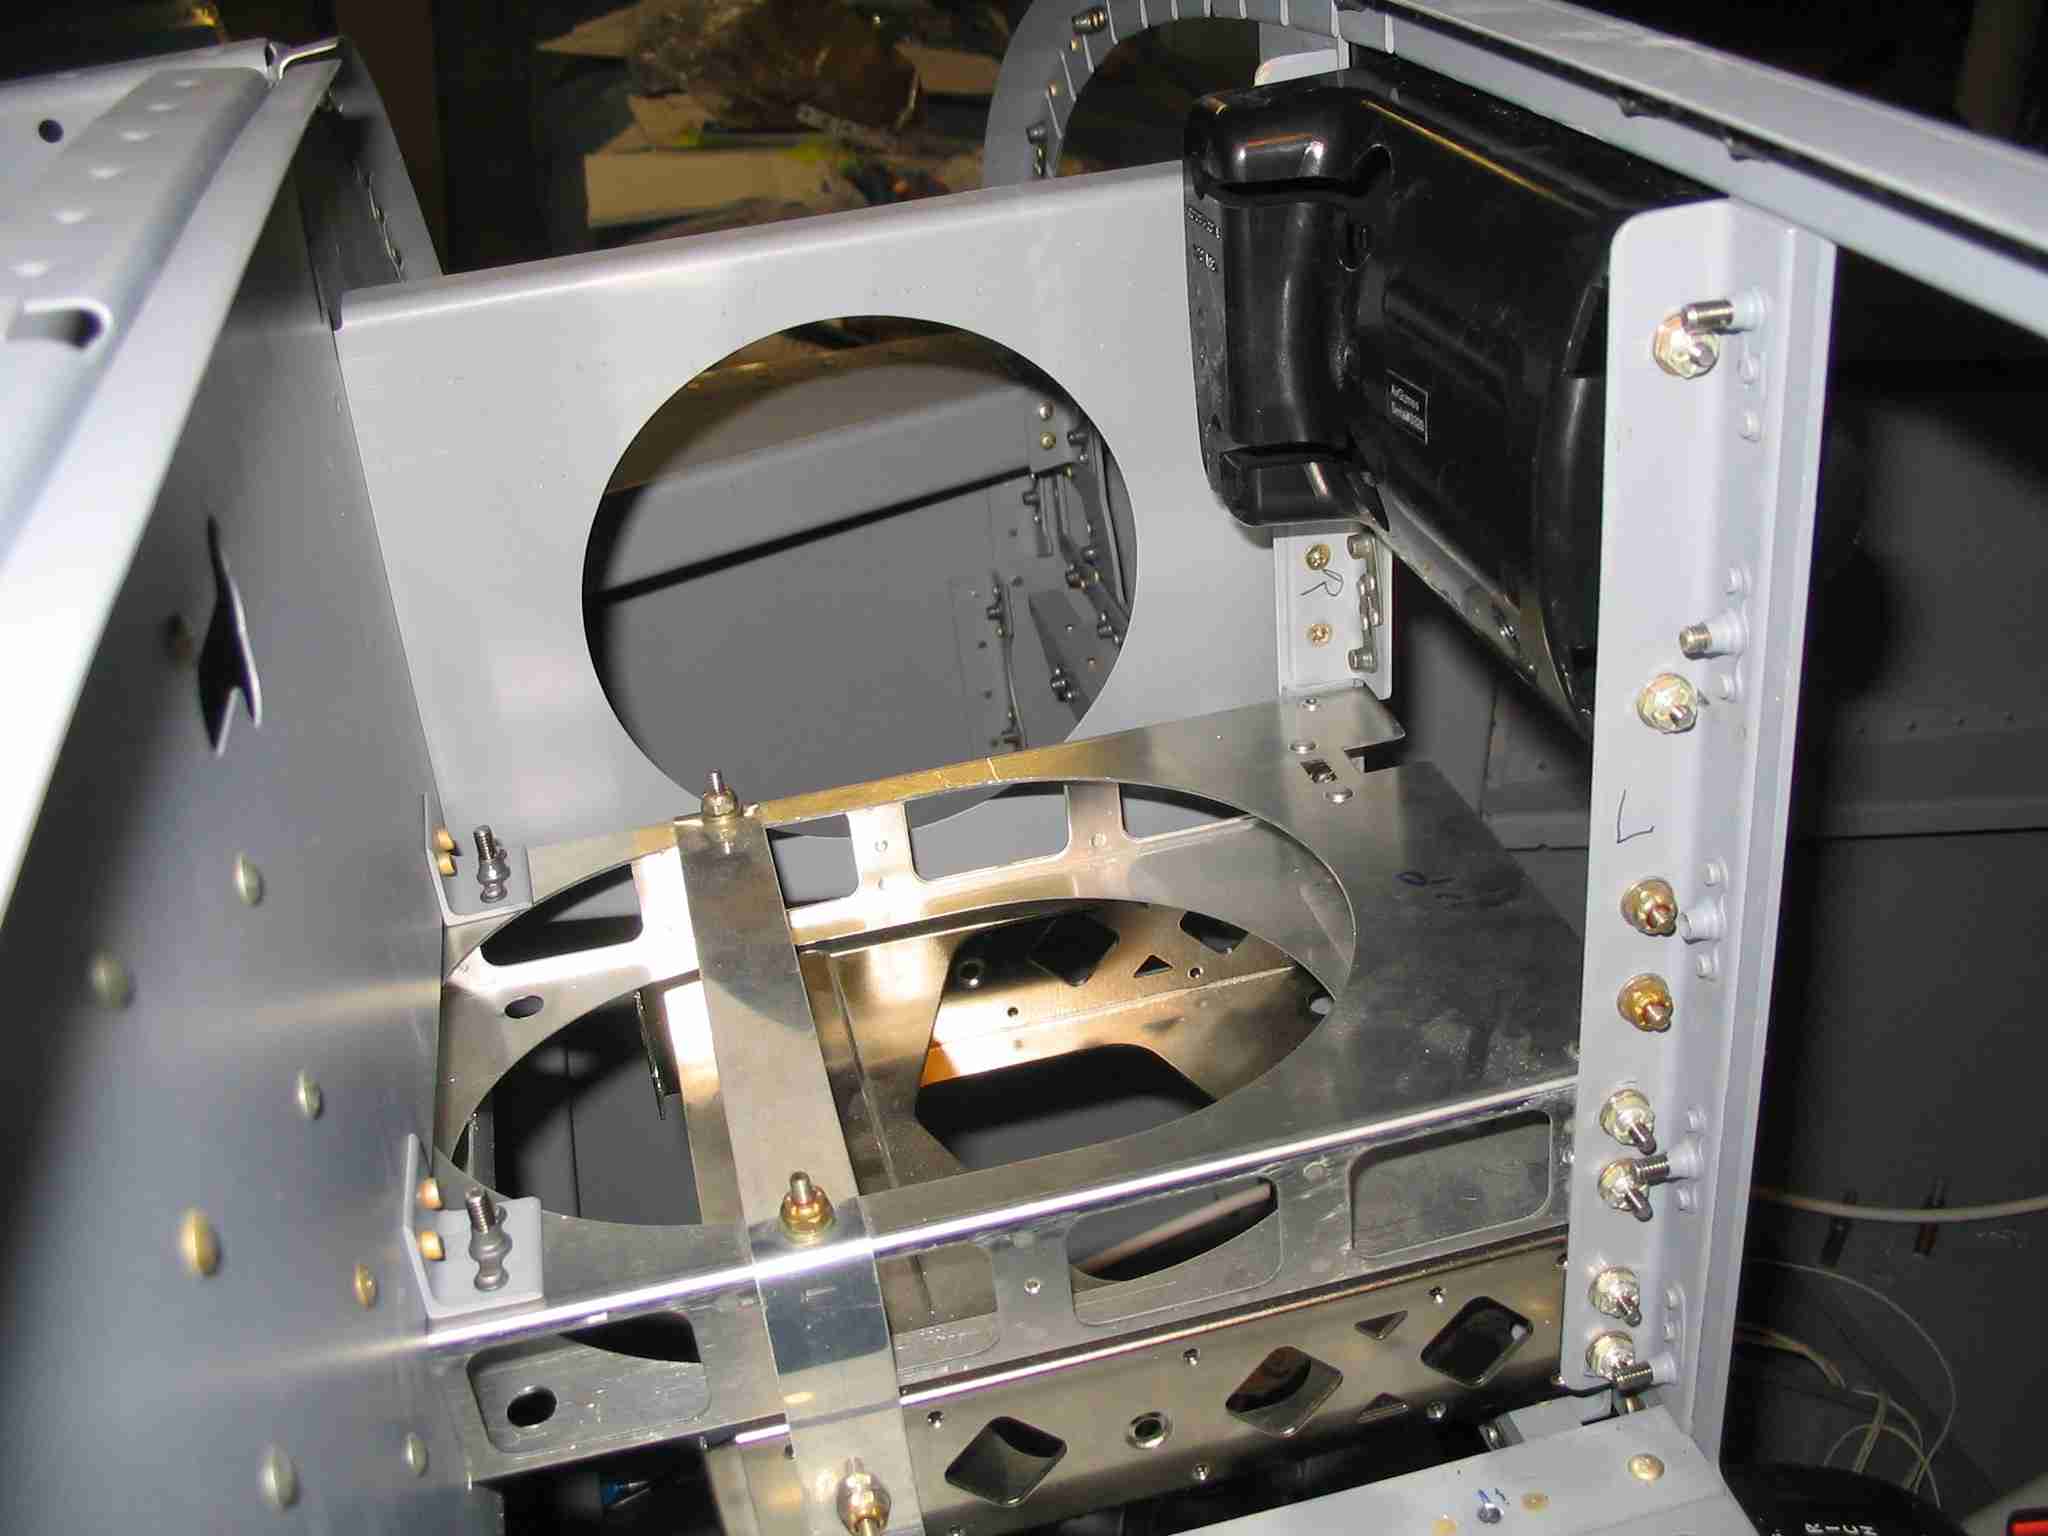
Last night I ran through a dress rehersal of lining up the trays to drill the angle which will eventually hold my radio stack to the panel. I did a search and read the mthods described. I chose the "duct tape" method and used BIll's idea with the popsicle sticks. It worked great, but I have a problem.

In order to spread the cost out, I have some, but not all of my radio gear. Here's the stack:

PMA9000
GNS-430
SL-40
GTX-330

I have everything but the SL-40, so I can easily align them. My question is if anyone has a similar stack, I would like to know about how much the SL-40 tray needs to be set in reference to the GNS-430 and GTX-330 trays so the faceplates line up.

Any one have a setup they can measure or send photos?

Thanks
 
Warning Will Robinson...Warning...

The Garmin SL 30 and SL 40 line of products were originally developed by UPS (yes, that UPS) and were part of the UPS Apollo line of avionics gear. Garmin bought up the line, eliminated some of the product line, and re-branded the other items. The mounting tray dimensions for the SL30/40 com's (and nav) are 6.250 inches wide.

I found the Garmin stuff to be 6.300 inches wide. So, if you design the sack initially with the Garmin stuff (not sure about the other suppliers), the stack will be too wide (by .050 inches) to accept the SLxx stuff. Spacers will need to be fabricated and accounted for, and not get in the way of the other trays.

If you have a preferred distributor, maybe you can request the specific mechanical dimensions pages for each of the items you plan to stack together?? Or, maybe ask one of the custom panel guys (like Stein) about specific mounting questions??
 
Noel is correct! make sure that you take the difference in width of the 330 into consideration. We built a whole new stack for Louise's airplane over the winter, and everything was 6.25 (SL-40, A200, PS Audio panel and Narco Xponder), and then I had to replace the transponder a month or so ago - I chose the Garmin 327, and ended up having to do some filing and grinding to make that portion of th slot wide enough. Bottom line - you will probably need so me shims.

This doesn't directly answer your question Bart, but is a good "oh by the way" caution....

Paul
 
When in doubt, check

Thanks guys! I picked up the width difference on the SL-40 tray, and your measurements match mine to the T. (Incidentally, the PMA9000 tray is 6.30", just like the Garmin Int trays.) But, the SL-40 tray is somewhat bland, difficult for the uninitiated eye to tell top from bottom. Check for the slot the keeper grabs and it's the bottom right? Well, that hole exists on both top and bottom, but one is a little smaller than the other.

I had a couple of others questions too, so just to be all pants and suspenders-like, I gave the guys at Stark a call. (I bought everything from them.) Tony was on it like a cat.

So, without lifting the SL-40 tray's tail and checking, just look for the Part Number sticker, it goes on top, or if no sticker, the smaller keeper slot goes on bottom.

Now, for the alignment in the front, the Garmin International products (GNS-430, GTX-330, etc) have a piece of sheet metal on the bottom of the tray that sticks out a bit. This "lip" should be flush with the panel. The SL-40 tray (Garmin AT, formerly UPS Apollo) has no such lip, and as such, the entire tray should be flush with the panel. I'm told this will properly align the fronts of these radios. (Can anyone confirm or deny?)

Here's something else (my own observation, not part of the Stark advice,) the little dimples that establish appropriate vertical spacing between trays work great, as long as they're the same family of products. Put the GNS-430 tray on top of the SL-40 tray and they will not. Seems like no big deal unless you actually load the radios in and try to turn the keeper mechanism. Yep, the GNS-430 tray and SL-40 tray are so close the mechanism will not fully rotate. Hence the popsicle stick trick:

Ignore the little dents and put pieces of popsicle sticks in between the trays. Guess what, it's almost exactly the spacing you get if the dimples align. (Not my idea, I got it from Bill R, courtesy of VAF.)

Thanks guys,

Bart
 
Bart,

Good to read that the popsicle stick trick helped another builder.

Don't forget to tie the radios together and secure them to the sub-panel so they don't move around when you pull some G's.

Click on this picture to see how I secured mine:


The screws that bolt through the strap and into the AA plate nuts are all in dimpled so they don't interfere with the radios.

There was a link a few months back on building radio stacks and there were a few pictures of some great techniques. Unfortunately, I couldn't find the tread for you.
 
Yes....

...
Now, for the alignment in the front, the Garmin International products (GNS-430, GTX-330, etc) have a piece of sheet metal on the bottom of the tray that sticks out a bit. This "lip" should be flush with the panel. The SL-40 tray (Garmin AT, formerly UPS Apollo) has no such lip, and as such, the entire tray should be flush with the panel. I'm told this will properly align the fronts of these radios. (Can anyone confirm or deny?)

....
Bart

Bart... this was correct for my mixture of a GX-60 (old UPS/Apollo), Garmin GX320, and a King KY-97A

When the forward edges of all of the trays (and the Garmin one had a "lip") lined up with the panel edge, the face plates aligned...
 
Face plate alignment

On my panel (PSE 8000B, Garmin 430W, SL40, 327) I wanted my faceplates to be nearly flush with the panel. I installed all radios in their trays, and made sure they were all flush and then attached with AA. I did have to tweak them some but if I recall if you align the trays flush your face plates will not be in alignment (flush). Naturally this is all a preliminary start because I haven't actually made the big cut in the panel. Just a heads up!
 
Worst case scenario....

Hi Terry, I am sending my panel out for cutting, which is why I'm going through this exercise now. For the radio stack cutout, it will be 6.30" (or just a smidge larger to account for paint) wide and some height, to be determined by building the stack. Those dimensions hold true regardless of faceplate alignment. I'm sending it to a panel shop, they've done this before.

I'm thinking in a worst case scenario, I build the angle stock supports now (which will be screwed to the panel, not riveted) to get the height dimension worked out. If the SL-40 face doesn't line up. I need to remove the screws holding the stack to the panel, and redo the angle stock. Not a big deal in the grand scheme of things. But it allows me to proceed with wiring. Yay!

I actually plan to add the SL-40 (Comm 2) sometime into or after the 40 hrs.

Bart
 
Gil's the MAN!!!!

You da man Gil!!!!

pdf Page 22 (Manual page 16) shows the radio protrudes .648" from the front of the tray!

Thanks!!!!!!!!

Bart
 
Last edited:
Back
Top