What's new
Van's Air Force

Don't miss anything! Register now for full access to the definitive RV support community.

Baffled Again

Blizzard

Well Known Member
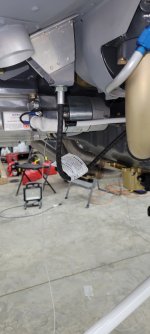
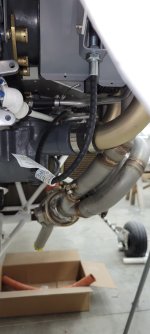
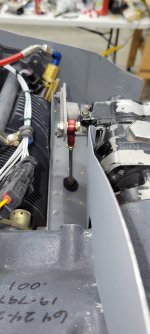
For those that may have installed a Hartzell 3 blade prop and the governor supplied with it. This governor, Model S-1-32, must be significantly larger than the stock plans show. Did you have to modify the FORWARD MOUNTED PROP GOVERNOR CABLE BRACKET? From what I can tell, the bracket needs to be adjusted about 1 inch aft and about a 1 1/4 inch outboard to line up with the prop governor control arm. Just wondering if anyone else has dealt with this. Thanks
 
I'm not running with that combo, but my engine was used and came with an old old hartzell brick governor, and yes I had to modify the bracket significantly to account for it.

After my first flight, I was unhappy with the prop governor I had (it only retarded to 1550-1600 rpm during runup checks), and opted to get a pcu (best decision ever, 1300rpm on runup checks), and had to modify it again for the bottom ramp mount cable. Most folks who have the pcu mount their cable on top of the engine instead of below the ramp, and there are cable brackets available for a mount that connects to the prop governor. If I had to do it over again, I'd probably go that route, as the bottom mount cable introduces significant friction in the system from the cable bends along the route.

I don't have any pictures of the mount I developed handy, just above ramp shots, but this was definitly a very "custom" area of the build. I basically cut the bottom of the mount off, reclocked it and lengthened it, for the throw I wanted, added bigger angle braces to make it sturdy, and then match drilled the hole in the ramp for the center of movement. The bracket works great, but it's significantly beefier than stock.

Roy
 
This is why I go to the forums. I didn't even consider reclocking the bracket. I wouldn't have to modify the bracket at all. I can just turn it about 45 degrees. DUHHH. Good info. Thanks a ton.
 
Here are some pics from the old original installation with the brick. To be clear, when I said reclocked, i meant fore and aft, not twisted... had to do it to clear the cylinder once it was lengthened.

Best of luck!
 

Attachments

  • 20220206_111944.jpg
    20220206_111944.jpg
    684.2 KB · Views: 34
  • 20220206_111951.jpg
    20220206_111951.jpg
    673.2 KB · Views: 33
  • 20220206_112215.jpg
    20220206_112215.jpg
    898.8 KB · Views: 35
Here are some pics from the old original installation with the brick. To be clear, when I said reclocked, i meant fore and aft, not twisted... had to do it to clear the cylinder once it was lengthened.

Best of luck!
I'm using the stock bracket. When you said "Clocking" it got me to thinking of how to orient the bracket so the hole in the bracket would align with where the cable comes through. Rotating the bracket solved the problem. Shouldn't make any difference how it's oriented and doesn't require me to reduce the size of the bracket flanges to fit in the space available. Thanks for the pix. That's a very beefy bracket.....should provide plenty of support!
 
Back
Top