What's new
Van's Air Force

Don't miss anything! Register now for full access to the definitive RV support community.

Baffle Trimming for Top Cowl

Jamie

Well Known Member
Hey All:

I've got all of my baffle bulkheads into place and I'm trying to trim them down to match the contour of the top cowl. I've used the "washer on a sharpie" trick to mark the contour but that's really only doable on the back bulkhead by reaching through the oil door. I have the side bulkheads on #3 and #4 cylinders but I can't reach them with a pen. Is there some trick to this I'm not seeing?

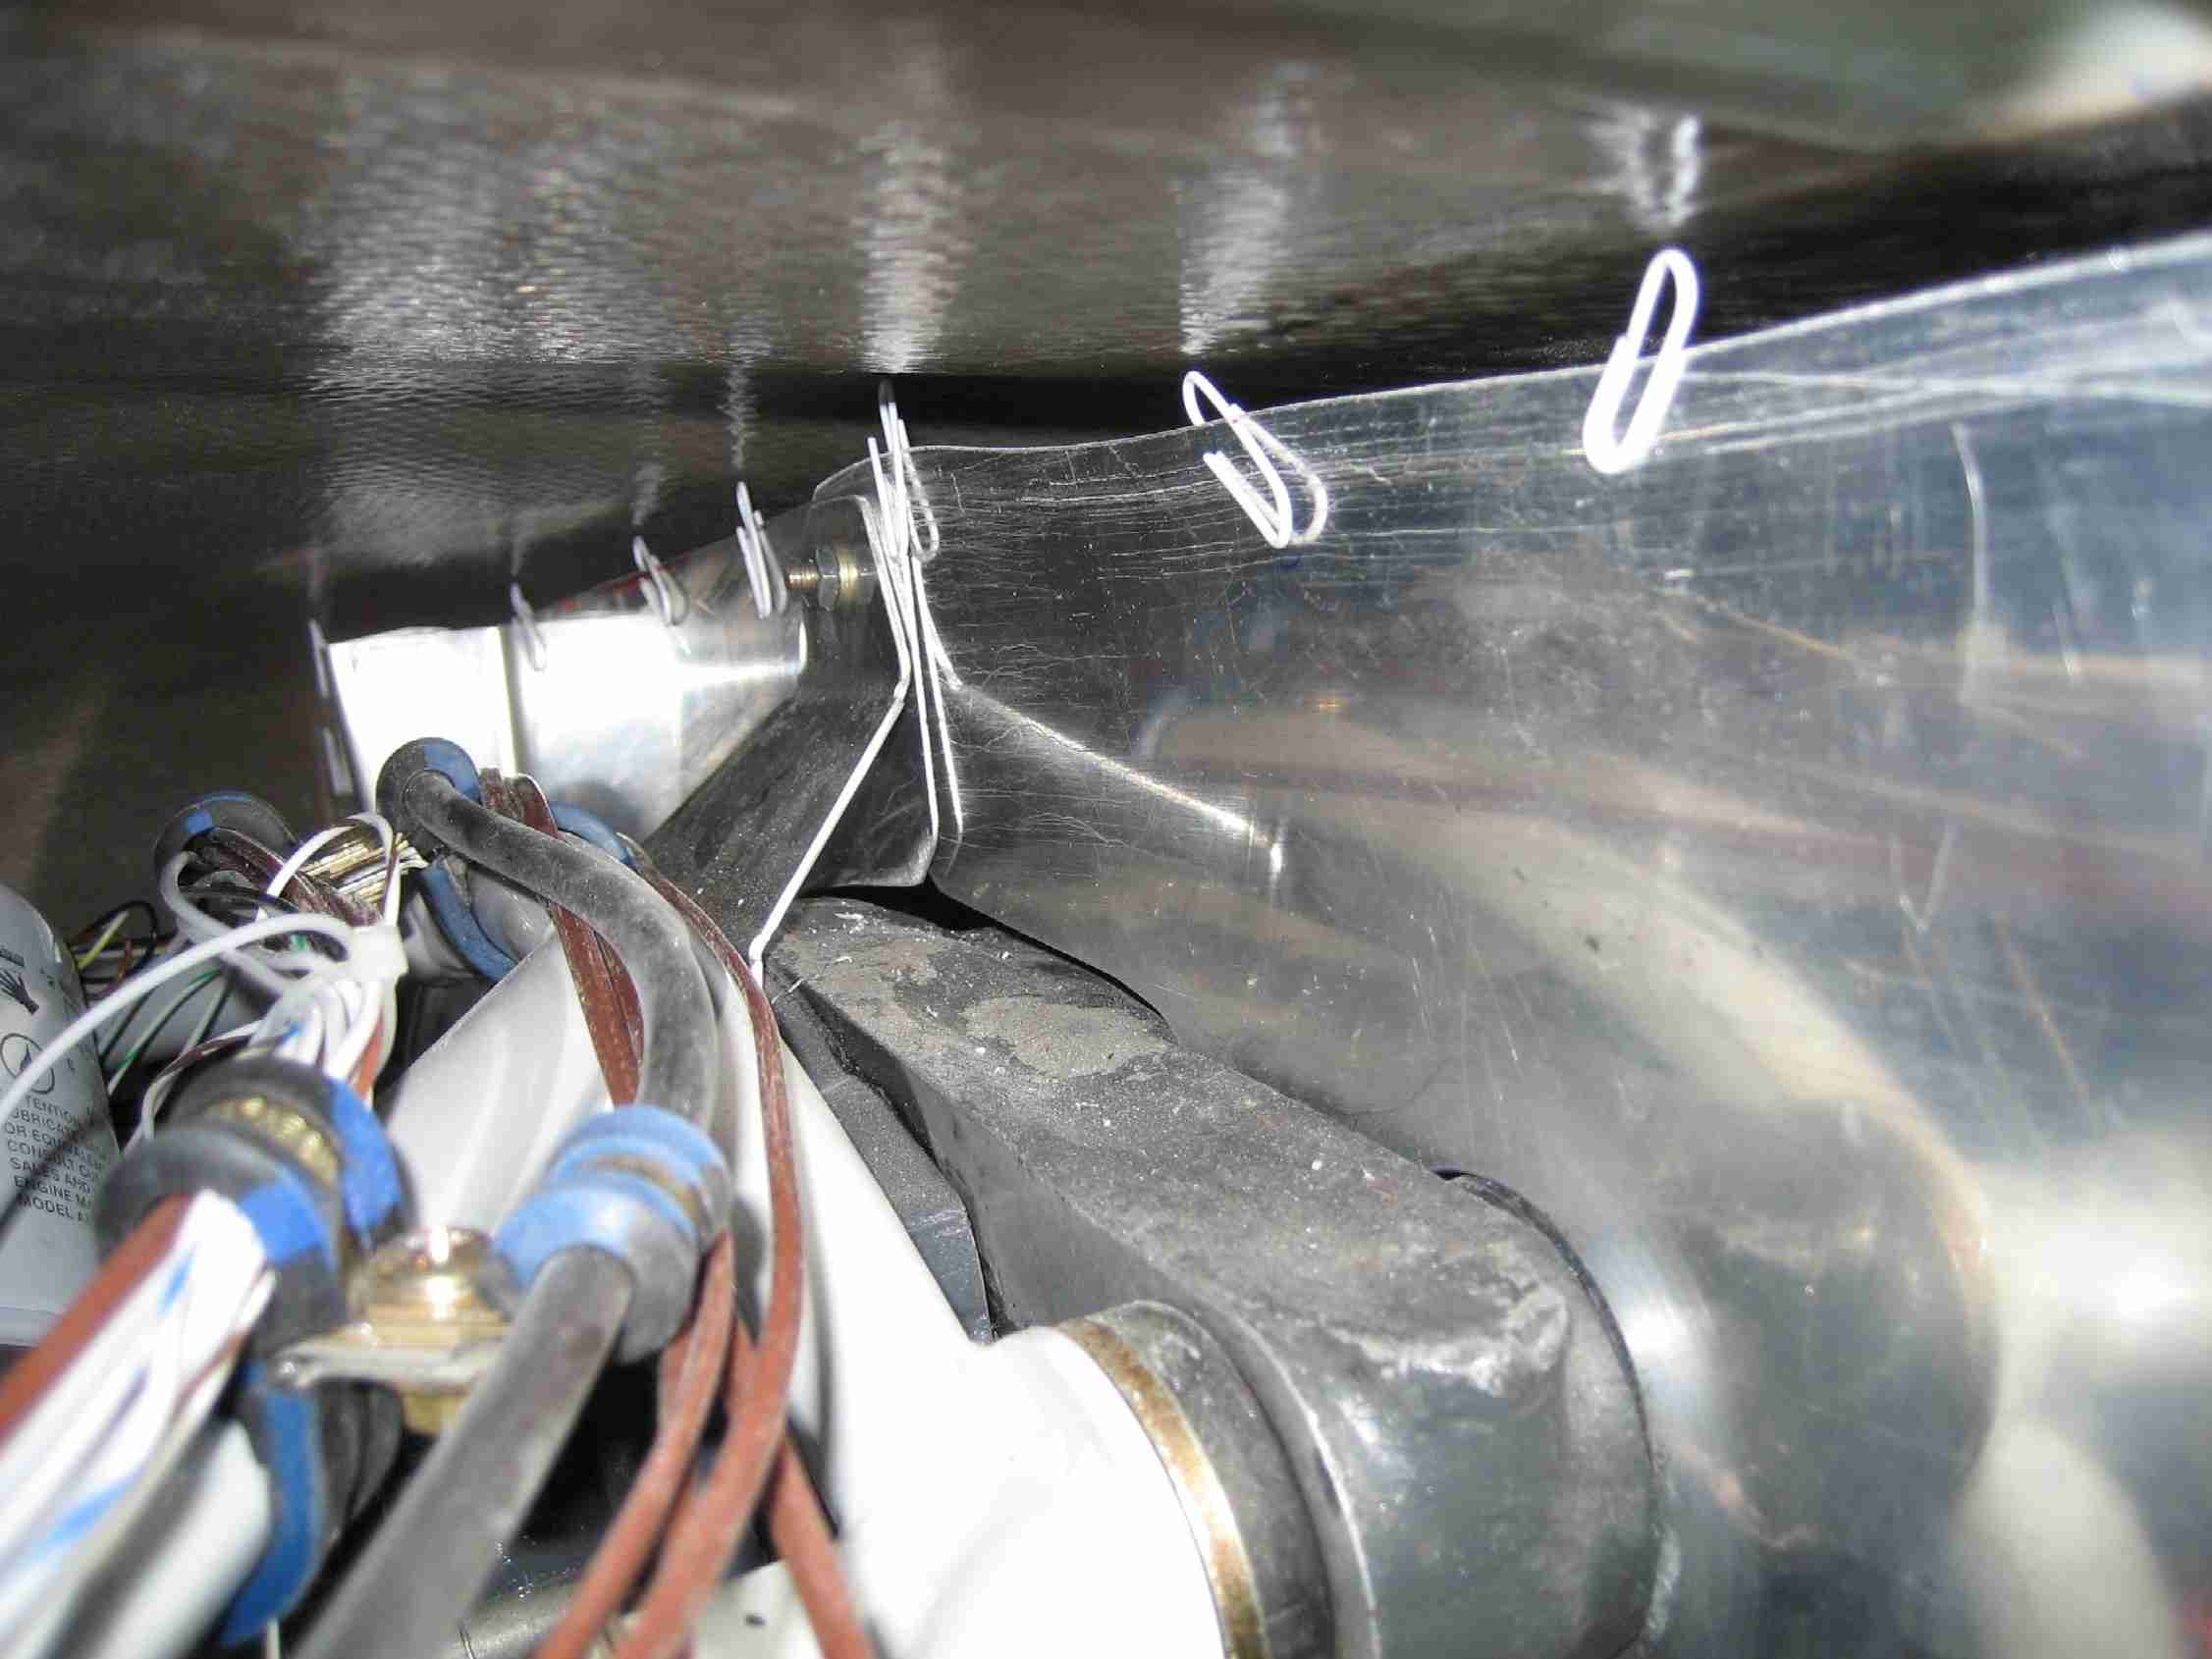
I just did a search and found a paper clip method that I'm going to try tonight. Anyone else have any clever ideas?
 
Maybe

Hi Jamie,
That's the appropriate name........"Baffling" :D We used a bright light under the cowl to make the side baffles more visible and reached in and just felt it along, trimmed a little, felt some more, got bandaids, cut a little more...etc. If you'll cleco a piece of scrap angle aluminum to the center of the top cowl so that it lays flat on the spinner back plate, you can more easily raise and lower the cowl as you look underneath and it'll always be level with the spinner top.

Just some thoughts,
 
Skinny Arms....

Jaimie -

This is a chance to re-connect with the better half.....she probably has skinnier arms than you do, and might be able to snake them through the air inlets better. Other than that, I agree with Pierre - patience and a little at a time.

Paul
 
Try removing the bottom half of the cowl. If the top half of the cowl is attached at the firewall, you should be able to simply support it at the front with clamps on the spinner bulkhead -- not clamping the top cowl per se, just providing something for the front of the cowl to rest on. That way you can keep the top cowl elevated to match the spinner...but the bottom is wide open.

Just a thought.
 
The right stuff...

I used one of those spring loaded grabbers. Don't know the proper name for it, but it has four little claws on the end of about two feet of cable with a push knob on the end. I just grabbed the pen with the washer on it and stuck it through the cowl.

Kent
 
Use the sharpie and the washer. Tape the sharpie to the dowl/stick at a 90 Deg angle and you will be able to trace on the side baffels.

Robert
 
Thanks guys. Plenty of good advise here. I'll give some of your ideas a try.

VAF comes through again!

- JDP
 
I cut an old sharpie in half and used it with the washer trick. That helped get into some tight spots.
 
Try Paperclips

Get a box of paperclips, slide them on the baffles so they are sticking up, put the top cowl on, then measured down from the top of each clip.

Great results and you don't have to get your hand up in there.

It took me a few tries to get it "just right" but it was easy enough.
 
A Picture is worth 1,000 words


I elected to use the "paper clip" method to get the gap correct. Simply place paper clips on the baffle, put the top cowl on, lift off, and measure down the correct distance from the top of the clips. On my RV-9, the gap should be between 1/4 and a 1/2". This method allowed me to trim them to 3/8".
 
Great idea Bill

Why didn't you tell me about this sooner. Oh well, on my next plane.

Kent
 
Pen on a Stick

Take the 'washer-sharpie' and tape it onto the end of a 1/4" dowel rod at a 45 degree angle. Run it back and forth on the sides. Simple enough for me. Im not smart enough for the paper clips.

Bruce W.
 
Jello

Place 1/2" blobs of plasticine (Do you blokes on the otherside of the pond call it plasticine, or do you call it jello or something?) on top of the baffles.
Drop the top cowl on.
Remove the cowl.
Measure the height of the squashed (You, I think, say squished and eat squash, but you get the idea) plasticine, above the top of the baffles and there you have it.
If you have 3/8" of plasticine above the baffles, your done.
Pete.
PS. I just found my Aussie MS WORD Dictionary tells me.
Plasticine; UK Trademark. Soft coloured (Colored) modelling material used especially by children. Now we all know.
Pete.
 
Last edited:
Hi Pete.

We generally call it by the largest brand name available here....Play Doh. Good idea!

Thanks to everyone who chimed in. Removing the bottom cowl and clamping the top cowl to the spinner back plate worked out well. It was still a little tight but I managed.
 
Thanks Jamie...

For clearing up the down-under lingo.
I was trying to decide which flavor of Jello to buy for baffles. :eek:

My picks were Strawberry or Lime and you could eat it when you were done. :cool:


Kent
 
Since I'm anal about stuff like this I'll correct myself.

Plasticine is not Play-Doh. It's non-hardening modeling clay. Play-doh will definitely harden. Thanks wikipedia.
 
kentb said:
For clearing up the down-under lingo.
I was trying to decide which flavor of Jello to buy for baffles. :eek:

My picks were Strawberry or Lime and you could eat it when you were done. :cool:


Kent
You guys (Y'all for the Southern Aussies out there) crack me up.

BTW, when I made a custom cold air box for the car I used play-doh method but I have found the paper-clip method is easier. I say that because is it was easier to transfer the measurement to the baffle w/o gumming up your sharpie with clay.

Also, I can't take credit for coming up with it. One of the local builders recommended it to me. (Thanks Tad!)
 
Play Doh, Jello and Knida.

Paper clips are for grown-ups!
Placka (as we really refer to it) brings back all thoses childhood memories and we are playing little boys and girls here.

Ah! The sweet nostalgia.

But alas, nostalgia is not what it used to be.

Pete.
 
Back
Top