

If you built a set of engine baffles for your RV back before, oh?.let?s say five years ago, you are probably going to either not believe me, or be ticked off?..but we have pretty much finished building and fitting the baffles for the RV-3 in about 30 hours of work. I?ll tell you ? this pre-punched baffle kit that Van?s sells these days is absolutely remarkable ? in fact, it must be magic! And the magic is ? it just ?fits!
I?ll tell you, between the CAD design the match-hole parts, and the completely readable instructions, I think anyone could actually build these things now ? no art required. What used to take a tremendous amount of trial and error trimming fitting now just bolts right up to the engine and snaps in place. All the holes for bolts line right up. And even the ramps are easy to bend and fit.
Yes, it probably helps to have built some baffles before so that you know where you are headed, but Louise did most of the work on this set, and I was only looking over her shoulder and occasionally working on a few custom bits (like the oil cooler mount). We did have to do some design work on the left rear corner to make the oil cooler mount fit inside the RV-3 cowl (and to make it strong enough to tow the airplane by if required), but having the side and rear panels fit the IO-320 right out of the box was a huge advantage. Because of the small size of the RV-3, it took some pretty aggressive trimming to fit the top of the kit to the cowl, but fortunately, we had some great pictures of that award-winning -3 from Oshkosh to let us know that were ?in the box?.
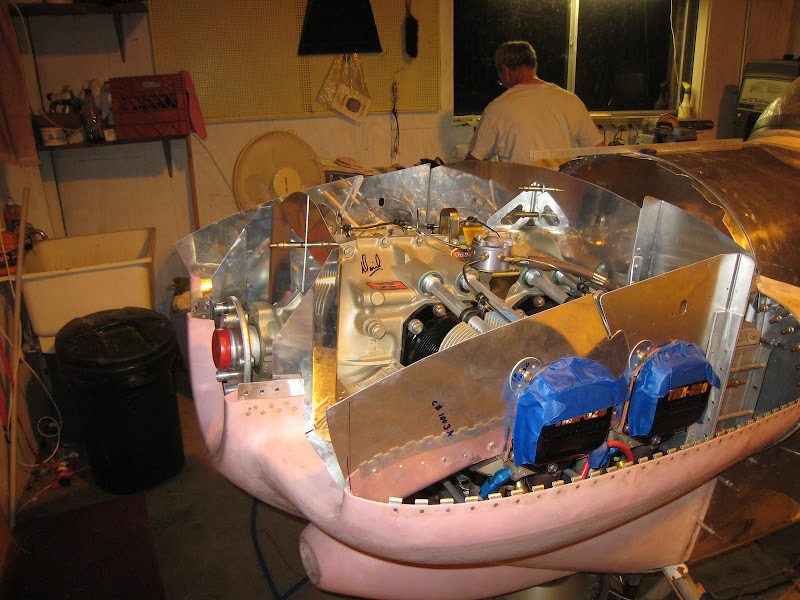
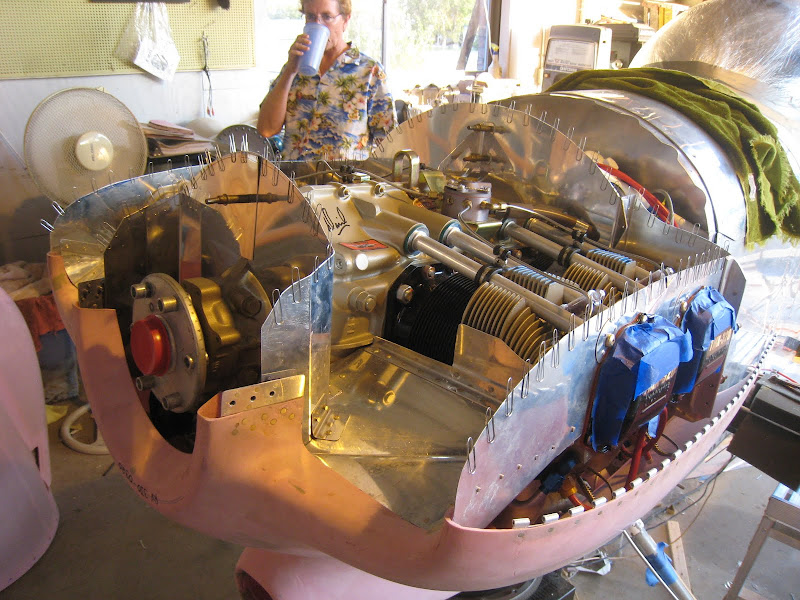
All that?s left now are a few penetrations for plug wires and blast tubes, and maybe a little paint (haven?t decided yet ? I usually go with bare aluminum, but these are turning out so nice?..). When I have finished baffles in the past, I was so glad to get them shoe-horned on to the engine that the last thing I ever wanted to do was remove them for finishing. These ? I can remove and install them in about five minutes, and re-install them just about as quick ? and truthfully, there will be almost no silicone required for sealing ? yes, they fit THAT WELL. Here are a few pictures from along the way:
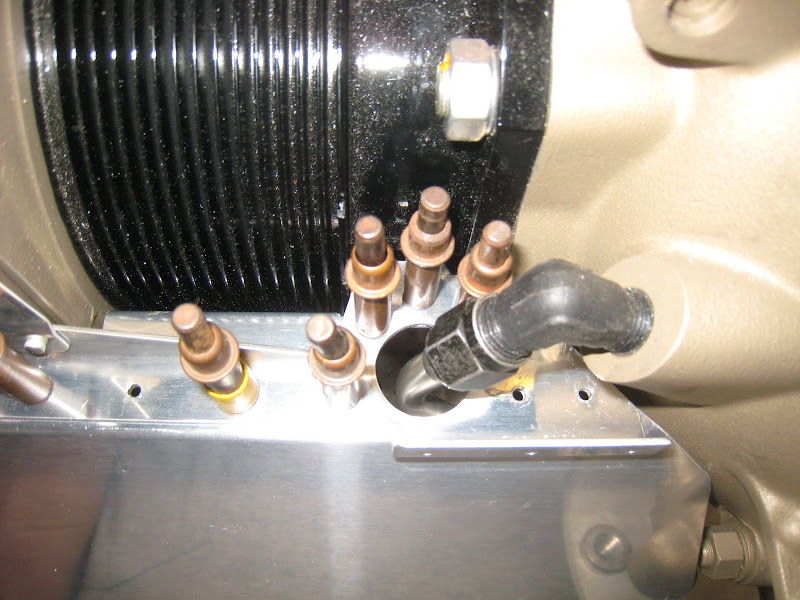
The pre-punched kit even nails the location of the oil cooler line ? exactly!
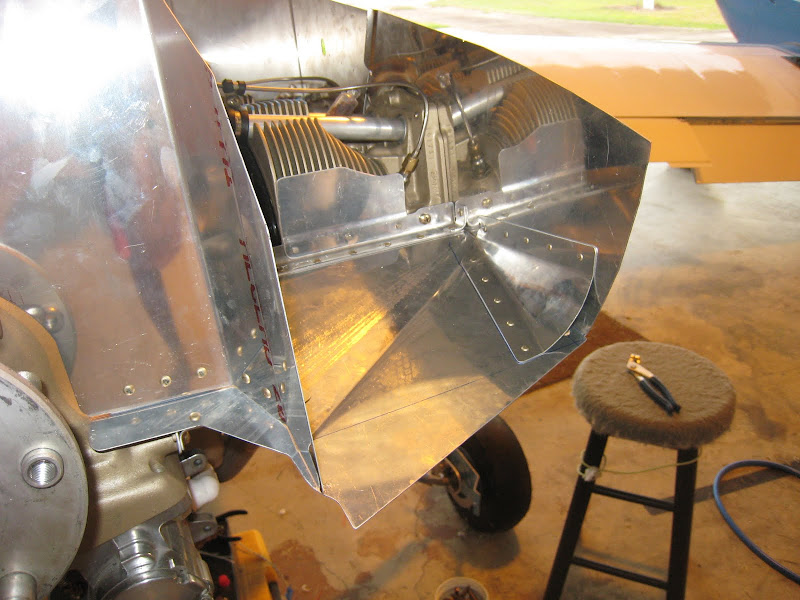
The oil cooler needs to hang quite low to clear the cheek cowls on the RV-3 ? in fact, it needs to hang below the bottom of the baffles, requiring a plenum be built. This was easily down with some scrap Z-Channel and 0.050? aluminum.
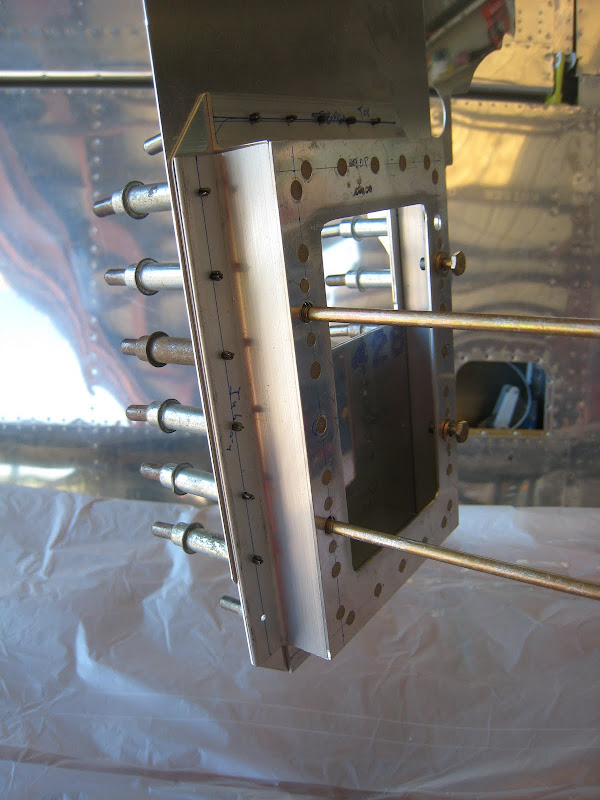
These curved corner baffles help fill the corners that interface with the cowl inlets and cut down on the baffle seal problem. They have to be custom-built, but the instructions are clear, and they don?t take long.
Our build log says it took about 20 person-hours to get to this point after opening the baffle kit box. That included the custom oil cooler corner and plenum.
For final clearance trimming, we used the paper-clip trick ? works like a champ!
Paul
I?ll tell you, between the CAD design the match-hole parts, and the completely readable instructions, I think anyone could actually build these things now ? no art required. What used to take a tremendous amount of trial and error trimming fitting now just bolts right up to the engine and snaps in place. All the holes for bolts line right up. And even the ramps are easy to bend and fit.
Yes, it probably helps to have built some baffles before so that you know where you are headed, but Louise did most of the work on this set, and I was only looking over her shoulder and occasionally working on a few custom bits (like the oil cooler mount). We did have to do some design work on the left rear corner to make the oil cooler mount fit inside the RV-3 cowl (and to make it strong enough to tow the airplane by if required), but having the side and rear panels fit the IO-320 right out of the box was a huge advantage. Because of the small size of the RV-3, it took some pretty aggressive trimming to fit the top of the kit to the cowl, but fortunately, we had some great pictures of that award-winning -3 from Oshkosh to let us know that were ?in the box?.
All that?s left now are a few penetrations for plug wires and blast tubes, and maybe a little paint (haven?t decided yet ? I usually go with bare aluminum, but these are turning out so nice?..). When I have finished baffles in the past, I was so glad to get them shoe-horned on to the engine that the last thing I ever wanted to do was remove them for finishing. These ? I can remove and install them in about five minutes, and re-install them just about as quick ? and truthfully, there will be almost no silicone required for sealing ? yes, they fit THAT WELL. Here are a few pictures from along the way:
The pre-punched kit even nails the location of the oil cooler line ? exactly!
The oil cooler needs to hang quite low to clear the cheek cowls on the RV-3 ? in fact, it needs to hang below the bottom of the baffles, requiring a plenum be built. This was easily down with some scrap Z-Channel and 0.050? aluminum.
These curved corner baffles help fill the corners that interface with the cowl inlets and cut down on the baffle seal problem. They have to be custom-built, but the instructions are clear, and they don?t take long.
Our build log says it took about 20 person-hours to get to this point after opening the baffle kit box. That included the custom oil cooler corner and plenum.
For final clearance trimming, we used the paper-clip trick ? works like a champ!
Paul

