

I stole that line from a famous Central Texas builder ? can?t take credit for it. But it is fairly truthful ? the bulkheads in the RV-3 kit are interesting to say the least. I am not sure that you can get a location for them where both the top and bottom fit precisely ? and in fact, the instructions clearly tell you that you can (and may have to) cut off the flanges and make new ones in order to get them to fit properly. Remember ? these kits were designed well before the age of CAD/CAM and match-holed technology. These are good old-fashioned drawings and parts. And when it comes to the curves and conics of an airplane fuselage ? well, let?s just say that a fair amount of art is involved.
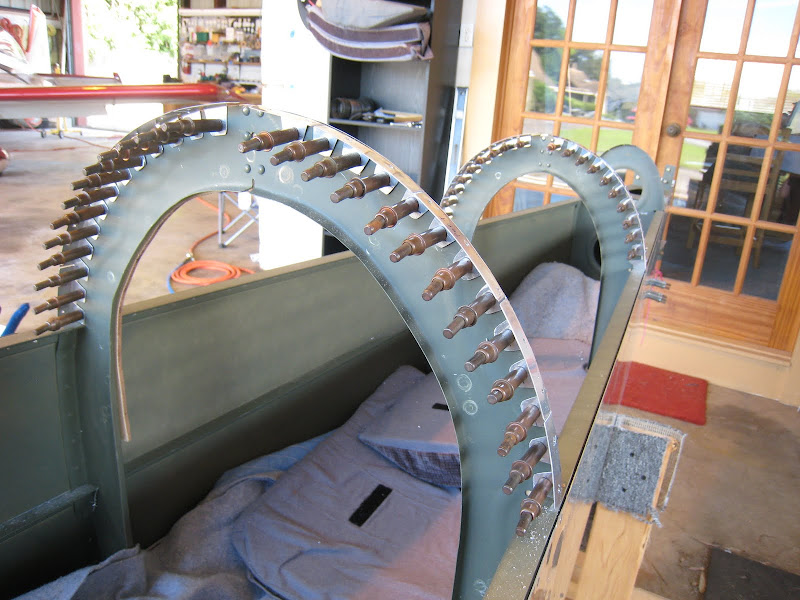
So it was time to fit out aft top skin in place, and since we had already invested a lot of time into the seat back bulkhead, we decided to use it and the aft end bulkhead (F-309) to determine the shape of the skin. We would then adjust the 306 and 308 to fit. That meant cutting off the 306 and 308 flanges, which I did with the cut-off wheel, sanding disks, and scotchbrite disks. Meanwhile, Louise went to work fabricating some ?Flexi-flange? as I call it ? lengths of flange with notches cut in to allow it to conform to the curvature of the bulkhead and the conical nature of the skin. She predrilled the flanges on the bench ? that it made it much, much easier when crawling in to install tem, and assured straighter rivet lines on the outside skin.
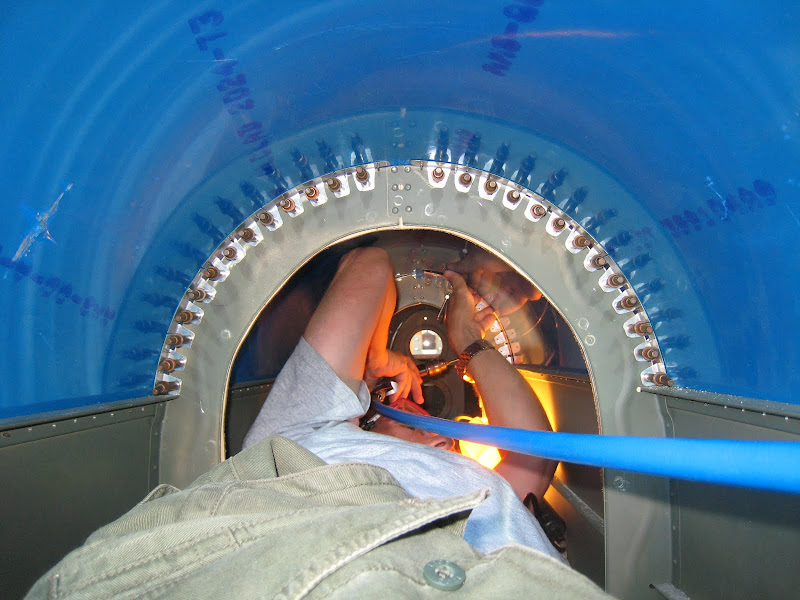
Installation was actually pretty simple ? if you like working in enclosed spaces. Since Louise had spent an afternoon inside ?Fuselage Cave? to drill the turtle deck to the longerons, it was my turn to go in and fit these flanges. Rather than build plywood bridges that are supported on the bulkheads, we stuffed the spaces between the bulkheads with blankets, then put more blankets on top, making it a nice, soft play to lay with the loads spread broadly over the structure. I crawled in with a drill and a drop light ? a headlamp helps a lot as well. Before we put the top skin on we cut out plywood forms for each bulkhead, to keep them straight and stiff ? these were attached with C-clamps. Without them, you?ll never keep the things in a straight line while attaching the flanges.
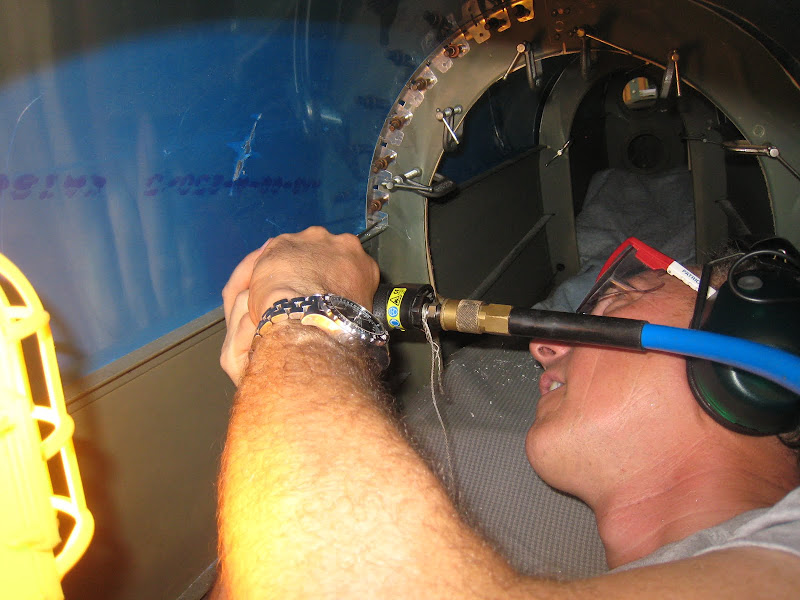
The sequence was easy ? hold the flange up to the skin and the bulkhead, make sure it was flush with both, and drill the skin holes. The outside person clecos as you go. Once the flange is fully drilled to the skin, swap drill bits and drill the flange to the bulkhead, clecoing as you go. It helps if the outside person feeds you clecos in the pliers, one at a time, like a surgical nurse handing the doctor sutures. We found that six inch drill bits were the perfect length ? with shorter bits, the drill chuck hit the bulkheads or skin, and longer ones just flat don?t fit inside a -3!
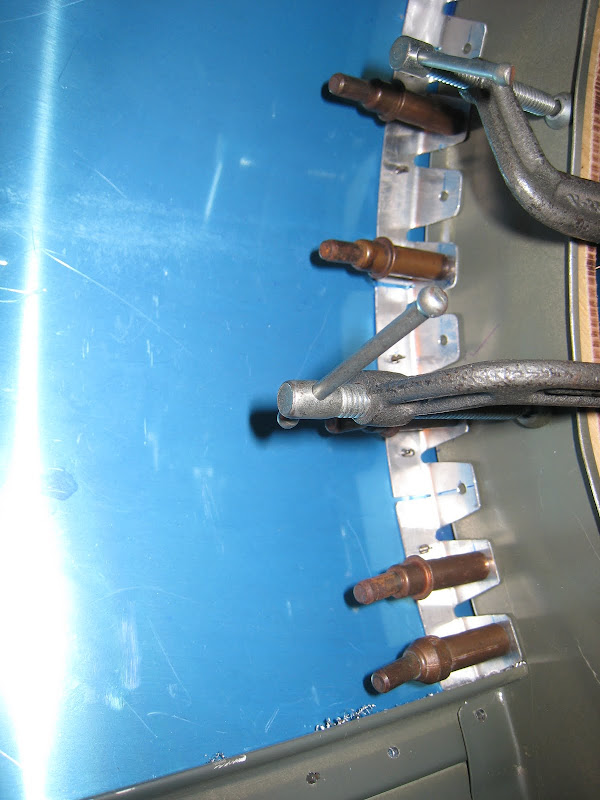
After everything was drilled, we took off the skin, removed the flanges, primed and debured them ? then riveted them to the bulkheads. Now THESE bulkheads fit the airplane like a glove!
Paul
So it was time to fit out aft top skin in place, and since we had already invested a lot of time into the seat back bulkhead, we decided to use it and the aft end bulkhead (F-309) to determine the shape of the skin. We would then adjust the 306 and 308 to fit. That meant cutting off the 306 and 308 flanges, which I did with the cut-off wheel, sanding disks, and scotchbrite disks. Meanwhile, Louise went to work fabricating some ?Flexi-flange? as I call it ? lengths of flange with notches cut in to allow it to conform to the curvature of the bulkhead and the conical nature of the skin. She predrilled the flanges on the bench ? that it made it much, much easier when crawling in to install tem, and assured straighter rivet lines on the outside skin.
Installation was actually pretty simple ? if you like working in enclosed spaces. Since Louise had spent an afternoon inside ?Fuselage Cave? to drill the turtle deck to the longerons, it was my turn to go in and fit these flanges. Rather than build plywood bridges that are supported on the bulkheads, we stuffed the spaces between the bulkheads with blankets, then put more blankets on top, making it a nice, soft play to lay with the loads spread broadly over the structure. I crawled in with a drill and a drop light ? a headlamp helps a lot as well. Before we put the top skin on we cut out plywood forms for each bulkhead, to keep them straight and stiff ? these were attached with C-clamps. Without them, you?ll never keep the things in a straight line while attaching the flanges.
The sequence was easy ? hold the flange up to the skin and the bulkhead, make sure it was flush with both, and drill the skin holes. The outside person clecos as you go. Once the flange is fully drilled to the skin, swap drill bits and drill the flange to the bulkhead, clecoing as you go. It helps if the outside person feeds you clecos in the pliers, one at a time, like a surgical nurse handing the doctor sutures. We found that six inch drill bits were the perfect length ? with shorter bits, the drill chuck hit the bulkheads or skin, and longer ones just flat don?t fit inside a -3!
After everything was drilled, we took off the skin, removed the flanges, primed and debured them ? then riveted them to the bulkheads. Now THESE bulkheads fit the airplane like a glove!
Paul
")

