RugerRV-10
I'm New Here
Hello VAF! (again)
It's only taken me two years to finish my empennage kit. Over the past 23 months, I've spent about 12 months of completely unproductive time and a few more months of barely productive time in between getting married, having a baby (wife did), and going to pilot training. So for everyone out there worried about time schedules and what not, two years for the emp kit here. Not the shortest and not the longest. But progress! So relax and keep plugging away.
It's not going to get any better. On my way to Oklahoma in a few weeks for a five month training course, and unfortunately, the wing kit will get put completely on hold in that time. So if there are any builders or EAA chapters near Altus, OK - let me know, I'll be around to help!!
I'm hoping to get chapter 13 complete at the very least, before everything gets put in storage for a while. I sent Van's an email two weeks ago and never got a reply. Partly miffed by it, but I'm guessing that my question was so menial that it wasn't worth replying to. However, if I'm going to carve into a really expensive part, I want to be sure that I know what I'm doing. Here's the message, and thanks for the help!
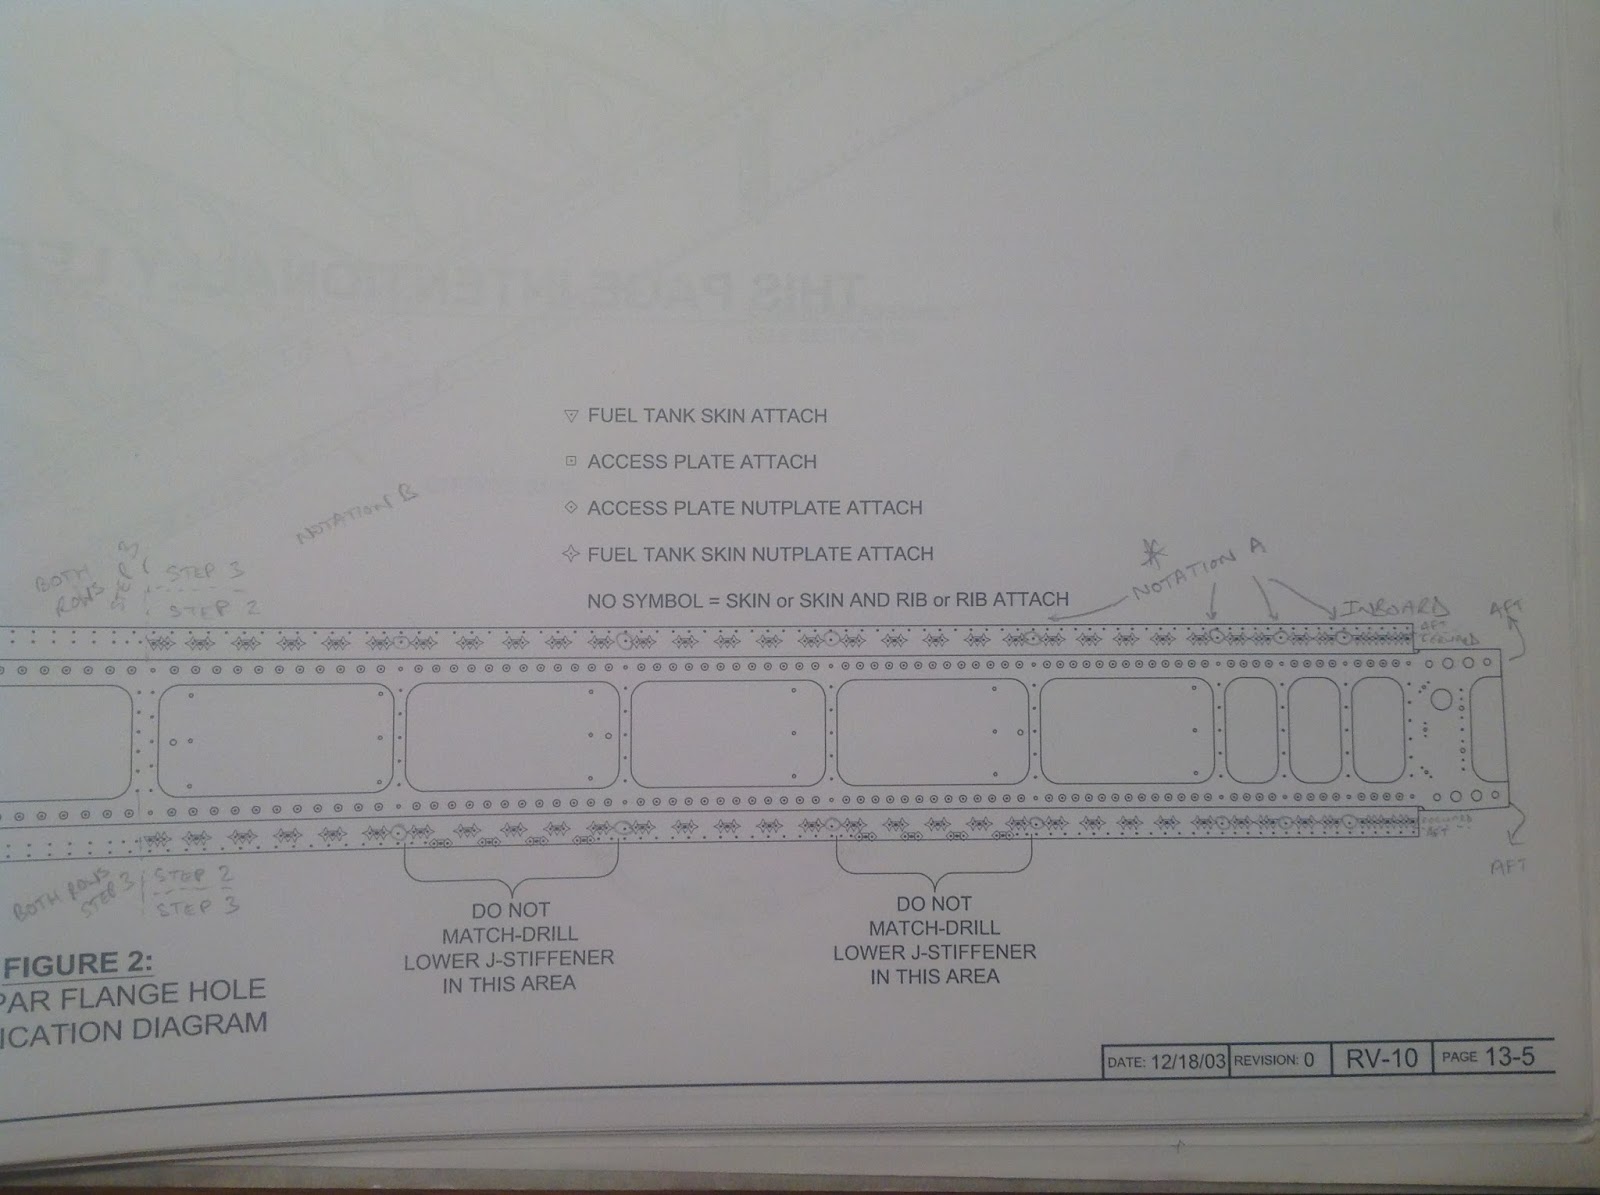
"I'm getting ready to start chapter 13 and while reading became a bit confused on rv-10 p.13-3 step 2.
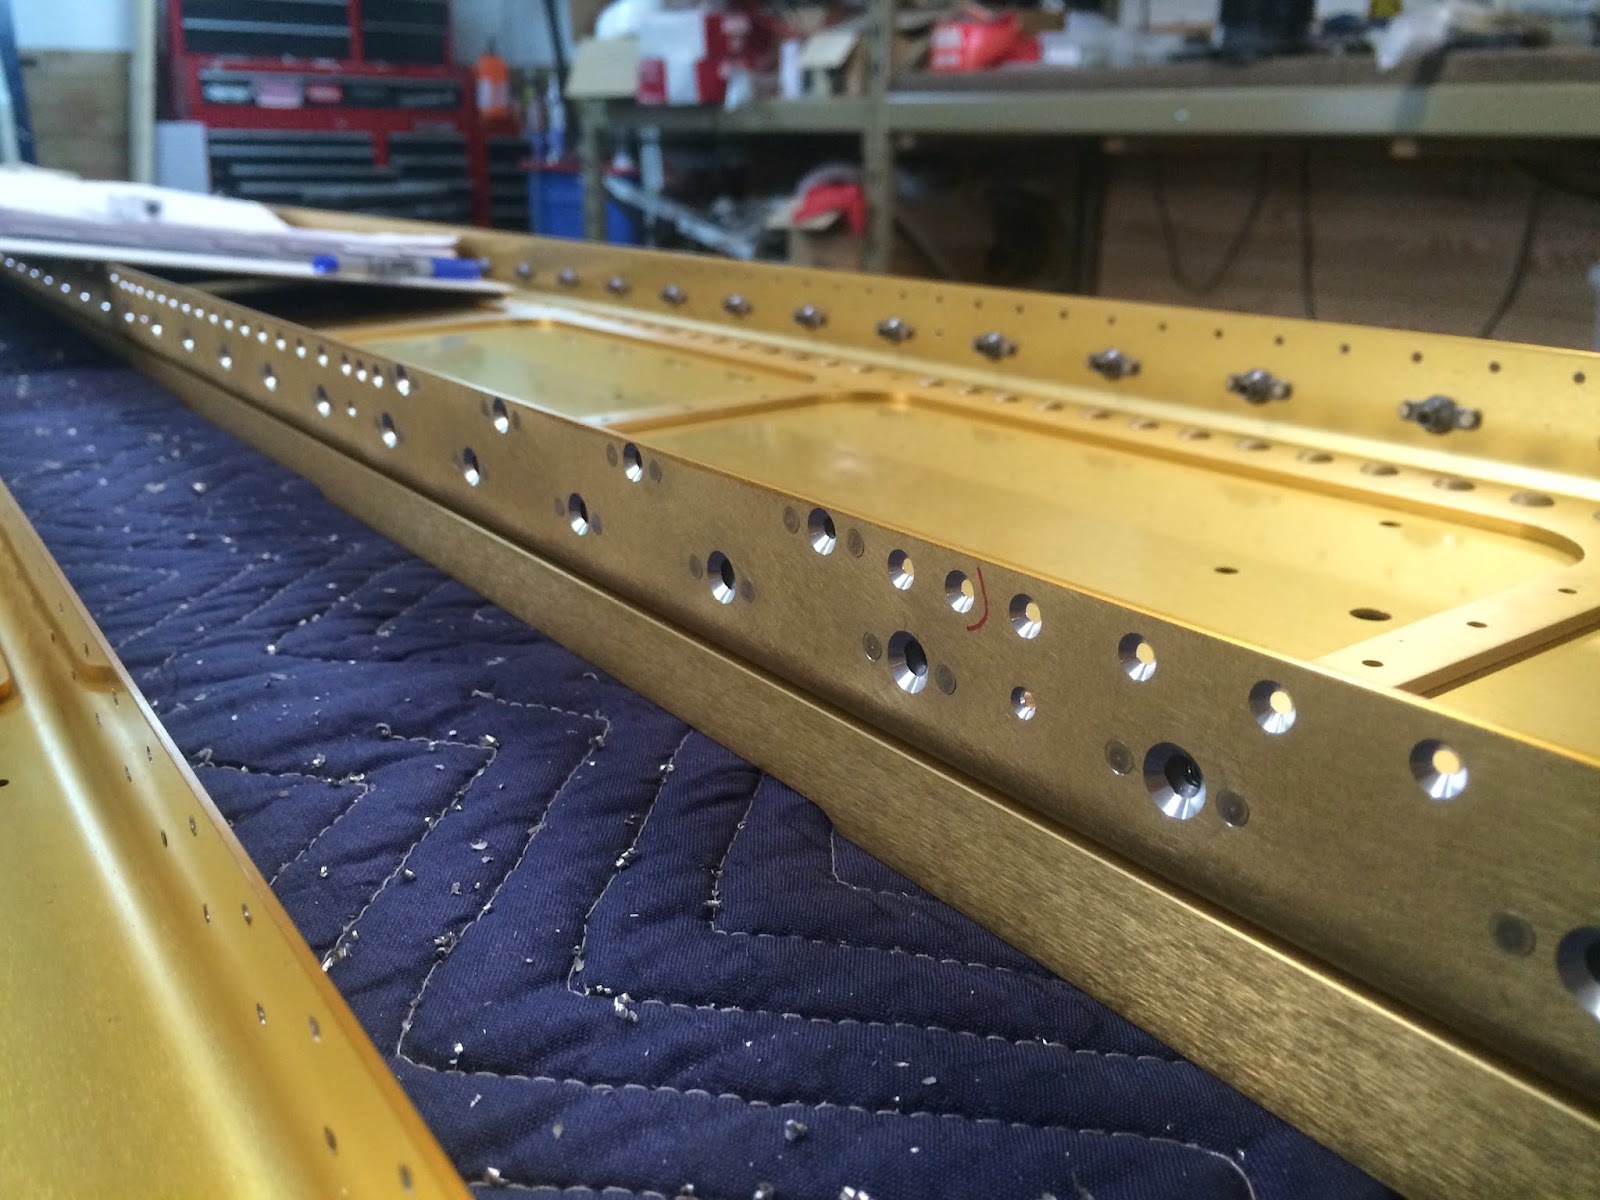
I understand that the "nutplate attach rivet holes" are all the holes on p.13-5 figure two that are marked with a diamond or star (not the triangles or squares). I'm trying to verify that the "rib to spar flange attach rivet holes" are ONLY the 14 holes on the FORWARD row of the spar flanges (7 each flange). See notation A on picture for circled holes. These holes are marked in plans as "no symbol"
Step 3 deals with the "skin and rib attach rivet holes" which are all the "no symbol" holes (both rows) outboard of notation B in the picture, as well as all the holes on the AFT row of the flange (Minus the 14 holes indicated above and the diamonds and squares).
Finally steps 5 and 7 deal with the holes indicated as triangles and squares.
I just want to be 100% certain of this before I go and start countersinking the spar assembly... "
It's only taken me two years to finish my empennage kit. Over the past 23 months, I've spent about 12 months of completely unproductive time and a few more months of barely productive time in between getting married, having a baby (wife did), and going to pilot training. So for everyone out there worried about time schedules and what not, two years for the emp kit here. Not the shortest and not the longest. But progress! So relax and keep plugging away.
It's not going to get any better. On my way to Oklahoma in a few weeks for a five month training course, and unfortunately, the wing kit will get put completely on hold in that time. So if there are any builders or EAA chapters near Altus, OK - let me know, I'll be around to help!!
I'm hoping to get chapter 13 complete at the very least, before everything gets put in storage for a while. I sent Van's an email two weeks ago and never got a reply. Partly miffed by it, but I'm guessing that my question was so menial that it wasn't worth replying to. However, if I'm going to carve into a really expensive part, I want to be sure that I know what I'm doing. Here's the message, and thanks for the help!
"I'm getting ready to start chapter 13 and while reading became a bit confused on rv-10 p.13-3 step 2.
I understand that the "nutplate attach rivet holes" are all the holes on p.13-5 figure two that are marked with a diamond or star (not the triangles or squares). I'm trying to verify that the "rib to spar flange attach rivet holes" are ONLY the 14 holes on the FORWARD row of the spar flanges (7 each flange). See notation A on picture for circled holes. These holes are marked in plans as "no symbol"
Step 3 deals with the "skin and rib attach rivet holes" which are all the "no symbol" holes (both rows) outboard of notation B in the picture, as well as all the holes on the AFT row of the flange (Minus the 14 holes indicated above and the diamonds and squares).
Finally steps 5 and 7 deal with the holes indicated as triangles and squares.
I just want to be 100% certain of this before I go and start countersinking the spar assembly... "