
Van's Air Force
You are using an out of date browser. It may not display this or other websites correctly.
You should upgrade or use an alternative browser.
You should upgrade or use an alternative browser.
control stick hitting panel
- Thread starter cholladay
- Start date

Vern
Well Known Member
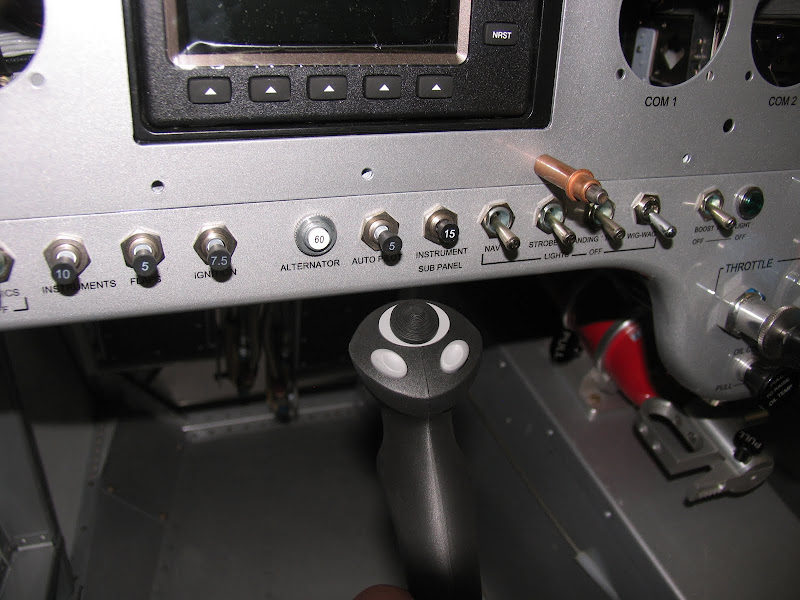
Hitting panel with the stick
With the stock Van's panel our 10 stick would just about touch the lower panel with the stick grips. Because I had some heater controls there that conceivably could hang the stick, I moved the heater controls.
The stick (elevator ) must make it's full travel without binding or hitting the panel prior to hitting the stop.
rleffler
Well Known Member
Chad,
I just took a look at mykitlog site to see if I documented how much I cut off the bottom of the stick. There are pictures that show me cutting, but not the actual dimension. It appears that the cut I made allows you to insert the control stick into the base up to where the powder coating starts on the stick.
Cutting a piece off the bottom will move the stick aft a bit and give you more clearance at the panel. I believe that did the trick for me, but I don't have my grips mounted yet to be 100% sure. Geoff has taken a look and believes that I should be ok too. But you never are certain until everything has been put together.
On the Matronics list, there are extensive dialogue started by Robin Marks on how he bent his sticks to gain the clearance needed.
bob
Mike S
Senior Curmudgeon
I cut the stick off at the bottom also, and the top is down to the absolute minimum size.
Still hit the panel, so I rotated the grip toward the centerline a bit.
Still had interference issues, now with the throttle mount plate.
Then later when the wings and tail were on, and the travel stops were actually in place, problem gone.
Unless you have both the tail, and the wings installed, dont try to do too much about the stick travel.
Seat and rudder pedal position
My sticks hit when I first installed them. I have the Aerosport Products panel and Infinity grips. I used a hydraulic press and moved them down. I then had to cut and re-weld the top so the stick wasn't leaned way back. I now can use front and rear heat and I still have clearance. One thing to think about is after moving the stick down and aft you have to think about your crotch! You know what I mean. The RV-10 is nose heavy (still within CG) with a single person on board. Ya you can put weight in the back, but something to think about when you are moving that stick aft. Full flaps and you can get close to the aft stick position on final. I'm right at fwd cg with just me and full fuel.
One thing I found out later that was beneficial was moving my rudder pedals to the aft position. I'm 5'10" and my seat track pin sits right in the middle of the track. It also makes the seat farther back for more room with the aft limit stick movement.
All things to think about.
Aerosport1
Well Known Member
Chad Vans calls for 20 to 25 degress of throw for down I believe. I have a additional stop on my elevator for down. it only needed about a 1/8" stop. I will look for some pictures. I think Deems had one like mine. I got the idea from him.
You can also adjust by your linkage a little bit to help the problem.
Not all sticks seem to be the same. When I looked at Bob Lefflers his
looked like it would not hit at all.
Geoff
You can also adjust by your linkage a little bit to help the problem.
Not all sticks seem to be the same. When I looked at Bob Lefflers his
looked like it would not hit at all.
Geoff
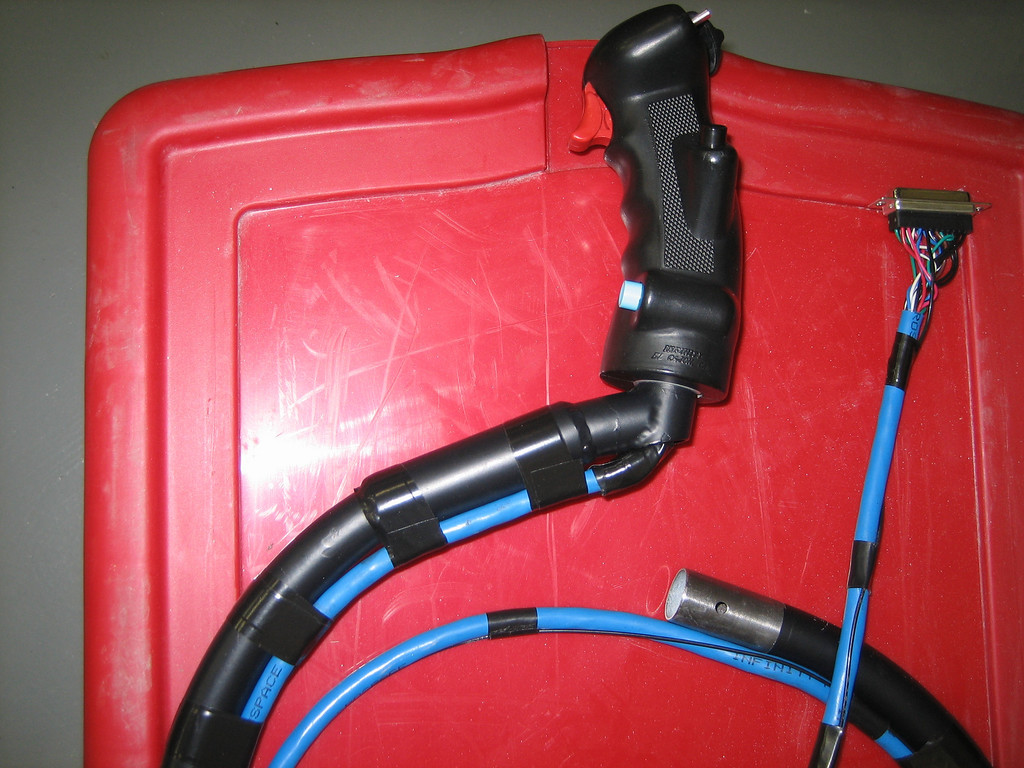
Tosten Grip
Here are some pics to show you what I ran into.
First, you really cannot finalize the stick grip until you mount the elevator and have the proper stops and full travel on the control column.
As you see, I shortend the stick down to minimums. I also shaved some of the plastic off the bottom of those nice grips.
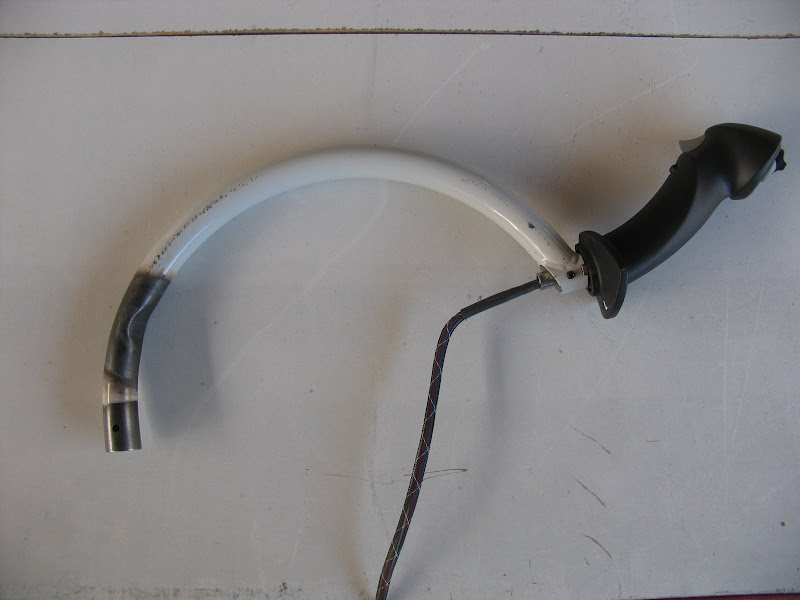
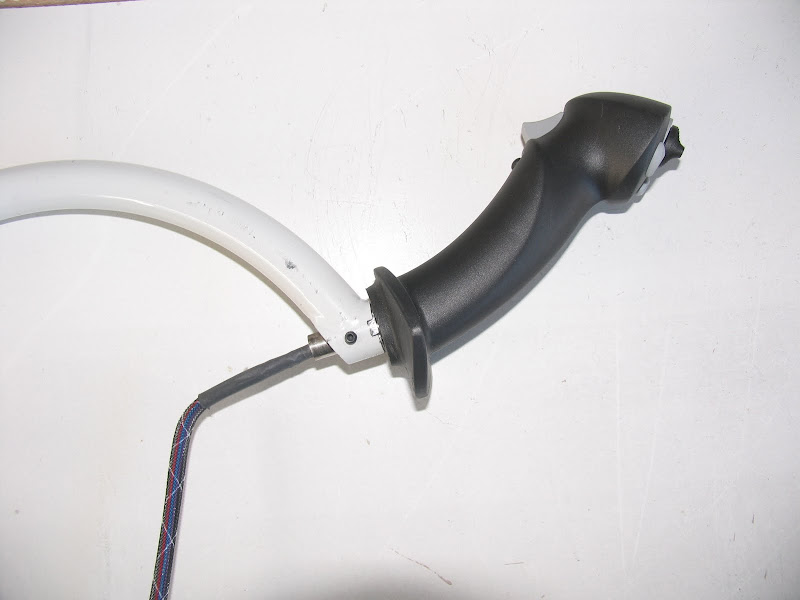
The lower end of the stick was cut back to where it can be inserted to where the paint starts.
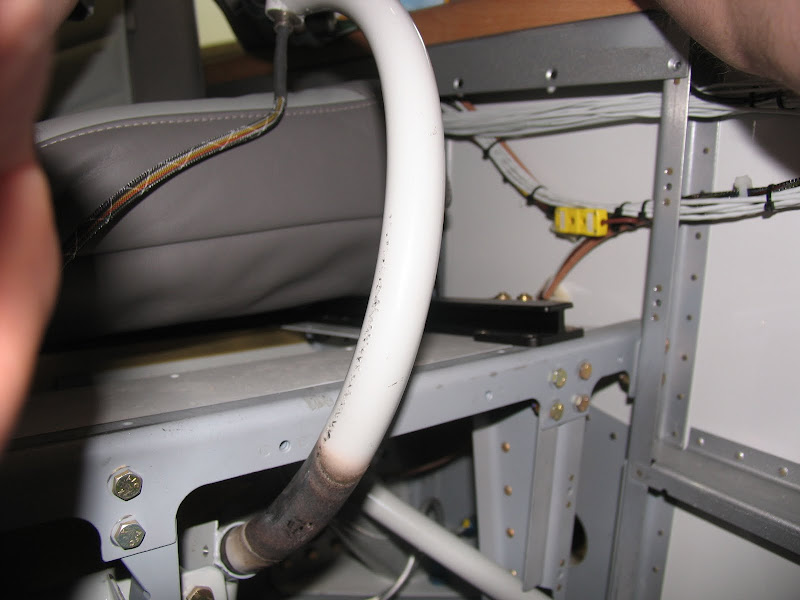
The consequences of this "minor" alteration manifested itself in having the stick scrape the bottom of the seat structure. Not wanting to remove aluminum in this area, I squeezed a dent into the stick instead as you see in the first picture.
Furthermore, as other have pointed out the stick grip is now "firmly" in my lap
at the full aft position.
I have not hooked up the ailerons and I sure hope I 'm not going to hit the throttle when moving the stick to the right.
Here are some pics to show you what I ran into.
First, you really cannot finalize the stick grip until you mount the elevator and have the proper stops and full travel on the control column.
As you see, I shortend the stick down to minimums. I also shaved some of the plastic off the bottom of those nice grips.
The lower end of the stick was cut back to where it can be inserted to where the paint starts.
The consequences of this "minor" alteration manifested itself in having the stick scrape the bottom of the seat structure. Not wanting to remove aluminum in this area, I squeezed a dent into the stick instead as you see in the first picture.
Furthermore, as other have pointed out the stick grip is now "firmly" in my lap
at the full aft position.
I have not hooked up the ailerons and I sure hope I 'm not going to hit the throttle when moving the stick to the right.
Tom Martin
Well Known Member
Ernst
I do not wish to be an alarmist but it looks like you heated the metal in the area where you wanted a dent. The control stick is not something that you want to fail and you have weakened it in a very important area. First the temper of the metal may have changed due to heating and putting a dent in that spot is exactly where most of the pressure will be. I suggest that you talk to Van's about this modification before first flight.
I do not wish to be an alarmist but it looks like you heated the metal in the area where you wanted a dent. The control stick is not something that you want to fail and you have weakened it in a very important area. First the temper of the metal may have changed due to heating and putting a dent in that spot is exactly where most of the pressure will be. I suggest that you talk to Van's about this modification before first flight.
flion
Well Known Member
While I agree that the stick is something you don't want to fail, those welds look pretty good. I don't think he'd be able to exert enough pull, even momentarily, to really fail the stick. I'd be more concerned about geometry changes to the control system. But then, I'm not a structural engineer, either.
One of the benefits of posting pics is that someone might spot
a potential problem or mistake on your project.
I have thought long and hard about that dent in the stick however, have not had a chance to show it to someone with knowledge in metallurgy.
The dent was pressed into the stick tube after heating it red hot.
There are no kinks in the tube and the metal was not shock cooled.
4130 chromoly is routinely welded and in some cases such as engine mounts
the welded area is reheated to red hot for stress relieve.
Others have removed metal from the stick in this area to have wiring exit,
that seemed like a bad idea to me. Others are cold bending the stick to fit, probably ok but not as gentle as heating it for treatment.
The stick should see no more than 25 to 30 lb of pressure( I'm guessing) and that only momentarily.
I left the treated area unpainted hoping that someone could talk me in or out of adding a patch to the bottom of the tube, effectively strengthening the dented area.
I really don't think it is needed but I can easily be convinced that a patch should be added.
Disclaimer: I'm not a professional aeronautical engineer, but I have nearby friends who are.
Don't want to sound overly pessimistic here, but the photo worries me a little.
You have heat deformation, probable microscopic cracking where the tube has been deformed, and additional stress concentration points where it has been deformed in the area that most stress is already present in a control yoke - near the base. I'd probably seek engineering advice before installing it, and maybe look at alternatives......
Speaking of holes etc in the stick to run wiring through, it reminds me of the several control stick failures many years ago in Pitts aircraft for these very reasons (drilling holes at the point of maximum stress on the yoke).
ScottSchmidt
Well Known Member
I'll share what I did
I had the same issue with the stick hitting the panel. Of course this is something that you don't want. You always want to be able to check the full throw of your controls, also you don't want your grips hitting the panel every time you get out of the plane and someone or the wind moves your elevator into the full down position. I've let go of the stick while taxiing a few times and the wind would throw the stick full down, that would have really hit the panel hard.
I had the same issue and I cut my stick, called Van's and purchased the same material and same thickness as the stick just a larger ID so it slid over the tube by about 2" on each end. I called in a tig welder who frequently repairs helicopters at our airfield and he charged me $20 to weld both sides. I too was concerned about weakening the stick even though I'm sure it would have been just fine with a butt weld but this way I know it is stout. If you had any concerns you could cut that area and slide a tube over it on the outside and weld it. I've said this before but the first lesson I was taught in engineering was, "If in doubt, make it stout, out of things we know about!".
Stick clearance
FWIW, the DAR who will be doing the inspection on my -6A said that not only should the stick clear the panel, but so should my hand when it's gripping the stick. I was able to adjust the rod end bearing slightly to change the geometry of the forward stick linkage and achieve clearance.
FWIW, the DAR who will be doing the inspection on my -6A said that not only should the stick clear the panel, but so should my hand when it's gripping the stick. I was able to adjust the rod end bearing slightly to change the geometry of the forward stick linkage and achieve clearance.

