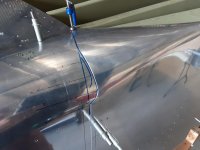
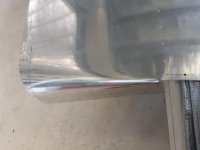
A friend and I did a bunch of riveting over the weekend. One area which was the source of much consternation to me came out well enough that I thought I would share. It's the corner where the side skin meets the bottom skin and the conical bend starts.
Here's how it turned out:

This is what I did to get a tight fit:
Hope someone else finds this useful.
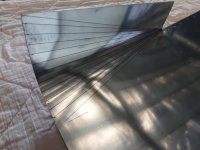
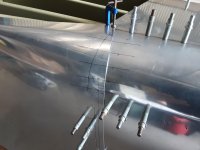
Here's how it turned out:
This is what I did to get a tight fit:
- Elongate the bend relief at the vertex of the conical bend until it is at least 1/8" from the bottom edge of the side skin. I found that the bend relief as supplied from Vans is not high enough on the side of the fuselage to allow the vertex of the conical bend to be made with a 3/32" radius (the minimum recommended for this thickness of skin).
- When making the conical bend, put a 3/32 radius on the clamping angle so that you don't end up with a sharp bend at the vertex and possibly a crack.
- Arrange the bend so that it starts 1/8" above the bottom edge of the side skin. The 3/32 bend radius in combination with the skin thickness of the conical flange will result in the flange of the conical bend being level with the bottom edge of the side skin.
- After making the conical bend, it's likely that the prepunched holes in the flange of the conical bend will no longer line up with the prepunched holes in the bottom skin. Since this flange gets sandwiched between the bottom skin and the triangular rib, I simply pushed the flange as far in as possible to tighten the gap as much as possible, drilled extra holes halfway between the prepunched ones, then match drilled through the original prepunched holes. The prepunched holes in the conical bend flange ended up being figure 8's, especially near the forward end of the flange, but that all got trapped under the bottom skin.
Hope someone else finds this useful.
")