
Van's Air Force
You are using an out of date browser. It may not display this or other websites correctly.
You should upgrade or use an alternative browser.
You should upgrade or use an alternative browser.
RV-7 Z-EDD, Zimbabwe
- Thread starter Z-EDD
- Start date

Z-EDD
Well Known Member
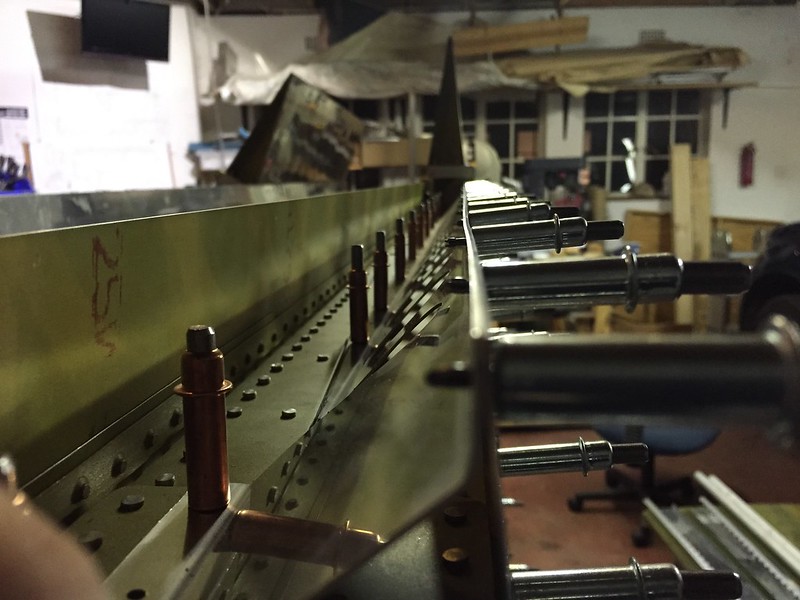
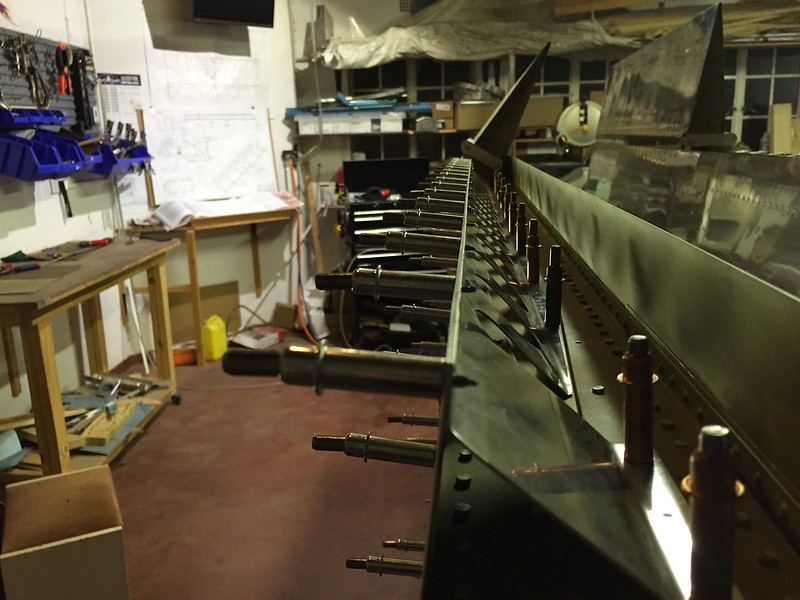
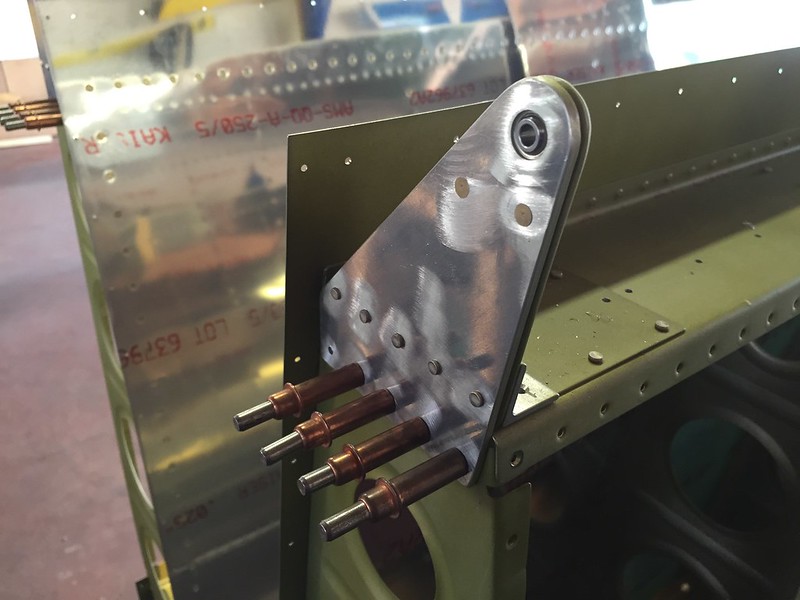
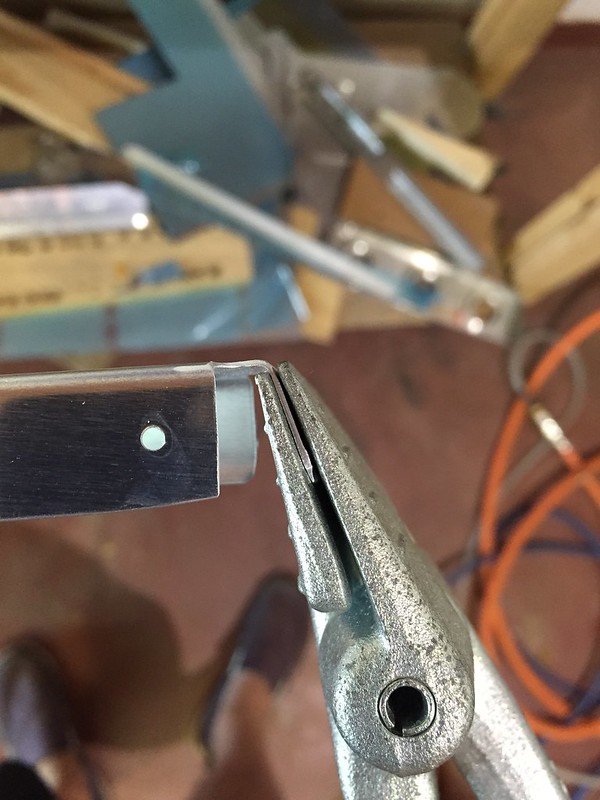
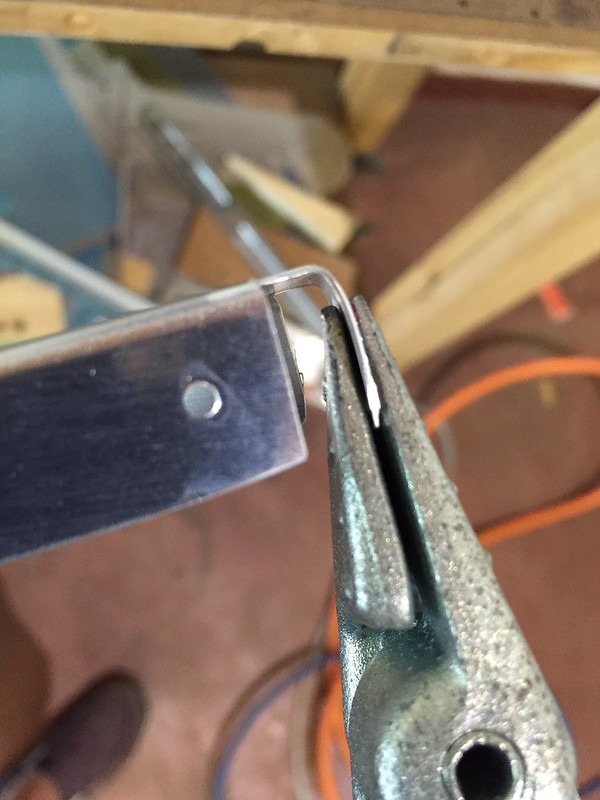
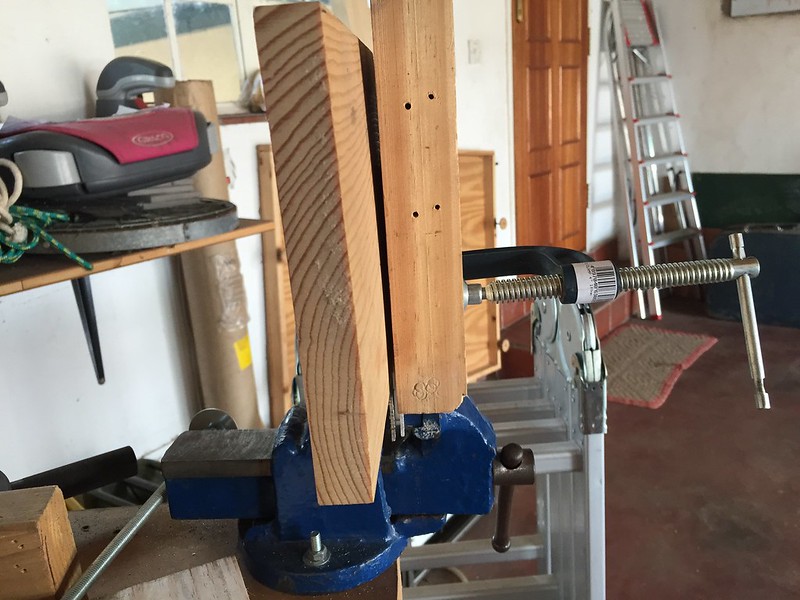
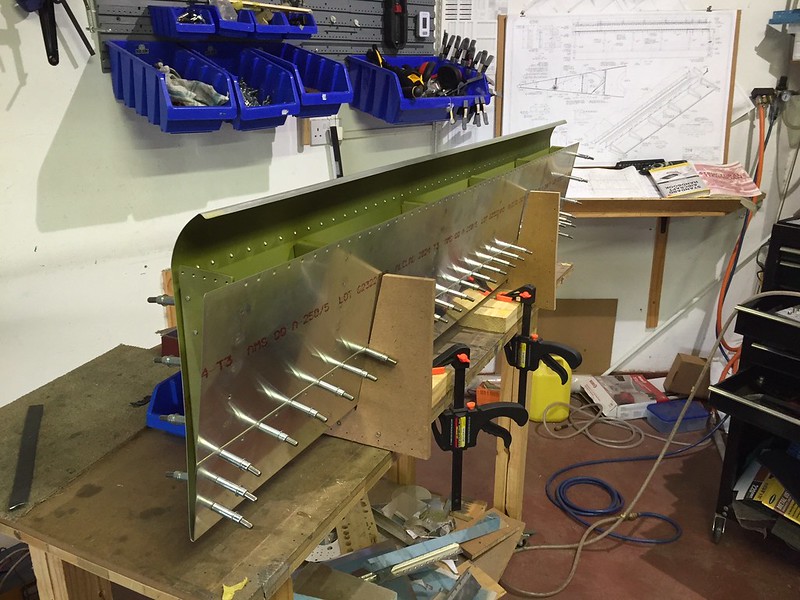
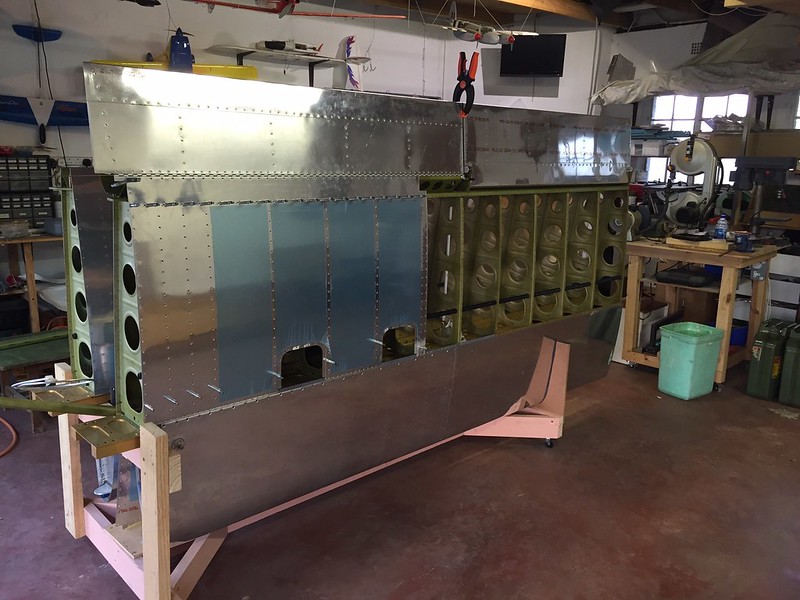
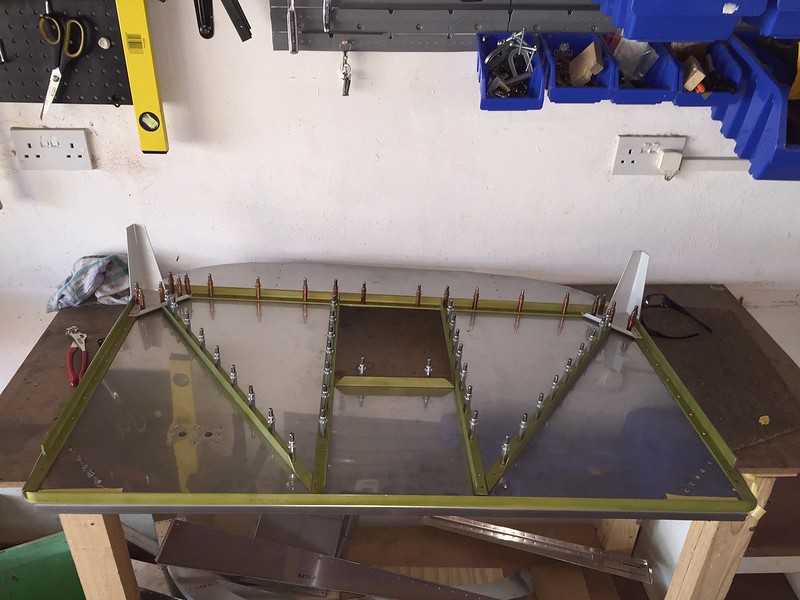
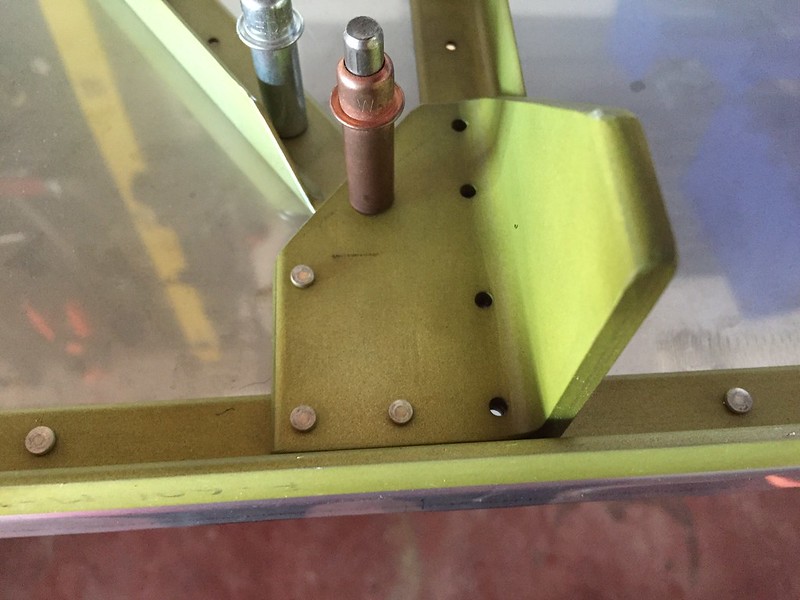
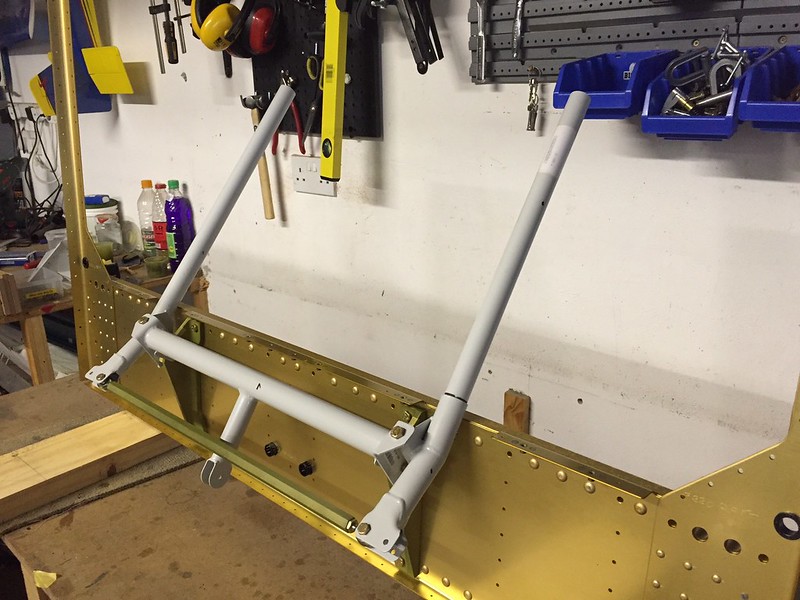
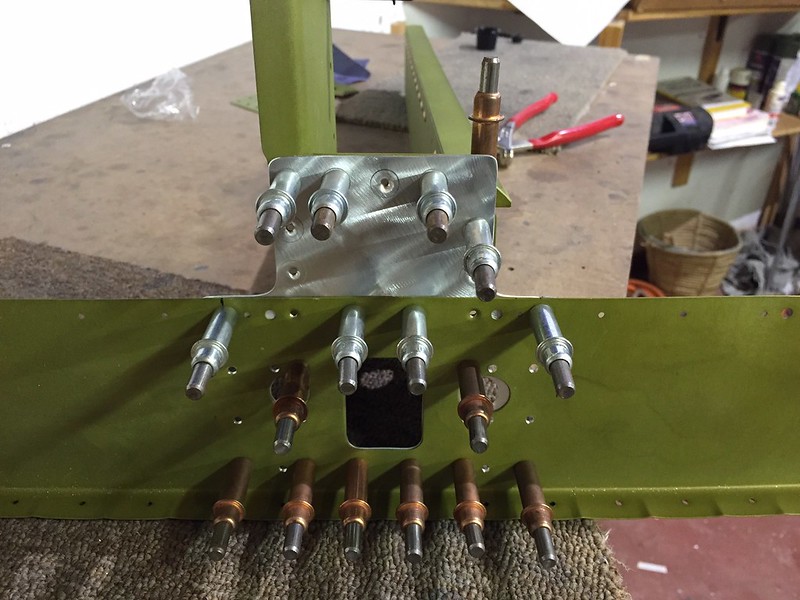
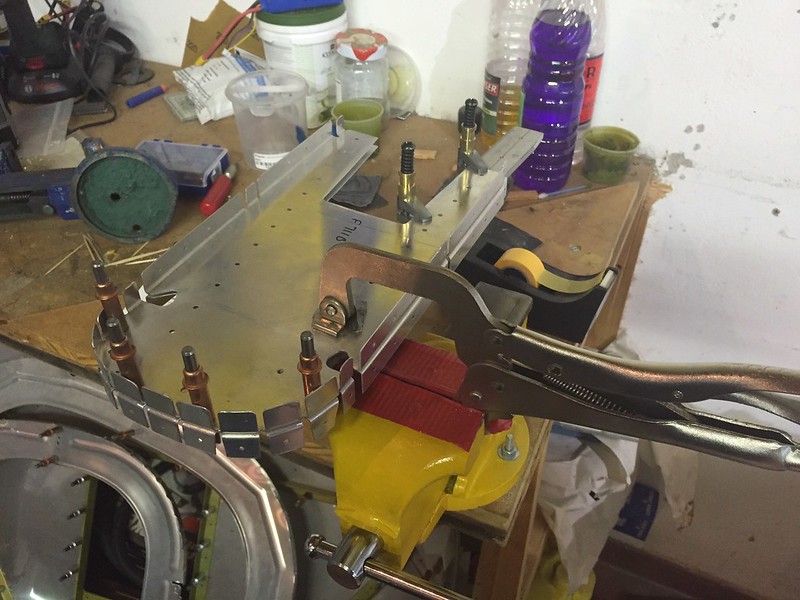
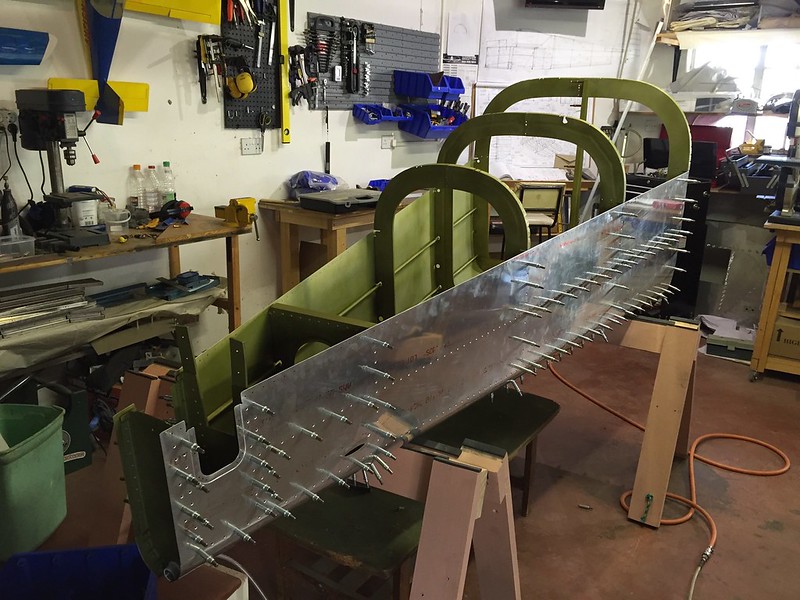
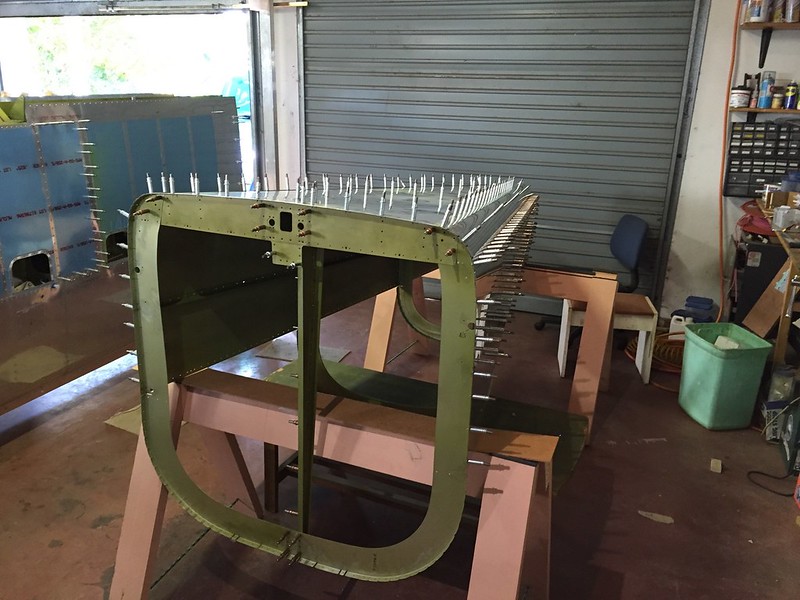
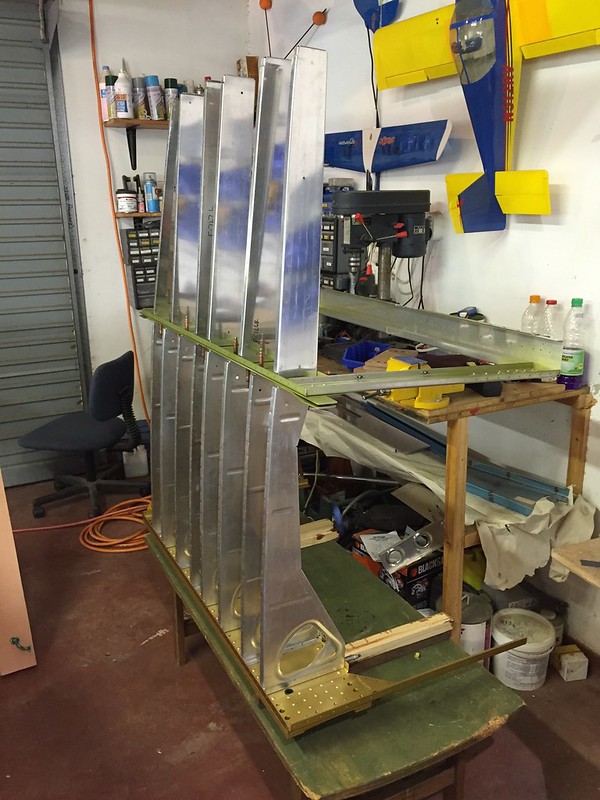
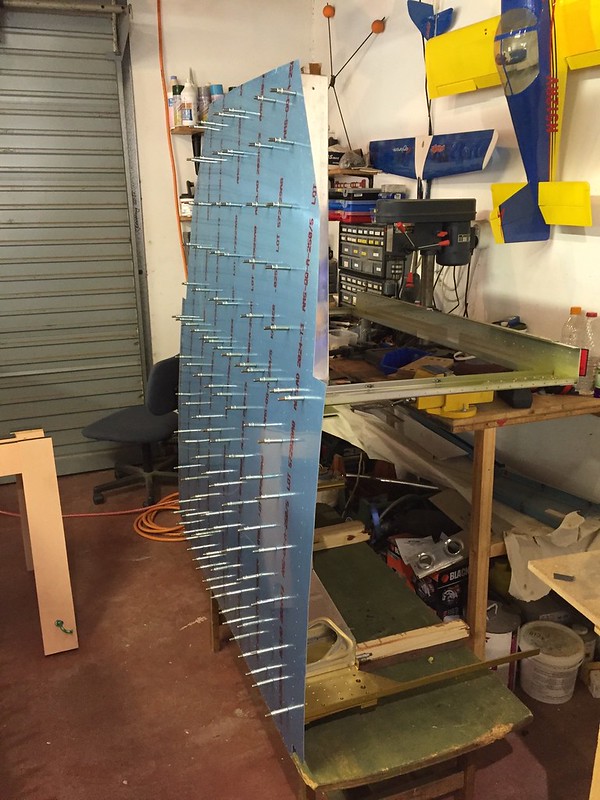
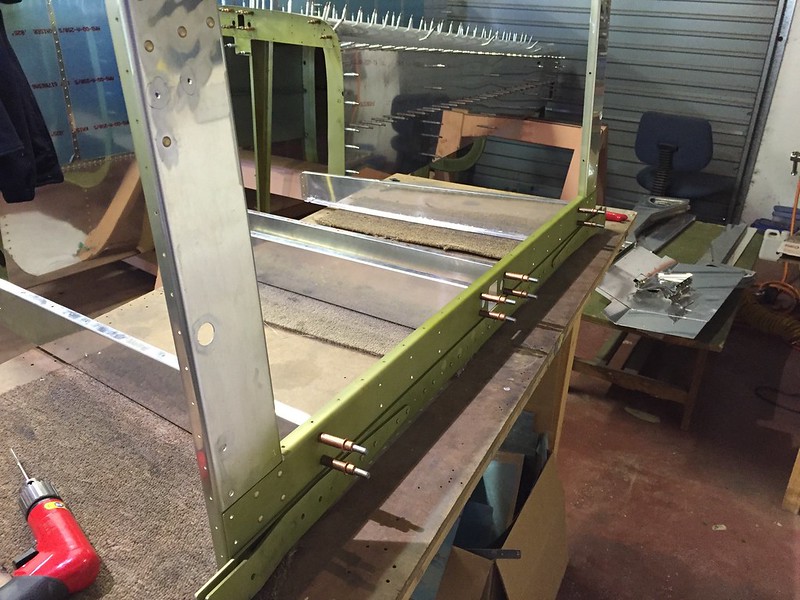
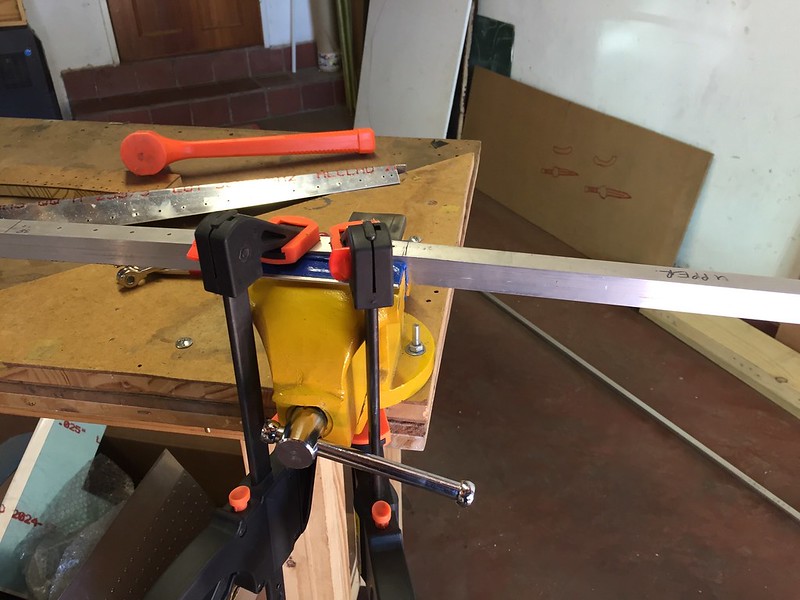
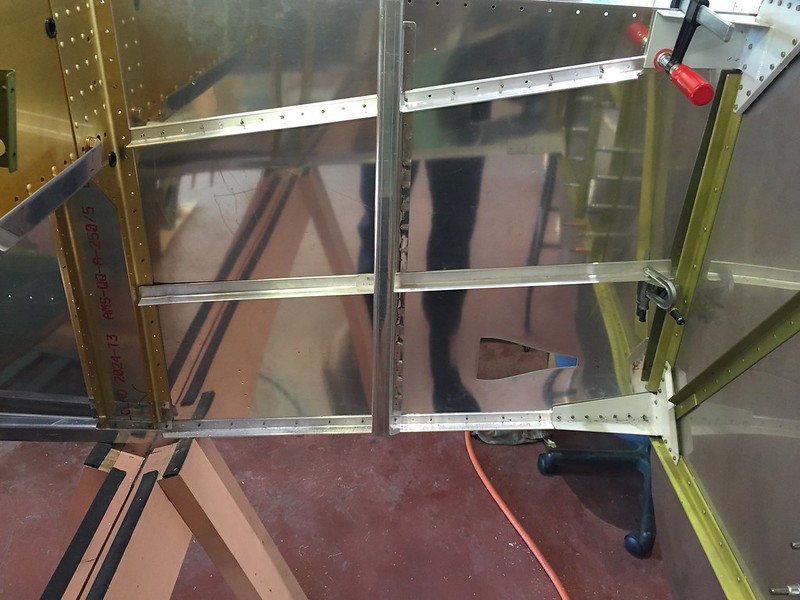
Flap braces
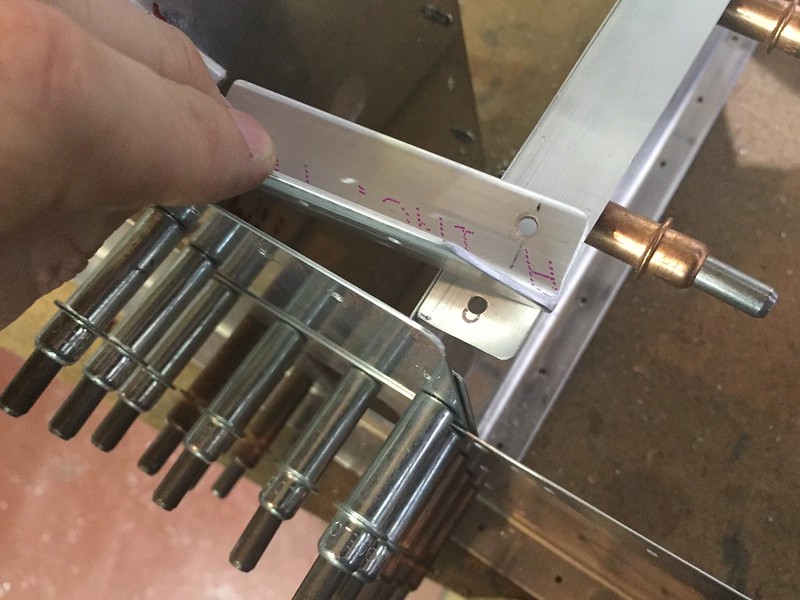
Moving on to the flap braces, these were a bit trickier than I thought. The problem is the flange which rivets to the rear spar is straight, but the section which attaches where the rear spar is doubled should be higher. hopefully you can see what I mean from the pictures. When you first cleco it in place this puts quite a kink in the lower flange where it rivets to the bottom skin. This required quite a bit of adjusting to get things straight. I got it to a point where it was straight with the skin clecoed on, but I found out later I needed to get it straight without the skin to help. Thats because when you drill the hinge you can't use clecos.
 IMG_0897 by Ed Fleming, on Flickr
 IMG_0898 by Ed Fleming, on Flickr
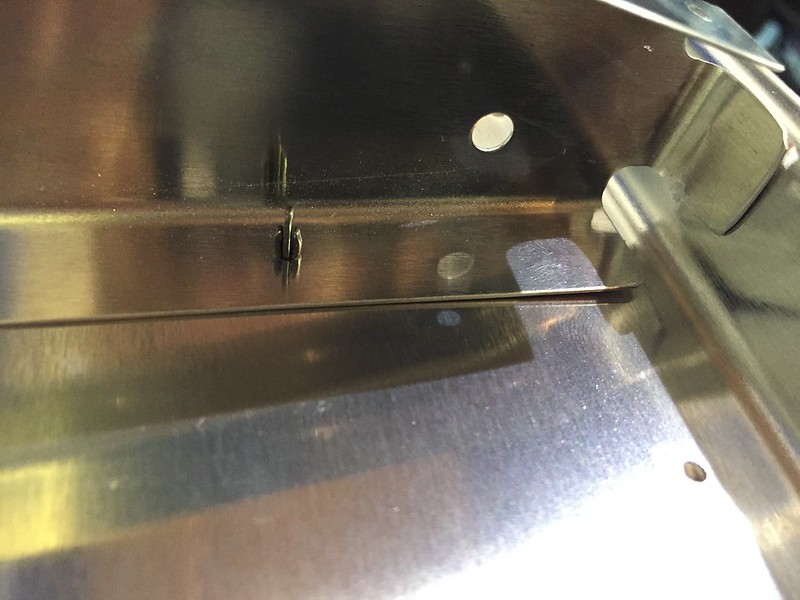
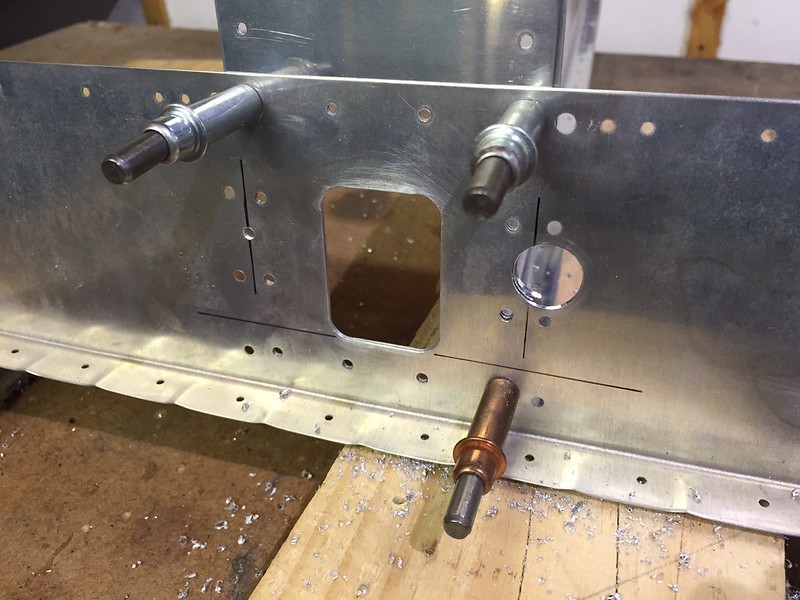
To do the countersinks in the lower flange I match drilled it to a piece of wood to guide the pilot.
 IMG_0900 by Ed Fleming, on Flickr
Moving on to the flap braces, these were a bit trickier than I thought. The problem is the flange which rivets to the rear spar is straight, but the section which attaches where the rear spar is doubled should be higher. hopefully you can see what I mean from the pictures. When you first cleco it in place this puts quite a kink in the lower flange where it rivets to the bottom skin. This required quite a bit of adjusting to get things straight. I got it to a point where it was straight with the skin clecoed on, but I found out later I needed to get it straight without the skin to help. Thats because when you drill the hinge you can't use clecos.
IMG_0897 by Ed Fleming, on FlickrIMG_0898 by Ed Fleming, on FlickrTo do the countersinks in the lower flange I match drilled it to a piece of wood to guide the pilot.
IMG_0900 by Ed Fleming, on Flickr
Last edited:
Z-EDD
Well Known Member
I just finished my stall warning cover and was not happy with the fit either. Hadn't even considered making my own cover until I saw yours. Now I have to do it!!!! Thanks for the pic!!
Glad to be of help! Actually although these little diversions eat up time I find them very enjoyable and the results usually satisfying.
Z-EDD
Well Known Member
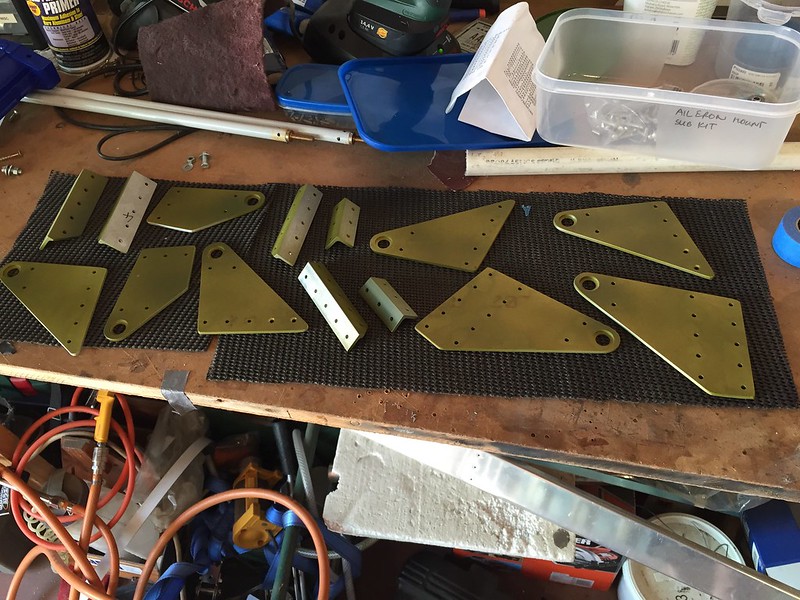
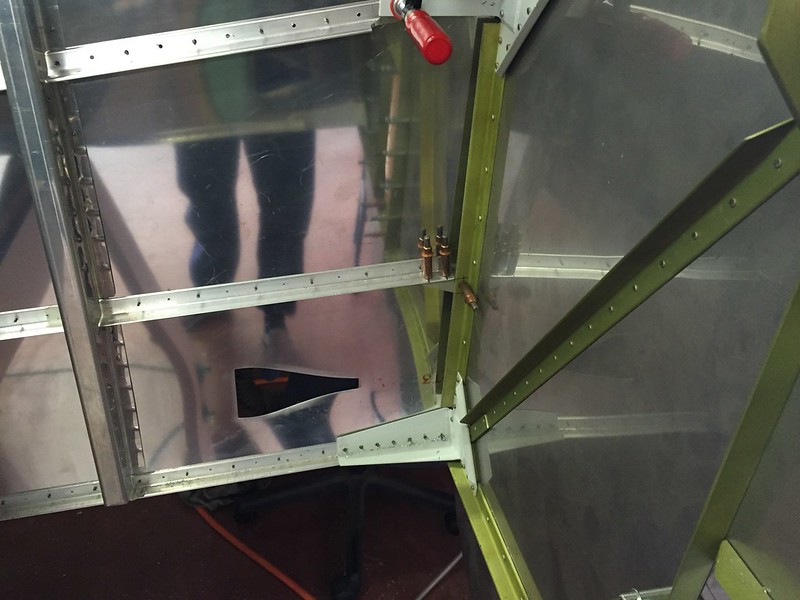
Aileron mounts and gap seal
Moving on to the Aileron mounts. I primed the inner surfaces first before riveting them together and drilling to the wings. later I primed the outer surfaces. Only slight challenge here was some of the bearings were binding and I had to relieve the recesses a little. This is not apparent with the parts just clecoed together so I used C-clamps to put more pressure over the rivet holes and made adjustments until the binding stopped. Sorry no pictures of that particular process!
 IMG_0863 by Ed Fleming, on Flickr
 IMG_0879 by Ed Fleming, on Flickr
 IMG_0879 by Ed Fleming, on Flickr
Don't forget that some of these rivets need to be countersunk!
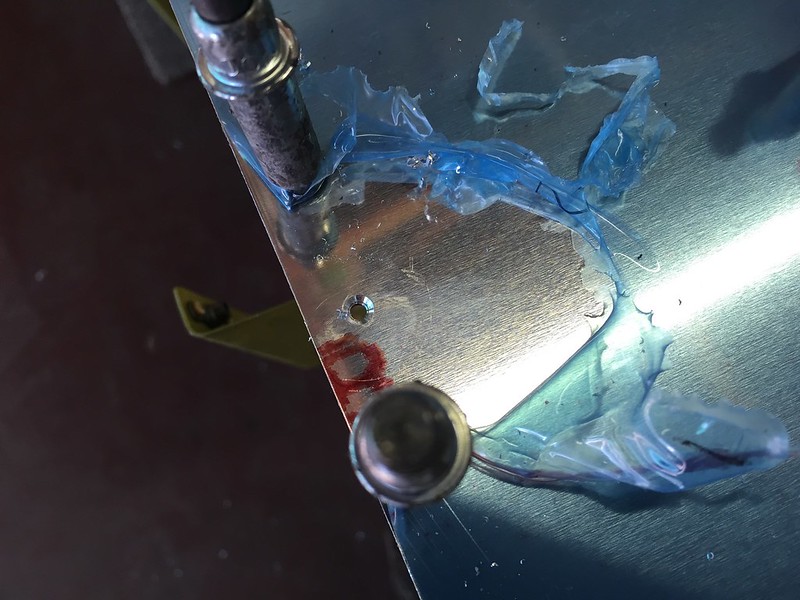
Next up the gap seal. Minor issue here, there was some slight interference between the gap seal and one of the mounts so its a good plan to have them all clecoed on to fix something like this before priming.
 IMG_0862 by Ed Fleming, on Flickr
Vinyl peeling is always a favourite job for smaller builders!
[url=https://flic.kr/p/YFdFby] IMG_0883 by Ed Fleming, on Flickr
 IMG_0883 by Ed Fleming, on Flickr
Moving on to the Aileron mounts. I primed the inner surfaces first before riveting them together and drilling to the wings. later I primed the outer surfaces. Only slight challenge here was some of the bearings were binding and I had to relieve the recesses a little. This is not apparent with the parts just clecoed together so I used C-clamps to put more pressure over the rivet holes and made adjustments until the binding stopped. Sorry no pictures of that particular process!
IMG_0863 by Ed Fleming, on FlickrIMG_0879 by Ed Fleming, on FlickrIMG_0879 by Ed Fleming, on FlickrDon't forget that some of these rivets need to be countersunk!
Next up the gap seal. Minor issue here, there was some slight interference between the gap seal and one of the mounts so its a good plan to have them all clecoed on to fix something like this before priming.
IMG_0862 by Ed Fleming, on FlickrVinyl peeling is always a favourite job for smaller builders!
[url=https://flic.kr/p/YFdFby]
 IMG_0883 by Ed Fleming, on FlickrIMG_0883 by Ed Fleming, on Flickr
Last edited:
Z-EDD
Well Known Member
Ailerons
Meanwhile I was working on the ailerons. After the familiar stiffener prep and riveting came the dreaded trailing edge bend. Now, when I did this on the elevators it did not go very well. Largely because I did not follow the instructions closely enough! When making my bending brake I did not have any sturdy 2x4s handy so decided to use some block board that I had laying around. I surmised that if I put enough hinges along the join it would hold up. Well it did not! The sheet wood just flexed under the strain and I ended up with an uneven bend that took a few hours to fix. Here are some pictures of the offending device-
 IMG_0400 by Ed Fleming, on Flickr
 IMG_0400 by Ed Fleming, on Flickr
So for the ailerons I wised up and went back to basics. I used sturdy wood that was left over from the wing stands and built more or less as per the instructions with the minor change in orientation as seen in George Orndorffs video. It worked a treat! Nice even bends with the correct radius. I didn't even use a piece of dowel inside the radius, it isn't needed. Just go for it as George does and its really simple. I did just one thing wrong. I made this brake just wide enough for the ailerons. But the flap skins could also do with a little extra bending so if I could do this again I'd make it wide enough for the flaps as well
 IMG_0843 by Ed Fleming, on Flickr
 IMG_0843 by Ed Fleming, on Flickr
Meanwhile I was working on the ailerons. After the familiar stiffener prep and riveting came the dreaded trailing edge bend. Now, when I did this on the elevators it did not go very well. Largely because I did not follow the instructions closely enough! When making my bending brake I did not have any sturdy 2x4s handy so decided to use some block board that I had laying around. I surmised that if I put enough hinges along the join it would hold up. Well it did not! The sheet wood just flexed under the strain and I ended up with an uneven bend that took a few hours to fix. Here are some pictures of the offending device-
IMG_0400 by Ed Fleming, on FlickrIMG_0400 by Ed Fleming, on FlickrSo for the ailerons I wised up and went back to basics. I used sturdy wood that was left over from the wing stands and built more or less as per the instructions with the minor change in orientation as seen in George Orndorffs video. It worked a treat! Nice even bends with the correct radius. I didn't even use a piece of dowel inside the radius, it isn't needed. Just go for it as George does and its really simple. I did just one thing wrong. I made this brake just wide enough for the ailerons. But the flap skins could also do with a little extra bending so if I could do this again I'd make it wide enough for the flaps as well
IMG_0843 by Ed Fleming, on FlickrIMG_0843 by Ed Fleming, on Flickr
Last edited:
Z-EDD
Well Known Member
More Ailerons
 IMG_0847 by Ed Fleming, on Flickr
 IMG_0847 by Ed Fleming, on Flickr
 IMG_0870 by Ed Fleming, on Flickr
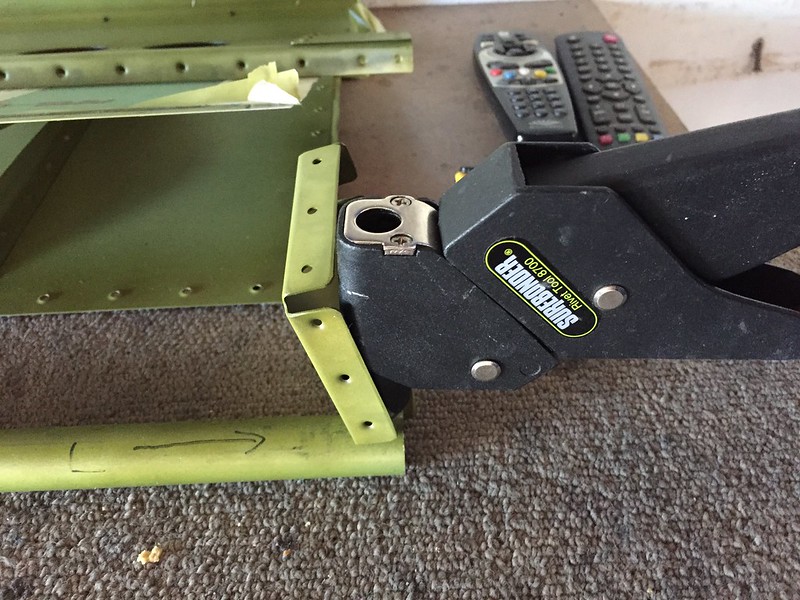 IMG_0870 by Ed Fleming, on Flickr
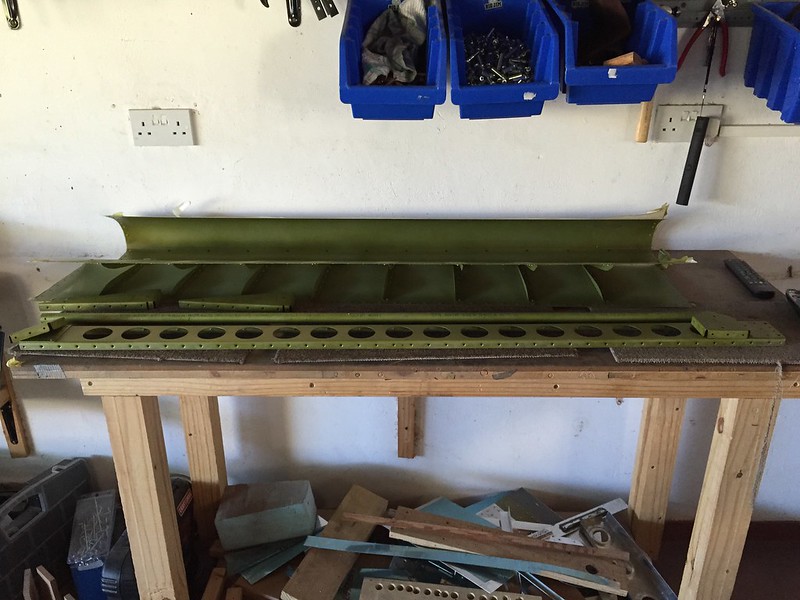 IMG_0870 by Ed Fleming, on Flickr
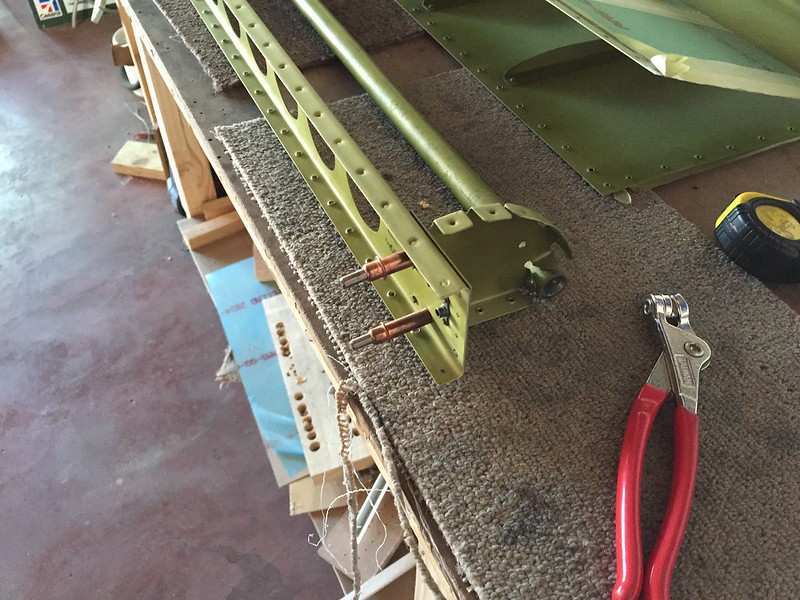 IMG_0870 by Ed Fleming, on Flickr
IMG_0847 by Ed Fleming, on FlickrIMG_0847 by Ed Fleming, on FlickrIMG_0870 by Ed Fleming, on FlickrIMG_0870 by Ed Fleming, on FlickrIMG_0870 by Ed Fleming, on FlickrIMG_0870 by Ed Fleming, on Flickr
Last edited:
Z-EDD
Well Known Member
Closing the ailerons
The only slight problems I had closing the ailerons were with the CS4-4 blind rivets. As you can see from the photo below I had a couple of the mandrels snap off way too high. I never really got to the bottom of this but switching to a different (cheap, locally bought ) puller actually solved it and I had no more issues. Per the vans advice in section 5, these 2 were just cut off and ground flush. The other problem you can see in this photo is that the flush heads were being distorted during the pulling process. This was due to the hole on the bottom of the puller being too large. I actually could not find a hole of the correct size on either of my 2 pullers (one came with my tool kit from Cleaveland) so ended up fabricating a spacer from .032 with the correct size hole drilled using my number size drill bit set. This worked a treat and the remaining rivets were fine.
 IMG_0857 by Ed Fleming, on Flickr
 IMG_0857 by Ed Fleming, on Flickr
The only slight problems I had closing the ailerons were with the CS4-4 blind rivets. As you can see from the photo below I had a couple of the mandrels snap off way too high. I never really got to the bottom of this but switching to a different (cheap, locally bought
) puller actually solved it and I had no more issues. Per the vans advice in section 5, these 2 were just cut off and ground flush. The other problem you can see in this photo is that the flush heads were being distorted during the pulling process. This was due to the hole on the bottom of the puller being too large. I actually could not find a hole of the correct size on either of my 2 pullers (one came with my tool kit from Cleaveland) so ended up fabricating a spacer from .032 with the correct size hole drilled using my number size drill bit set. This worked a treat and the remaining rivets were fine.IMG_0857 by Ed Fleming, on FlickrIMG_0857 by Ed Fleming, on Flickr
Last edited:
Z-EDD
Well Known Member
Flaps
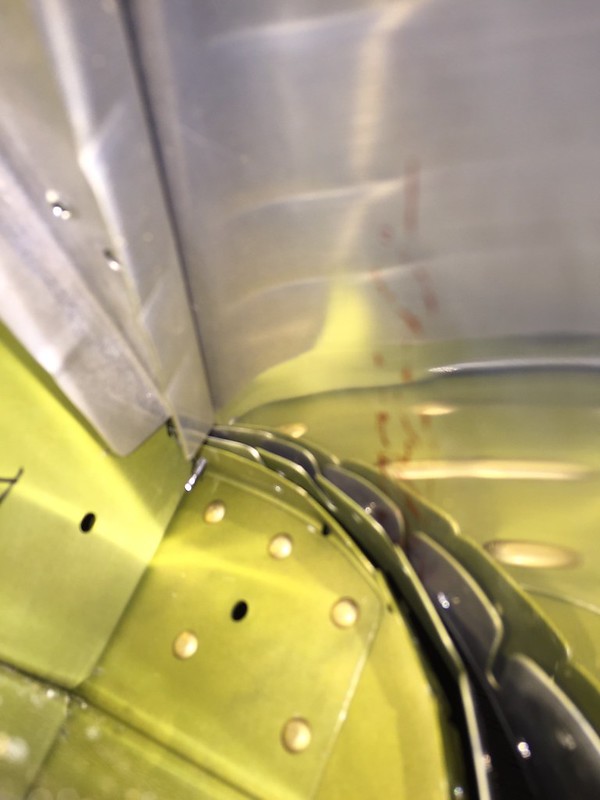
A common problem with the flaps is this gap between the aft flange of the ribs and the "rear spar" bent into the bottom skin. The instructions say that shims are acceptable but I felt there must be a slightly better way. I found it easy to adjust the flanges outward slightly as pictured below. Just another possibility.
 IMG_0889 by Ed Fleming, on Flickr
 IMG_0890 by Ed Fleming, on Flickr
 IMG_0891 by Ed Fleming, on Flickr
It now fits much better but the friction of the flange against the rear spar can cause the bottom skin to sit away from the rib flange as in the picture below. If I had drilled it like this I would have felt really dumb but luckily I caught it!
 IMG_0892 by Ed Fleming, on Flickr
Fabricating the two FL-706As. Pilot holes being drilled. Why do it twice
 IMG_0893 by Ed Fleming, on Flickr
This is how I bent the FL-706Bs. Hard to see but the forward end is held securely in the vice and the wood blocks clamped on gave me the leverage to easily make the bend. Easy peasy.
 IMG_0894 by Ed Fleming, on Flickr
A common problem with the flaps is this gap between the aft flange of the ribs and the "rear spar" bent into the bottom skin. The instructions say that shims are acceptable but I felt there must be a slightly better way. I found it easy to adjust the flanges outward slightly as pictured below. Just another possibility.
IMG_0889 by Ed Fleming, on FlickrIMG_0890 by Ed Fleming, on FlickrIMG_0891 by Ed Fleming, on FlickrIt now fits much better but the friction of the flange against the rear spar can cause the bottom skin to sit away from the rib flange as in the picture below. If I had drilled it like this I would have felt really dumb but luckily I caught it!
IMG_0892 by Ed Fleming, on FlickrFabricating the two FL-706As. Pilot holes being drilled. Why do it twice
IMG_0893 by Ed Fleming, on FlickrThis is how I bent the FL-706Bs. Hard to see but the forward end is held securely in the vice and the wood blocks clamped on gave me the leverage to easily make the bend. Easy peasy.
IMG_0894 by Ed Fleming, on Flickr
Last edited:
Z-EDD
Well Known Member
Flaps continued
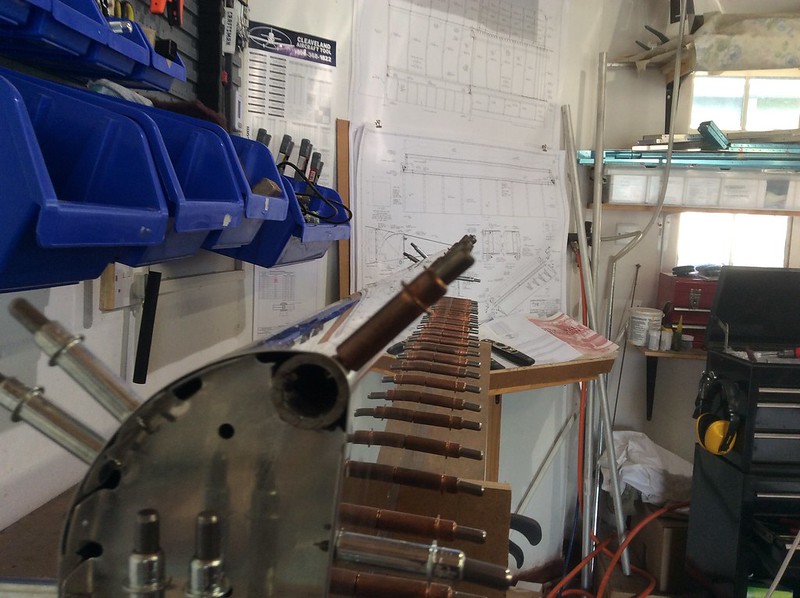
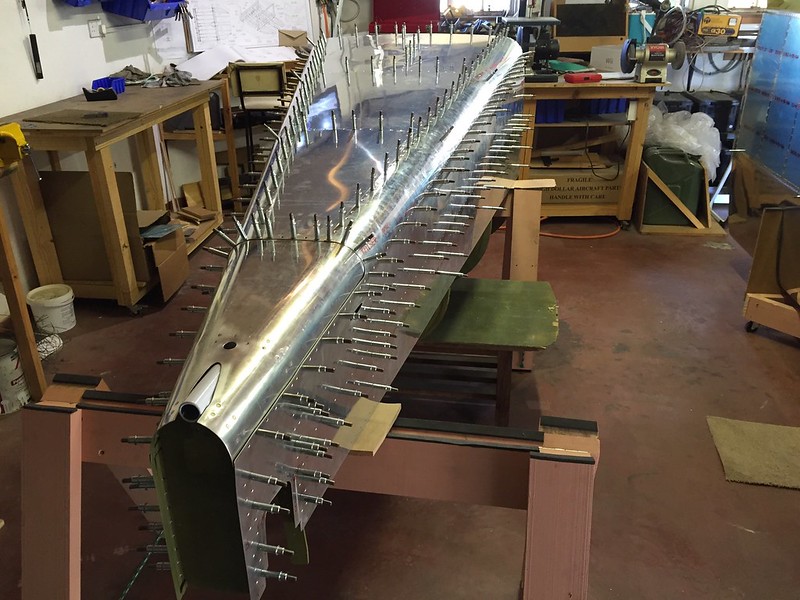
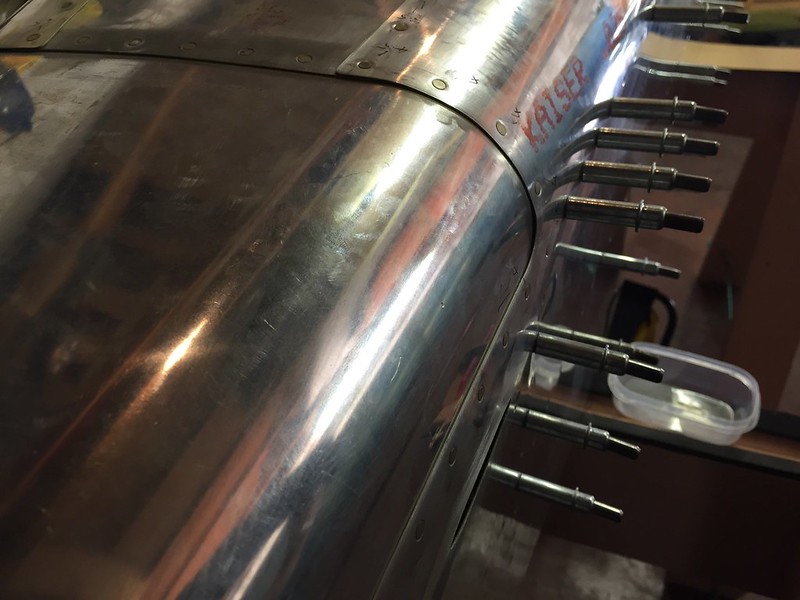
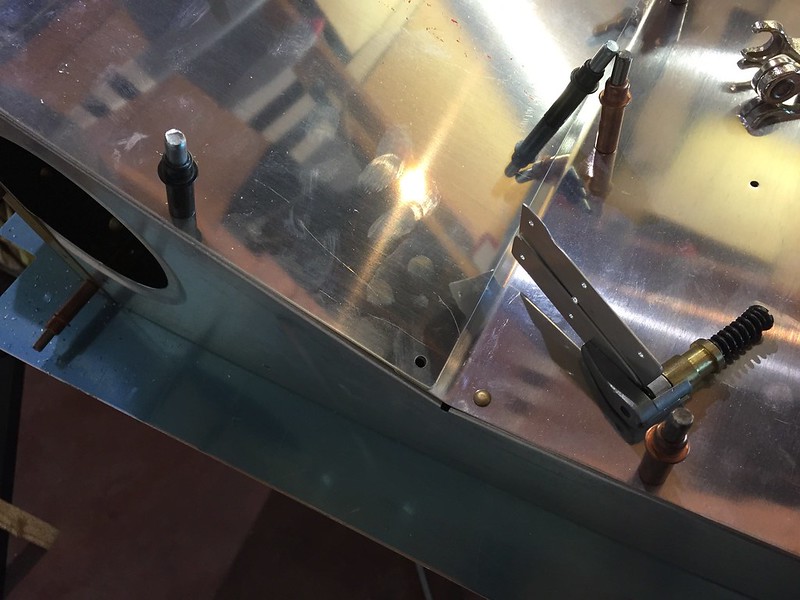
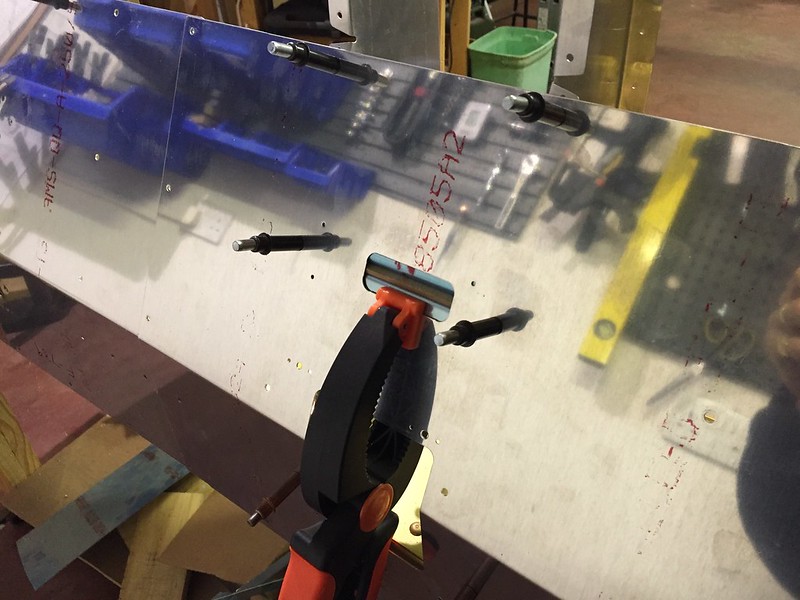
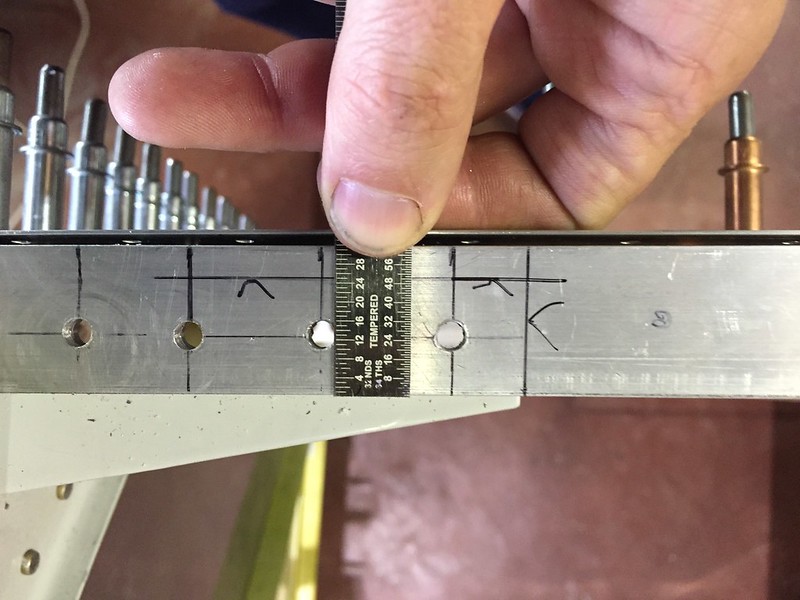
The next slightly tricky part of the flaps is drilling the hinge. This would be trivial if it weren't for the fact that research showed many builders have edge distance problems down the road when drilling the flaps to the wings. Fore warned is fore-armed so I decided not to drill these exactly on the centre line, but rather gave myself just a couple of 32nds extra to work with. See in a couple of posts how this worked out.
 IMG_0885 by Ed Fleming, on Flickr
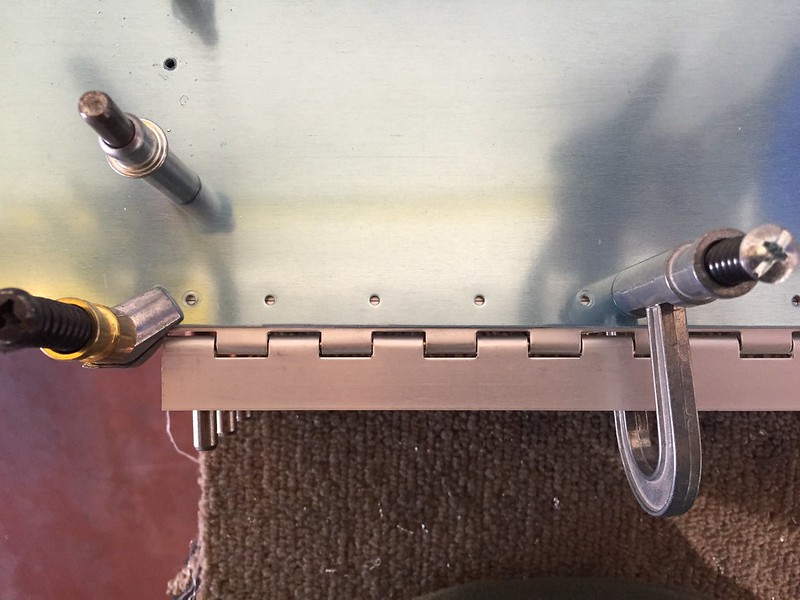 IMG_0885 by Ed Fleming, on Flickr
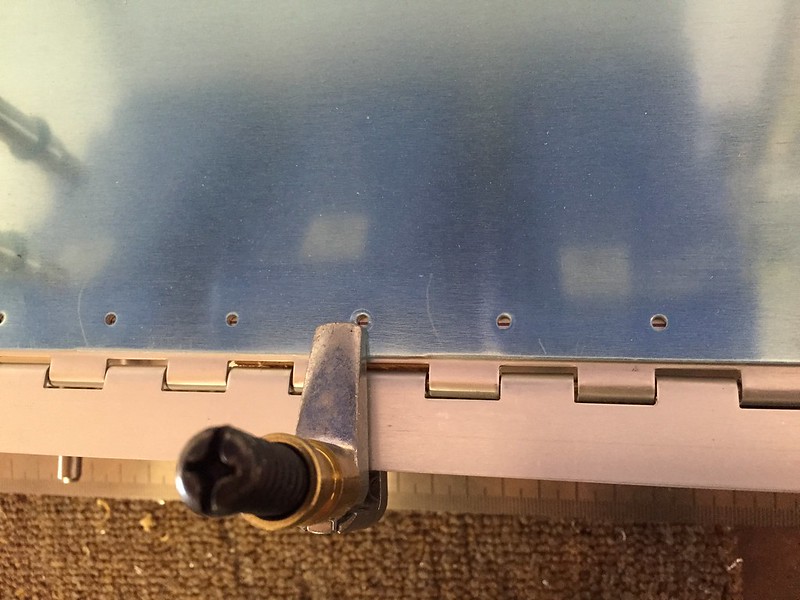 IMG_0885 by Ed Fleming, on Flickr
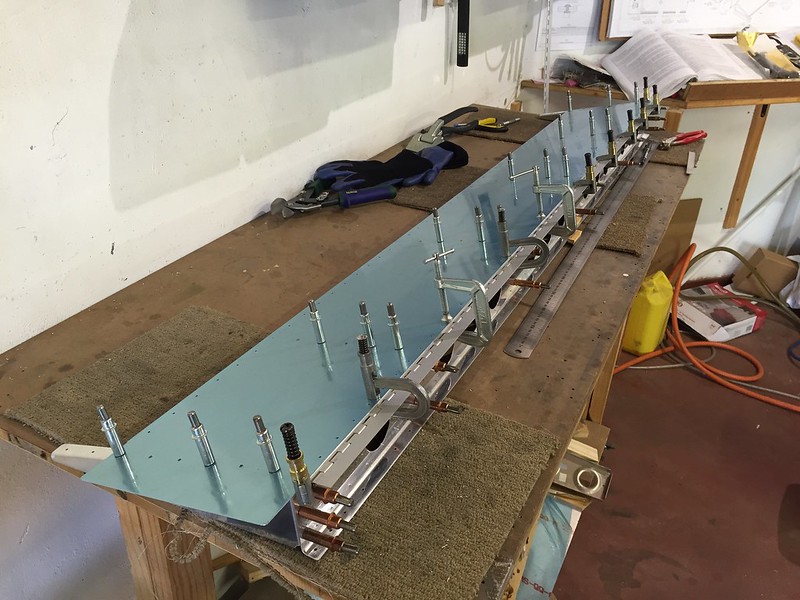 IMG_0885 by Ed Fleming, on Flickr
The next slightly tricky part of the flaps is drilling the hinge. This would be trivial if it weren't for the fact that research showed many builders have edge distance problems down the road when drilling the flaps to the wings. Fore warned is fore-armed so I decided not to drill these exactly on the centre line, but rather gave myself just a couple of 32nds extra to work with. See in a couple of posts how this worked out.
IMG_0885 by Ed Fleming, on FlickrIMG_0885 by Ed Fleming, on FlickrIMG_0885 by Ed Fleming, on FlickrIMG_0885 by Ed Fleming, on Flickr
Last edited:
Z-EDD
Well Known Member
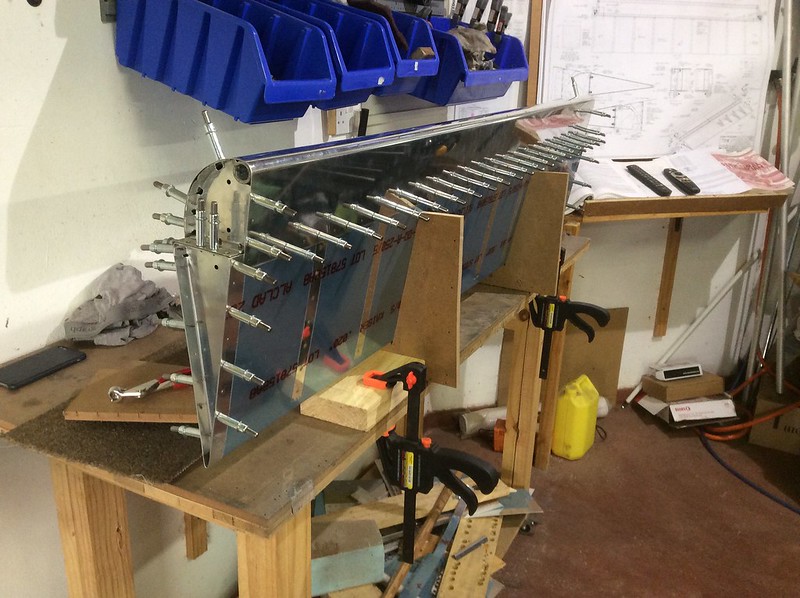
Riveting the flaps
 IMG_0198 by Ed Fleming, on Flickr
A piece of weather strip along the rear spar allowed me to rest the bucking bar on it. Easy to just hold it in place while riveting.
 IMG_0208 by Ed Fleming, on Flickr
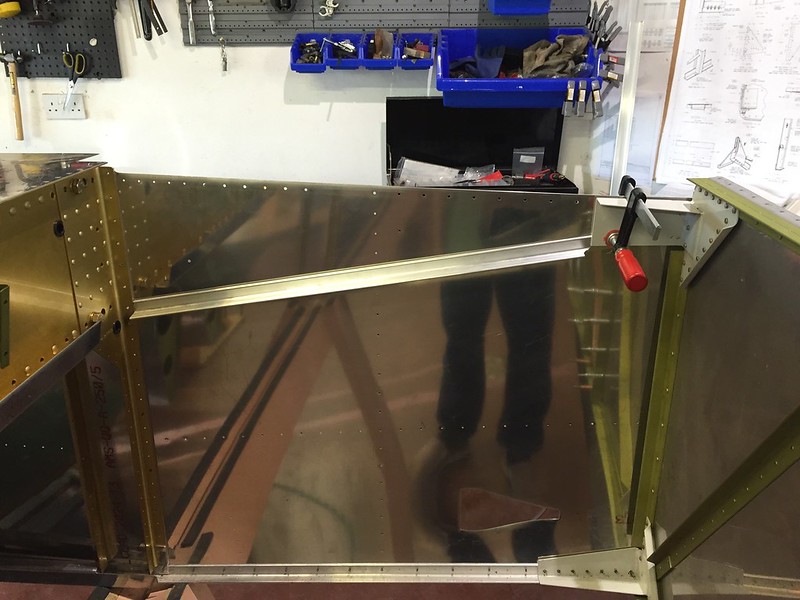
I weighted the flap down to a flat piece of board when riveting the ribs to the top skin.
 IMG_0645 by Ed Fleming, on Flickr
IMG_0198 by Ed Fleming, on FlickrA piece of weather strip along the rear spar allowed me to rest the bucking bar on it. Easy to just hold it in place while riveting.
IMG_0208 by Ed Fleming, on FlickrI weighted the flap down to a flat piece of board when riveting the ribs to the top skin.
IMG_0645 by Ed Fleming, on Flickr
Last edited:
Z-EDD
Well Known Member
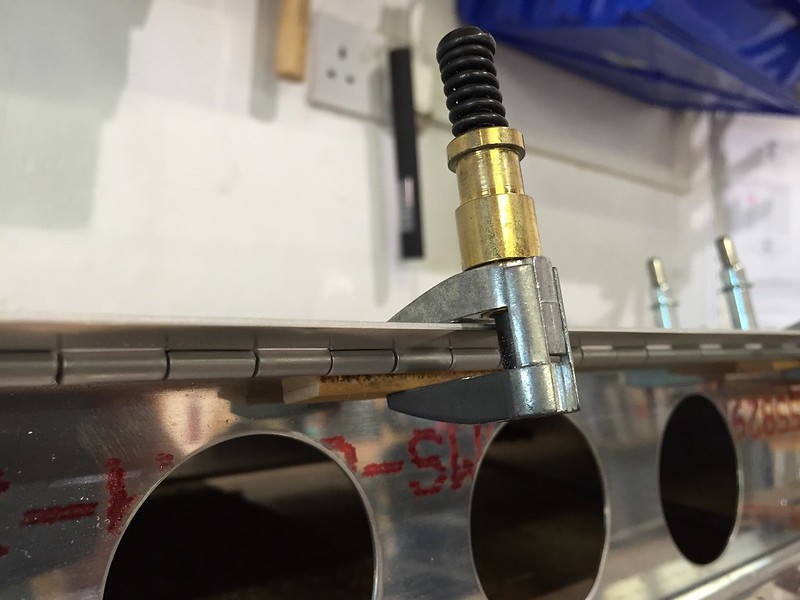
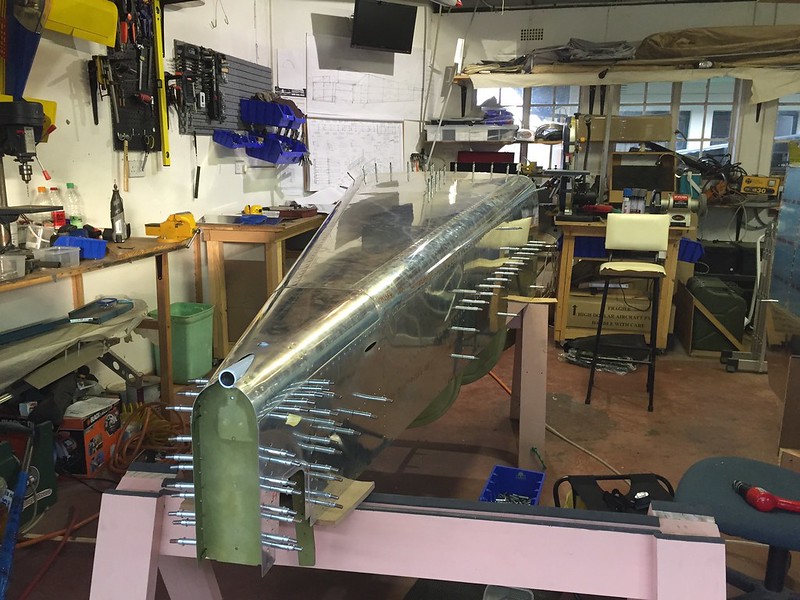
Mounting the flaps
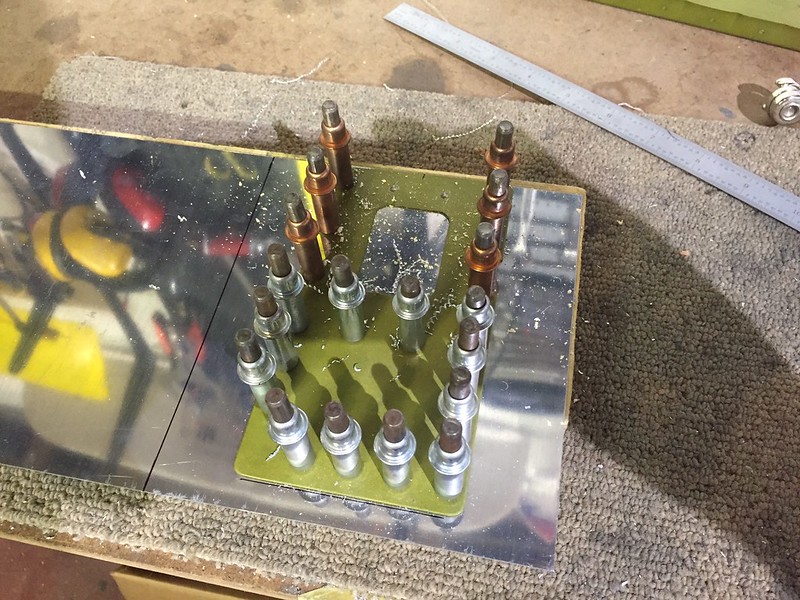
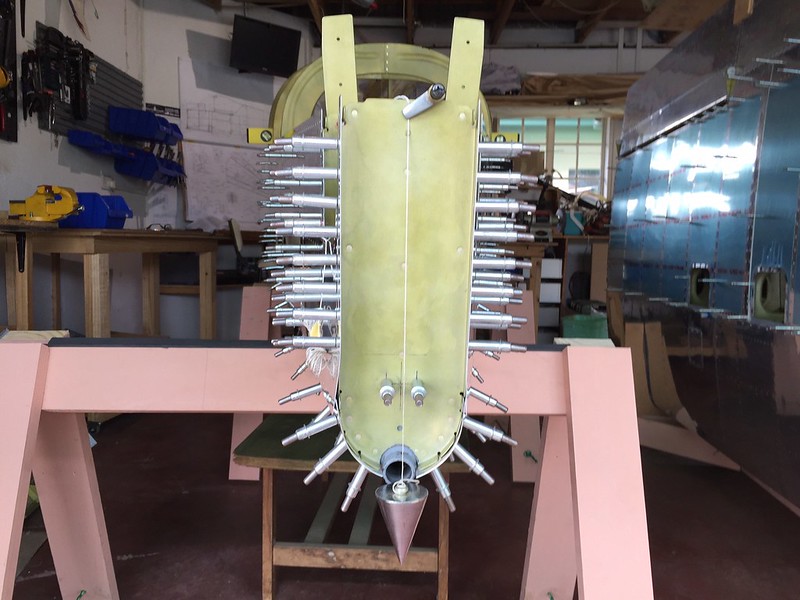
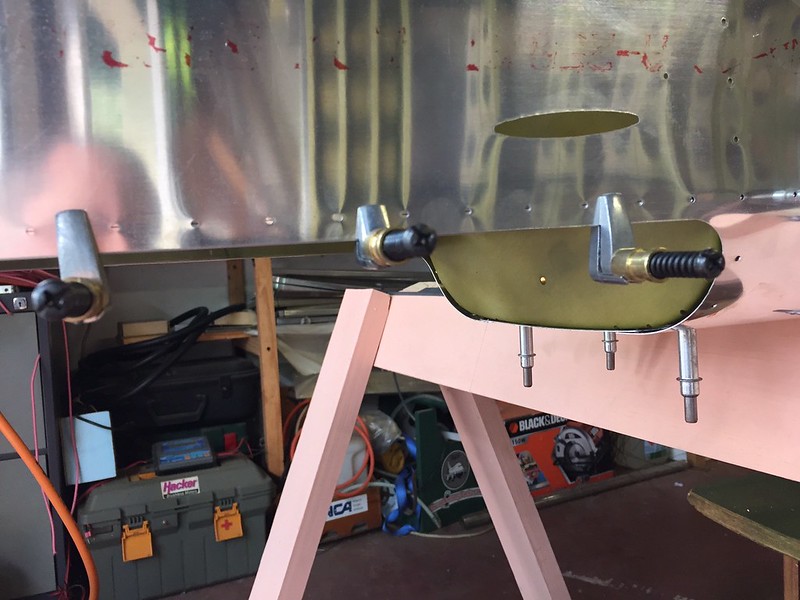
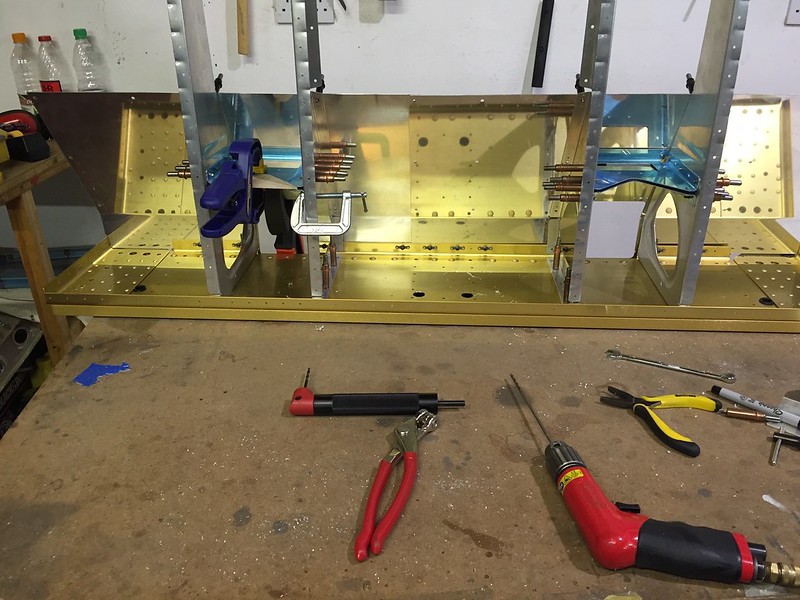
This was one of those processes that gave me many sleepless nights and prompted much research. The conundrum of course is that the hinge can only be held in place by small clamps at each end. How do you keep the holes in the skin and flap brace aligned? My research turned up some funky methods involving keeper rivets, but also a few guys who just went ahead and drilled and had no alignment problems. After playing around with the fit, this is what I did too, and its so much easier and simpler than I had thought, much worry about nothing.
A couple of key points though.
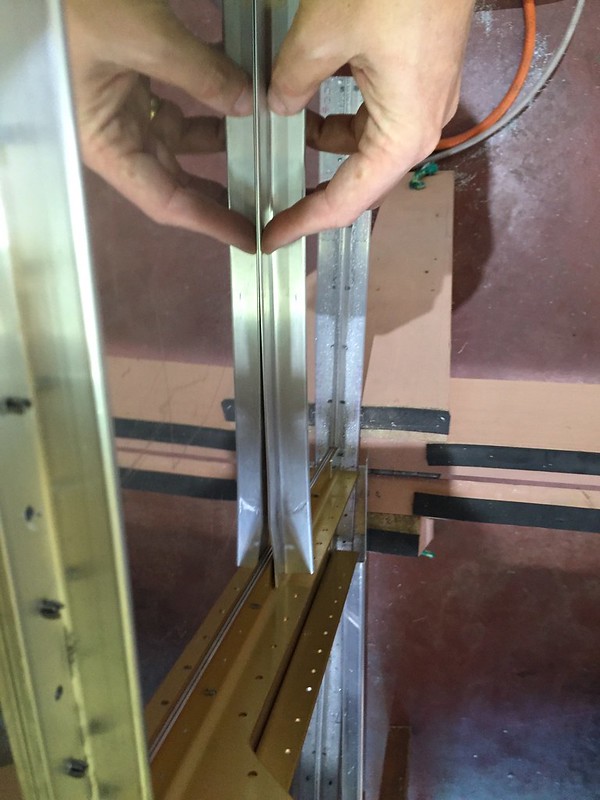
1. As I mentioned a couple of posts back its important to get the lower flange of the flap brace properly adjusted so it is dead straight and the holes align with the skin with out needing clecos.
2. To help with the above I dimpled the bottom skins, so the dimples sit in the countersinks in the flap brace and the holes are kept in alignment without needing clecos.
I then clamped the flap in place, aligned the trailing edge, checked edge distance, and started drilling from outboard in, one hole at a time and clecoing every hole. ok, that makes it sound like it was really quick. Actually I clamped, checked, fussed, adjusted and repeated for a couple of days before committing steel to Aluminium, but it was eventually a non event and worked perfectly.
The below photo shows the min edge distance line passing through the bottom of each hole, so no problem there. It also illustrates that the edge distance is quite equally shared between the two hinge sections, vindicating what I did when drilling the hinge to the flap.
 IMG_0199 by Ed Fleming, on Flickr
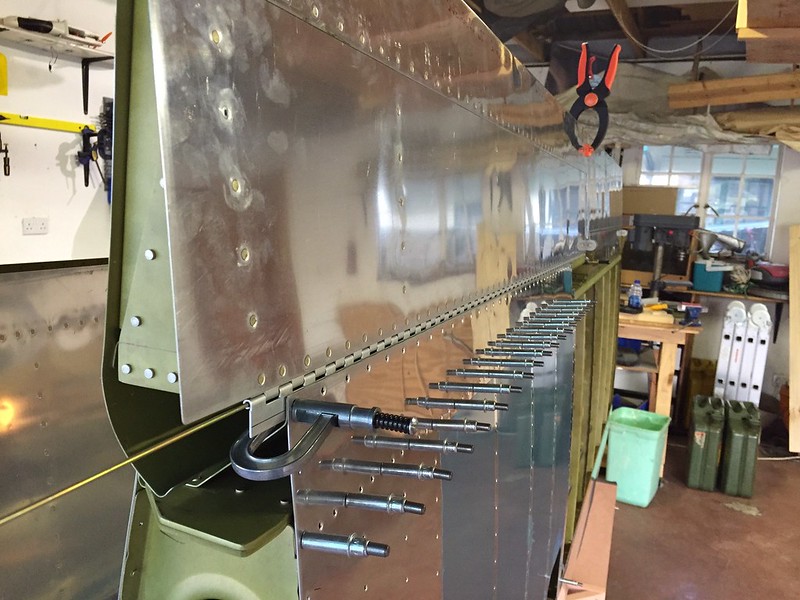 IMG_0199 by Ed Fleming, on Flickr
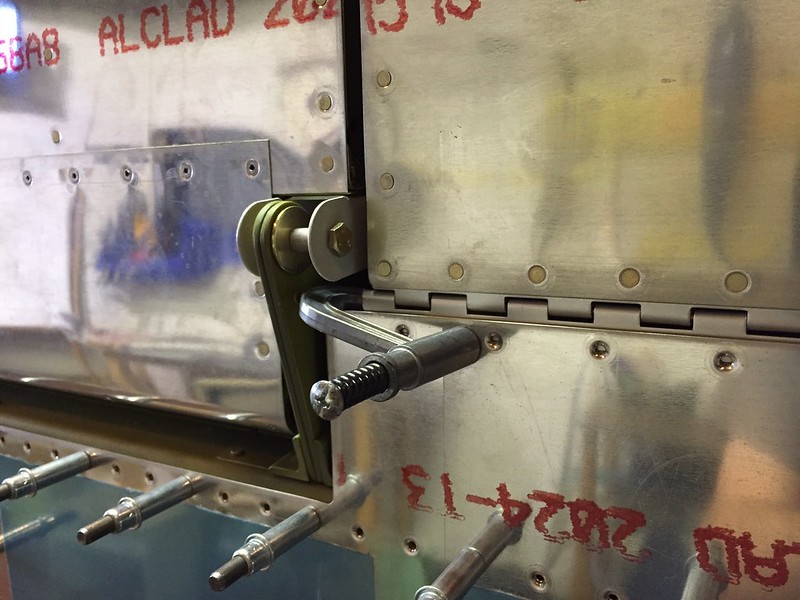 IMG_0205 by Ed Fleming, on Flickr
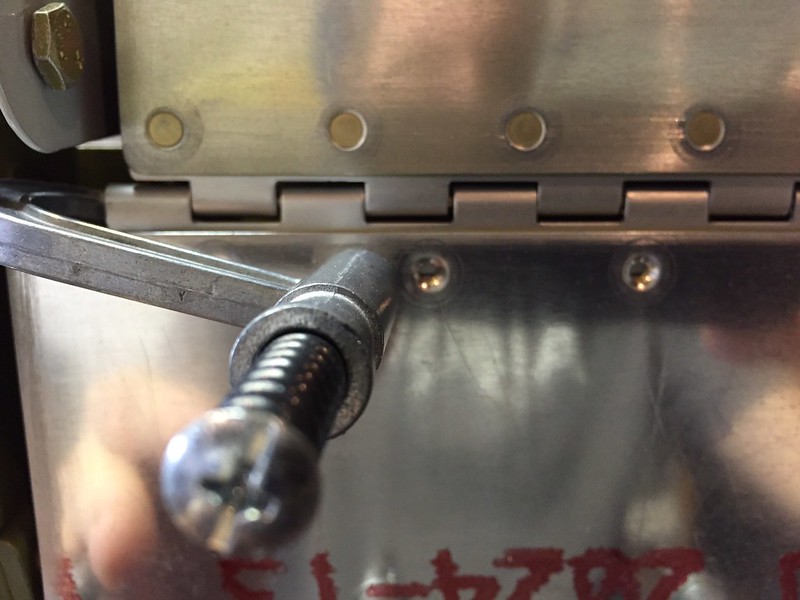 IMG_0205 by Ed Fleming, on Flickr
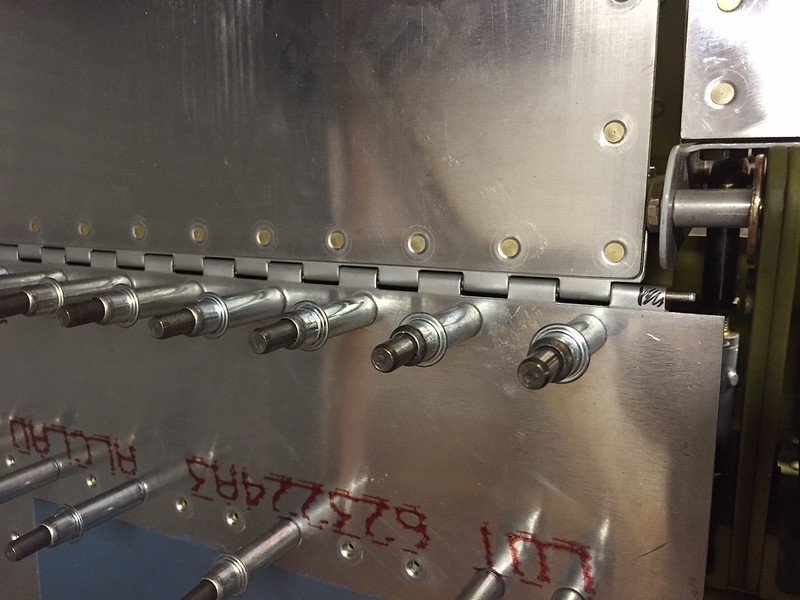 IMG_0207 by Ed Fleming, on Flickr
This was one of those processes that gave me many sleepless nights and prompted much research. The conundrum of course is that the hinge can only be held in place by small clamps at each end. How do you keep the holes in the skin and flap brace aligned? My research turned up some funky methods involving keeper rivets, but also a few guys who just went ahead and drilled and had no alignment problems. After playing around with the fit, this is what I did too, and its so much easier and simpler than I had thought, much worry about nothing.
A couple of key points though.
1. As I mentioned a couple of posts back its important to get the lower flange of the flap brace properly adjusted so it is dead straight and the holes align with the skin with out needing clecos.
2. To help with the above I dimpled the bottom skins, so the dimples sit in the countersinks in the flap brace and the holes are kept in alignment without needing clecos.
I then clamped the flap in place, aligned the trailing edge, checked edge distance, and started drilling from outboard in, one hole at a time and clecoing every hole. ok, that makes it sound like it was really quick. Actually I clamped, checked, fussed, adjusted and repeated for a couple of days before committing steel to Aluminium, but it was eventually a non event and worked perfectly.
The below photo shows the min edge distance line passing through the bottom of each hole, so no problem there. It also illustrates that the edge distance is quite equally shared between the two hinge sections, vindicating what I did when drilling the hinge to the flap.
IMG_0199 by Ed Fleming, on FlickrIMG_0199 by Ed Fleming, on FlickrIMG_0205 by Ed Fleming, on FlickrIMG_0205 by Ed Fleming, on FlickrIMG_0207 by Ed Fleming, on Flickr
Last edited:
Z-EDD
Well Known Member
Stupid mistake
You can even see the mark on the one I should have removed! Oh well. I was surprised to find some long pieces of hinge stock in the fuselage kit so I borrowed a length and redid this. I think the hinge stock is for the seat backs so I'll have to replace it before I get there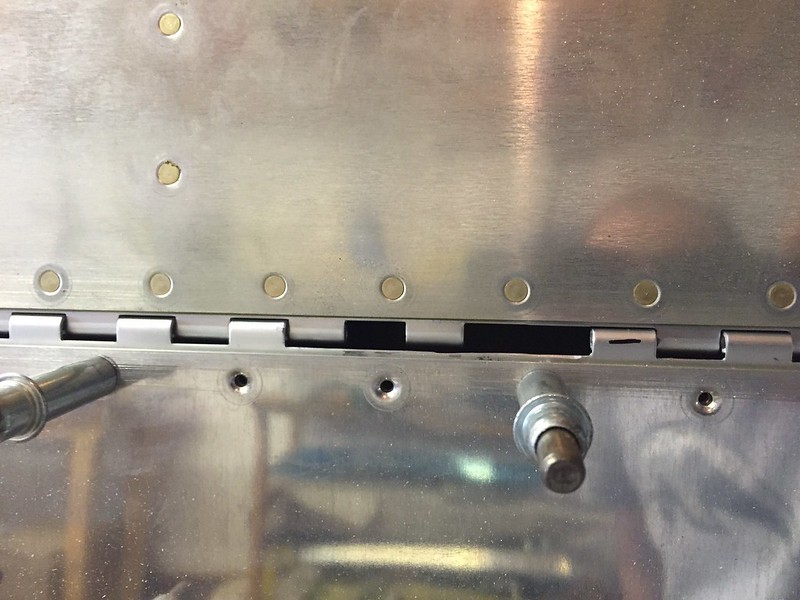 IMG_0192 by Ed Fleming, on Flickr
You can even see the mark on the one I should have removed! Oh well. I was surprised to find some long pieces of hinge stock in the fuselage kit so I borrowed a length and redid this. I think the hinge stock is for the seat backs so I'll have to replace it before I get there
IMG_0192 by Ed Fleming, on Flickr
Last edited:
Z-EDD
Well Known Member
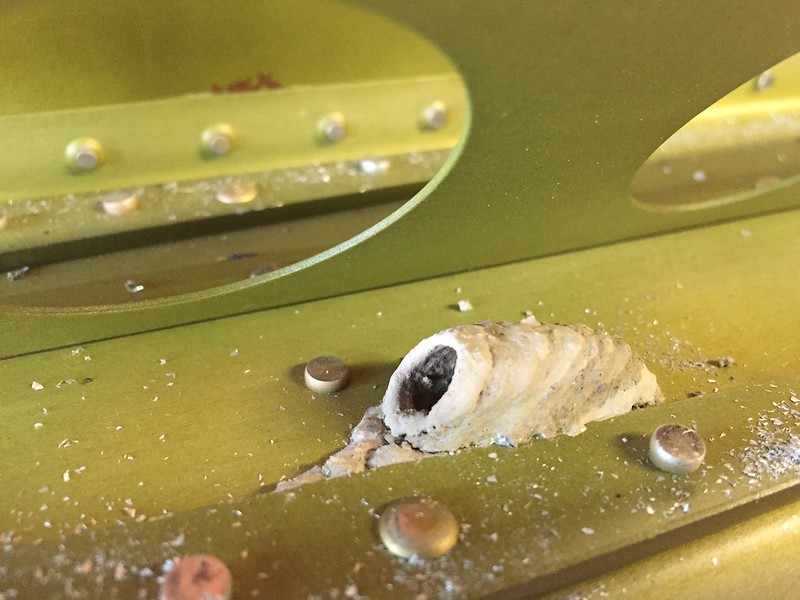
Mason Wasp
While I was messing around with the flap mounting I noticed this guy had made his house on the rear spar. I guess this must be the African cousin of what you guys call a Mud dauber. We call him a Mason Wasp. They don't come too far indoors, but this end of the wings is near the garage door which I often leave open all day. I'll need to close off this end of the wings with paper or plastic, if the bottom skins had been on it would have been much harder to remove.
 IMG_0631 by Ed Fleming, on Flickr
While I was messing around with the flap mounting I noticed this guy had made his house on the rear spar. I guess this must be the African cousin of what you guys call a Mud dauber. We call him a Mason Wasp. They don't come too far indoors, but this end of the wings is near the garage door which I often leave open all day. I'll need to close off this end of the wings with paper or plastic, if the bottom skins had been on it would have been much harder to remove.
IMG_0631 by Ed Fleming, on Flickr
Last edited:
Z-EDD
Well Known Member
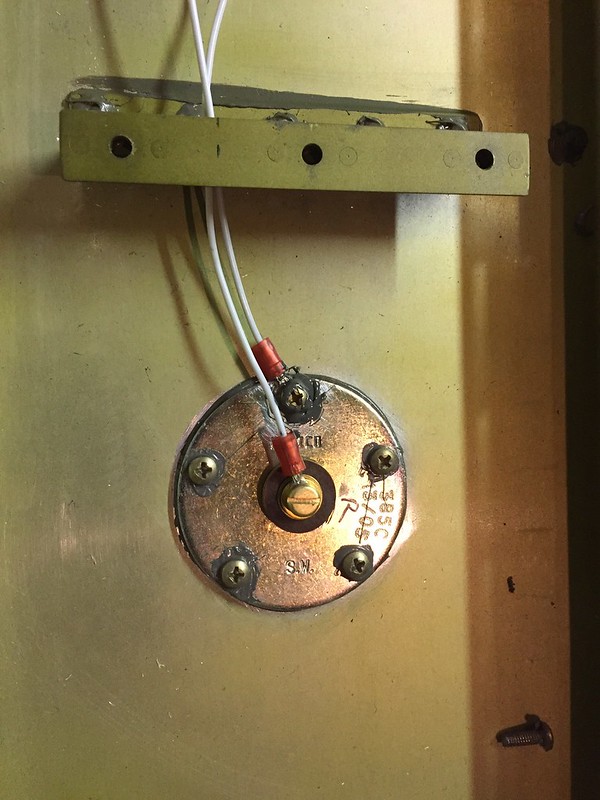
Wiring fuel senders
One of the last big jobs I wanted to do before closing the wings was to wire the fuel senders. Mine are mounted through the rear baffles because I have one flop tube. I should have done this while the wings were in the stands but I was so eager to get them out and in the moveable cradle that I forgot. So they had to come out of the cradle one by one. It did give me a chance for some gratuitous shots of the wing top skins though!
 IMG_0623 by Ed Fleming, on Flickr
 IMG_0623 by Ed Fleming, on Flickr
 IMG_0623 by Ed Fleming, on Flickr
 IMG_0623 by Ed Fleming, on Flickr
 IMG_0632 by Ed Fleming, on Flickr
One of the last big jobs I wanted to do before closing the wings was to wire the fuel senders. Mine are mounted through the rear baffles because I have one flop tube. I should have done this while the wings were in the stands but I was so eager to get them out and in the moveable cradle that I forgot. So they had to come out of the cradle one by one. It did give me a chance for some gratuitous shots of the wing top skins though!
IMG_0623 by Ed Fleming, on FlickrIMG_0623 by Ed Fleming, on FlickrIMG_0623 by Ed Fleming, on FlickrIMG_0623 by Ed Fleming, on FlickrIMG_0632 by Ed Fleming, on Flickr
Last edited:
Z-EDD
Well Known Member
Leading edge/ Tank join shim
Also while the wings were out I wanted to fix this mismatch of the leading edge and tank skins. I had it on both wings in the same place. Not sure of the cause but it seems quite common. I had already done the right wing in the stand, but had forgotten the left. In this case it was just that one rivet immediately forward of the spar, so I drilled out the first 2 rivets and inserted an .016 shim. Did the trick, though you'll have to take my word since I forgot to take an "after" shot:roll eyes: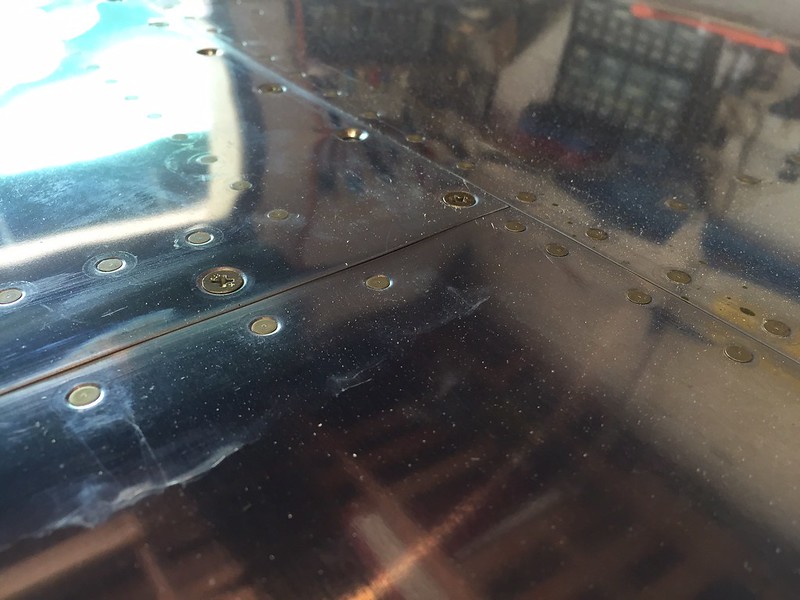 IMG_0626 by Ed Fleming, on Flickr
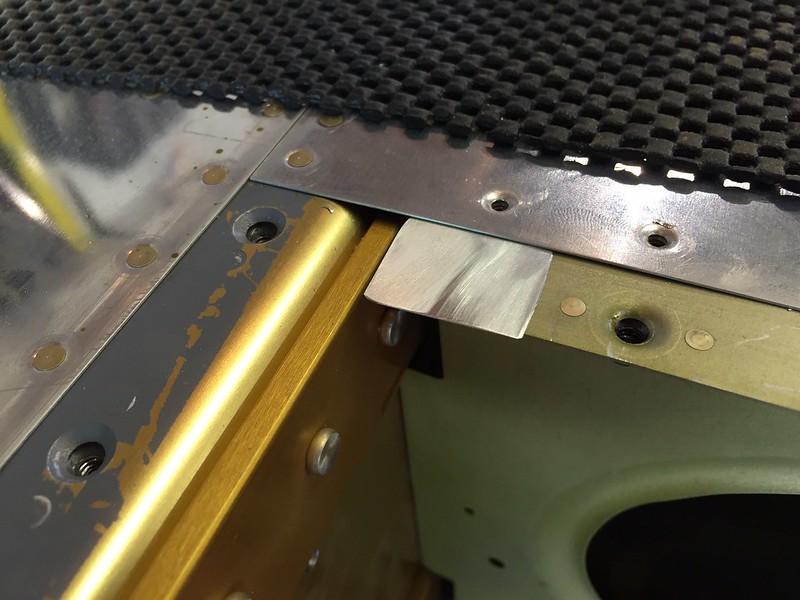 IMG_0627 by Ed Fleming, on Flickr
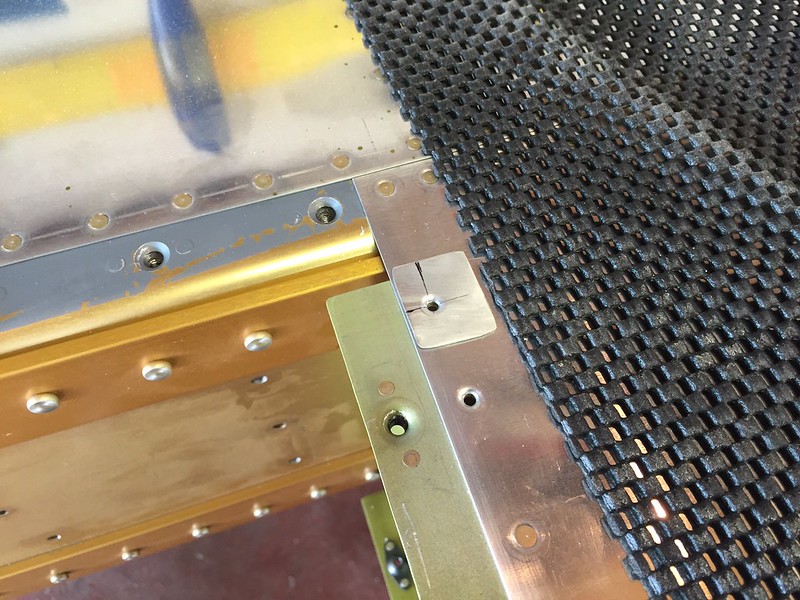 IMG_0629 by Ed Fleming, on Flickr
 IMG_0630 by Ed Fleming, on Flickr
Also while the wings were out I wanted to fix this mismatch of the leading edge and tank skins. I had it on both wings in the same place. Not sure of the cause but it seems quite common. I had already done the right wing in the stand, but had forgotten the left. In this case it was just that one rivet immediately forward of the spar, so I drilled out the first 2 rivets and inserted an .016 shim. Did the trick, though you'll have to take my word since I forgot to take an "after" shot:roll eyes:
IMG_0626 by Ed Fleming, on FlickrIMG_0627 by Ed Fleming, on FlickrIMG_0629 by Ed Fleming, on FlickrIMG_0630 by Ed Fleming, on Flickr
Last edited:
Z-EDD
Well Known Member
Sender wiring
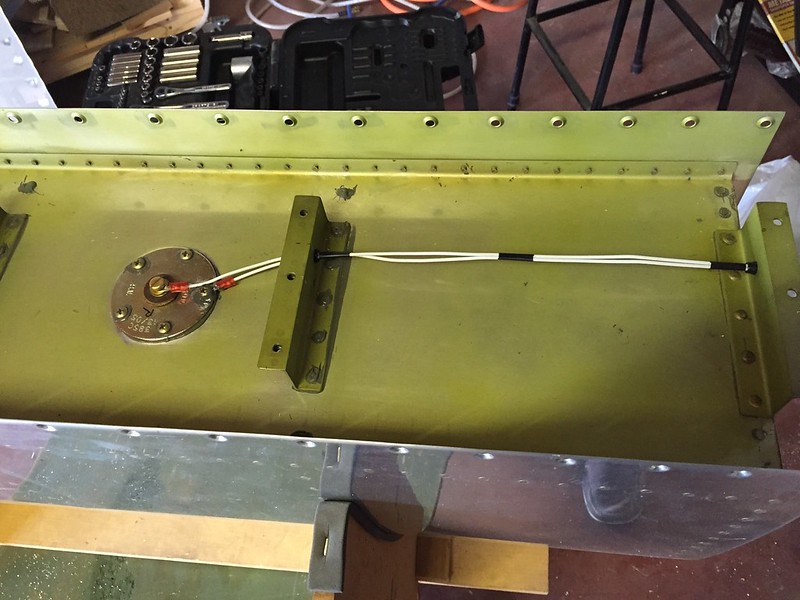
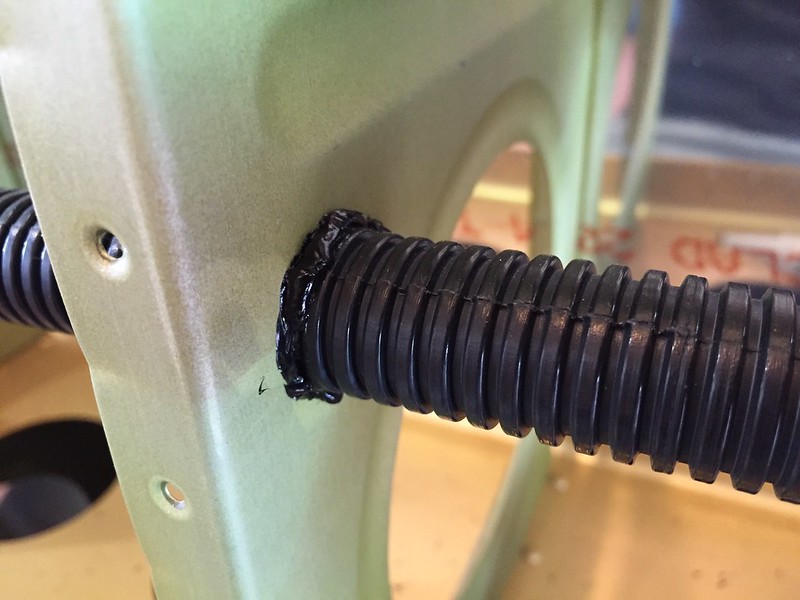
And finally I wired the senders. I had originally not intended to wire separate ground wires but some research suggested that this would be a good idea. Since my senders are so hard to get to, the last thing I need is some minor grounding issue disabling my senders, so I'm running a ground from one of the screws to the one of the bolts on the inboard Z bracket. This entailed a re-aquaintance with proseal when I replaced the screws.
Also I had wondered how to safely route the wires. Eventually an email to Vans confirmed that it would be ok to drill a 1/4 hole in the z brackets for a snap bushing.
Oh, also while I was at it I fixed up some scratches and misted some primer onto the baffle and end rib to protect them.
 IMG_0640 by Ed Fleming, on Flickr
 IMG_0640 by Ed Fleming, on Flickr
 IMG_0653 by Ed Fleming, on Flickr
 IMG_0653 by Ed Fleming, on Flickr
With the tanks fully bolted back in place, the final job before closing the wings was to work RTV silicone into the holes where the conduit passes through the ribs. This should help prevent the ribs from chafing through the conduit. And with that, I'm ready to close the wings!
 IMG_0657 by Ed Fleming, on Flickr
And finally I wired the senders. I had originally not intended to wire separate ground wires but some research suggested that this would be a good idea. Since my senders are so hard to get to, the last thing I need is some minor grounding issue disabling my senders, so I'm running a ground from one of the screws to the one of the bolts on the inboard Z bracket. This entailed a re-aquaintance with proseal when I replaced the screws.
Also I had wondered how to safely route the wires. Eventually an email to Vans confirmed that it would be ok to drill a 1/4 hole in the z brackets for a snap bushing.
Oh, also while I was at it I fixed up some scratches and misted some primer onto the baffle and end rib to protect them.
IMG_0640 by Ed Fleming, on FlickrIMG_0640 by Ed Fleming, on FlickrIMG_0653 by Ed Fleming, on FlickrIMG_0653 by Ed Fleming, on FlickrWith the tanks fully bolted back in place, the final job before closing the wings was to work RTV silicone into the holes where the conduit passes through the ribs. This should help prevent the ribs from chafing through the conduit. And with that, I'm ready to close the wings!
IMG_0657 by Ed Fleming, on Flickr
Last edited:
Z-EDD
Well Known Member
Finally updating the fuselage work!
Its been way too long since I updated this thread. Too much time spent building! Actually, is there such a thing? Anyway, lots of pictures, some mistakes, a few solutions, so here goes.
This was back in January, and concurrent with finishing off some of the wing details, I got started on the firewall. I still have not closed up the bottom of the wings. I got started on that and then the rear spar/ aileron bracket SB came out and that stopped me in my tracks with one inboard skin riveted on. Whilst I have no intention at the moment of drilling out rivets to apply that SB, it was a reminder that I still may need to get in there for some reason in the future, so there really is no rush to close them up now.
The firewall is straight forward. This shot shows how I held the 601P spacer in place for drilling, no rocket science here.
 IMG_0194 by Ed Fleming, on Flickr
On to the riveting. I squeezed as many as I could. This requires leaving the steel brackets off so that you can slide the squeezer over the angles to reach the rivets.
 IMG_0583 by Ed Fleming, on Flickr
On the 601J's I was able to squeeze these 3 rivets but that was it. Now, many guys back rivet the rest of the firewall. I'll be honest, I never even tried. I just shot and bucked all the rest of the rivets for two reasons. With the 3/32 rivets I saw them as excellent practice for potential riveting partners, so my wife and son shot those for experience. On the 1/8 flush rivets, I opted to shoot those myself for experience, since there are quite a few on the fuselage and I'd never shot any before. It was useful experience.
 IMG_0584 by Ed Fleming, on Flickr
Now, regarding the 4 holes along the radius of the angle, these gave me problems on one side. I think that on one of these angles I did not get it clamped tightly to the adjacent stiffener angle, and the holes ended up just a tiny bit closer to the radius. When bucking these the bar ended up damaging the radius and I had to dress it out and re-prime. I don't have photos of this but I'm sure you can see how it might happen. These rivets would also be really hard to back rivet. I suggest taking care in drilling to get these as far from that radius as you can!
Its been way too long since I updated this thread. Too much time spent building! Actually, is there such a thing? Anyway, lots of pictures, some mistakes, a few solutions, so here goes.
This was back in January, and concurrent with finishing off some of the wing details, I got started on the firewall. I still have not closed up the bottom of the wings. I got started on that and then the rear spar/ aileron bracket SB came out and that stopped me in my tracks with one inboard skin riveted on. Whilst I have no intention at the moment of drilling out rivets to apply that SB, it was a reminder that I still may need to get in there for some reason in the future, so there really is no rush to close them up now.
The firewall is straight forward. This shot shows how I held the 601P spacer in place for drilling, no rocket science here.
IMG_0194 by Ed Fleming, on FlickrOn to the riveting. I squeezed as many as I could. This requires leaving the steel brackets off so that you can slide the squeezer over the angles to reach the rivets.
IMG_0583 by Ed Fleming, on FlickrOn the 601J's I was able to squeeze these 3 rivets but that was it. Now, many guys back rivet the rest of the firewall. I'll be honest, I never even tried. I just shot and bucked all the rest of the rivets for two reasons. With the 3/32 rivets I saw them as excellent practice for potential riveting partners, so my wife and son shot those for experience. On the 1/8 flush rivets, I opted to shoot those myself for experience, since there are quite a few on the fuselage and I'd never shot any before. It was useful experience.
IMG_0584 by Ed Fleming, on FlickrNow, regarding the 4 holes along the radius of the angle, these gave me problems on one side. I think that on one of these angles I did not get it clamped tightly to the adjacent stiffener angle, and the holes ended up just a tiny bit closer to the radius. When bucking these the bar ended up damaging the radius and I had to dress it out and re-prime. I don't have photos of this but I'm sure you can see how it might happen. These rivets would also be really hard to back rivet. I suggest taking care in drilling to get these as far from that radius as you can!
Last edited:
Z-EDD
Well Known Member
F-704
On to the 704 bulkhead, I used my drill cup here to keep these holes nice and straight. I think these are the ones through the 704G spacer bars
 IMG_0197 by Ed Fleming, on Flickr
Riveting these parts was the first time I tried riveting with the C-frame. All the time is spent setting up and getting things level. After that its literally a couple of minutes to set all these rivets. Ridiculously easy.
 IMG_0195 by Ed Fleming, on Flickr
And beautiful. Unfortunately there just aren't that many parts on an RV where this technique makes much sense.
 IMG_0193 by Ed Fleming, on Flickr
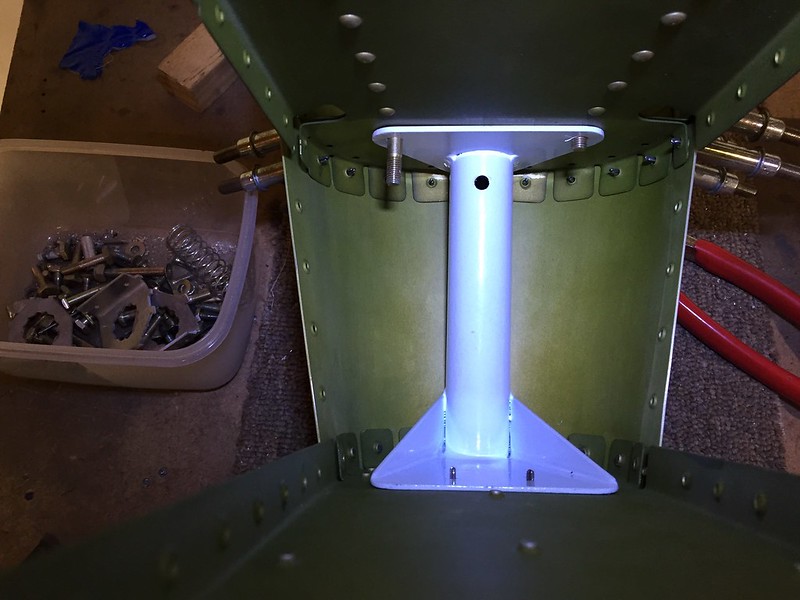
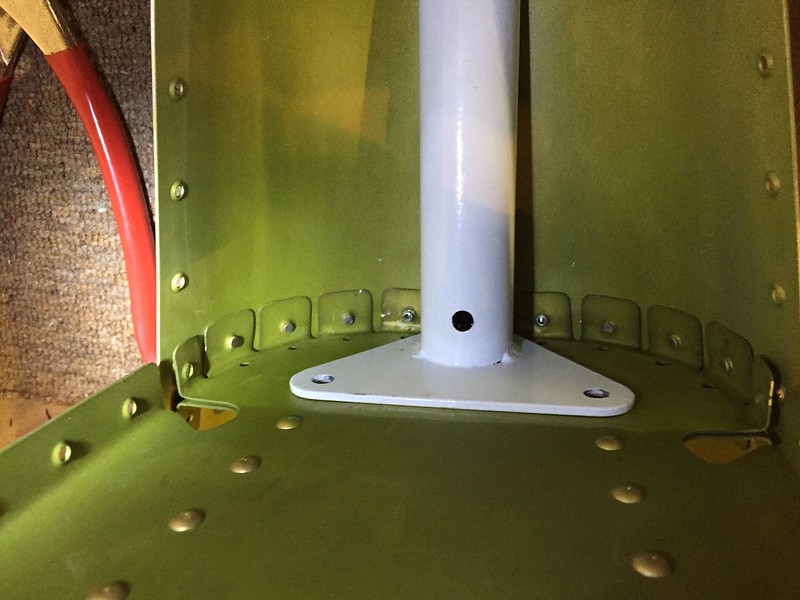
Fitting the control sticks was a fun diversion.
 IMG_0185 by Ed Fleming, on Flickr
Heres how I squared and adjusted the ends of the brass bushings to get a Play-free fit.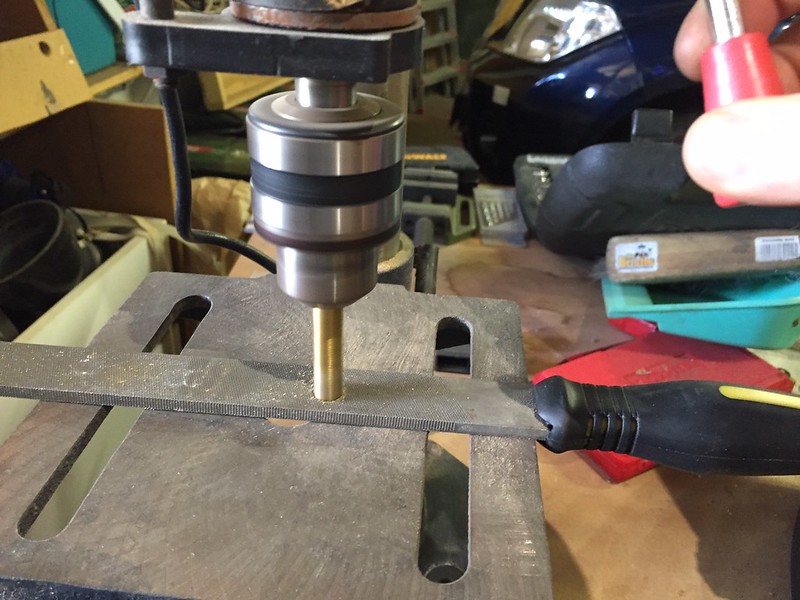 IMG_0186 by Ed Fleming, on Flickr
On to the 704 bulkhead, I used my drill cup here to keep these holes nice and straight. I think these are the ones through the 704G spacer bars
IMG_0197 by Ed Fleming, on FlickrRiveting these parts was the first time I tried riveting with the C-frame. All the time is spent setting up and getting things level. After that its literally a couple of minutes to set all these rivets. Ridiculously easy.
IMG_0195 by Ed Fleming, on FlickrAnd beautiful. Unfortunately there just aren't that many parts on an RV where this technique makes much sense.
IMG_0193 by Ed Fleming, on FlickrFitting the control sticks was a fun diversion.
IMG_0185 by Ed Fleming, on FlickrHeres how I squared and adjusted the ends of the brass bushings to get a Play-free fit.
IMG_0186 by Ed Fleming, on Flickr
Last edited:
Z-EDD
Well Known Member
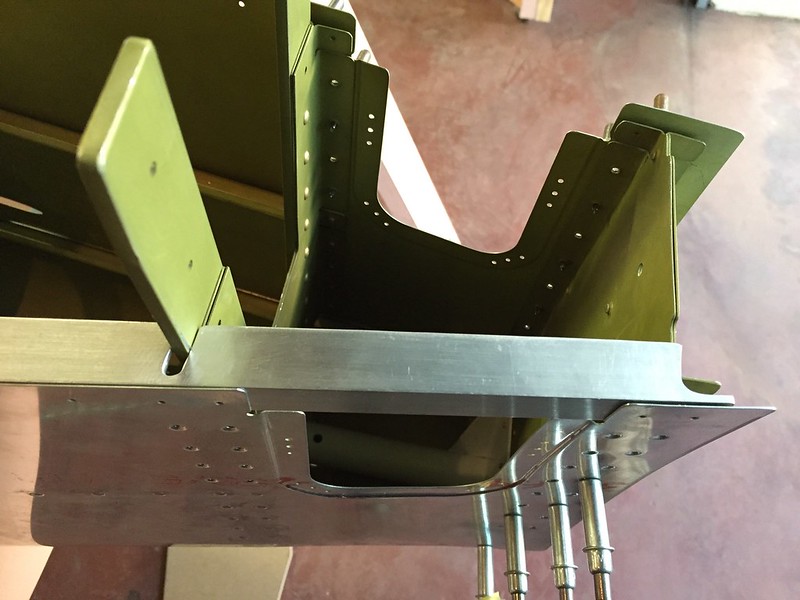
706 Bulkhead
At this point I spent WAY too much time searching for all the parts of the 705 bulkhead. The problem was the 040 sheet that makes up the 705K, I just could not find it anywhere! eventually, weeks later I did find it, underneath a bunch of other stuff of course. Lesson learned, when you inventory, make a note of where the parts are stored, and then don't move them! It is VERY annoying to be stopped by something so simple. Anyway, as i contemplated ordering a new piece of sheet, I opted to continue with the remaining bulkheads, so on to the 706.
this is seemingly straight forward, yet I made my first major mistake of the fuselage here. These are the parts of the bell crank support structure clecoed together.
 IMG_0588 by Ed Fleming, on Flickr
This was a minor problem. I had insufficient edge distance on the first 729C to 729B rivet hole. This could have been avoided if I had made 729B a little longer, or positioned further forward. It was a reminder that vans dimensions have zero tolerance. Accurate cutting and positioning is a must, there is no fat! I opted to make another 729C and position the hole at min edge distance rather than central as per the plans. in this photo you can see where the hole would have been originally.
 IMG_0589 by Ed Fleming, on Flickr
And now for the really big mistake! The plans show two optional 5/8 holes through the bulkhead, one for the manual trim cable, the other for optional wiring. Since I am fitting manual trim at least one hole is non optional, and I opted to drill the other as well. Looking carefully at the plans, even if the hole is positioned perfectly, it will still result in less than min edge distance on all surrounding holes. Since this is per plans, it must be ok, but it seems important to get the hole position right so edge distance is shared equally.
It was at this point that I got too clever. I had read a number of build logs where guys had made a nice hole through 706B, only to lament that they now had to make corresponding cutouts in several other parts. Wouldn't it have been easier to have them all clecoed together and drilled in one go, they all wondered? Well thanks to the heads up, I was now ahead, or so I thought!
The problem is, when everything is clecoed together, there is no way to get the whole contraption into a drill press for nice accurate drilling, so I drilled a pilot hole, then went at it free hand. I did not pay attention to how things were going and it was a couple of minutes after finishing that I noticed to my horror that the hole was way off from where it should have been! The underlying parts, 730 and 729, whose edges bisect the hole, had cause the unibit to walk sideways and I had not noticed.
This is not good.
 IMG_0593 by Ed Fleming, on Flickr
If I lived in the US, I would have been online ordering new parts, but that is a bit pricey for me. initially I used my dremel to open the hole out to where it should have been, then I went ahead and made the other hole with a lot more care. But the edge distance is still really bad on some of these holes.
 IMG_0597 by Ed Fleming, on Flickr
So the email went off to vans, could I save this part, or were Fedex going to make some money out of me?
At this point I spent WAY too much time searching for all the parts of the 705 bulkhead. The problem was the 040 sheet that makes up the 705K, I just could not find it anywhere! eventually, weeks later I did find it, underneath a bunch of other stuff of course. Lesson learned, when you inventory, make a note of where the parts are stored, and then don't move them! It is VERY annoying to be stopped by something so simple. Anyway, as i contemplated ordering a new piece of sheet, I opted to continue with the remaining bulkheads, so on to the 706.
this is seemingly straight forward, yet I made my first major mistake of the fuselage here. These are the parts of the bell crank support structure clecoed together.
IMG_0588 by Ed Fleming, on FlickrThis was a minor problem. I had insufficient edge distance on the first 729C to 729B rivet hole. This could have been avoided if I had made 729B a little longer, or positioned further forward. It was a reminder that vans dimensions have zero tolerance. Accurate cutting and positioning is a must, there is no fat! I opted to make another 729C and position the hole at min edge distance rather than central as per the plans. in this photo you can see where the hole would have been originally.
IMG_0589 by Ed Fleming, on FlickrAnd now for the really big mistake! The plans show two optional 5/8 holes through the bulkhead, one for the manual trim cable, the other for optional wiring. Since I am fitting manual trim at least one hole is non optional, and I opted to drill the other as well. Looking carefully at the plans, even if the hole is positioned perfectly, it will still result in less than min edge distance on all surrounding holes. Since this is per plans, it must be ok, but it seems important to get the hole position right so edge distance is shared equally.
It was at this point that I got too clever. I had read a number of build logs where guys had made a nice hole through 706B, only to lament that they now had to make corresponding cutouts in several other parts. Wouldn't it have been easier to have them all clecoed together and drilled in one go, they all wondered? Well thanks to the heads up, I was now ahead, or so I thought!
The problem is, when everything is clecoed together, there is no way to get the whole contraption into a drill press for nice accurate drilling, so I drilled a pilot hole, then went at it free hand. I did not pay attention to how things were going and it was a couple of minutes after finishing that I noticed to my horror that the hole was way off from where it should have been! The underlying parts, 730 and 729, whose edges bisect the hole, had cause the unibit to walk sideways and I had not noticed.
This is not good.
IMG_0593 by Ed Fleming, on FlickrIf I lived in the US, I would have been online ordering new parts, but that is a bit pricey for me. initially I used my dremel to open the hole out to where it should have been, then I went ahead and made the other hole with a lot more care. But the edge distance is still really bad on some of these holes.
IMG_0597 by Ed Fleming, on FlickrSo the email went off to vans, could I save this part, or were Fedex going to make some money out of me?
Last edited:
Z-EDD
Well Known Member
The Fix
They came back pretty quick and the good news was, there was a fix. The bad news, it needed quite a bit of work and some .032. I thought about for a while and then decided to give it a try. Make a new F-730, only wider to reinforce the area. The pictures should be self explanatory.
 IMG_0635 by Ed Fleming, on Flickr
 IMG_0636 by Ed Fleming, on Flickr
 IMG_0639 by Ed Fleming, on Flickr
 IMG_0641 by Ed Fleming, on Flickr
In the end, I'm very happy with this. It really strengthens the whole area for very little weight gain.
They came back pretty quick and the good news was, there was a fix. The bad news, it needed quite a bit of work and some .032. I thought about for a while and then decided to give it a try. Make a new F-730, only wider to reinforce the area. The pictures should be self explanatory.
IMG_0635 by Ed Fleming, on FlickrIMG_0636 by Ed Fleming, on FlickrIMG_0639 by Ed Fleming, on FlickrIMG_0641 by Ed Fleming, on FlickrIn the end, I'm very happy with this. It really strengthens the whole area for very little weight gain.
Last edited:
Z-EDD
Well Known Member
Aft Bulkheads
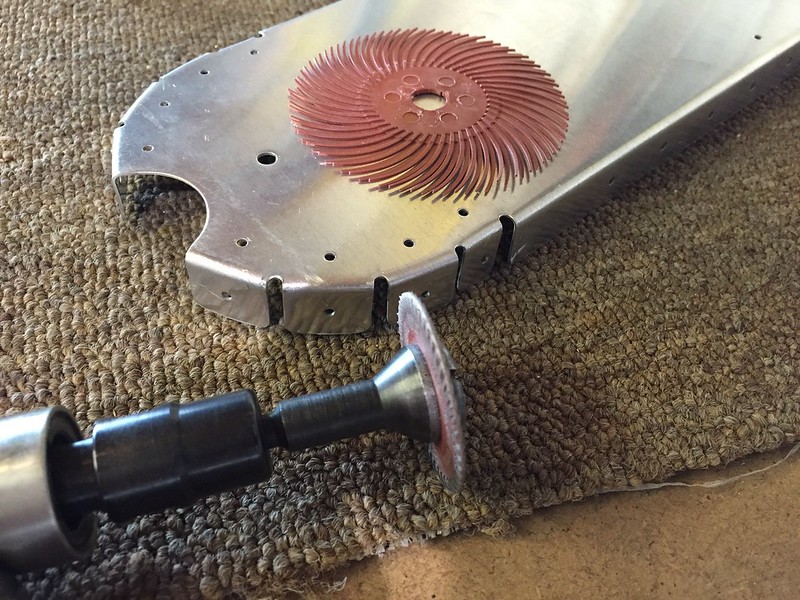
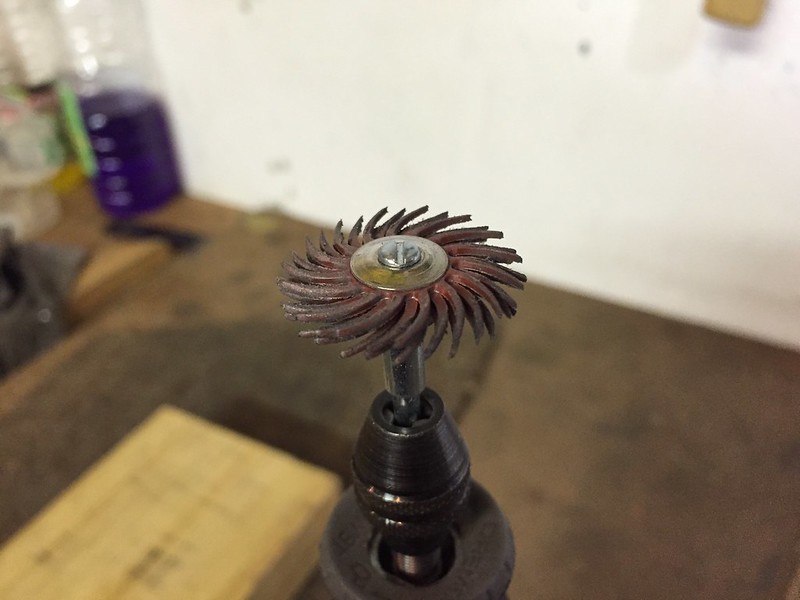
Most of the aft bulkheads don't warrant a photo, they are so simple. The next interesting one is 711. Here I am using my new favourite deburring tool. It starts out like the new one laying on top of the part. I picked it up at a store in Anchorage. No idea what its called but its made by 3m. I figured it might help get into those pesky relief notches. Well it did, but it really came into its own once all the bristles came off! Just a plastic disc with stubs around the edge, but it really works
 IMG_0586 by Ed Fleming, on Flickr
This is how I positioned the 711C bars for drilling.
 IMG_0592 by Ed Fleming, on Flickr
Here's a bunch of bulkhead components laid out for priming.
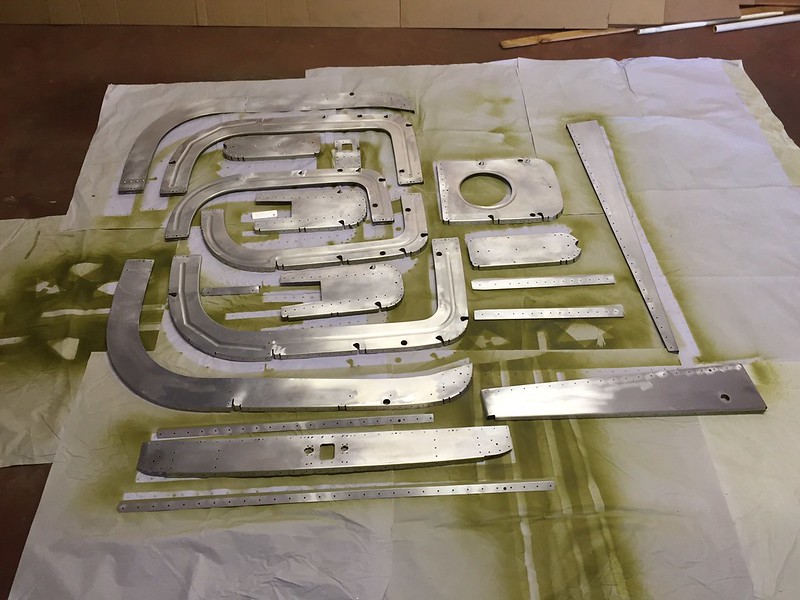 IMG_0596 by Ed Fleming, on Flickr
Most of the aft bulkheads don't warrant a photo, they are so simple. The next interesting one is 711. Here I am using my new favourite deburring tool. It starts out like the new one laying on top of the part. I picked it up at a store in Anchorage. No idea what its called but its made by 3m. I figured it might help get into those pesky relief notches. Well it did, but it really came into its own once all the bristles came off! Just a plastic disc with stubs around the edge, but it really works
IMG_0586 by Ed Fleming, on FlickrThis is how I positioned the 711C bars for drilling.
IMG_0592 by Ed Fleming, on FlickrHere's a bunch of bulkhead components laid out for priming.
IMG_0596 by Ed Fleming, on Flickr
Last edited:
Z-EDD
Well Known Member
Drilling the aft Fuse
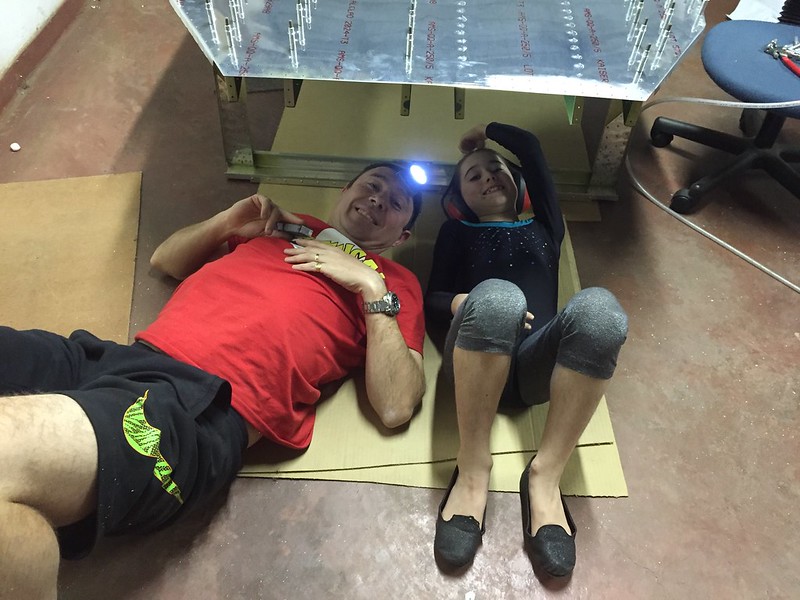
I still had not started the F-705, but all of the aft bulkheads were done and my Buddy Kevin was in town for a couple of days. Kev lives in Dubai and is a serious wannabe builder. He also started his aviation career turning spanners in a hangar, so I knew he'd be super keen to help assemble the aft fuse.
 IMG_0608 by Ed Fleming, on Flickr
 IMG_0609 by Ed Fleming, on Flickr
Getting the 779 skin in place is a real bear. The bend of the skin is some of the problem, but here you can also see how the weld in the tail spring mount interferes with the mouse hole. I had to relieve that hole quite a bit to get the whole contraption to fit nicely.
Also note the holes drilled and countersunk for the keeper rivets through the WD-409. These are in completely the wrong place! The plans reference the dimension as 1 inch below a certain rivet. I mistakenly assumed this rivet must be the lowest one through F-712. Actually, the reference rivet is on the VS rear spar!!!
Ok, thats a dumb mistake by me, but how dumb for the plans to reference a part that will only be attached here in several years time?? How are you supposed to measure this?? Anyway, so far as I can tell, these rivets will be fine and will not be too close to the bolts, but how dumb!
Here's another shot of WD-409 to show how the weld on mine interferes with the cutout in F-712.
 IMG_0599 by Ed Fleming, on Flickr
When I originally unpacked the tail spring mount I was surprised to find it was not powder coated and had already started to rust. I immediately cleaned and primed it, but when I got it down for drilling I could see the rust coming through the primer already. Better get this powder coated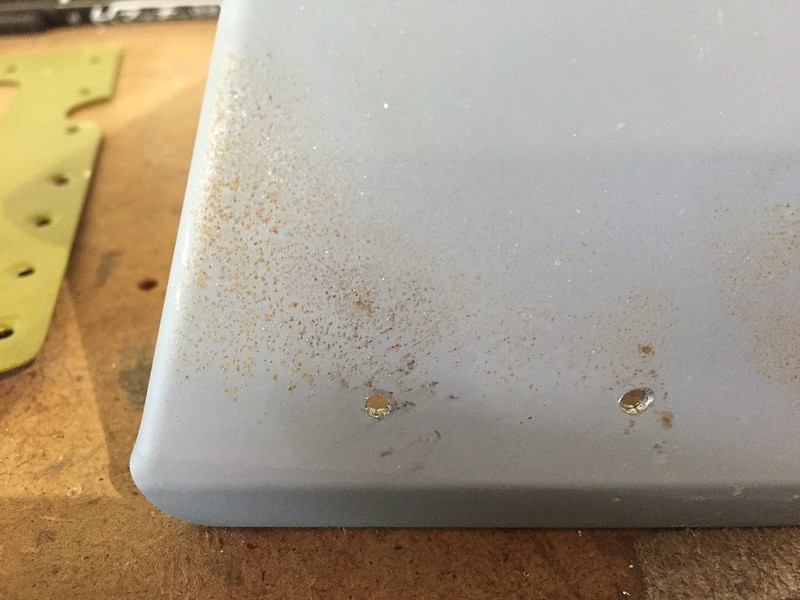 IMG_0622 by Ed Fleming, on Flickr
I still had not started the F-705, but all of the aft bulkheads were done and my Buddy Kevin was in town for a couple of days. Kev lives in Dubai and is a serious wannabe builder. He also started his aviation career turning spanners in a hangar, so I knew he'd be super keen to help assemble the aft fuse.
IMG_0608 by Ed Fleming, on FlickrIMG_0609 by Ed Fleming, on FlickrGetting the 779 skin in place is a real bear. The bend of the skin is some of the problem, but here you can also see how the weld in the tail spring mount interferes with the mouse hole. I had to relieve that hole quite a bit to get the whole contraption to fit nicely.
Also note the holes drilled and countersunk for the keeper rivets through the WD-409. These are in completely the wrong place! The plans reference the dimension as 1 inch below a certain rivet. I mistakenly assumed this rivet must be the lowest one through F-712. Actually, the reference rivet is on the VS rear spar!!!
Ok, thats a dumb mistake by me, but how dumb for the plans to reference a part that will only be attached here in several years time?? How are you supposed to measure this?? Anyway, so far as I can tell, these rivets will be fine and will not be too close to the bolts, but how dumb!
Here's another shot of WD-409 to show how the weld on mine interferes with the cutout in F-712.
IMG_0599 by Ed Fleming, on FlickrWhen I originally unpacked the tail spring mount I was surprised to find it was not powder coated and had already started to rust. I immediately cleaned and primed it, but when I got it down for drilling I could see the rust coming through the primer already. Better get this powder coated
IMG_0622 by Ed Fleming, on Flickr
Last edited:
Z-EDD
Well Known Member
Drilling the aft fuse
Leveling was easy at the aft end
 IMG_0613 by Ed Fleming, on Flickr
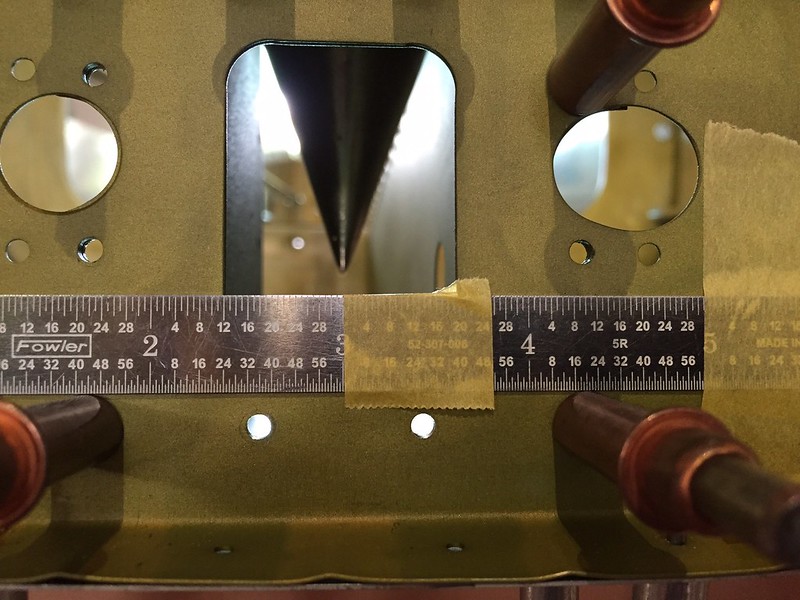
Took a little longer to set up at the front. The tape on the ruler was necessary because there was light reflecting off of it at my viewing angle!
 IMG_0614 by Ed Fleming, on Flickr
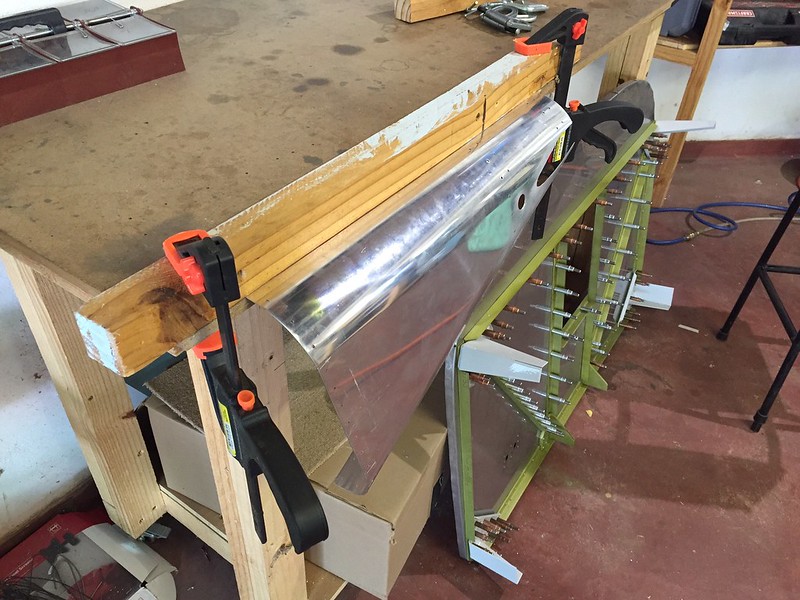
I adjusted the 779 skin for a better fit. think it helped a bit.
 IMG_0612 by Ed Fleming, on Flickr
While the skin was off I drilled the stringer to the side skins so that I could cleco along here.
 IMG_0611 by Ed Fleming, on Flickr
Now that fits much better.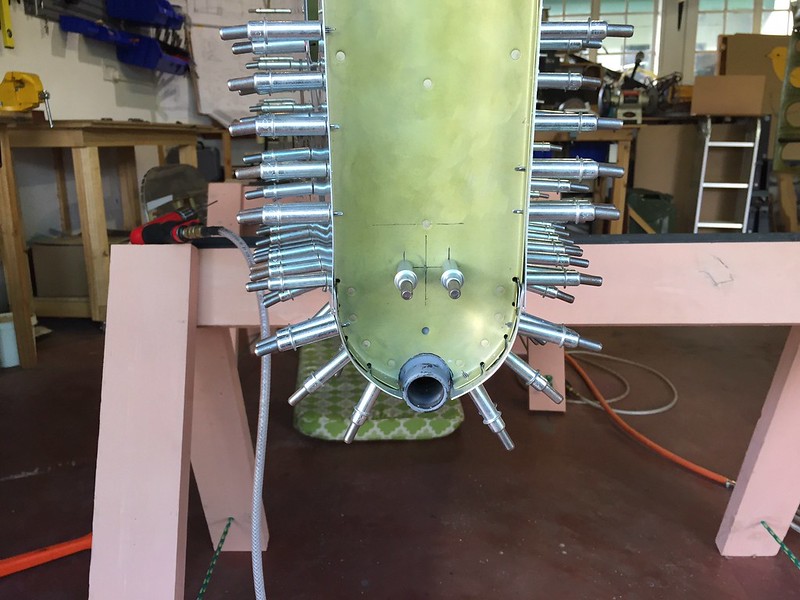 IMG_0618 by Ed Fleming, on Flickr
Leveling was easy at the aft end
IMG_0613 by Ed Fleming, on FlickrTook a little longer to set up at the front. The tape on the ruler was necessary because there was light reflecting off of it at my viewing angle!
IMG_0614 by Ed Fleming, on FlickrI adjusted the 779 skin for a better fit. think it helped a bit.
IMG_0612 by Ed Fleming, on FlickrWhile the skin was off I drilled the stringer to the side skins so that I could cleco along here.
IMG_0611 by Ed Fleming, on FlickrNow that fits much better.
IMG_0618 by Ed Fleming, on Flickr
Last edited:
Z-EDD
Well Known Member
Drilling continued
This was a bit of a conundrum. What we have here is matched holes on the skin and bulkhead tab, but no hole in the stringer, which sits in between! If I just drilled this, any slight misalignment of that tab would result in an oval hole. I think this is a mistake by vans, one of those cases where the part really should not be pre-punched. I dealt with it by drilling all the other holes through the skin and stringer. Then I removed the skins from the bulkheads with stringers still clecoed to the skin, and drill the remaining holes. when they were back in place I could check for proper alignment and reamed the tabs to final size.
 IMG_0610 by Ed Fleming, on Flickr
Drilling finally complete.
 IMG_0617 by Ed Fleming, on Flickr
The inevitable disassembly.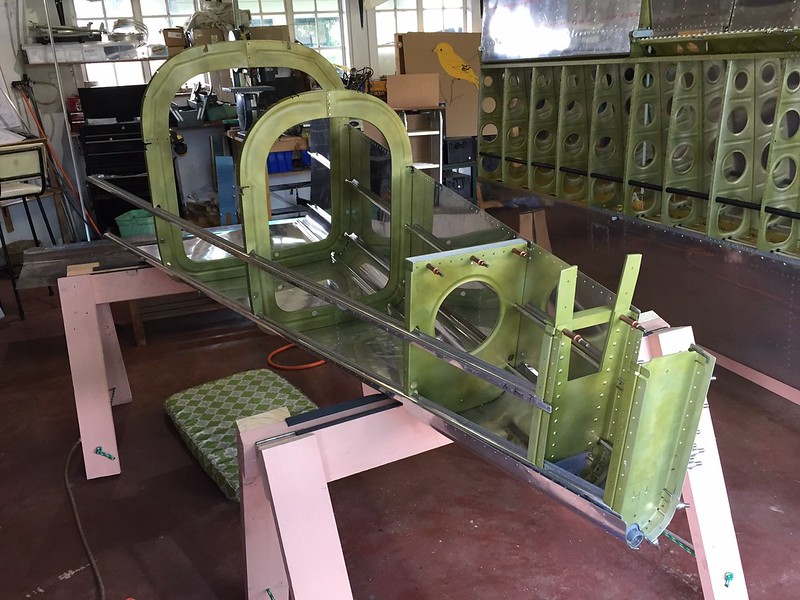 IMG_0619 by Ed Fleming, on Flickr
 IMG_0620 by Ed Fleming, on Flickr
This was a bit of a conundrum. What we have here is matched holes on the skin and bulkhead tab, but no hole in the stringer, which sits in between! If I just drilled this, any slight misalignment of that tab would result in an oval hole. I think this is a mistake by vans, one of those cases where the part really should not be pre-punched. I dealt with it by drilling all the other holes through the skin and stringer. Then I removed the skins from the bulkheads with stringers still clecoed to the skin, and drill the remaining holes. when they were back in place I could check for proper alignment and reamed the tabs to final size.
IMG_0610 by Ed Fleming, on FlickrDrilling finally complete.
IMG_0617 by Ed Fleming, on FlickrThe inevitable disassembly.
IMG_0619 by Ed Fleming, on FlickrIMG_0620 by Ed Fleming, on Flickr
Last edited:
rightrudder
Well Known Member
Lookin' good, Ed!! It's really starting to take form.
Z-EDD
Well Known Member
Riveting the tail cone.
While I was getting on with all the prep work I sent the Tail spring mount off for powder coating. Came back looking nice!
 IMG_0711 by Ed Fleming, on Flickr
Here is how I set up for riveting the tail cone. F-712 is easy squeazy, just a couple to be shot and bucked on the lower forward flange.
 IMG_0712 by Ed Fleming, on Flickr
F-711 is another story. The tail spring mount has to go in now, no way it can be inserted after riveting. But it really hampers access to those lower rivets. Ignore the odd sized bolts, they are just holding things in place. Bolts had to be removed for bucking access anyway.
 IMG_0713 by Ed Fleming, on Flickr
Here you can see I gave up on the lower two holes and used pop rivets. The first tries bent over and mangled the dimples on both sides. Drilled out to 7/64 and cleaned up for MK-319s, no one will ever know. If I get some expert bucking help I could still go up to an oops rivet here but I'll probably leave well enough alone.
 IMG_0715 by Ed Fleming, on Flickr
The forward flange was easier. not my best riveting but it will do.
Now here's a funny story! So I'm in bed with my wife one evening, and what better to do these days than update my build log and look through some photos. This was a good couple of months after the fact, and the tailcone is now fully riveted together as I took a look at the photo below. Hang on, what are those empty holes along the bottom of the bulkhead? should there be rivets in them? Quick check of the pdf plans reveals the obvious answer, of course there should!
It speaks volumes of how my wife is taking this whole process in her stride, as she barely looked up from her book when I muttered an expletive, shot out of bed, downstairs, and into the garage to take a look. I was still holding onto some vain hope that some magical riveting fairy might have visited and filled those holes since I took the picture. Unfortunately my flashlight revealed exactly what I had seen in the picture.
 IMG_0720 by Ed Fleming, on Flickr
I can get between the 710 and 711 bulkhead with a rivet gun and offset, but bucking is going to be a real challenge. I'll need skilled help for that. What a dumb mistake, how did I miss those??
While I was getting on with all the prep work I sent the Tail spring mount off for powder coating. Came back looking nice!
IMG_0711 by Ed Fleming, on FlickrHere is how I set up for riveting the tail cone. F-712 is easy squeazy, just a couple to be shot and bucked on the lower forward flange.
IMG_0712 by Ed Fleming, on FlickrF-711 is another story. The tail spring mount has to go in now, no way it can be inserted after riveting. But it really hampers access to those lower rivets. Ignore the odd sized bolts, they are just holding things in place. Bolts had to be removed for bucking access anyway.
IMG_0713 by Ed Fleming, on FlickrHere you can see I gave up on the lower two holes and used pop rivets. The first tries bent over and mangled the dimples on both sides. Drilled out to 7/64 and cleaned up for MK-319s, no one will ever know. If I get some expert bucking help I could still go up to an oops rivet here but I'll probably leave well enough alone.
IMG_0715 by Ed Fleming, on FlickrThe forward flange was easier. not my best riveting but it will do.
Now here's a funny story! So I'm in bed with my wife one evening, and what better to do these days than update my build log and look through some photos. This was a good couple of months after the fact, and the tailcone is now fully riveted together as I took a look at the photo below. Hang on, what are those empty holes along the bottom of the bulkhead? should there be rivets in them? Quick check of the pdf plans reveals the obvious answer, of course there should!
It speaks volumes of how my wife is taking this whole process in her stride, as she barely looked up from her book when I muttered an expletive, shot out of bed, downstairs, and into the garage to take a look. I was still holding onto some vain hope that some magical riveting fairy might have visited and filled those holes since I took the picture. Unfortunately my flashlight revealed exactly what I had seen in the picture.
IMG_0720 by Ed Fleming, on FlickrI can get between the 710 and 711 bulkhead with a rivet gun and offset, but bucking is going to be a real challenge. I'll need skilled help for that. What a dumb mistake, how did I miss those??
Last edited:
Z-EDD
Well Known Member
Reassembly
Moving on, still blissfully unaware of my blunder, I reassembled the rest of the aft fuselage.
 IMG_0723 by Ed Fleming, on Flickr
Looks just like it did a few weeks ago....
 IMG_0727 by Ed Fleming, on Flickr
 IMG_0728 by Ed Fleming, on Flickr
 IMG_0738 by Ed Fleming, on Flickr
 IMG_0739 by Ed Fleming, on Flickr
Canoe building time!
Moving on, still blissfully unaware of my blunder, I reassembled the rest of the aft fuselage.
IMG_0723 by Ed Fleming, on FlickrLooks just like it did a few weeks ago....
IMG_0727 by Ed Fleming, on FlickrIMG_0728 by Ed Fleming, on FlickrIMG_0738 by Ed Fleming, on FlickrIMG_0739 by Ed Fleming, on FlickrCanoe building time!
Last edited:
Z-EDD
Well Known Member
Riveting the aft Fuse
After a few frustrating days without a riveting partner, my lovely wife gave some of her precious time to start shooting on the aft fuse. I had literally lost sleep wondering how these overlaps would come out. well here we go, this side great.
 IMG_0761 by Ed Fleming, on Flickr
This side, not so much, bit of a gap right on the corner. Oh well, maybe some better preparation. Too late now.
 IMG_0762 by Ed Fleming, on Flickr
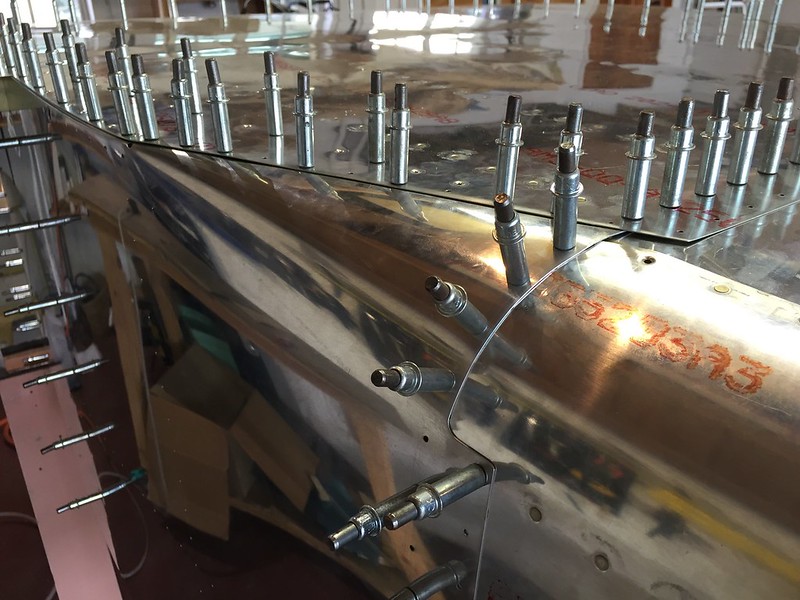
There's really not much else out there that looks quite as good as riveted RV parts!
 IMG_0765 by Ed Fleming, on Flickr
At about this point I was so close to finishing this that I succumbed to temptation and attempted to continue riveting the upper stringers solo. It was working fine, but about 10 rivets from the 706 bulkhead, on the left hand side, I lost control of the bucking bar and dented the skin. Sorry, I didn't take photos, it was too distressing! This mistake will stare me in the face every time I enter the left seat. It's not worth it, wait for riveting help!!
After a few frustrating days without a riveting partner, my lovely wife gave some of her precious time to start shooting on the aft fuse. I had literally lost sleep wondering how these overlaps would come out. well here we go, this side great.
IMG_0761 by Ed Fleming, on FlickrThis side, not so much, bit of a gap right on the corner. Oh well, maybe some better preparation. Too late now.
IMG_0762 by Ed Fleming, on FlickrThere's really not much else out there that looks quite as good as riveted RV parts!
IMG_0765 by Ed Fleming, on FlickrAt about this point I was so close to finishing this that I succumbed to temptation and attempted to continue riveting the upper stringers solo. It was working fine, but about 10 rivets from the 706 bulkhead, on the left hand side, I lost control of the bucking bar and dented the skin. Sorry, I didn't take photos, it was too distressing! This mistake will stare me in the face every time I enter the left seat. It's not worth it, wait for riveting help!!
Last edited:
Z-EDD
Well Known Member
Centre section
Moving on with the updates, here is the centre section coming together. The usual rib prep, not much more of that to do really. I did discover this great little tool from Dremel for getting into relief notches. Is called a detail abrasive brush.
 IMG_0828 by Ed Fleming, on Flickr
I then began assembling the ribs and bulkheads
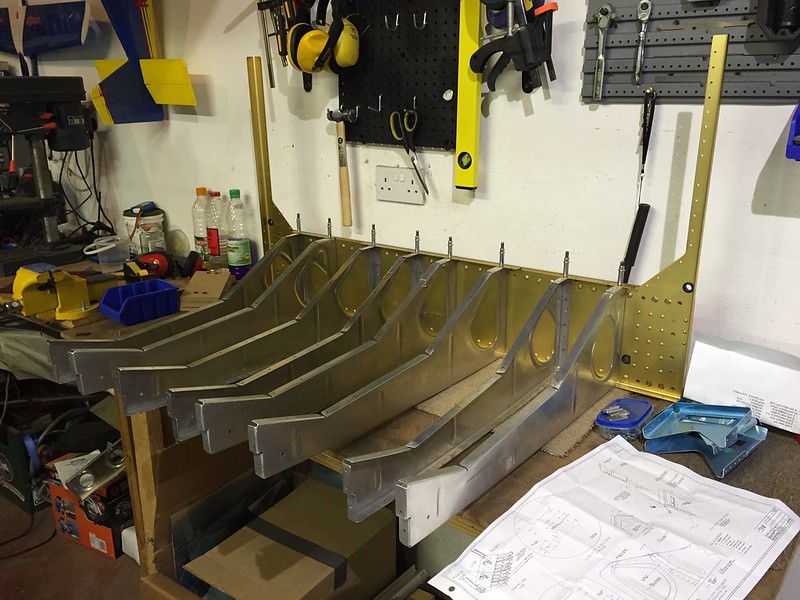 IMG_0742 by Ed Fleming, on Flickr
 IMG_0743 by Ed Fleming, on Flickr
 IMG_0744 by Ed Fleming, on Flickr
The instructions are a bit strange when it comes to fitting these outboard F-715 ribs. They have you fit and drill these after the rest of this structure is riveted. I could see no good reason for this, so I did them now. Seems to be ok so far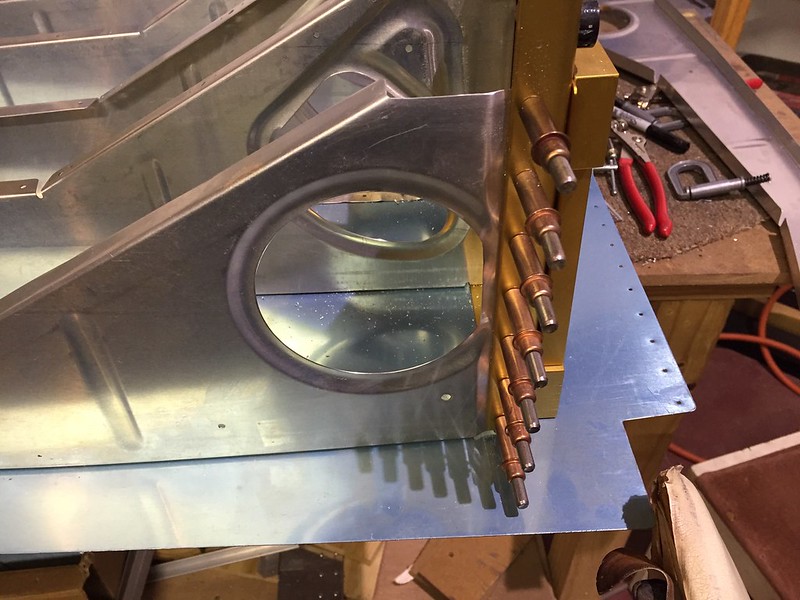 IMG_0745 by Ed Fleming, on Flickr
Moving on with the updates, here is the centre section coming together. The usual rib prep, not much more of that to do really. I did discover this great little tool from Dremel for getting into relief notches. Is called a detail abrasive brush.
IMG_0828 by Ed Fleming, on FlickrI then began assembling the ribs and bulkheads
IMG_0742 by Ed Fleming, on FlickrIMG_0743 by Ed Fleming, on FlickrIMG_0744 by Ed Fleming, on FlickrThe instructions are a bit strange when it comes to fitting these outboard F-715 ribs. They have you fit and drill these after the rest of this structure is riveted. I could see no good reason for this, so I did them now. Seems to be ok so far
IMG_0745 by Ed Fleming, on Flickr
Last edited:
Z-EDD
Well Known Member
Center section continued.
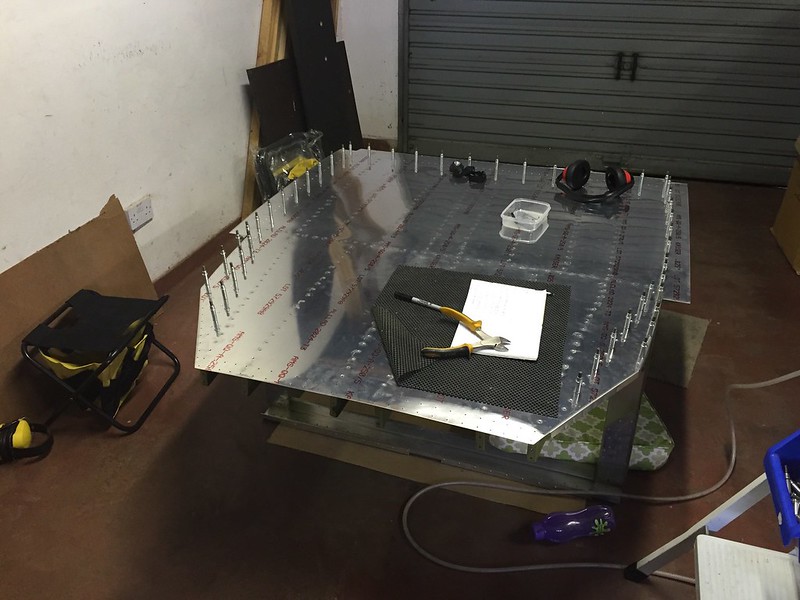
Drilling the bottom skins and countersinking the specified holes.
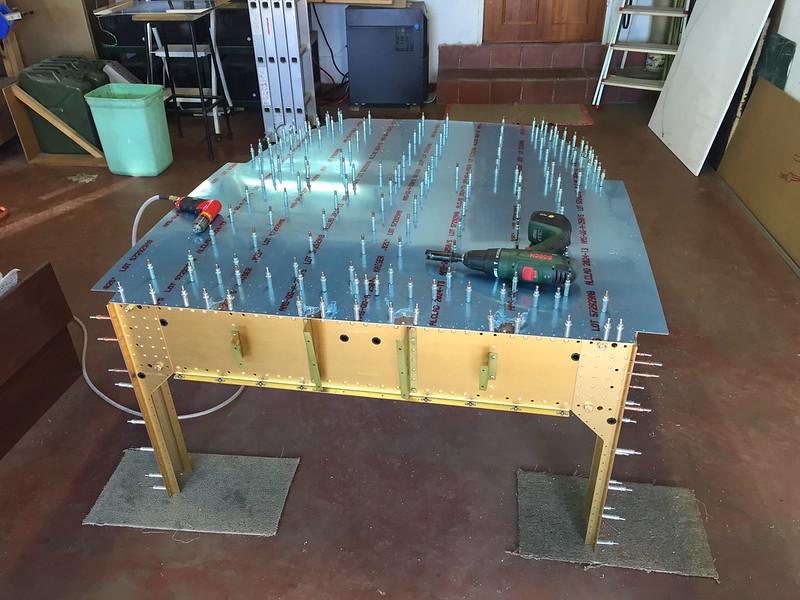 IMG_0756 by Ed Fleming, on Flickr
You can see how the countersink goes through the skin and into the Bulkhead. This is by design and is ok!
 IMG_0757 by Ed Fleming, on Flickr
I fitted the floors and positioned them 1/32nd from the edge of the rib. Not the first time these black clecos have come in handy.
 IMG_0758 by Ed Fleming, on Flickr
Here's the whole thing drilled and ready for disassembly. One part I did't get many pictures of, but you can just see here, is the F-623 corner ribs. The instructions and plans are quite vague on the positioning of this. I had trouble visualising how the skins meet in this area. Now that I have the rest of the fuselage assembled I can advise that it is important to position the forward outer flange (closest in this photo) flush with the F-776 skin. This will allow the F-770 side skins to meet the -776 with little or no gap. Mine won't quite be like that better instructions or a section on the plans would have helped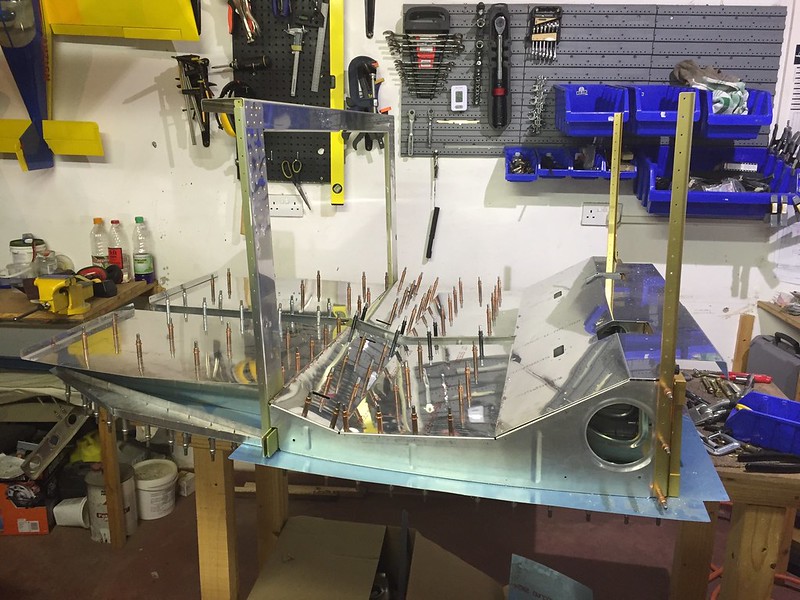 IMG_0760 by Ed Fleming, on Flickr
Drilling the bottom skins and countersinking the specified holes.
IMG_0756 by Ed Fleming, on FlickrYou can see how the countersink goes through the skin and into the Bulkhead. This is by design and is ok!
IMG_0757 by Ed Fleming, on FlickrI fitted the floors and positioned them 1/32nd from the edge of the rib. Not the first time these black clecos have come in handy.
IMG_0758 by Ed Fleming, on FlickrHere's the whole thing drilled and ready for disassembly. One part I did't get many pictures of, but you can just see here, is the F-623 corner ribs. The instructions and plans are quite vague on the positioning of this. I had trouble visualising how the skins meet in this area. Now that I have the rest of the fuselage assembled I can advise that it is important to position the forward outer flange (closest in this photo) flush with the F-776 skin. This will allow the F-770 side skins to meet the -776 with little or no gap. Mine won't quite be like that
better instructions or a section on the plans would have helpedIMG_0760 by Ed Fleming, on Flickr
Last edited:
Z-EDD
Well Known Member
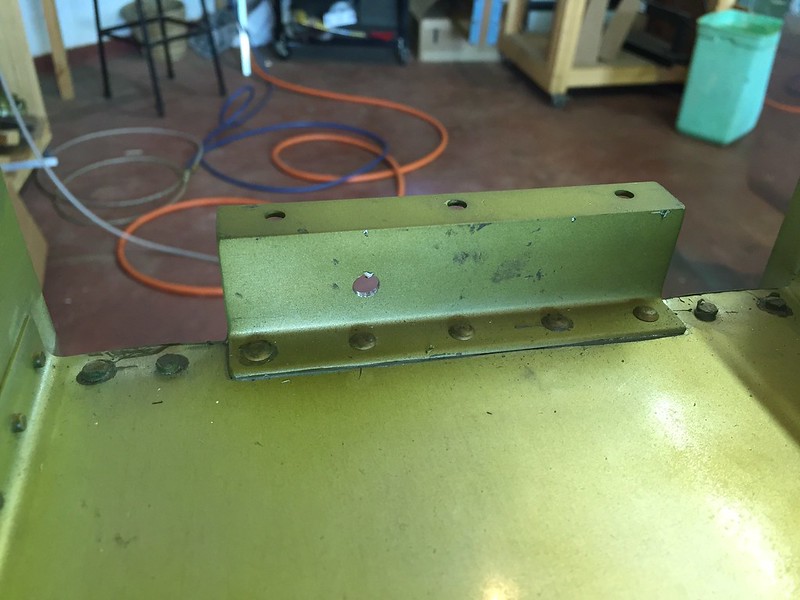
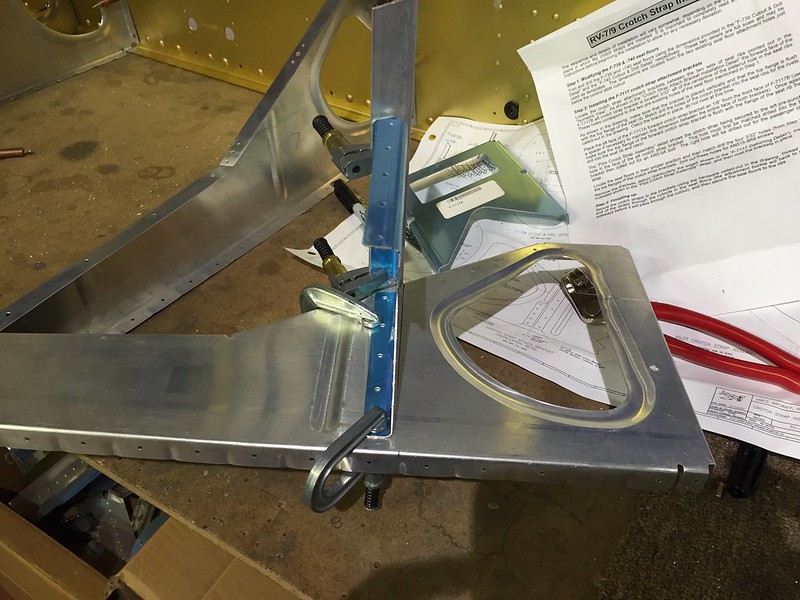
Crotch straps.
Before removing all of the seat ribs, I fitted the crotch strap sub-kit. This is a little tricky as the brackets are pre-punched but they must be positioned and clamped to the ribs and floors for drilling. I ended up using my angle drill attachment quite a bit.
Here is the initial positioning and marking. I used a piece of angle to represent the floor.
 IMG_0747 by Ed Fleming, on Flickr
Here the right side is done and the left is in progress. I used a piece of balsa as a spacer. Multiple clamps were required!
 IMG_0748 by Ed Fleming, on Flickr
The view form the top drilling the upper flanges.
 IMG_0749 by Ed Fleming, on Flickr
I had just received my Crow harnesses. This shot shows how they mount a little lower than the stock harness. Also, they use an AN4 bolt, not AN5. The thickness is the same though, 1/8.
 IMG_0752 by Ed Fleming, on Flickr
All done
 IMG_0753 by Ed Fleming, on Flickr
Before removing all of the seat ribs, I fitted the crotch strap sub-kit. This is a little tricky as the brackets are pre-punched but they must be positioned and clamped to the ribs and floors for drilling. I ended up using my angle drill attachment quite a bit.
Here is the initial positioning and marking. I used a piece of angle to represent the floor.
IMG_0747 by Ed Fleming, on FlickrHere the right side is done and the left is in progress. I used a piece of balsa as a spacer. Multiple clamps were required!
IMG_0748 by Ed Fleming, on FlickrThe view form the top drilling the upper flanges.
IMG_0749 by Ed Fleming, on FlickrI had just received my Crow harnesses. This shot shows how they mount a little lower than the stock harness. Also, they use an AN4 bolt, not AN5. The thickness is the same though, 1/8.
IMG_0752 by Ed Fleming, on FlickrAll done
IMG_0753 by Ed Fleming, on Flickr
Last edited:
Z-EDD
Well Known Member
Centre section prep and Longerons
Here is the F-705 that I completely forgot to photograph while building. Note I did not prime above the spar, in preparation for interior painting. However I have now discovered that my Tempo Zinc Phosphate primer is quite a good undercoat, so I may prime and paint this before riveting.
 IMG_0754 by Ed Fleming, on Flickr
Dimpling setup. I use a steel 8 oz Ball peen hammer for nice crisp dimples.
 IMG_0755 by Ed Fleming, on Flickr
getting started on the longerons. I opted to shape the ends before trimming. If it had gone wrong I could just redo them! IMG_0777 by Ed Fleming, on Flickr
 IMG_0778 by Ed Fleming, on Flickr
 IMG_0779 by Ed Fleming, on Flickr
Here is the F-705 that I completely forgot to photograph while building. Note I did not prime above the spar, in preparation for interior painting. However I have now discovered that my Tempo Zinc Phosphate primer is quite a good undercoat, so I may prime and paint this before riveting.
IMG_0754 by Ed Fleming, on FlickrDimpling setup. I use a steel 8 oz Ball peen hammer for nice crisp dimples.
IMG_0755 by Ed Fleming, on Flickrgetting started on the longerons. I opted to shape the ends before trimming. If it had gone wrong I could just redo them!
IMG_0777 by Ed Fleming, on FlickrIMG_0778 by Ed Fleming, on FlickrIMG_0779 by Ed Fleming, on Flickr
Last edited:
Z-EDD
Well Known Member
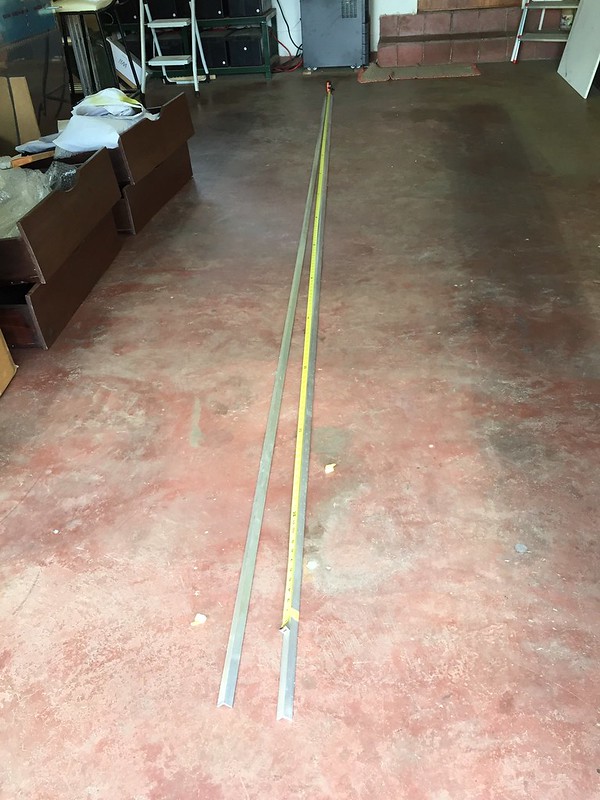
Longeron bending
Measure twice, cut once applies!
 IMG_0780 by Ed Fleming, on Flickr
First one getting there. I had bending dies, but they didn't work for me. I just couldn't find the right amount of torque on my vice, the difference between no result and over bent was minuscule. I reverted to the plans technique but struggled there too. I guess I must just lack the finesse necessary. If it is mathematically possible, I did more unbending than bending, on both sides! Anyway, after 3 frustrating days of on and off work and frustration, it was finally nearly over. IMG_0764 by Ed Fleming, on Flickr
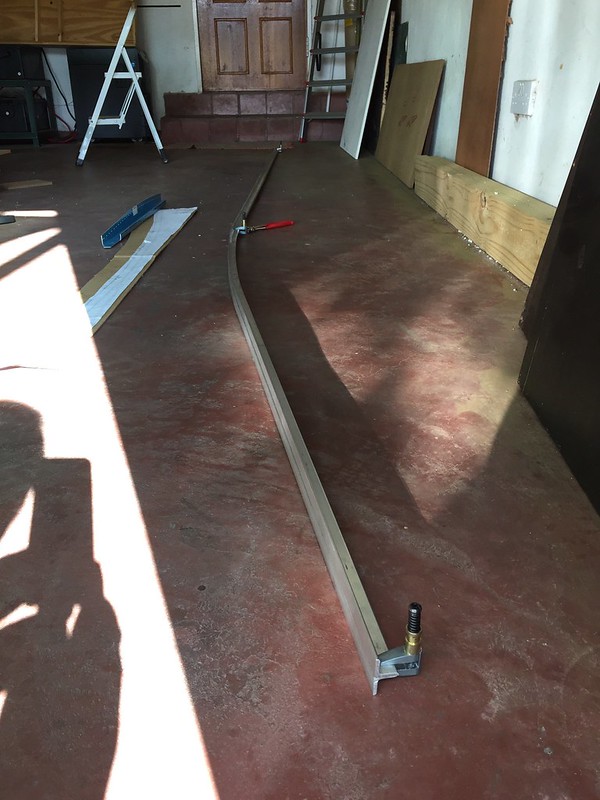 IMG_0769 by Ed Fleming, on Flickr
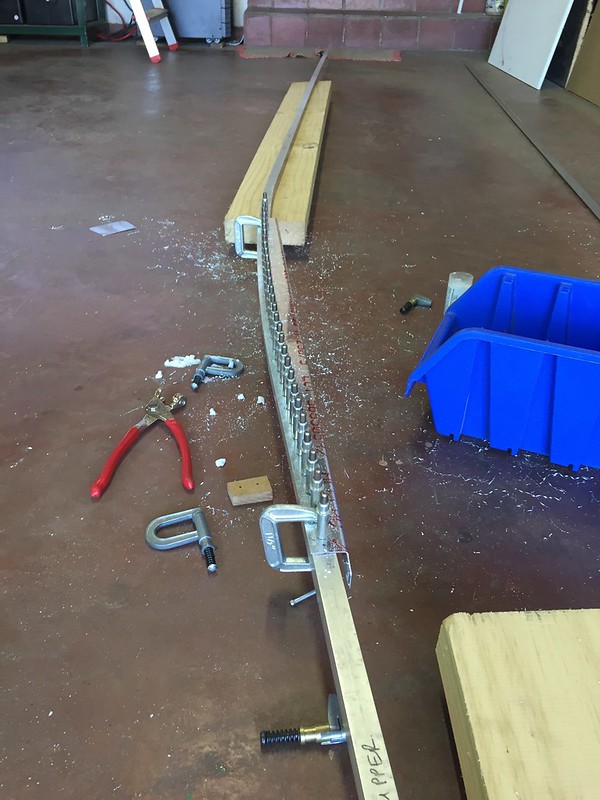 IMG_0770 by Ed Fleming, on Flickr
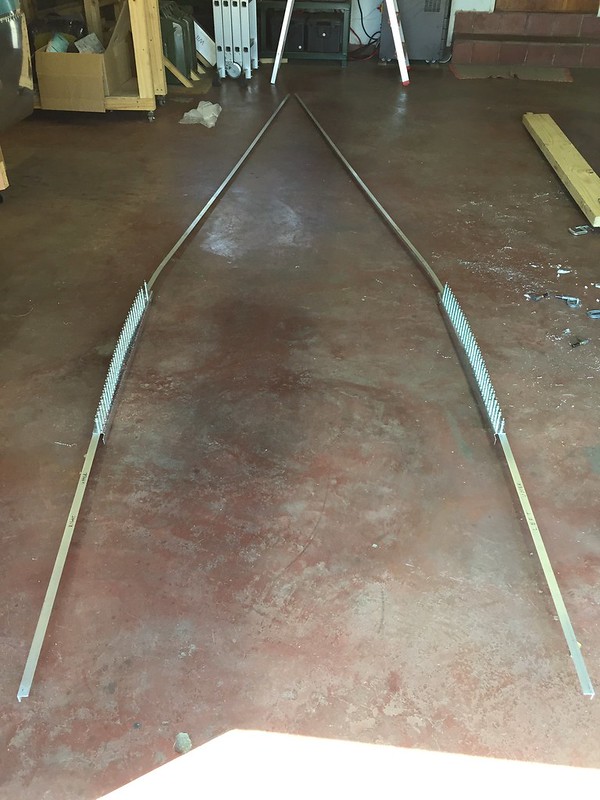 IMG_0771 by Ed Fleming, on Flickr
Measure twice, cut once applies!
IMG_0780 by Ed Fleming, on FlickrFirst one getting there. I had bending dies, but they didn't work for me. I just couldn't find the right amount of torque on my vice, the difference between no result and over bent was minuscule. I reverted to the plans technique but struggled there too. I guess I must just lack the finesse necessary. If it is mathematically possible, I did more unbending than bending, on both sides! Anyway, after 3 frustrating days of on and off work and frustration, it was finally nearly over.
IMG_0764 by Ed Fleming, on FlickrIMG_0769 by Ed Fleming, on FlickrIMG_0770 by Ed Fleming, on FlickrIMG_0771 by Ed Fleming, on Flickr
Last edited:
Z-EDD
Well Known Member
Finishing Longerons
Clamped for the downward bend.
 IMG_0772 by Ed Fleming, on Flickr
Thats about right.
 IMG_0773 by Ed Fleming, on Flickr
The final twist- probably the easiest part, all this stuff wants to do is twist anyway!
 IMG_0774 by Ed Fleming, on Flickr
Slots for F-711C's. This still needs to be opened a bit.
 IMG_0763 by Ed Fleming, on Flickr
Clamped for the downward bend.
IMG_0772 by Ed Fleming, on FlickrThats about right.
IMG_0773 by Ed Fleming, on FlickrThe final twist- probably the easiest part, all this stuff wants to do is twist anyway!
IMG_0774 by Ed Fleming, on FlickrSlots for F-711C's. This still needs to be opened a bit.
IMG_0763 by Ed Fleming, on Flickr
Last edited:
Z-EDD
Well Known Member
Riveting the centre section.
 IMG_3399 by Ed Fleming, on Flickr
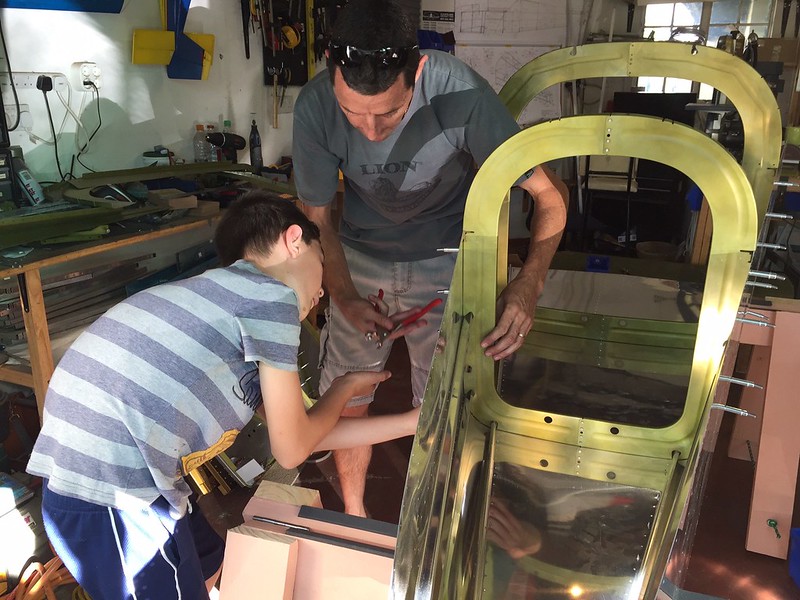
Most of this beautiful riveting was done by my Wife. She seemed almost as keen as I was to get it done and assemble the fuse
 IMG_0782 by Ed Fleming, on Flickr
 IMG_0786 by Ed Fleming, on Flickr
I put the seat floors in place but left off the baggage floors, since it makes it easier to fit to the aft fuse. Once the parts were joined I put the baggage floors in place. Ready to join to the Aft fuse!
IMG_3399 by Ed Fleming, on FlickrMost of this beautiful riveting was done by my Wife. She seemed almost as keen as I was to get it done and assemble the fuse
IMG_0782 by Ed Fleming, on FlickrIMG_0786 by Ed Fleming, on FlickrI put the seat floors in place but left off the baggage floors, since it makes it easier to fit to the aft fuse. Once the parts were joined I put the baggage floors in place. Ready to join to the Aft fuse!
Last edited:
Z-EDD
Well Known Member
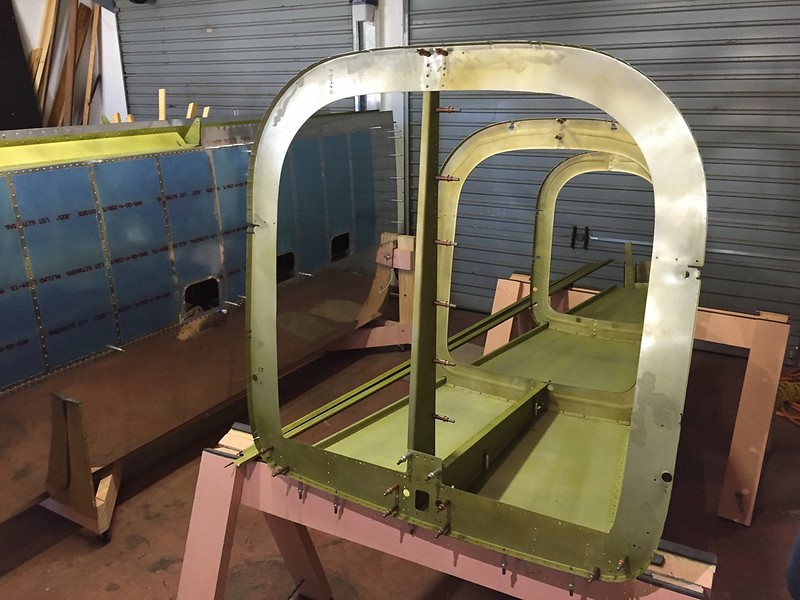
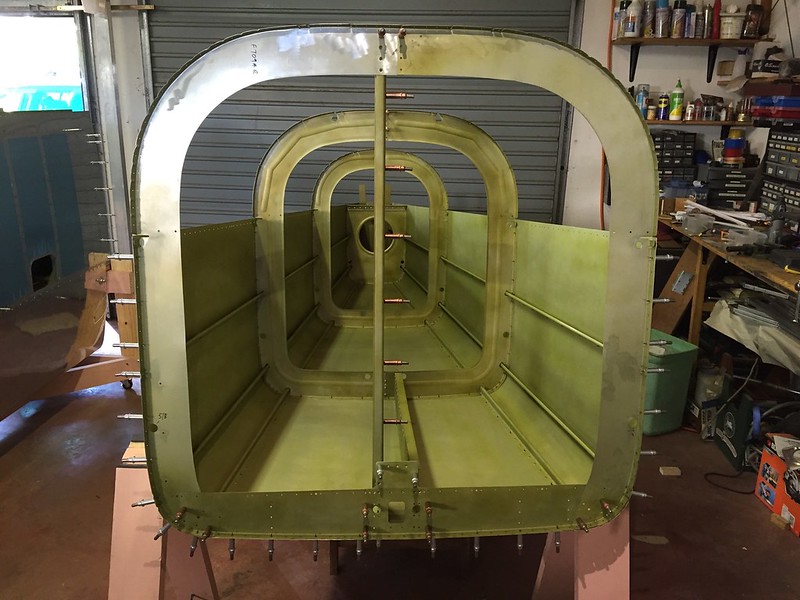
Fuselage assembled!
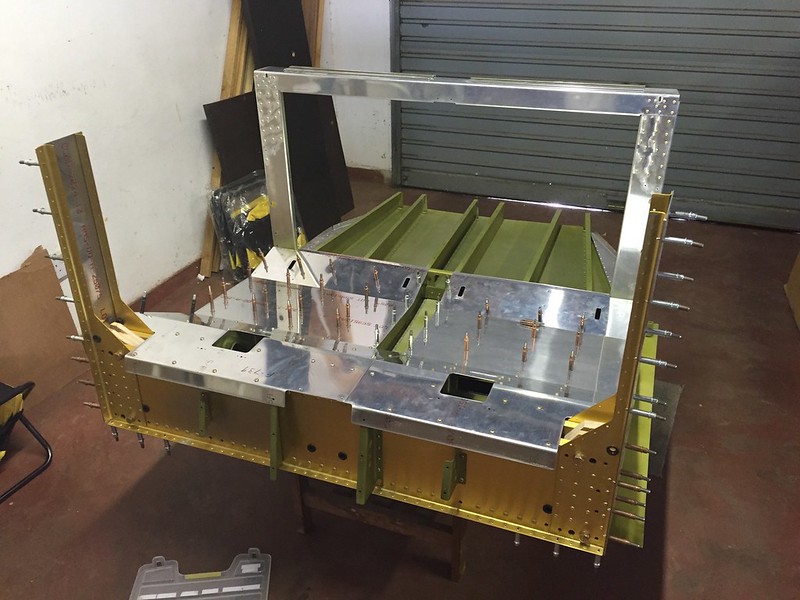
This was an awesome RV building day! As soon as we finished riveting the centre section, I put the longerons in place, and arranged the sawhorses. Then we lifted the centre section into place. the clecos are tough to get in at first, but then it all starts to line up and comes together.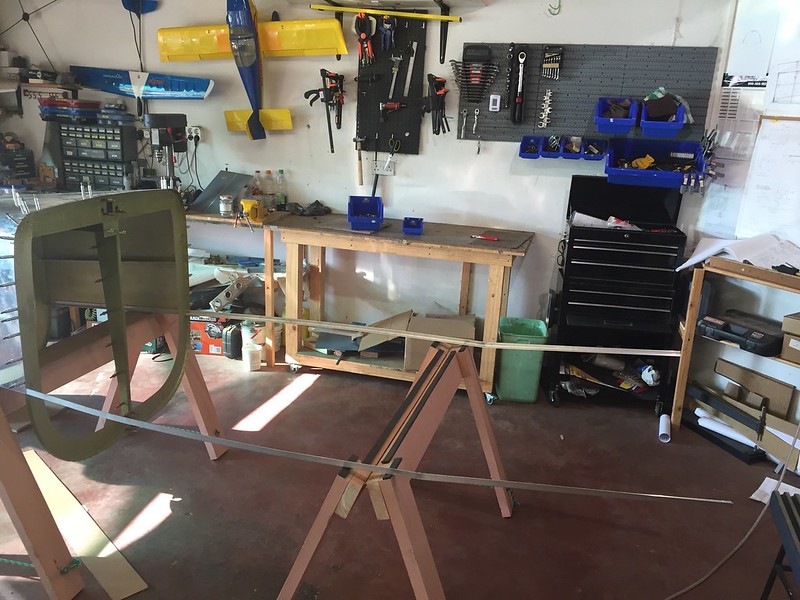 IMG_0789 by Ed Fleming, on Flickr
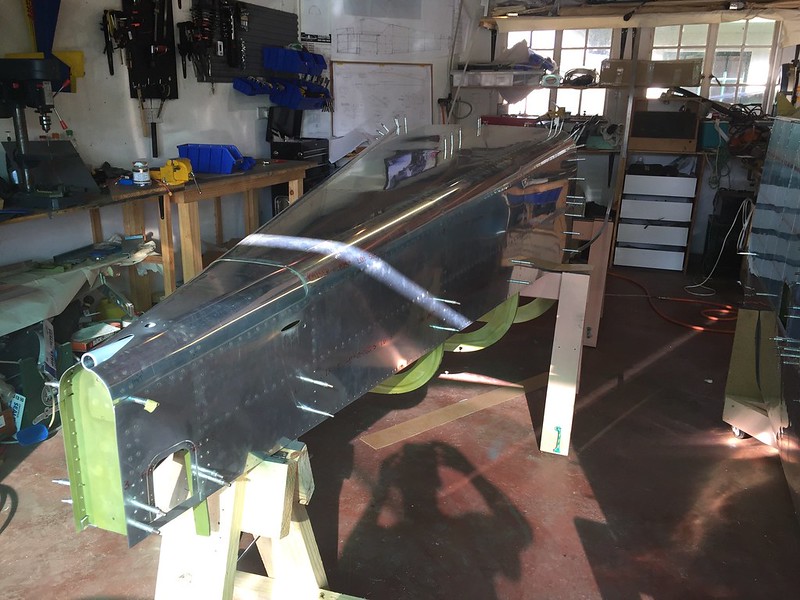 IMG_0790 by Ed Fleming, on Flickr
 IMG_0791 by Ed Fleming, on Flickr
 IMG_0792 by Ed Fleming, on Flickr
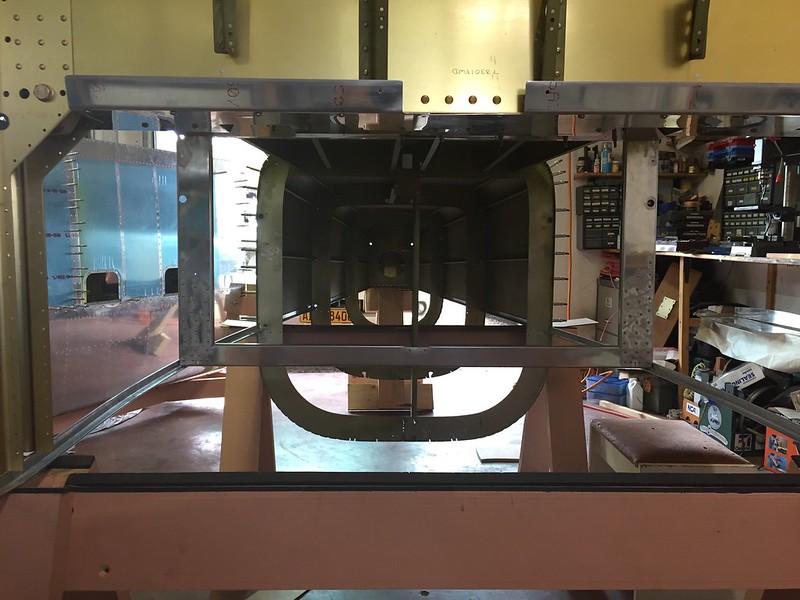 IMG_0794 by Ed Fleming, on Flickr
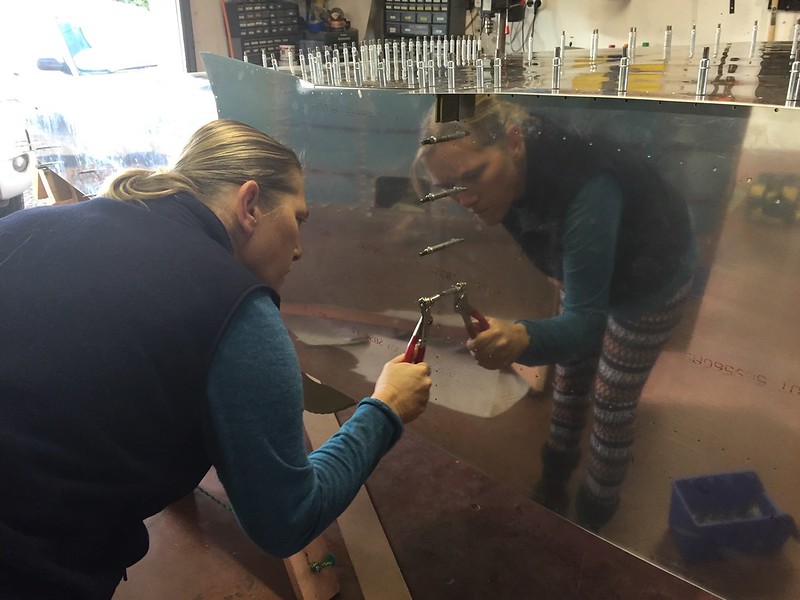 IMG_0795 by Ed Fleming, on Flickr
This was an awesome RV building day! As soon as we finished riveting the centre section, I put the longerons in place, and arranged the sawhorses. Then we lifted the centre section into place. the clecos are tough to get in at first, but then it all starts to line up and comes together.
IMG_0789 by Ed Fleming, on FlickrIMG_0790 by Ed Fleming, on FlickrIMG_0791 by Ed Fleming, on FlickrIMG_0792 by Ed Fleming, on FlickrIMG_0794 by Ed Fleming, on FlickrIMG_0795 by Ed Fleming, on Flickr
Last edited:
Skykingbob
Well Known Member
Nice!
Great looking photos Ed.....looks like you are going to have a great-7
Great looking photos Ed.....looks like you are going to have a great-7
Neal Trombley
Well Known Member
Build looks awesome
Rob Rickards
Active Member
Zakanaka
Hi Ed,
Looks good. Very good. Looks like the Zimbo VAF guys are going strong. Any idea of how many RV's flying and being built by the intrepids in Zim?
Cheers Rob (ex MFC and Air Zim)
Hi Ed,
Looks good. Very good. Looks like the Zimbo VAF guys are going strong. Any idea of how many RV's flying and being built by the intrepids in Zim?
Cheers Rob (ex MFC and Air Zim)
Z-EDD
Well Known Member
Thanks for all the comments. I need to get some air under the eflite RV's wings sometime, amazing how old hobbies fall away when you get into this.
Hi Rob. Flying RV's have multiplied to about 6 I believe. Most recent additions were brought in flying or nearly flying. Another 4 are under construction that I know of. Should have a full squadron soon!
Hi Ed,
Looks good. Very good. Looks like the Zimbo VAF guys are going strong. Any idea of how many RV's flying and being built by the intrepids in Zim?
Cheers Rob (ex MFC and Air Zim)
Hi Rob. Flying RV's have multiplied to about 6 I believe. Most recent additions were brought in flying or nearly flying. Another 4 are under construction that I know of. Should have a full squadron soon!
Last edited:
Z-EDD
Well Known Member
Conical bends
 IMG_0803 by Ed Fleming, on Flickr
This gap is due to poor positioning of F-623. Also note the edge distance problem on the aft most hole. More care is required with positioning F-623, wish I could start over. Probably would be better to drill it just before making the conical bends.
 IMG_0804 by Ed Fleming, on Flickr
Instructions don't mention this either, but you need to bend these tabs up to fit flush
 IMG_0814 by Ed Fleming, on Flickr
IMG_0803 by Ed Fleming, on FlickrThis gap is due to poor positioning of F-623. Also note the edge distance problem on the aft most hole. More care is required with positioning F-623, wish I could start over. Probably would be better to drill it just before making the conical bends.
IMG_0804 by Ed Fleming, on FlickrInstructions don't mention this either, but you need to bend these tabs up to fit flush
IMG_0814 by Ed Fleming, on Flickr
Last edited:
Z-EDD
Well Known Member
Starting the forward fuselage
 IMG_0815 by Ed Fleming, on Flickr
 IMG_0816 by Ed Fleming, on Flickr
 IMG_0817 by Ed Fleming, on Flickr
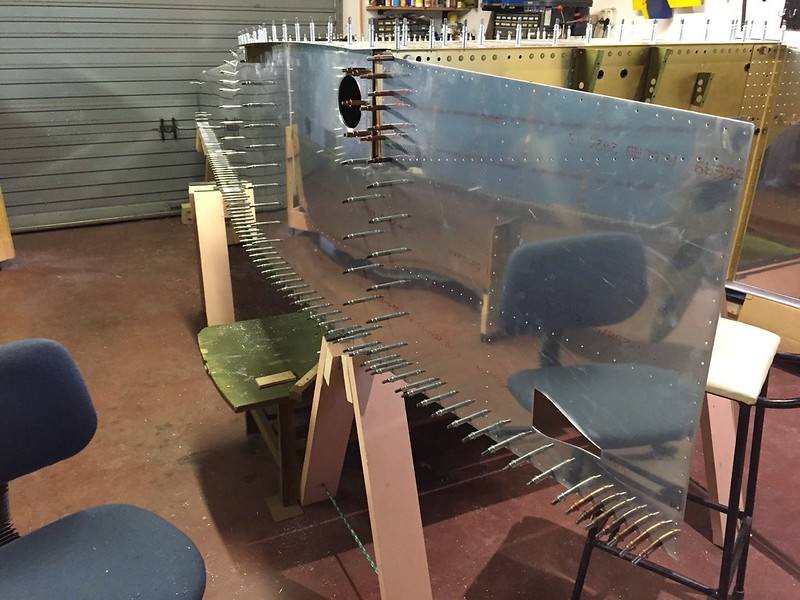 IMG_0818 by Ed Fleming, on Flickr
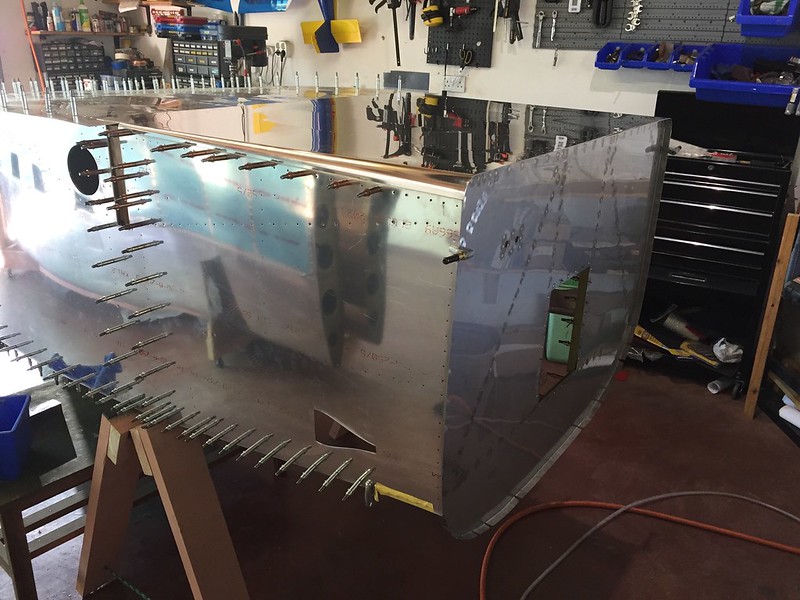 IMG_0827 by Ed Fleming, on Flickr
IMG_0815 by Ed Fleming, on FlickrIMG_0816 by Ed Fleming, on FlickrIMG_0817 by Ed Fleming, on FlickrIMG_0818 by Ed Fleming, on FlickrIMG_0827 by Ed Fleming, on Flickr
Last edited:
Z-EDD
Well Known Member
 IMG_0822 by Ed Fleming, on Flickr
 IMG_0823 by Ed Fleming, on Flickr
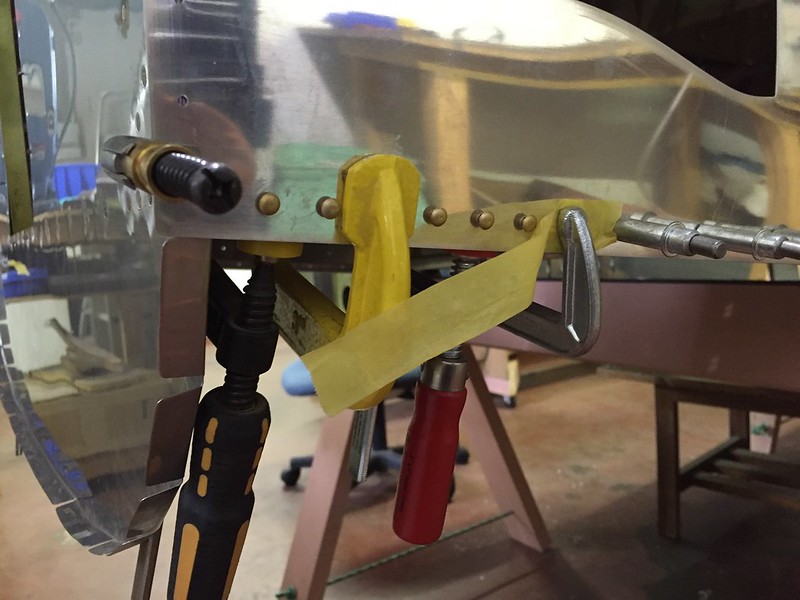 IMG_0819 by Ed Fleming, on Flickr
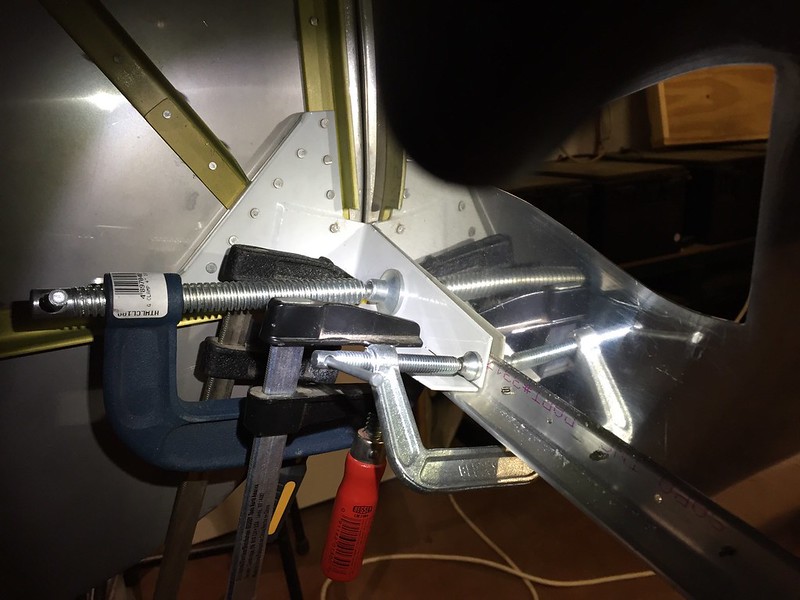 IMG_0820 by Ed Fleming, on Flickrhttps://flic.kr/p/YTmXQh
Last edited:
Z-EDD
Well Known Member
Aux Longerons and side stiffeners
 IMG_0809 by Ed Fleming, on Flickr
 IMG_0810 by Ed Fleming, on Flickr
Watch out for that one hole that is off the centreline! It needs to have good edge distance, and will only be drilled along with the F-684 gussets.
 IMG_0811 by Ed Fleming, on Flickr
Used F-902 to help secure side stiffener in position during fitting.
 IMG_0812 by Ed Fleming, on Flickr
Some guys use a squeezer to "improve" this joggle, but I've seen that go wrong and cause the part to crack. So I used my longeron dies to impart a little bit of a curve here. There was still a bit of a gap so I filled that later with a shim.
 IMG_0813 by Ed Fleming, on Flickr
 IMG_0805 by Ed Fleming, on Flickr
Heres how I finally drilled the angle clip to the firewall angle. Note drill stop to protect the skin. Angle drill fitting has been invaluable during this phase!
IMG_0809 by Ed Fleming, on FlickrIMG_0810 by Ed Fleming, on FlickrWatch out for that one hole that is off the centreline! It needs to have good edge distance, and will only be drilled along with the F-684 gussets.
IMG_0811 by Ed Fleming, on FlickrUsed F-902 to help secure side stiffener in position during fitting.
IMG_0812 by Ed Fleming, on FlickrSome guys use a squeezer to "improve" this joggle, but I've seen that go wrong and cause the part to crack. So I used my longeron dies to impart a little bit of a curve here. There was still a bit of a gap so I filled that later with a shim.
IMG_0813 by Ed Fleming, on FlickrIMG_0805 by Ed Fleming, on FlickrHeres how I finally drilled the angle clip to the firewall angle. Note drill stop to protect the skin. Angle drill fitting has been invaluable during this phase!
Last edited:
Z-EDD
Well Known Member
Lower longerons
Always amazes me how some parts in this kit are so nicely pre-fabricated, and then others are not at all! The aux longerons came nicely cut, and just needed slight trimming to length. The lower longerons on the other hand, are just a single length of angle, and need a lot of work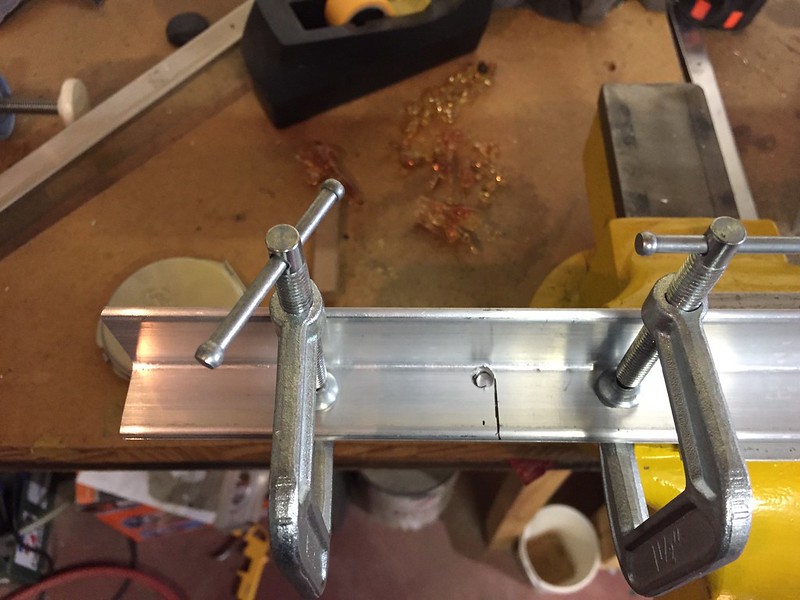 IMG_0806 by Ed Fleming, on Flickr
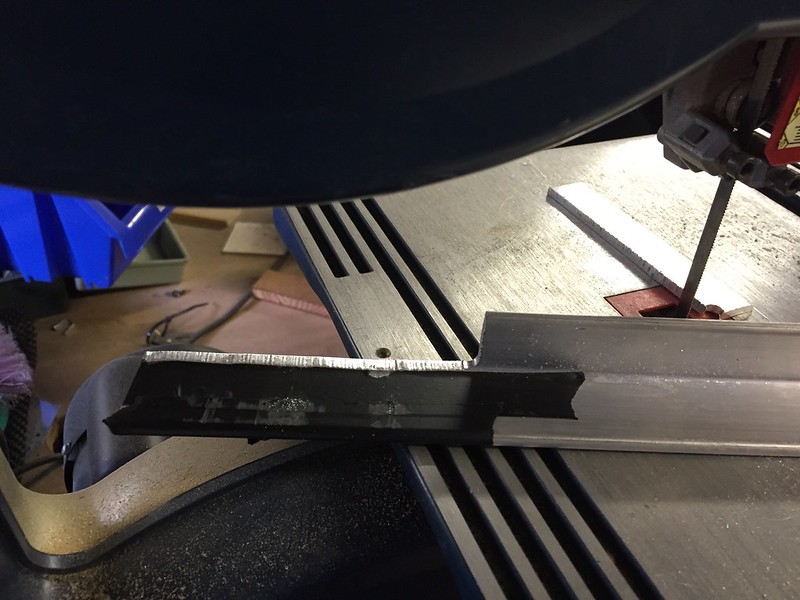 IMG_0807 by Ed Fleming, on Flickr
 IMG_0808 by Ed Fleming, on Flickr
Always amazes me how some parts in this kit are so nicely pre-fabricated, and then others are not at all! The aux longerons came nicely cut, and just needed slight trimming to length. The lower longerons on the other hand, are just a single length of angle, and need a lot of work
IMG_0806 by Ed Fleming, on FlickrIMG_0807 by Ed Fleming, on FlickrIMG_0808 by Ed Fleming, on Flickr
Last edited:
Z-EDD
Well Known Member
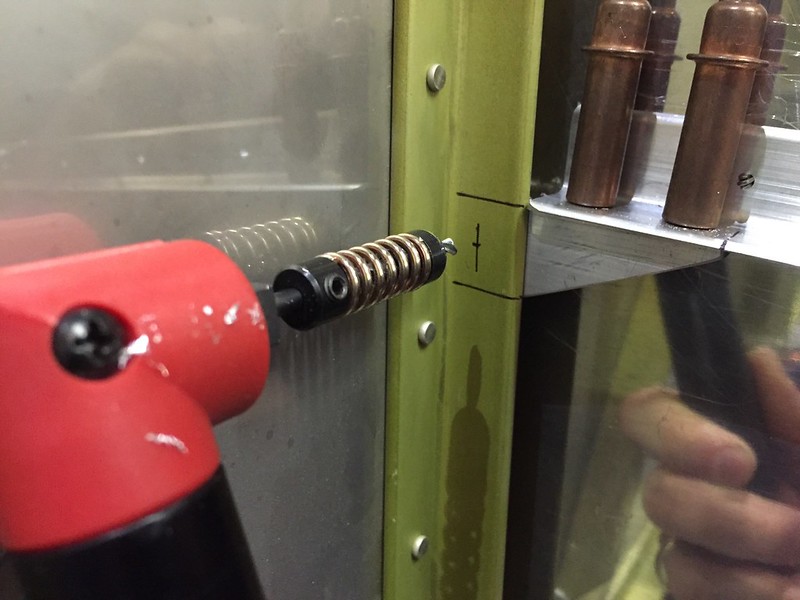
Drilling firewall brackets
When drilling the lower longerons to the firewall brackets, edge distance on the steel bracket also needs to be preserved. here is how I marked the longerons to show the underlying bracket.
 IMG_0831 by Ed Fleming, on Flickr
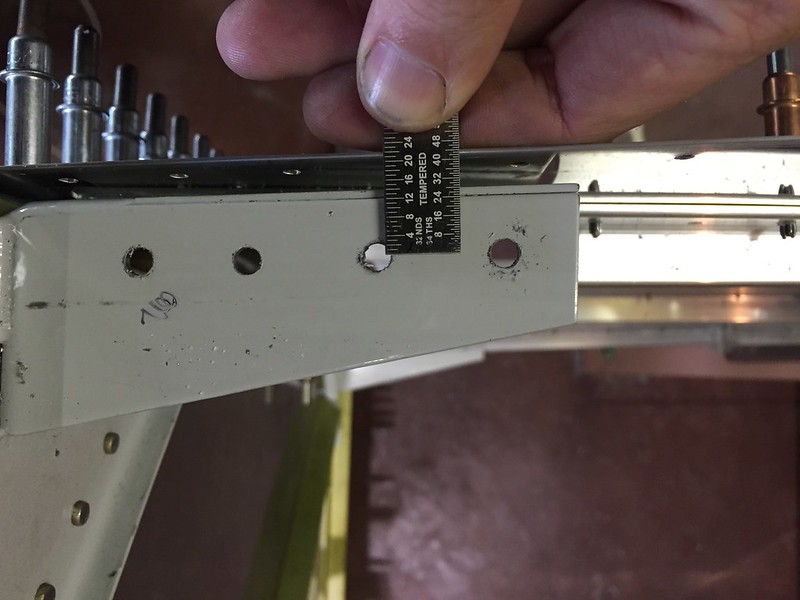 IMG_0832 by Ed Fleming, on Flickr
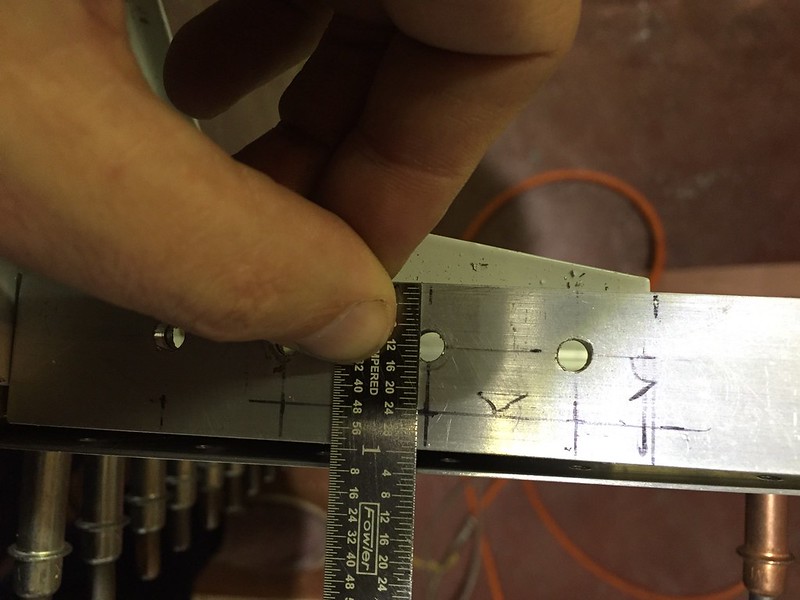 IMG_0833 by Ed Fleming, on Flickr
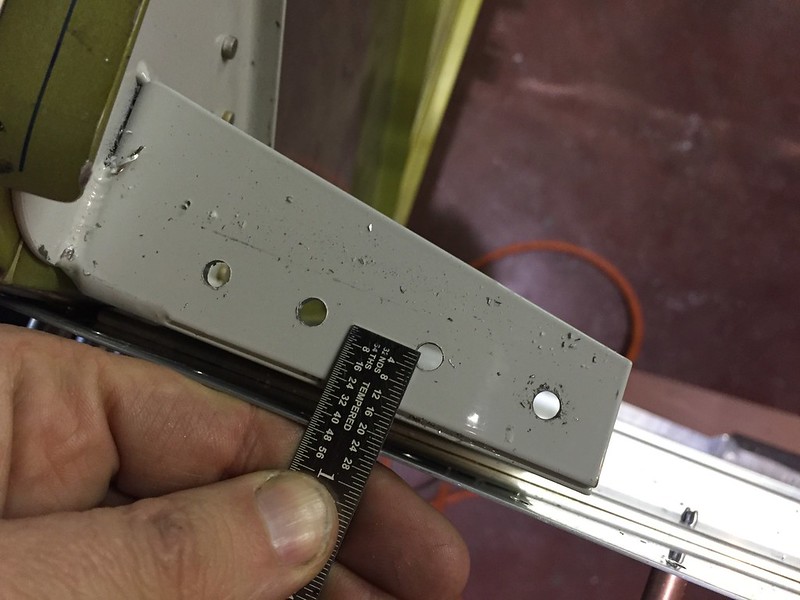 IMG_0834 by Ed Fleming, on Flickr
When drilling the lower longerons to the firewall brackets, edge distance on the steel bracket also needs to be preserved. here is how I marked the longerons to show the underlying bracket.
IMG_0831 by Ed Fleming, on FlickrIMG_0832 by Ed Fleming, on FlickrIMG_0833 by Ed Fleming, on FlickrIMG_0834 by Ed Fleming, on Flickr
Last edited:
Z-EDD
Well Known Member
Rudder pedals
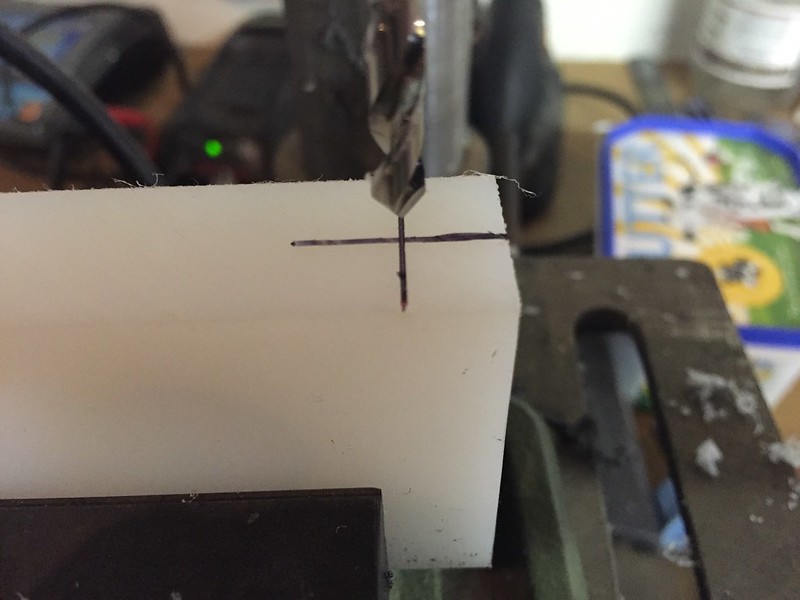 IMG_0866 by Ed Fleming, on Flickr
Drilled the UHMW blocks with 3/16 plastic bit. Definitely works better, but the bolts wouldn't fit the 3/16 hole. When I drilled out with the number 10 bit it was as bad as using it in the first place!
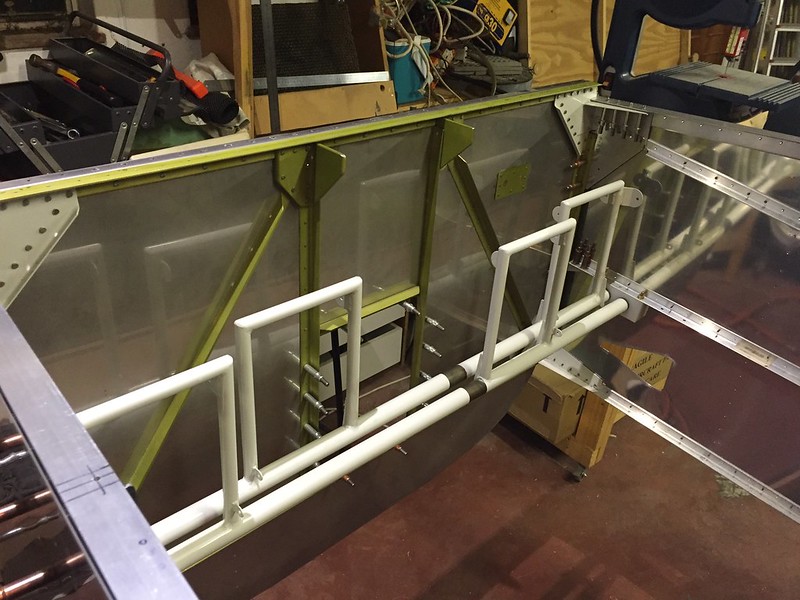 IMG_0843 by Ed Fleming, on Flickr
Rudder pedals fitted. 3 positions as others have managed. I'm saving the brake pedals for the inevitable frustrating days waiting for a riveting partner!
IMG_0866 by Ed Fleming, on FlickrDrilled the UHMW blocks with 3/16 plastic bit. Definitely works better, but the bolts wouldn't fit the 3/16 hole. When I drilled out with the number 10 bit it was as bad as using it in the first place!
IMG_0843 by Ed Fleming, on FlickrRudder pedals fitted. 3 positions as others have managed. I'm saving the brake pedals for the inevitable frustrating days waiting for a riveting partner!
Last edited:
Z-EDD
Well Known Member
Edge distance issues on floor stiffeners
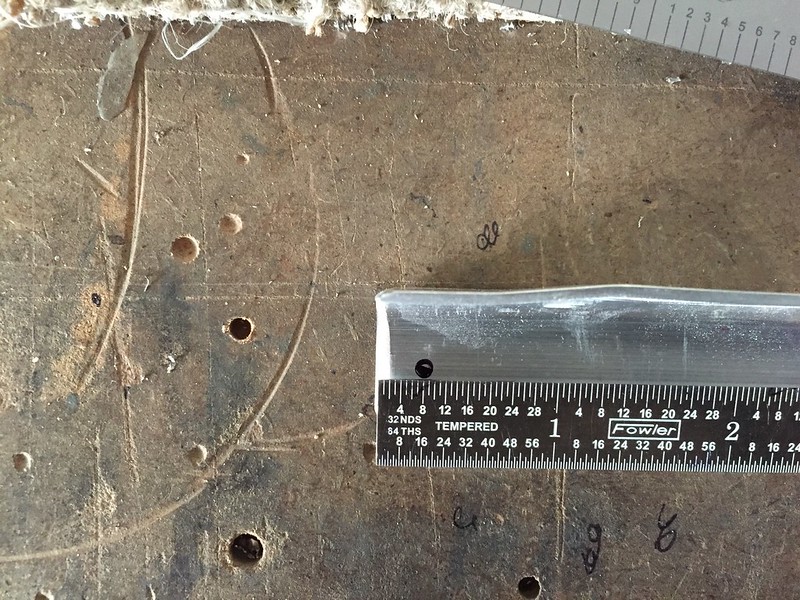 IMG_0854 by Ed Fleming, on Flickr
The aft end is just OK.
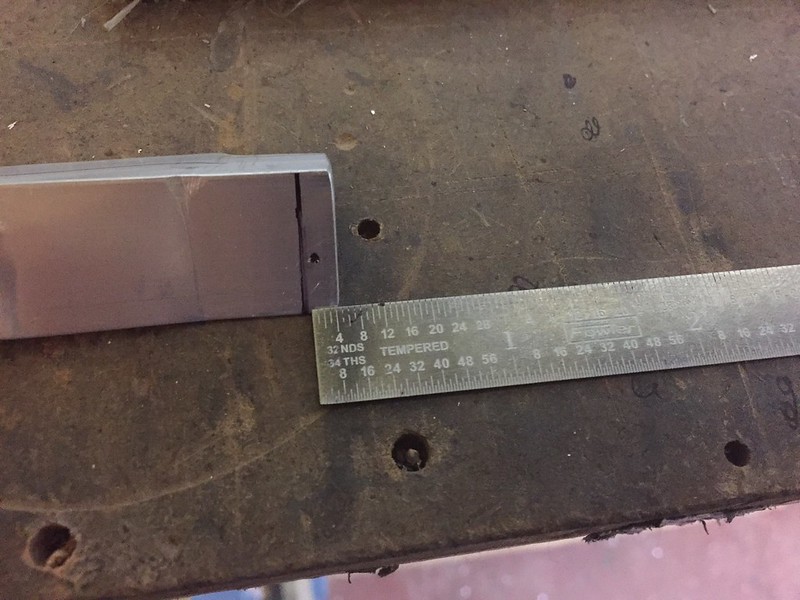 IMG_0868 by Ed Fleming, on Flickr
But not the forward. After some consideration and research I decided to drill a new hole with the seat support rib. Apparently that aft most hole is really difficult to rivet anyway so I abandoned it. The new hole is 2D from the abandoned hole and 3D from the middle hole.
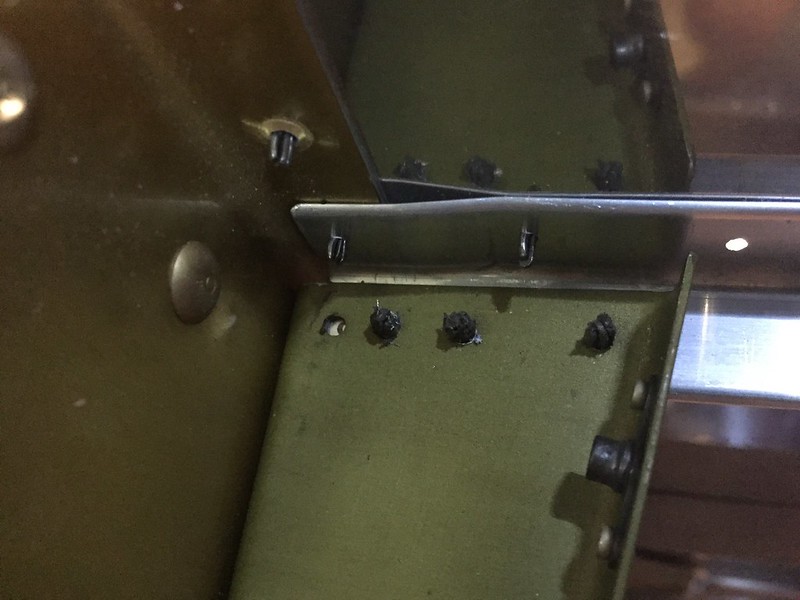 IMG_0882 by Ed Fleming, on Flickr
Here's how it turned out. Note I'm down to the proseal clecos at this point!
IMG_0854 by Ed Fleming, on FlickrThe aft end is just OK.
IMG_0868 by Ed Fleming, on FlickrBut not the forward. After some consideration and research I decided to drill a new hole with the seat support rib. Apparently that aft most hole is really difficult to rivet anyway so I abandoned it. The new hole is 2D from the abandoned hole and 3D from the middle hole.
IMG_0882 by Ed Fleming, on FlickrHere's how it turned out. Note I'm down to the proseal clecos at this point!
Last edited:

