

One of the few things I would like to have work better on my RV-8 is the aileron trim. It?s the standard spring bias system common in RV?s today ? whether manual or electric, the net result is that it applies a spring force to the stick to pull it left or right. This is pretty much akin to putting a thumb on a control yoke to counter a heavy wing.
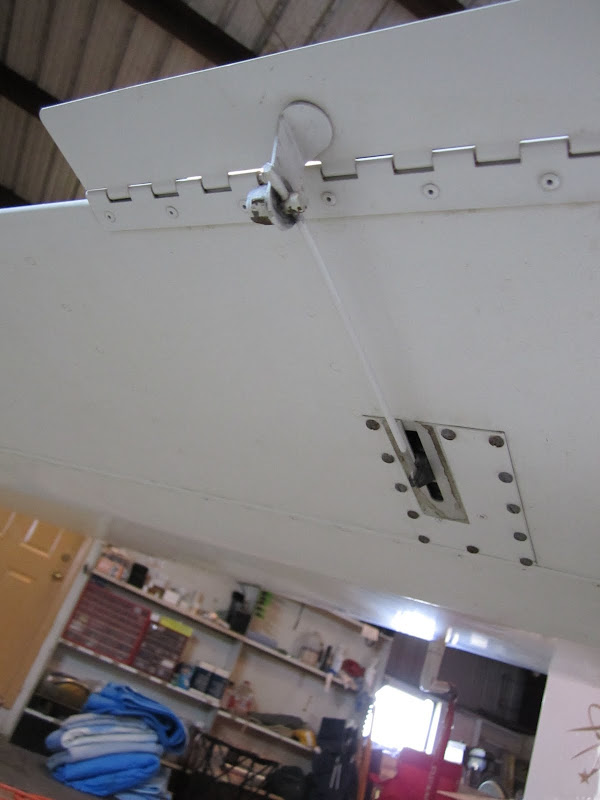
I was pleasantly surprised to find that Louise?s RV-6 has three-axis trim ? and it is done with trim tabs on the control surfaces! You have to remember that her plane was kit #4, built when there was still a lot of development work being on the model, and different things were being tried. The builder installed small trailing edge trim tabs on the left aileron and the rudder, with servos embedded in the surfaces themselves and a pushrod to what is not much more than a piece of wide piano hinge riveted to the trailing edge of the surface. They are amazingly effective, providing crisp and quick trim to the aircraft. While probably adding a touch of drag when deflected, it is not hard to put them in trail if you want, and flying the plane out of trim is draggy anyway.
The RV-6 Aileron Trim - I heard that it was an STC'd kit for a Mooney, but that could be rumor.
Since we are building the RV-3 as a Technically Advanced airplane, and because the stick grip has a coolie hat that just begs to drive aileron trim, I decided to copy the RV-6 trim system. Van?s actually has early drawings for the system, but I discovered that they were going to be hard to adapt to the smaller ailerons of the -3, and that our RV-6 wasn?t built to them anyways. This was going to be a ?design as you go? effort ? but that is half the fun of homebuilding.
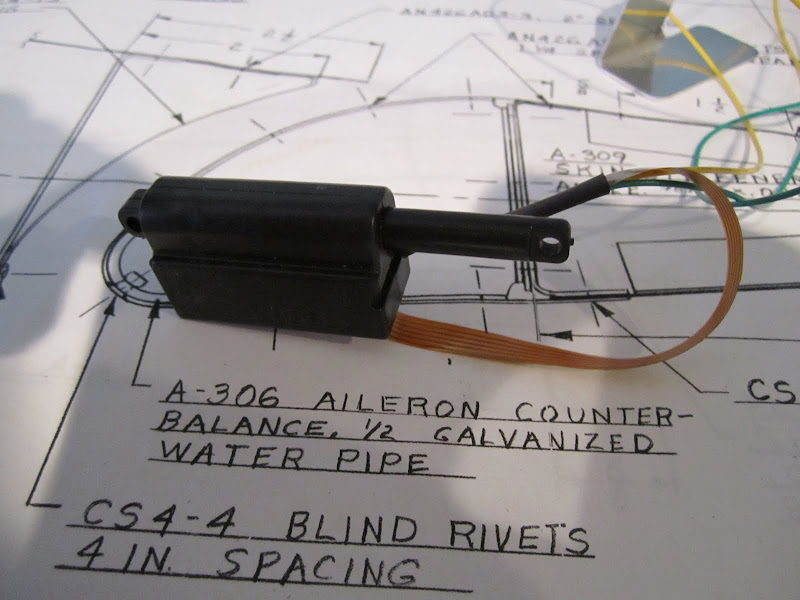
The first problem I dealt with was sticker shock on the price of a servo. The Ray Allen servos that are used pretty much exclusively in the homebuilding world are awfully precious I guess ? and the ?compact? version is even more costly. Sure, I wanted aileron trim?.but for $290 per servo?! I talked about this with other builders on and off, and one day, I received a note from one of them suggesting that I take a look at the web site www.firgelli.com . They appeared to have a line (three different basic sizes, with different gear ratios for each) of very compact linear actuators intended for use in RC and robotics applications. I was intrigued, and collaborated with a few engineers in the RV world to see if we could make the force and strokes work for moving small surface trim tabs. Surprisingly, the tiniest actuator appeared to have just what we would need, so I ordered a pair for our project ? at $65 each, they were a real bargain ? compared to the alternatives! (To avoid nervousness on the part of the vendor, I try to not tell them it's for an airplane!)
The Firgelli PQ12 - if you order one, let's not tell them its for an airplane, OK?
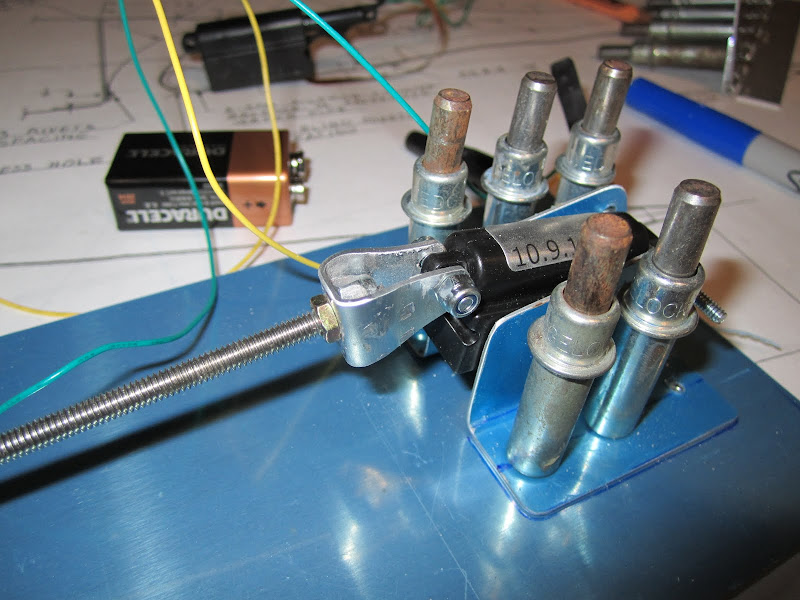
The actuators arrived in a little over a week, and I didn?t waste much time hooking them up to a 9 volt battery to try them out. Encouraged by what I saw, I laid one on the full-sized side view of the aileron, and there was no doubt they would fit. Using some of my memories and pictures of how the trim servo was mounted in my RV-8 elevator, and having access to RV-6 and -8 drawings (plus the two airplanes), I began making bits and pieces to mount the servo. I opted for a completely self-contained ?plate? design ? the servo would be mounted to a plate through which the pushrod would pass to get back to the trailing edge of the surface. This would the cover a large access hole cut in the aileron, and be very easy to remove and replace for maintenance and modification. The trim tab would simply be a piece of piano hinge pop-riveted to the trailing edge itself. Not having a piece of hinge with 1.5? flanges handy, I built a tab up using skinny hinge and aluminum scrap. The side view drawing of the aileron was invaluable for determining the shape and height of the control horn, which I fabricated and riveted in place.
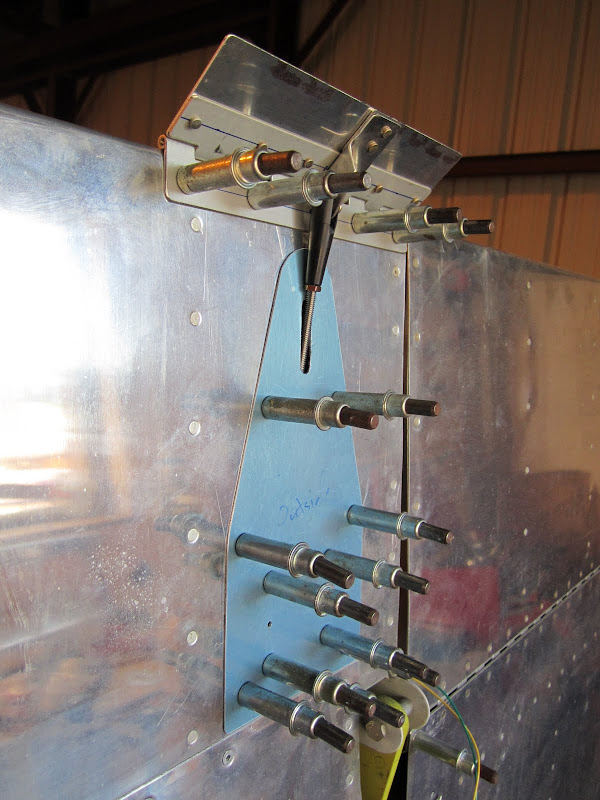
This picture shows the simple mounting brackets and pushrod yoke.
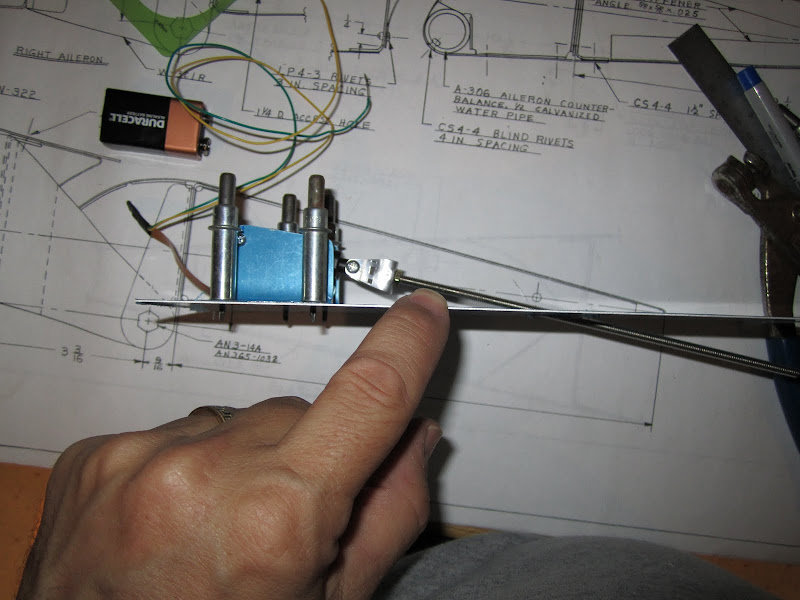
I think it's going to fit!
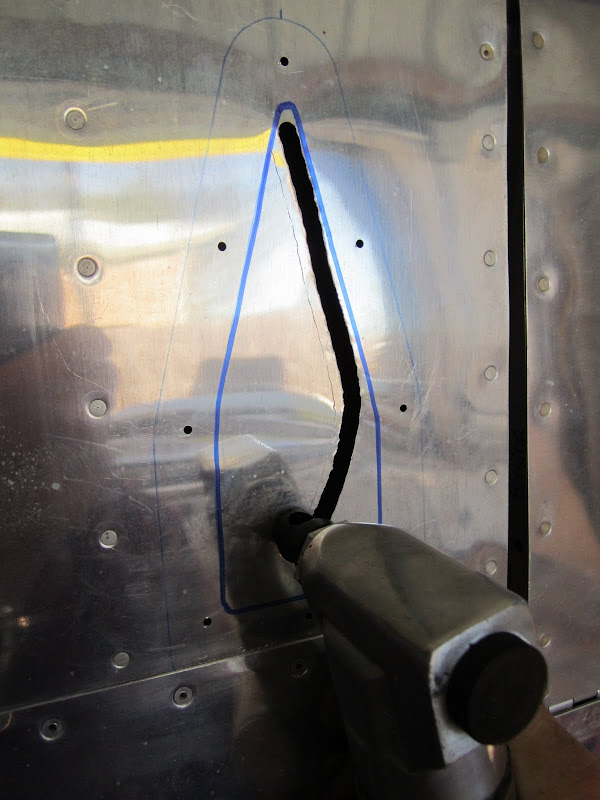
Probably the toughest part of the job was cutting a large hole in our QB aileron ? if I messed it up, I was going to have to buy parts and build another one. But sort of like cutting a hole in your leading edge for Duckworks lights, it sounds worse than it is. Using the removable plate concept made it quite simple, and the air nibbler made quick work of the task. The plate stiffens the area very nicely, and fabricating a frame/backing plate made drilling the holes very simple (I used it as a template).
It was actually a simple retrofit to a finished aileron.
The small size of the actuator meant that I had to make a few adjustments to ?normal? attaching hardware. I had to build a special attaching yoke for the threaded pushrod that we use to link it to the tab for instance. Metric hardware is included with the actuator and the brackets had to fit that ? but overall, there was nothing that couldn?t be solved with a little thinking. The actuators have built-in position feedback, and while I am going to bring that out and in to the aircraft, I won?t really know how it works until I get more of the avionics wired up. As with the Ray Allen servos, the speed of the actuators can be reduced by lowering the voltage, and they are somewhat quick at 12 volts ? so a speed reduction circuit may be desirable. My next job will be to use what I have learned to build a similar tab for the rudder ? I see no difficulties with this, although dimensions will be slightly different.
A few rivets and nutplates, and it will be finished!
Can these actuators be used for pitch trim? It sure would be nice to use less expensive pieces, but I consider pitch trim to be a pretty important flight control, so we?ll have to be sure that the rates and travel are adequate. I am happy with the quality of the Firgellis, and that is a good first step. I doubt that these little units will have enough ?oomph? to handle the larger elevator tab, but the company makes more powerful units in a bit larger size. We?re working on the calculations now ? time will tell.
Creating the aileron trim was a lot of fun, and it was nice to have a model from the early -6 to work from. I built the new parts without doing any drawings ? another fun way to work in the shop, just real-time prototyping. Cutting and fitting, letting the material and space available be my guide ? it?s a different way to design (for an engineer) ? more like art than science. But when it works, it is very rewarding ? the essence of homebuilding in a prefab kit world.
Paul
I was pleasantly surprised to find that Louise?s RV-6 has three-axis trim ? and it is done with trim tabs on the control surfaces! You have to remember that her plane was kit #4, built when there was still a lot of development work being on the model, and different things were being tried. The builder installed small trailing edge trim tabs on the left aileron and the rudder, with servos embedded in the surfaces themselves and a pushrod to what is not much more than a piece of wide piano hinge riveted to the trailing edge of the surface. They are amazingly effective, providing crisp and quick trim to the aircraft. While probably adding a touch of drag when deflected, it is not hard to put them in trail if you want, and flying the plane out of trim is draggy anyway.
The RV-6 Aileron Trim - I heard that it was an STC'd kit for a Mooney, but that could be rumor.
Since we are building the RV-3 as a Technically Advanced airplane, and because the stick grip has a coolie hat that just begs to drive aileron trim, I decided to copy the RV-6 trim system. Van?s actually has early drawings for the system, but I discovered that they were going to be hard to adapt to the smaller ailerons of the -3, and that our RV-6 wasn?t built to them anyways. This was going to be a ?design as you go? effort ? but that is half the fun of homebuilding.
The first problem I dealt with was sticker shock on the price of a servo. The Ray Allen servos that are used pretty much exclusively in the homebuilding world are awfully precious I guess ? and the ?compact? version is even more costly. Sure, I wanted aileron trim?.but for $290 per servo?! I talked about this with other builders on and off, and one day, I received a note from one of them suggesting that I take a look at the web site www.firgelli.com . They appeared to have a line (three different basic sizes, with different gear ratios for each) of very compact linear actuators intended for use in RC and robotics applications. I was intrigued, and collaborated with a few engineers in the RV world to see if we could make the force and strokes work for moving small surface trim tabs. Surprisingly, the tiniest actuator appeared to have just what we would need, so I ordered a pair for our project ? at $65 each, they were a real bargain ? compared to the alternatives! (To avoid nervousness on the part of the vendor, I try to not tell them it's for an airplane!)
The Firgelli PQ12 - if you order one, let's not tell them its for an airplane, OK?
The actuators arrived in a little over a week, and I didn?t waste much time hooking them up to a 9 volt battery to try them out. Encouraged by what I saw, I laid one on the full-sized side view of the aileron, and there was no doubt they would fit. Using some of my memories and pictures of how the trim servo was mounted in my RV-8 elevator, and having access to RV-6 and -8 drawings (plus the two airplanes), I began making bits and pieces to mount the servo. I opted for a completely self-contained ?plate? design ? the servo would be mounted to a plate through which the pushrod would pass to get back to the trailing edge of the surface. This would the cover a large access hole cut in the aileron, and be very easy to remove and replace for maintenance and modification. The trim tab would simply be a piece of piano hinge pop-riveted to the trailing edge itself. Not having a piece of hinge with 1.5? flanges handy, I built a tab up using skinny hinge and aluminum scrap. The side view drawing of the aileron was invaluable for determining the shape and height of the control horn, which I fabricated and riveted in place.
This picture shows the simple mounting brackets and pushrod yoke.
I think it's going to fit!
Probably the toughest part of the job was cutting a large hole in our QB aileron ? if I messed it up, I was going to have to buy parts and build another one. But sort of like cutting a hole in your leading edge for Duckworks lights, it sounds worse than it is. Using the removable plate concept made it quite simple, and the air nibbler made quick work of the task. The plate stiffens the area very nicely, and fabricating a frame/backing plate made drilling the holes very simple (I used it as a template).
It was actually a simple retrofit to a finished aileron.
The small size of the actuator meant that I had to make a few adjustments to ?normal? attaching hardware. I had to build a special attaching yoke for the threaded pushrod that we use to link it to the tab for instance. Metric hardware is included with the actuator and the brackets had to fit that ? but overall, there was nothing that couldn?t be solved with a little thinking. The actuators have built-in position feedback, and while I am going to bring that out and in to the aircraft, I won?t really know how it works until I get more of the avionics wired up. As with the Ray Allen servos, the speed of the actuators can be reduced by lowering the voltage, and they are somewhat quick at 12 volts ? so a speed reduction circuit may be desirable. My next job will be to use what I have learned to build a similar tab for the rudder ? I see no difficulties with this, although dimensions will be slightly different.
A few rivets and nutplates, and it will be finished!
Can these actuators be used for pitch trim? It sure would be nice to use less expensive pieces, but I consider pitch trim to be a pretty important flight control, so we?ll have to be sure that the rates and travel are adequate. I am happy with the quality of the Firgellis, and that is a good first step. I doubt that these little units will have enough ?oomph? to handle the larger elevator tab, but the company makes more powerful units in a bit larger size. We?re working on the calculations now ? time will tell.
Creating the aileron trim was a lot of fun, and it was nice to have a model from the early -6 to work from. I built the new parts without doing any drawings ? another fun way to work in the shop, just real-time prototyping. Cutting and fitting, letting the material and space available be my guide ? it?s a different way to design (for an engineer) ? more like art than science. But when it works, it is very rewarding ? the essence of homebuilding in a prefab kit world.
Paul
") working on the moments for the elevator tabs, which have considerably more area.
working on the moments for the elevator tabs, which have considerably more area.
