After inspecting my cam, it was decided that 5 years of sitting around did it no favors. (Engines are like people, 5 years of being a couch potato really kill them!) So we pulled the engine, split the case, and all that. A story for another thread. Anyway, while the engine was off I decided to install firewall insulation and pull the engine mount off the plane for a good cleaning and look-over.
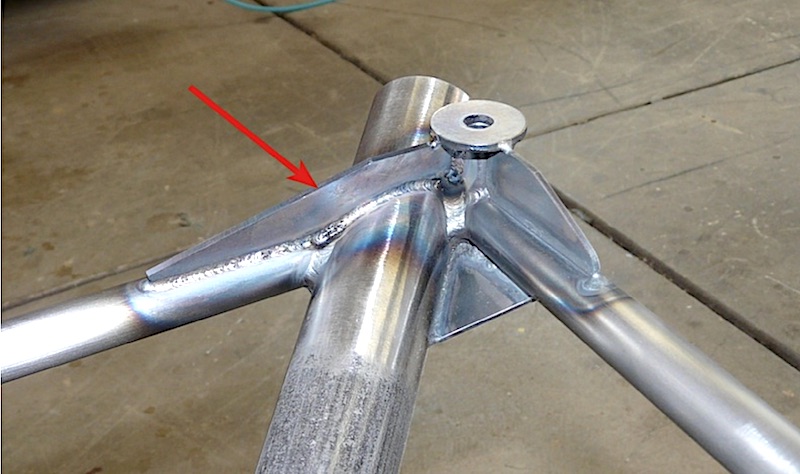
While I was cleaning it, I found several areas where the paint had rubbed or chipped off, but there was one tiny crack in the paint that looked suspicious. The paint had split open a tiny bit and looked like it had been pulled apart. This is the joint between the lower left bolt pad and the left gear leg.
I showed this picture to a representative for Aerospace Welding Minneapolis a couple weeks ago when I was at a maintenance technicians conference. They specialize in certified engine mount repair. He said it does look suspicious and that I should do a dye penetrant test on it.
So, I did. We had a Magnaflux brand dye penetrant kit at the shop. You can buy one from Aircraft Spruce for a little over $100.
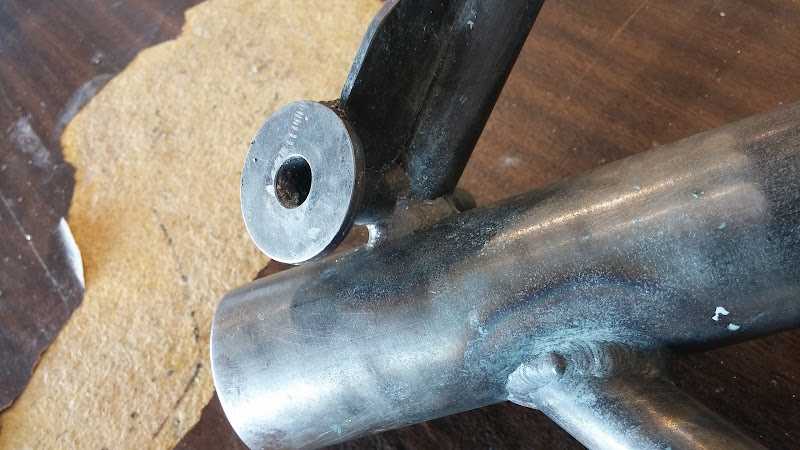
First, I stripped all the paint off using a chemical stripper. Apparently, if you use sandpaper or other mechanical means to get the paint off, you can fill in the crack enough that the dye won't penetrate it. After stripping the paint off, the welds looked great. There was nothing there to make me suspect anything, other than I just knew better.
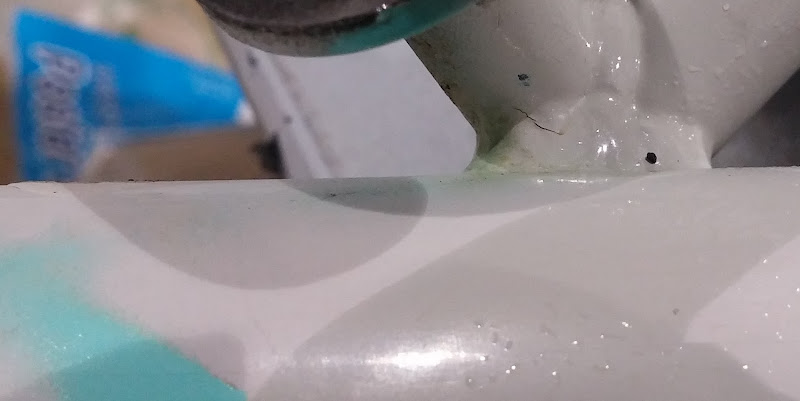
I applied the dye penetrant to the area around both gear leg sockets. The other side had a bit of rust showing beneath the paint, so I wanted to check that side too. Lo and behold...
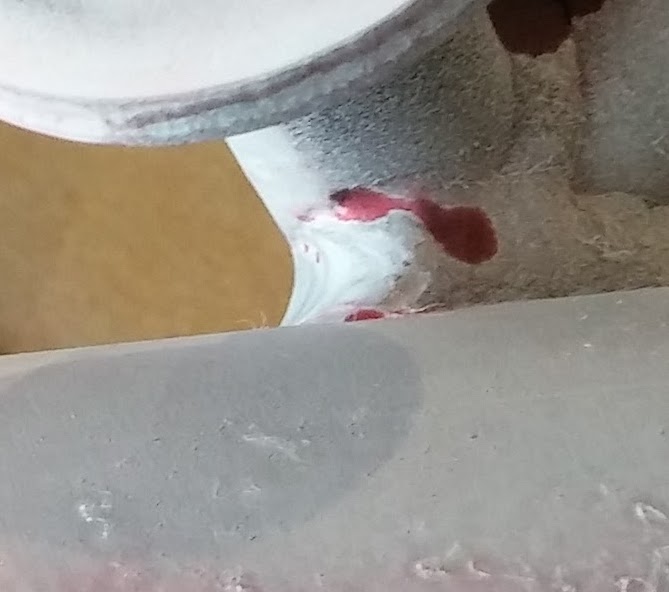
Both sides were indicating cracks. So I took it to a local welder who has experience with repairing experimental aircraft engine mounts and welded spar boxes. He had it fixed in less than an hour. No big deal! But boy am I glad I checked it. These cracks were in a really tough spot to inspect when the mount and engine are on the plane. Mirrors and cleaning are definitely required. If your engine is off the plane, don't skimp-- clean up your mount and check it all over. The RV-3, -4, and -6 mounts are known for cracking in this area, so I was suspicious of it automatically.
By the way, the dye penetrant thing sounds complicated but it's really simple... I just followed the instructions that came with the kit. The cracks show up like magic!
As for painting the engine mount? The rep from Aerospace Welding Minneapolis said that certified aircraft engine mounts are almost never powdercoated. This is because powdercoating can make cracks like this very difficult to spot. And, powdercoat is really difficult to strip off in the event of an inspection or repair.
Dave Paule saw my picture and he decided to weld some gussets on his mount, and others have done the same thing. I thought about this, but decided to stick with the stock design this time around. The airplane had a history of gear shimmy, but it was fixed with wood stiffeners. And I plan to keep it on pavement most of the time. I'm not quite sold on gussets yet because from all my experience with repairing RC models, I know that a structure needs to flex a little bit, and it usually re-breaks next to the beefed up repaired area. So, we'll see how the new welds hold up.
While I was cleaning it, I found several areas where the paint had rubbed or chipped off, but there was one tiny crack in the paint that looked suspicious. The paint had split open a tiny bit and looked like it had been pulled apart. This is the joint between the lower left bolt pad and the left gear leg.
I showed this picture to a representative for Aerospace Welding Minneapolis a couple weeks ago when I was at a maintenance technicians conference. They specialize in certified engine mount repair. He said it does look suspicious and that I should do a dye penetrant test on it.
So, I did. We had a Magnaflux brand dye penetrant kit at the shop. You can buy one from Aircraft Spruce for a little over $100.
First, I stripped all the paint off using a chemical stripper. Apparently, if you use sandpaper or other mechanical means to get the paint off, you can fill in the crack enough that the dye won't penetrate it. After stripping the paint off, the welds looked great. There was nothing there to make me suspect anything, other than I just knew better.
I applied the dye penetrant to the area around both gear leg sockets. The other side had a bit of rust showing beneath the paint, so I wanted to check that side too. Lo and behold...
Both sides were indicating cracks. So I took it to a local welder who has experience with repairing experimental aircraft engine mounts and welded spar boxes. He had it fixed in less than an hour. No big deal! But boy am I glad I checked it. These cracks were in a really tough spot to inspect when the mount and engine are on the plane. Mirrors and cleaning are definitely required. If your engine is off the plane, don't skimp-- clean up your mount and check it all over. The RV-3, -4, and -6 mounts are known for cracking in this area, so I was suspicious of it automatically.
By the way, the dye penetrant thing sounds complicated but it's really simple... I just followed the instructions that came with the kit. The cracks show up like magic!
As for painting the engine mount? The rep from Aerospace Welding Minneapolis said that certified aircraft engine mounts are almost never powdercoated. This is because powdercoating can make cracks like this very difficult to spot. And, powdercoat is really difficult to strip off in the event of an inspection or repair.
Dave Paule saw my picture and he decided to weld some gussets on his mount, and others have done the same thing. I thought about this, but decided to stick with the stock design this time around. The airplane had a history of gear shimmy, but it was fixed with wood stiffeners. And I plan to keep it on pavement most of the time. I'm not quite sold on gussets yet because from all my experience with repairing RC models, I know that a structure needs to flex a little bit, and it usually re-breaks next to the beefed up repaired area. So, we'll see how the new welds hold up.