What's new
Van's Air Force

Don't miss anything! Register now for full access to the definitive RV support community.

Rv-10 TDI 1st Condition Complete

Flandy10

Well Known Member
Well, it took about 2.5 months, but its back in the air- sort of.:rolleyes:

The condition inspection went very well. RV guru Vic Syracuse gave the airframe a thorough inspection. He left the engine to me.

Punch list items--
1. Aileron SB inspection- completed- no cracks.
2. One brake master cylinder fitting weeping- resealed all 8.
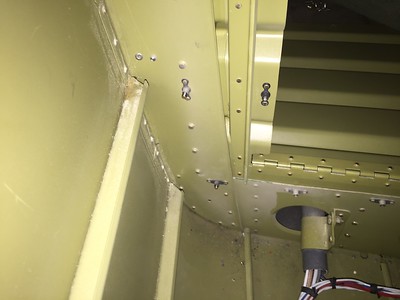
3. Two small cracks in the inlet ramp baffles- stop drilled.


Modification list--
1. Upgraded rudder stop installed-recommended by Vic.
2. Reduced my aux battery system by half- saved about 8 lbs.
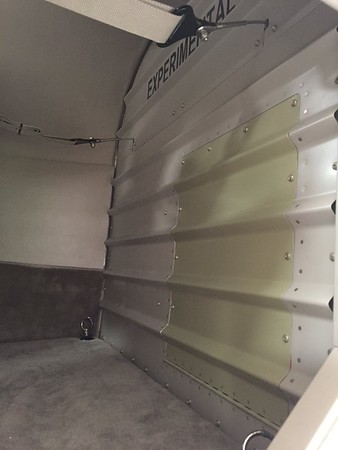
3. Installed an access door in aft bulkhead- Now just 10 screws instead of 35 to check the battery and aft equipment bay.
i-dzgqHff-M.jpg
i-FtppJLk-M.jpg

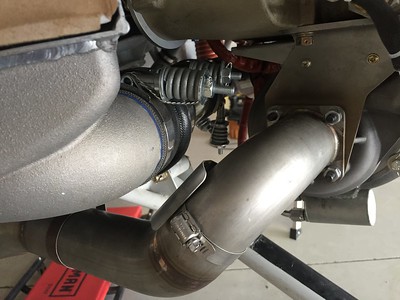
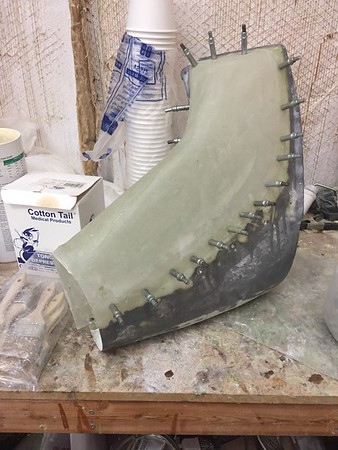
4. Enlarged oil cooler inlet and ducting
i-BNdZ5zn-M.jpg

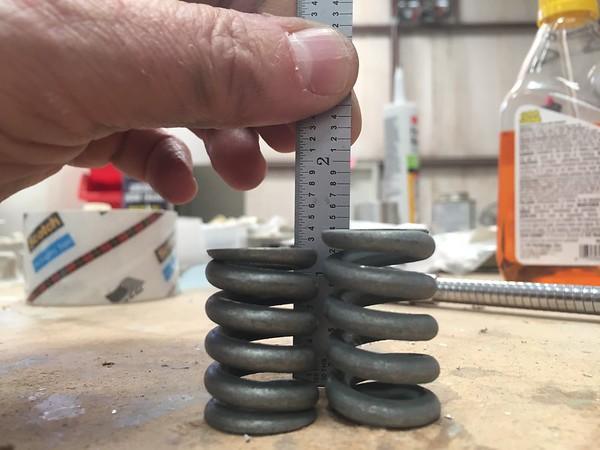
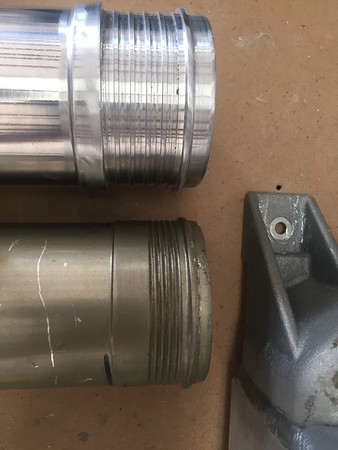
5. CMI installed a production version oil pump -- This was a huge disassembly job that is half of the reason for the lengthy condition. Checking to see if I can post photos.- standby.
 
Last edited:
Now for the "sort of" answer....

During a post condition test flight, I found one of the eight induction clamps migrating:eek:. They're not supposed to move and didn't during the first 100 hours.
i-qwrKCTQ-S.jpg


When your running 90" MAP at takeoff, you don't want ANY movement in these clamps.

Still troubleshooting the issue, but I did find that the migrating clamp's spring has gotten shorter compared to a new one.
i-8Hpk6Nv-S.jpg

Checking with manufacturer...

to be con't.
 
Last edited:
One example is sold by Flyboy accessories, called the internal rudder stop. Or you can make your own from aluminum. The kit rudder stops have been known to break the rivets in high wind conditions when parked without securing the rudder. Mine included. It can happen while at a fuel stop when someone inadvertently pulls away with a lot of power and the prop blast is facing your RV10. When that happens the rudder contacts the elevator and usually leaves a dent or a hole in the rudder.

Vic
 
The easiest way to upgrade the rudder stop is to replace the #4 rivets with #6 screws and nuts.
 
And you believe the internal rudder stop is structurally better?

Offhand, Dan, I'd guess "yes." The internal stop would be nylon against the heavier gauge aluminum rudder spar whereas the standard stop is heavier gauge aluminum against the lighter gauge aluminum skin. Granted, I believe the contact is where the skin is backed by a rib but the internal stop is contacting heavier gauge that is also backed by heavier gauge.
 
And you believe the internal rudder stop is structurally better?


Well, I haven't done any FEMA analysis on it, but after mine broke from a gust of wind and put a hole in the rudder, I made a solid piece similar to the nylon one provided by Flyboys. It hasn't broken since. :) Nor do I think it is now capable of breaking.

I see Jesse mentioned replacing the rivets with screws. I thought about that but didn't want to be a test bed again. :) I also think there is more surface area contacting the rudder now as well.

Vic
 
Last edited:
Extra Rear Bulkhead Material

Scott,

Did you have to order another complete rear bulkhead panel in order to make the doubler behind your door? If not, how did you get the material needed to do that door? I'm interested in following in your footsteps, but want to be sure not to reduce the structural capacity of the rear bulkhead. Thanks.
 
BTW, Scott is this month's centerfold in Kitplanes. You'll find an account of his adventures to date, and future plans.

As a bonus, Continental was kind enough to grant access to their development facility for an internal tour of the CD230/CD265 series diesel, with photos of the interesting bits. If you like the article, tell 'em next time you visit a Continental display.
 
Back to the rudder stop...

<Edited> I shouldn't have commented. I remembered the -10's rudder stop as being like the one on my -6. It isn't.
 
Last edited:
Mike,

I did use another bulkhead for the doubler and door. Was able to piggyback my order with another local builder. I had to run an aluminum angle along the right side of the doubler to stiffen that side. Feels like the original bulkhead. I'll try to get a picture for you.
 
Last edited:
Mike,

I did use another bulkhead for the doubler and door. Was able to piggyback my order with another local builder. I had to run an aluminum angle along the right side of the doubler to stiffen that side. Feels like the original bulkhead. I'll try to get a picture for you.

Scott,

I?m also interested in how you framed the access door in the bulkhead. Not sure if you were going to PM the picture to Mike but is there any chance you can post that picture here or PM it to me as well. Thanks!!

Dave
 
Scott,

I?m also interested in how you framed the access door in the bulkhead. Not sure if you were going to PM the picture to Mike but is there any chance you can post that picture here or PM it to me as well. Thanks!!

Dave

Plus 1 (and a few words)

-Marc
 
Baggage Bulkhead Door

What a fantastic idea building a door into the bulkhead. I stripped out those lower corner screws way to many times getting mine off and on!
 
All of Scott's airplane is an example of attention to detail and ease of use. Continental couldn't have asked for a better RV-10 test bed for the diesel engine.

Vic
 
Its a solid piece that rests against the VS spar.

The stock stops shear the rivets (empty holes in the photo) attaching them to the hinge bracket? Got it. No fundamental change to the load path into the aircraft structure.
 
Bulkhead Access

Note: I am not an engineer nor has one reviewed this mod.


My opening inside the doubler is approx. 11" x 13". I did use a second lower bulkhead for the doubler and new door, but I guess you could do this without it if you cut the door opening carefully. Also, I had planned on using 1/4 turn fasteners, but the edge distances didn't quite work out, so I used #8 screws instead. The outboard side needed an aluminum angle for stiffness due to narrow strip of material remaining compared to inboard side. Run the angle to the bottom of the hinge and to the top of the aft bulkhead. Depending on how wide your door is you will need to trim the stiffener at the bottom to match the angle of the frame.
i-3h3STZS-S.jpg
i-4btSwD9-S.jpg


Send me a PM if you need more.
 
Last edited:
Offhand, Dan, I'd guess "yes." The internal stop would be nylon against the heavier gauge aluminum rudder spar whereas the standard stop is heavier gauge aluminum against the lighter gauge aluminum skin. Granted, I believe the contact is where the skin is backed by a rib but the internal stop is contacting heavier gauge that is also backed by heavier gauge.

I don't recall where I got my internal stop, but it is made of UHMW plastic, not nylon. Just looked at it yesterday as part of my condition inspection. Some light marking at contact points, but no physical change.
 
Back in the Air

Its been a month and a half since the condition was signed off, but I've finally got the post condition gremlins solved.

1- The moving clamp fix required a modification to the intercooler inlets and one of the induction pipes
.
i-b58nMDC-M.jpg


The top pipe is the new version-a "slightly" more aggressive grip range.

2- RPM sensor replaced and it's reading is now very stable.

3- Oil Temp sensor connection replaced and know works good-no more 350F readings.:eek:

4- G3X EMS intermittent because of a loose CAN bus shield solder joint.


So after two short test flights to verify everything was good, it was time to stretch her wings. Left KFFC early morning May 3 nonstop to KAVO (Avon Park,FL) for a freight drop to mom. Left there after a short stay for a quick flight to X35 to top the tanks ($2.89/gal) and then back to Falcon.

Started the day with 43 gallons. Took on 56.3 at Marion County and arrived back at Falcon Field with 58 Gallons remaining.

Total burn--approx. 41 gal.
Hobbs time--5.7 hrs
TAS 155Kts
Distance 760nm
 
Last edited:
Back
Top