Hartstoc
Well Known Member
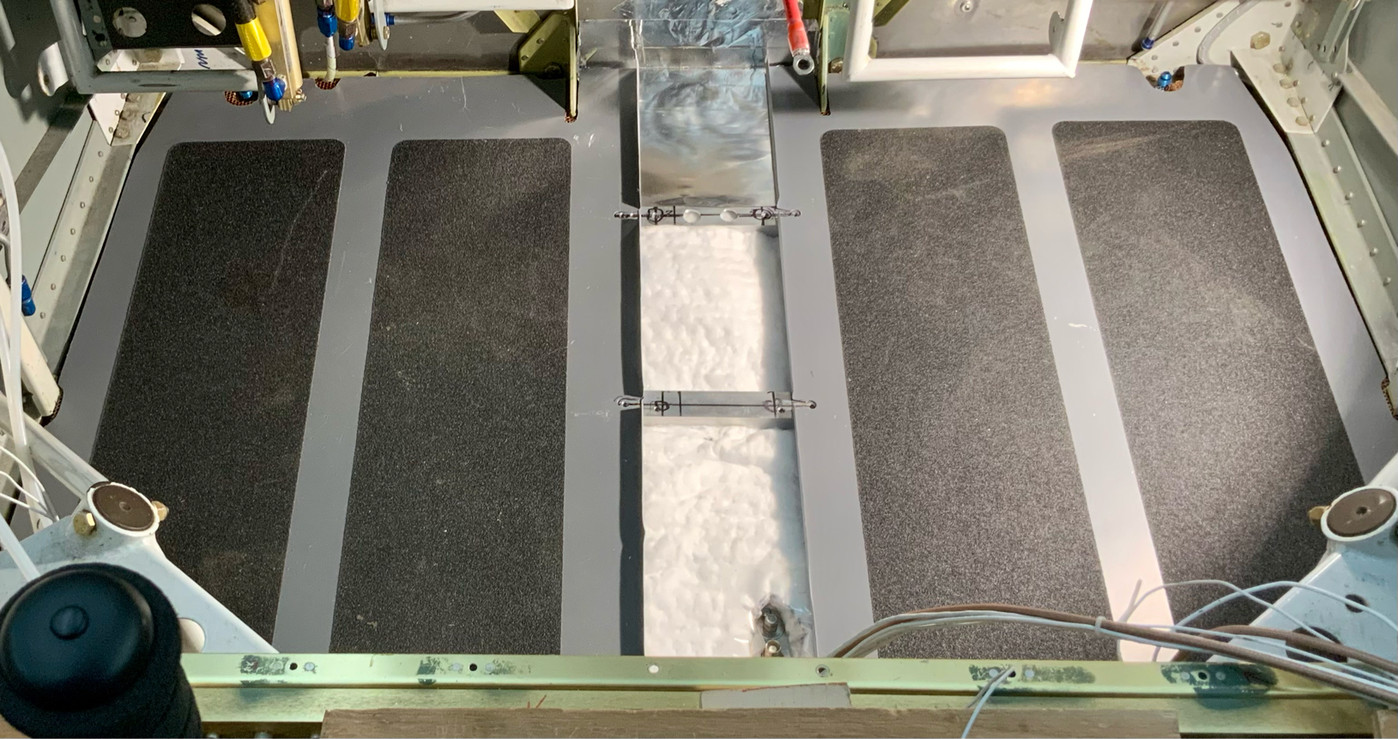
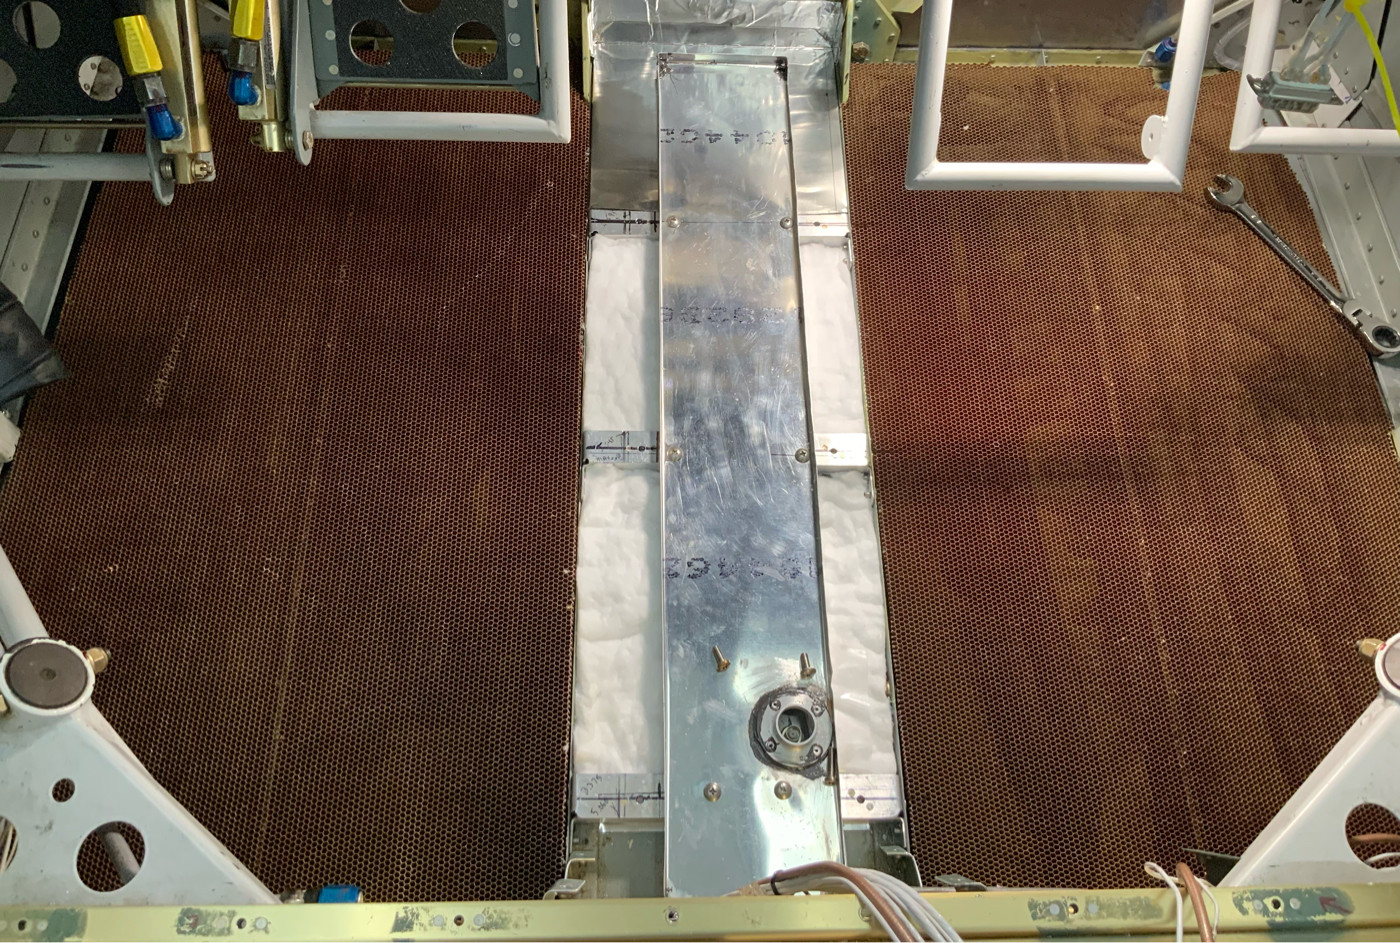
I’ve always felt that theRV cabin floor was the source of considerable noise and also a potential burn-through fire threat during an engine fire. The usual solution of thick, heavy spacing material under a carpet has never struck me as satisfactory. I now have 150 trouble-free hours on a light-weight, very successful solution I came up with. Just to get your attention I’ll start with a photo of the nearly complete installation, shown just prior to installation of my new panel and center console:
Think about the incredibly strong and rigid structural flooring used on airliners, consisting of thick Nomex-honeycomb sandwiched between layers of rigid carbon fiber pre-preg facings. I had the idea of adhering This fire-resistant core material directly to the cabin floor with a strong adhesive having a bit of give to it, then adding a layer of .016 aluminum similarly attached to its upper surface could result in a semi-rigid sandwhich that would serve as a sturdy floor just flexible enough to dampen out a good deal of the pounding energy from prop and exhaust that results in so much noise. It might even impart some fire resistance in the event of an engine fire.
I found some sheets of 1” thick x 1/8”density Nomex honeycomb on ebay to experiment with. The next challenge was finding a suitable adhesive, and I tried everything from various RTV formulations to assorted glues and contact cements, but was at first frustrated by the inability of these to “wet-out” onto the face of the honeycomb. When subjected to the “peel-test”, samples would come apart too easily and leaving the face of the nomex clean. A successful destructive peel test requires that both mating surfaces be covered with fractured adhesive.
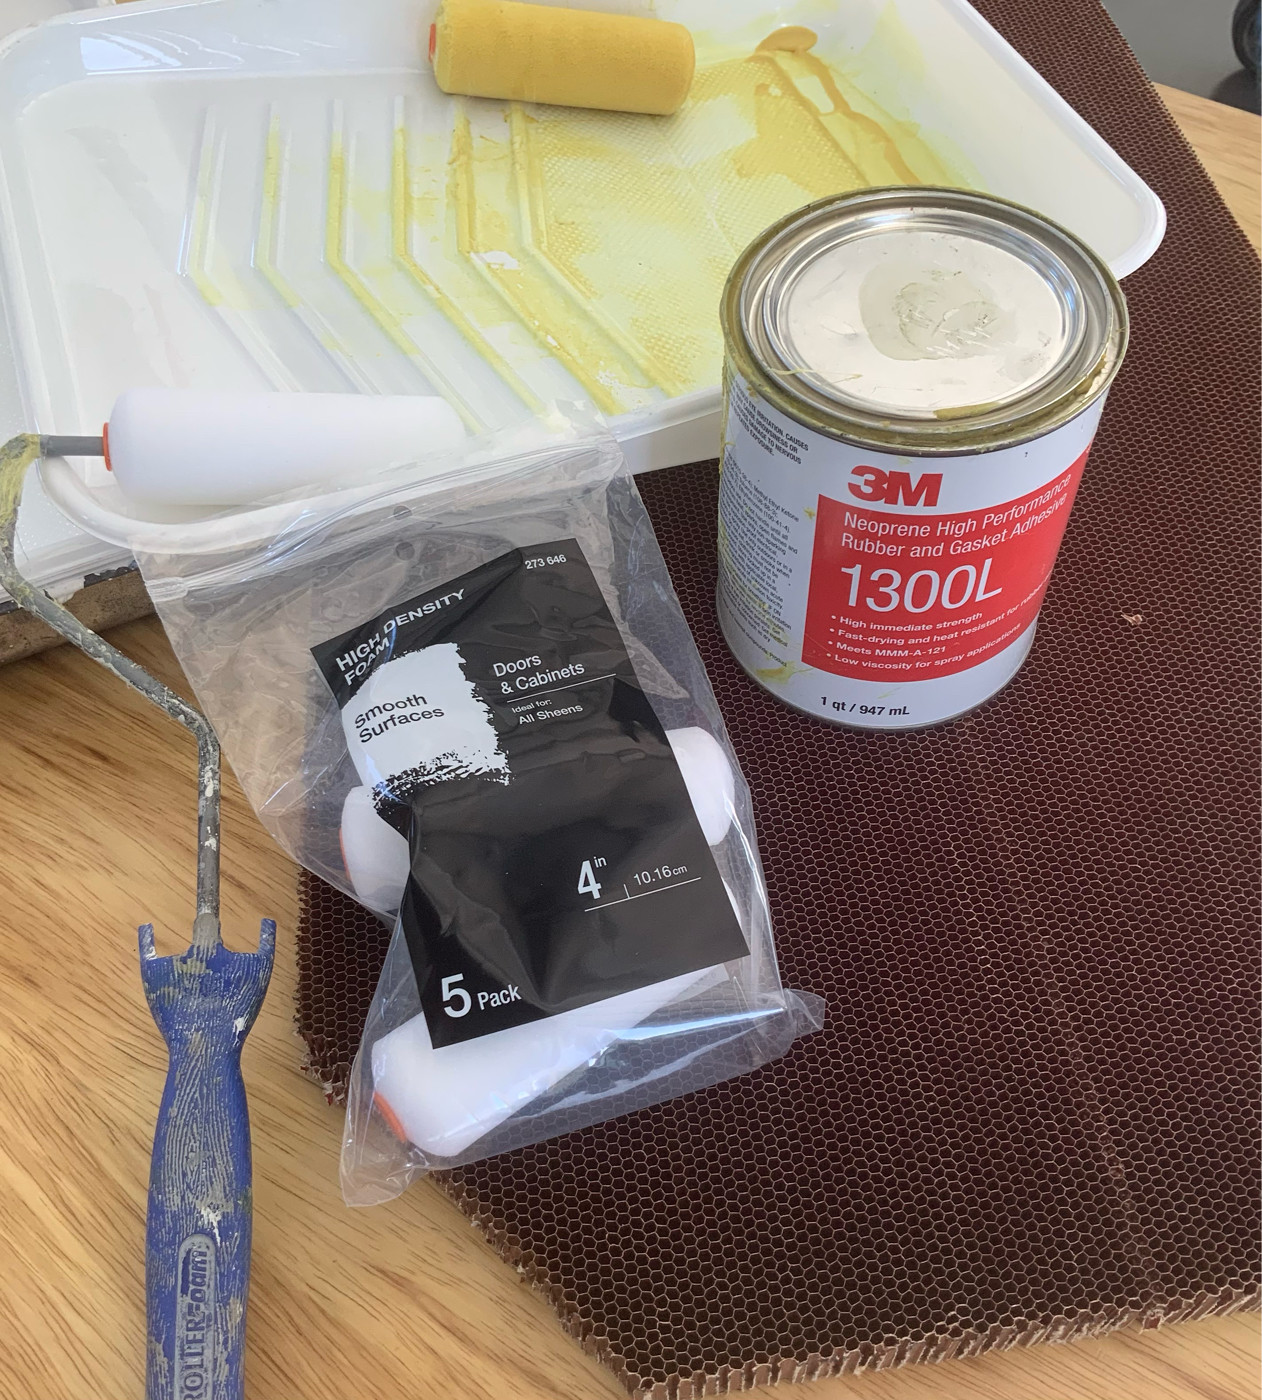
Fortunately, I stumbled upon 3M 1300L adhesive. This tenacious stuff, applied to both surfaces and allowed to dry briefly before mating, wet out both the nomex and the painted aluminum floor beautifully, and passed the peel test with flying colors. It was, in fact, impossible to fracture, but an enormous amount of pull force would result in hundreds of tiny fibers per square inch stretching to about an inch before finally giving way leaving both surfaces coated. I later learned this to be the same adhesive used to attach de-icing boots to painted aluminum aircraft leading edges- PERFECT!
Here’s the recipe:
1- Discard 4-pound carpet and clean painted surface with prep-sol.
2- make a paper pattern and cut the nomex to shape for each side of the floor
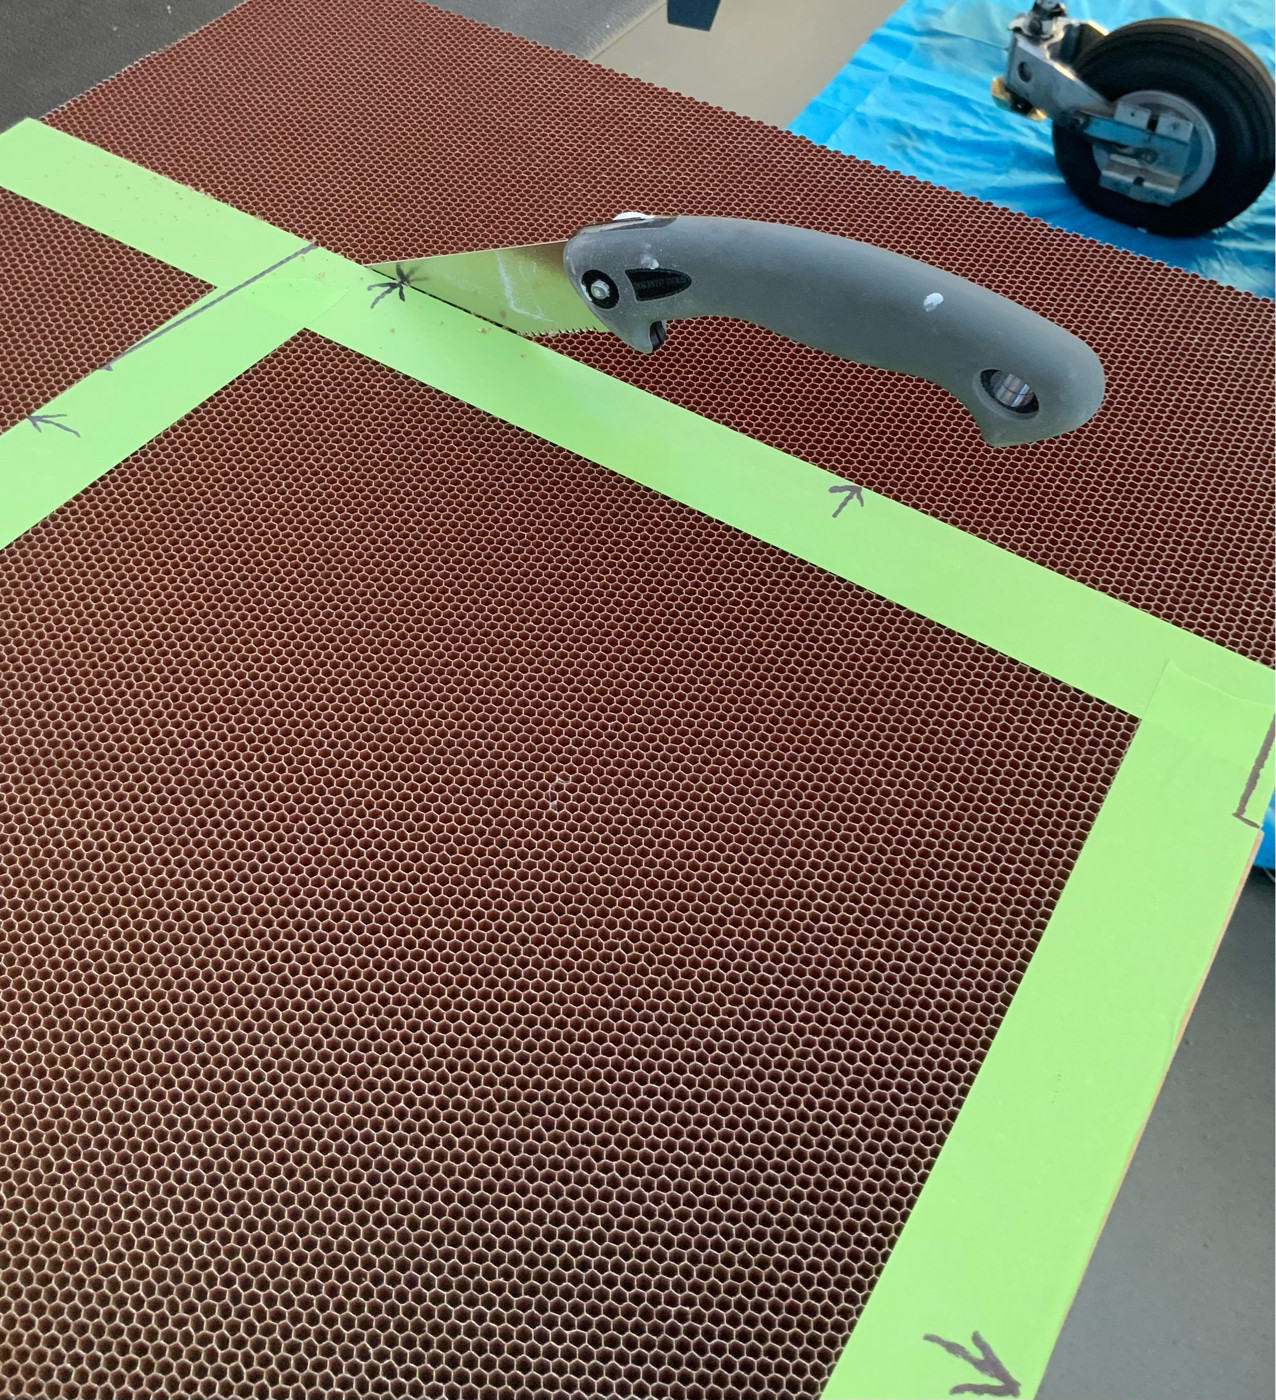
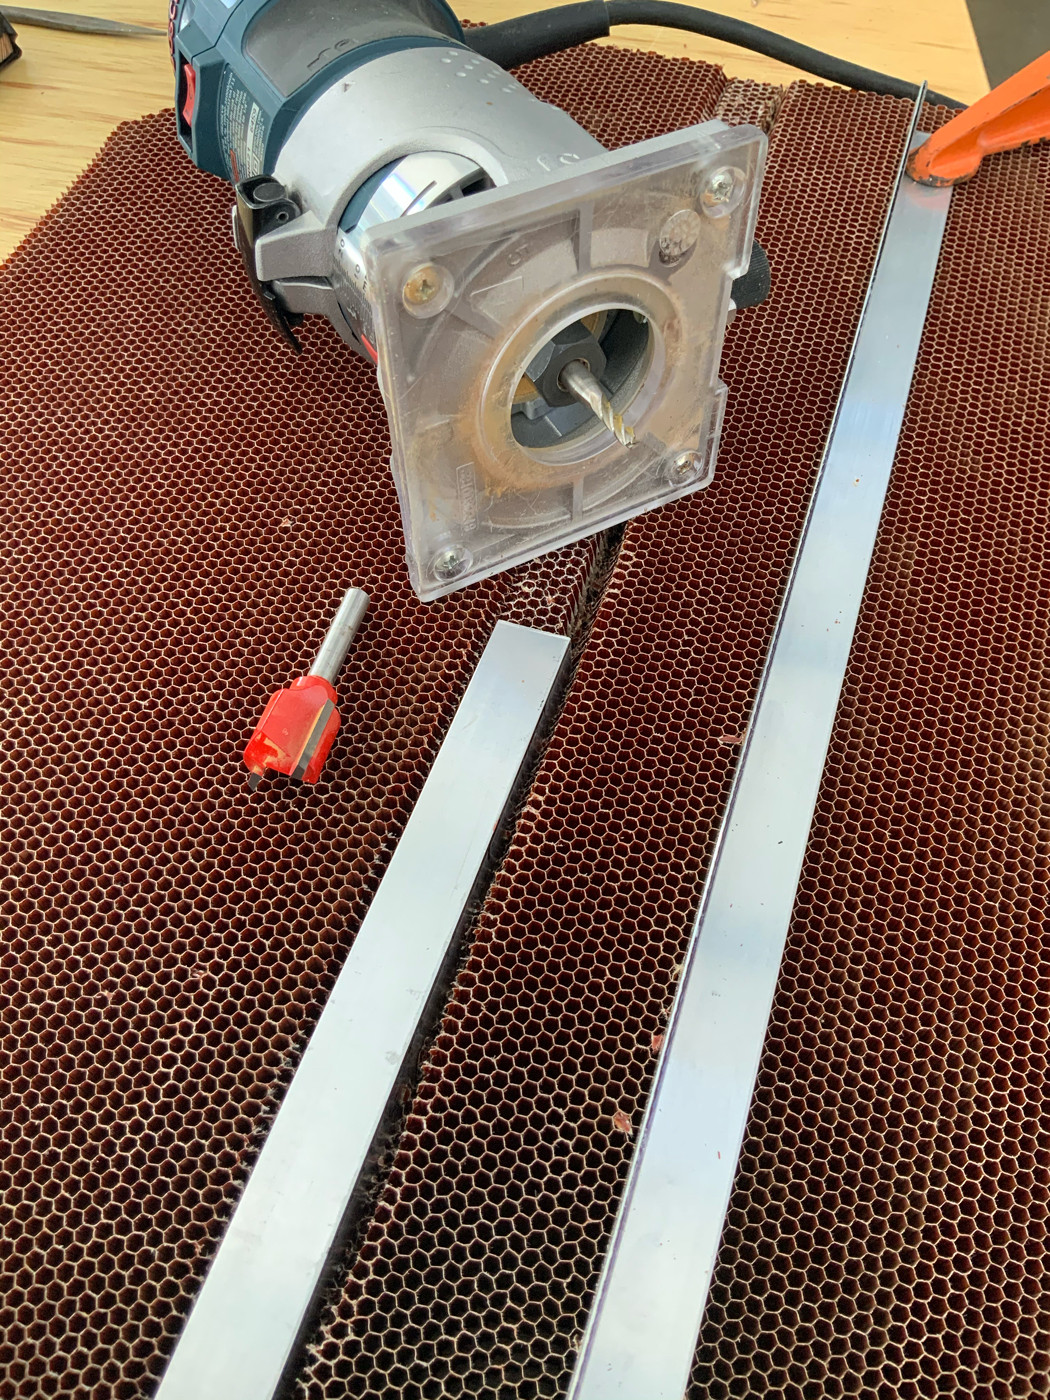
3- Machine 1” thick Nomex honeycomb to slip over aluminum angle brace that runs down the middle of the floor. Carbide router bits worked great for this step.
4- Adhere Nomex to floor with 3M 1300L. (The nomex was not installed in my center section, which was instead lined with .005 stainless steel then filled with 1/2” ceramic fiberfrax-type kiln insulation. The shallow aluminum pan is installed below the center console , which contains, among other things, my dual electric fuel pumps, dual stage selector valve with return lines, fuel flow transducer, and fuel pressure transducer. The pan would catch dripping should there be any leakage, and I can touch the bottom of the pan with my fingertip as part of preflight. MUCH more on this system in a future thread)
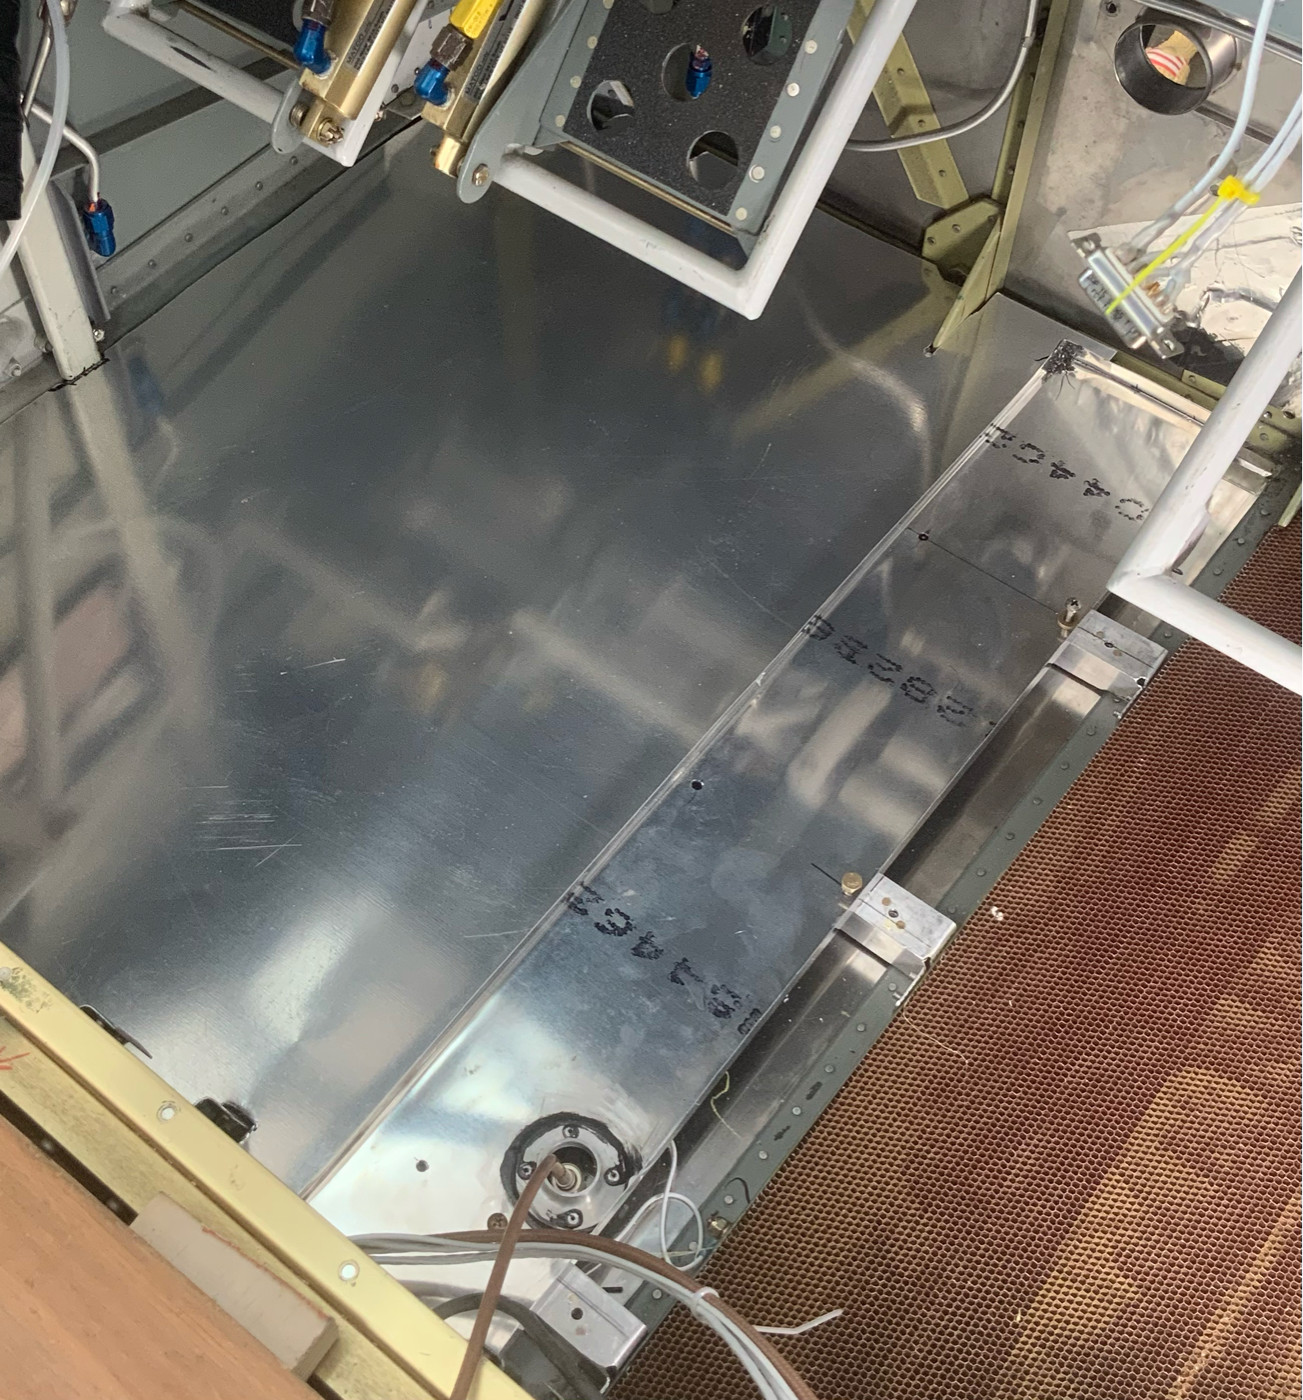
5- Fit .016 upper skin to space(I included a 90° flange along each side of my center console to stiffen the narrow section of .016 that is not supported by Nomex.
6- Adhere self-etching-primed .016 al-clad to upper surface.
7- Install anti-skid strips for ease of entry. (See top photo)
Results: WOW! 3# installed weight( vs 4# for thecarpet with padding that I discarded) , Feels rock-solid, but adhesive flexibility absorbs pounding vibration significantly reducing cabin noise. Enhanced resistance to external fires. You can get really good purchase with the anti-skid against your shoes to easily walk down into the seat or push yourself upright to exit. It feels like a 1/2” plate of aluminum, not the .016 aluminum that is actually under the anti-skid material!
Not shown in the first photo- cut to size pieces of black gorilla tape were later used to seal around the perimeter to prevent debris/washers, etc. from falling into that space.- Otis Holt
Think about the incredibly strong and rigid structural flooring used on airliners, consisting of thick Nomex-honeycomb sandwiched between layers of rigid carbon fiber pre-preg facings. I had the idea of adhering This fire-resistant core material directly to the cabin floor with a strong adhesive having a bit of give to it, then adding a layer of .016 aluminum similarly attached to its upper surface could result in a semi-rigid sandwhich that would serve as a sturdy floor just flexible enough to dampen out a good deal of the pounding energy from prop and exhaust that results in so much noise. It might even impart some fire resistance in the event of an engine fire.
I found some sheets of 1” thick x 1/8”density Nomex honeycomb on ebay to experiment with. The next challenge was finding a suitable adhesive, and I tried everything from various RTV formulations to assorted glues and contact cements, but was at first frustrated by the inability of these to “wet-out” onto the face of the honeycomb. When subjected to the “peel-test”, samples would come apart too easily and leaving the face of the nomex clean. A successful destructive peel test requires that both mating surfaces be covered with fractured adhesive.
Fortunately, I stumbled upon 3M 1300L adhesive. This tenacious stuff, applied to both surfaces and allowed to dry briefly before mating, wet out both the nomex and the painted aluminum floor beautifully, and passed the peel test with flying colors. It was, in fact, impossible to fracture, but an enormous amount of pull force would result in hundreds of tiny fibers per square inch stretching to about an inch before finally giving way leaving both surfaces coated. I later learned this to be the same adhesive used to attach de-icing boots to painted aluminum aircraft leading edges- PERFECT!
Here’s the recipe:
1- Discard 4-pound carpet and clean painted surface with prep-sol.
2- make a paper pattern and cut the nomex to shape for each side of the floor
3- Machine 1” thick Nomex honeycomb to slip over aluminum angle brace that runs down the middle of the floor. Carbide router bits worked great for this step.
4- Adhere Nomex to floor with 3M 1300L. (The nomex was not installed in my center section, which was instead lined with .005 stainless steel then filled with 1/2” ceramic fiberfrax-type kiln insulation. The shallow aluminum pan is installed below the center console , which contains, among other things, my dual electric fuel pumps, dual stage selector valve with return lines, fuel flow transducer, and fuel pressure transducer. The pan would catch dripping should there be any leakage, and I can touch the bottom of the pan with my fingertip as part of preflight. MUCH more on this system in a future thread)
5- Fit .016 upper skin to space(I included a 90° flange along each side of my center console to stiffen the narrow section of .016 that is not supported by Nomex.
6- Adhere self-etching-primed .016 al-clad to upper surface.
7- Install anti-skid strips for ease of entry. (See top photo)
Results: WOW! 3# installed weight( vs 4# for thecarpet with padding that I discarded) , Feels rock-solid, but adhesive flexibility absorbs pounding vibration significantly reducing cabin noise. Enhanced resistance to external fires. You can get really good purchase with the anti-skid against your shoes to easily walk down into the seat or push yourself upright to exit. It feels like a 1/2” plate of aluminum, not the .016 aluminum that is actually under the anti-skid material!
Not shown in the first photo- cut to size pieces of black gorilla tape were later used to seal around the perimeter to prevent debris/washers, etc. from falling into that space.- Otis Holt
Last edited: