VansAirForceForums  
Home > VansAirForceForums

-POSTING RULES
-Advertise in here!
- Today's Posts | Insert Pics

Keep VAF Going
w/a Donation


VAF on Twitter:
@VansAirForceNet


Go Back   VAF Forums > Model Specific > RV-14
Register FAQ Members List Calendar Search Today's Posts Mark Forums Read

Reply
 
Thread Tools Search this Thread Display Modes
  #1  
Old 01-04-2022, 09:11 AM
Meat Meat is offline
 
Join Date: Jan 2018
Location: Glendale, AZ
Posts: 44
Default RV-14 QB Fuselage Modifications for -119EXP Engine

Hi All,

After reviewing Section OP-62 on the IO-390-EXP119 engine installation it looks like modifications are needed to QB fuselages. Specifically, along the lower forward firewall to modify cowl plates and shims. And along the tunnel area to add 10 nutplates to mount the cooling flap assembly. These areas already come completed in the QB fuselage so approximately 30 rivets will need to be drilled out to complete these changes. The affected KAI Sections are in 28 and 45.

I wanted to hear from anyone that's completed those modifications to a QB fuselage related to OP-62. How big a hassle was it and were there any gotchas along the way to be aware of? I'm trying to decide if the benefits and expense of using the -EXP119 engine are outweighed by the hassle and time to make the required modifications on a QB fuselage. Thanks for everyone's time.

Scott Davis
RV-14 #140702
Fuselage/Wings done
Waiting on Finishing Kit
Reply With Quote
  #2  
Old 01-04-2022, 01:49 PM
Ron B. Ron B. is offline
 
Join Date: Nov 2007
Location: Yarmouth, Nova Scotia
Posts: 2,722
Default

After building both models ( slow build) , that’s all that I can think of that would be different.
__________________
Thanks Ron
RV-10 SOLD
RV-14 Flying
AirCam flying
Reply With Quote
  #3  
Old 01-05-2022, 12:17 AM
SteveHicks SteveHicks is offline
 
Join Date: Sep 2017
Location: Shropshire, UK
Posts: 41
Default EXP119 Fuselage Changes

I have been building a slow build, but had effectively built the fuselage to QB status prior to ordering the EXP119. The changes required are easy to accomplish ... see my blog post pictures here for the cowling flap, and here for the lower cowling support plates.
__________________
Steve Hicks
RV14 G-STRV - Flying
www.vansrv14project.uk
Reply With Quote
  #4  
Old 01-05-2022, 11:00 PM
Meat Meat is offline
 
Join Date: Jan 2018
Location: Glendale, AZ
Posts: 44
Default

Quote:
Originally Posted by SteveHicks View Post
I have been building a slow build, but had effectively built the fuselage to QB status prior to ordering the EXP119. The changes required are easy to accomplish ... see my blog post pictures here for the cowling flap, and here for the lower cowling support plates.
Thanks so much Steve for your time and the link/photos of your project. I thought I'd get more responses to my query. I know many RV-14s being built today are QB fuselages using the -119 EXP engine and wanted to see how others were handling the mods. The photos are super helpful to visualize it all.

Cheers,
Scott
__________________
QB RV-14 #140702
Fuselage/empennage/wings mostly finished
Working on Finishing Kit.
2022 dues paid. Worth every cent.
Reply With Quote
  #5  
Old 01-06-2022, 04:20 AM
Jetmart's Avatar
Jetmart Jetmart is offline
 
Join Date: Sep 2019
Location: Windsor, Ontario
Posts: 673
Default

I put on the cowl cooling flap on a QB with a non EXP engine that I had already decided to go with the dual Vetterman exhausts. The drilling out of the rivets and adding nut plates for the cowl flap was very easy to do. I imagine the other modifications required would be similar.
__________________
Glenn Martin
Windsor, Ontario
1941 Tiger Moth
2017 Waco YMF-5
RV-14 Kit # 140694 - First Flight June 22, 2021
2023 Dues Paid
Reply With Quote
  #6  
Old 01-09-2022, 10:29 AM
Swiss14A Swiss14A is offline
 
Join Date: Feb 2018
Location: Switzerland
Posts: 54
Default

Hi Scott
We did the EXP mods to a quickbuild fuselage. Very easy to do and not much work required. We trimmed the shims with a Dremel, that was easy. And we are quite experts in drilling out rivets by now, so also no problem if that is your only concern, go for the EXP!!
Cheers
Fabian
__________________
Alexandra & Fabian
RV14A HB-YAF, 140’489, flying
Reply With Quote
  #7  
Old 01-09-2022, 11:03 AM
Jumpbat74 Jumpbat74 is offline
 
Join Date: May 2019
Location: Portland OR
Posts: 11
Default

Just complicated it on a quick build fuse. It was very easy. Just complete it all before installing the engine mount. Though not required use of a nutplate jig from the Yard Store has made drilling holes for nutplates, like those required for the tunnel cover, accurate and stress free.
__________________
2023 Donation Made!
RV-14A
Emp- done
Fuse- done
Finish- done
Engine- mounted
FWF- IN PROGRESS
Reply With Quote
  #8  
Old 01-09-2022, 11:29 AM
rockitdoc's Avatar
rockitdoc rockitdoc is offline
 
Join Date: May 2020
Location: Fort Collins, CO
Posts: 845
Default SB Fuse with -119 Mods

I did a slo build fuse and was consternated that I would have to 'unbuild' the bottom portion to accommodate the cowl flap door. But, it took less than a day to complete. Requires two people, though. Reaching the rivets on the inside aft tunnel is the normal challenge for the bucking bar person. All the others are simple. Getting the fuse in the air helps the riveter on the bottom.
__________________
14A-EXP119 Thunderbolt
Begun 07-23-20
Emp Completed 11-12-20
Slo Fuse Completed 3-2-21
QB Wings 99% Complete 7-30-22
Wiring and Avionics 85%
Cowl Completed sans paint 10-30-22!
2023 Dues Paid
Reserved: N52XL
Reply With Quote
  #9  
Old 01-09-2022, 09:58 PM
Meat Meat is offline
 
Join Date: Jan 2018
Location: Glendale, AZ
Posts: 44
Default

Thanks so much for everyone's reply to my query. OP-62 doesn't mention it but how did you handle the two F-1465 Muffler Hanger Angles in the tunnel that are attached in Section 28? My QB fuse came with them installed. It's not clear if they'd interfere with the -EXP Tunnel Cover and Tunnel Exit Door assembly. The 3 options appear to be: Leave them installed (Maybe bend them upward a bit). Cut them out but leave the mounting flanges installed (Steel so it would take a while). Lastly, remove them both completely (which would be a bitch since the rivet shop heads are totally hidden).

Thanks for your time. It's very appreciated.

Cheers,
Scott
__________________
QB RV-14 #140702
Fuselage/empennage/wings mostly finished
Working on Finishing Kit.
2022 dues paid. Worth every cent.
Reply With Quote
  #10  
Old 01-09-2022, 11:33 PM
SteveHicks SteveHicks is offline
 
Join Date: Sep 2017
Location: Shropshire, UK
Posts: 41
Default Muffler Hanger Angles

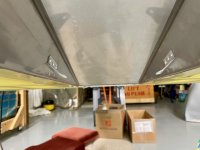
As installed the F-1465 Muffler Hanger Angles did interfere slightly with the F-14190 Closeout Assembly on my plane.
The least invasive way to solve the issue was to bend the lower portion of each angle upwards, allowing enough clearance to ensure no contact if the panel was to vibrate/move slightly ...
Attached Thumbnails
Click image for larger version

Name:	IMG_8115.jpeg
Views:	264
Size:	535.4 KB
ID:	20771  
__________________
Steve Hicks
RV14 G-STRV - Flying
www.vansrv14project.uk
Reply With Quote
Reply


Thread Tools Search this Thread
Search this Thread:

Advanced Search
Display Modes

Posting Rules
You may not post new threads
You may not post replies
You may not post attachments
You may not edit your posts

vB code is On
Smilies are On
[IMG] code is On
HTML code is Off
Forum Jump


All times are GMT -6. The time now is 01:26 PM.


The VAFForums come to you courtesy Delta Romeo, LLC. By viewing and participating in them you agree to build your plane using standardized methods and practices and to fly it safely and in accordance with the laws governing the country you are located in.