What's new
Van's Air Force

Don't miss anything! Register now for full access to the definitive RV support community.

What is the secret ?

ratc

Well Known Member
OK, I've bonded the canopy to the frame with Sikaflex, the front skin has been riveted on, albeit there is a slight bulge on the LH side which I could lose by shimming the forward instrument panel cover.

BUT, what is the secret to fitting those pesky side skins. I've spent more time than I care to remember searching the net, drawing plans and formulating a process. I've already scrapped one side skin so now a different approach.

For those who have gone before where did you start and what method did you use?

Any information gratefully received, OR, I could turn to ................ Fibreglass, might not be a bad idea at that !
 
The side skins went on OK for the front half of them. I could never get the rear portion to fit and ended up cutting the rear portion off someplace just aft of the rear seatback bulkhead. I then made a fiberglass fairing from there around the back portion of the canopy.

Believe it or not I used drywall compound to for a base mold for the fiberglass to be laid up on. Just waxed the heck out of it after sanding to shape and laid the glass right on it. After it set up lifted the canopy up and trimmed the rear into a nice shape. This ended up with a perfect fit for the rear which can be quite a source of airflow if it doesn't fit tight.

That's what I did in any event.
 
What I did

The side skins are the most difficult part of the-4 construction, so as a "metal guy" for my day job, it was a bit easier for me. First off, if you are intending on using SIKA only, and no rivets along the canopy edge/frame interface, your skirt will have to fit absolutely perfect, and you will likely be very frustrated! The kit supplied skirts come with a minimum of extra material, but have a small "shrinked" area which starts the contour.I did not use the supplied parts, but cut my own slightly larger. The hardest part is the flange that must be formed at the canopy, requiring an edge roller either purchased or home made. Mine is homemade with nylon rollers that are radiused. the process isn't easy, as the flange changes angle from front to rear, and there is no set formula in doing it...just trial/error, go slowly working the angle a little at a time. I have no filler in mine at all, and it fits well. You may want to see if there is a "metal guy" in your area that can help, or go the fiberglass route others have chosen. Good luck!
 
The black art !

I figured it wouldn't be easy, but not this difficult to get the "perfect" fit !
What a pity, it is precisely the canopy fit that I look at on first seeing a -4.

I may well need an english wheel to produce some of the required curves, not to mention the spacers on my factory delivered canopy frame. I hate making the best of a bad job, striving for perfection is a killer!

I'll work slowly and hope I get a fit that I can be proud of, it may take some time, there must be an easier way!
 
Help session

Hi Andy,
We need more RV-4 action on this forum, so I'll pitch in to assist you.

The side skirts are difficult at first, but you shouldn't give up; light weight, looks good, stock design.

I happened to take a few photos of my canopy build, so here goes with my method...

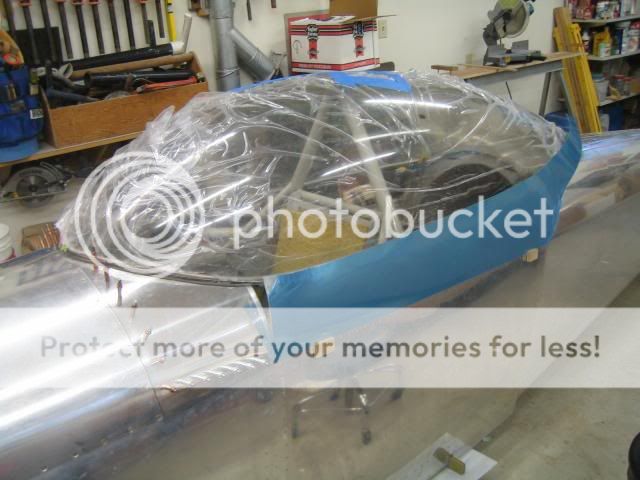
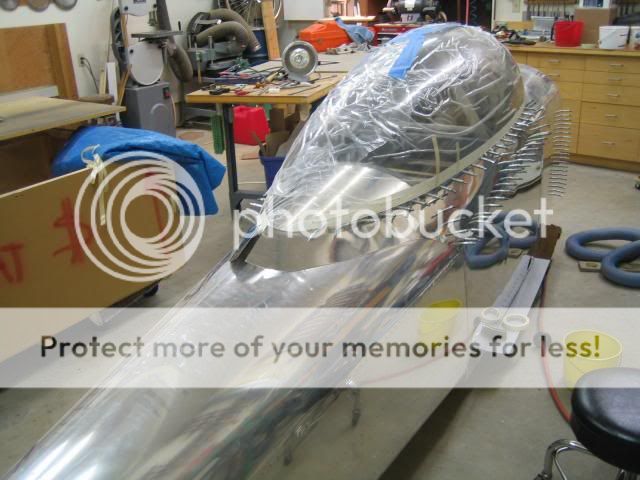
1) Helping hands - I temporarily adhered some wood blocks with foam tape on the fuse sides to rest the skirt on. The blocks have a slight rabbit slot to facilitate holding the skirt. This enables you to quickly position it on the frame over and over again -- in the same exact location. The bottom straight edge of the skirt is your starting point; no trimming. Make the blocks longer than I did, so they don't accidentally fall off as easily.

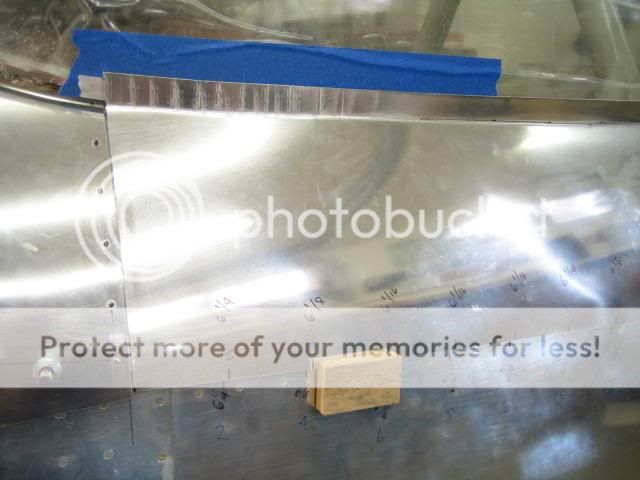
2) Lofting the bend line - With the skirt in place on the blocks, draw a line on the fuse at the bottom of the skirt so you can measure up to the bend line on the plexi, which is just below the round aluminum frame. Draw the bend line on the canopy Plexiglas (masking tape). With the skirt off the frame, and using a flexible metal ruler, measure up to the bend line on the canopy Plexiglas every two inches, and write it on the fuse at the measurement station. Now put the skirt back on the blocks and measure up and mark a dot with your Sharpie pen. By connecting the dots you have established the bend line. You will have to trim the top of the skirt to create a uniform flange width that rests on the plex. Do not do any trimming to the aft skirt yet. Trim to the proper flange width (+-18mm?), and start forming the bend with your roller tool (Avery has them). Go slow and test fit on your blocks frequently. Work both sides at the same time, and take advantage of your skills as they improve.

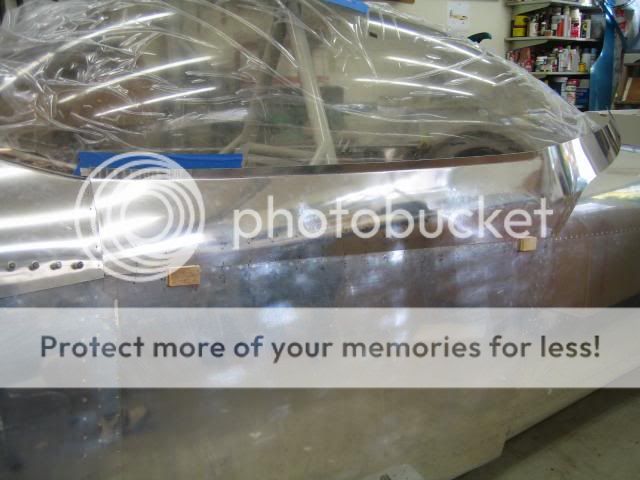
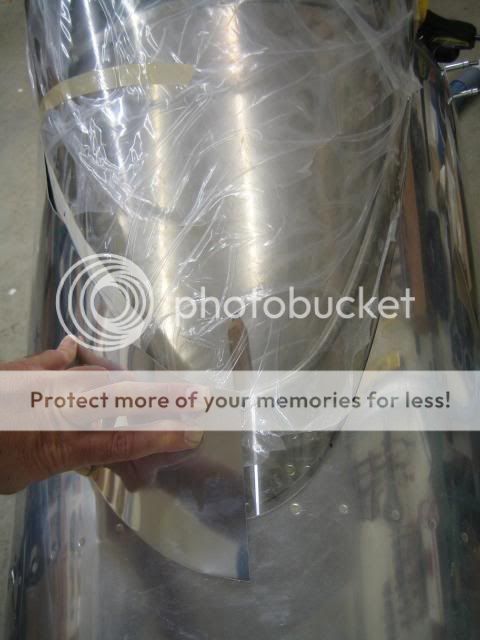
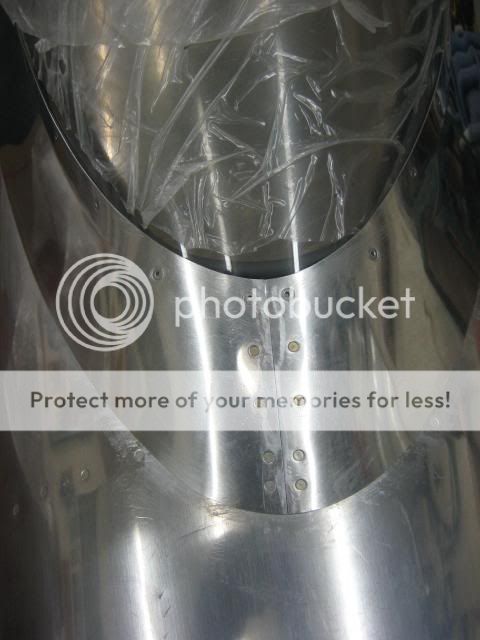
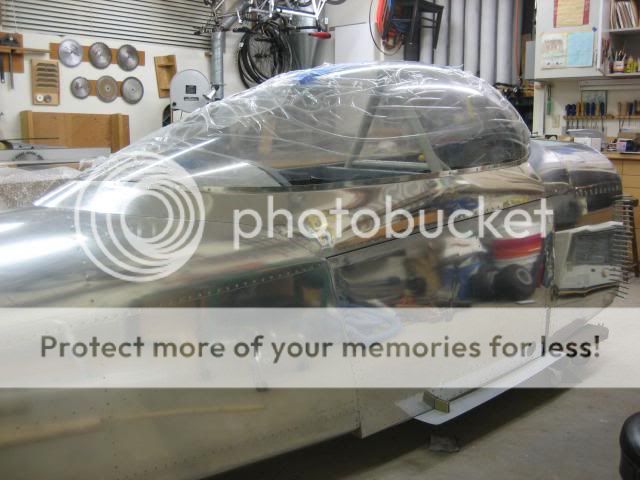
3) Finish both sides of the front section - Once you have the front section on both sides cut, flange formed and trimmed, move on to the to the aft. Same process... draw lofting dots from an established point on the fuse. Look at the photo; with the skirt off, I drew a straight line on the fuse, up to the bend line. The aft canopy skirt tends to rise up as you work toward the tail, so don't get carried away with aggressive trimming. Keep test fitting both sides and bend them into position to make sure the tails are on target. In one of the photos you can see the un-trimmed skirt to the right of my hand. I'm slowly working my way aft a few inches at a time. Near the tail, the flange bend stops. Once you get to the tail, trim them to mate. I used a doubler at the tail seam.

Finally, it took me two weeks of evenings to do it the first time, but it wasn't that great. I ordered another set of skins, and did it the second time around in one weekend. To be honest, the photos document my second go-around at the skirts, so don't get down on yourself. After all said and done, my skirt was too tight against the fuse turtle deck, so I trimmed by sanding block and emery cloth. After painting the fuse I had to trim slightly more. I think canopy cracks are often caused by too much stress when the canopy locked down.

I hope this helps
Sincerely, Brian

IMG_3671.jpg


IMG_3676.jpg


IMG_3675.jpg


IMG_3679.jpg


IMG_3681.jpg


IMG_3967-1.jpg


IMG_4087.jpg


IMG_4090a.jpg
 
Inspiration !

Brian,
Thank you for this..................... a golden nugget of information !
I think I now see a way forward, only time will tell. I'll keep you posted when I re-start after the workshop build and aircraft move.
 
Back
Top