What's new
Van's Air Force

Don't miss anything! Register now for full access to the definitive RV support community.

Engine Mount holes misdrilled

bkthomps

Well Known Member
since the old thread I posted on is actually in the 8 subforum for some reason, i'll post this in the main for others to see (and hopefully help someone avoid the trouble I'm facing)

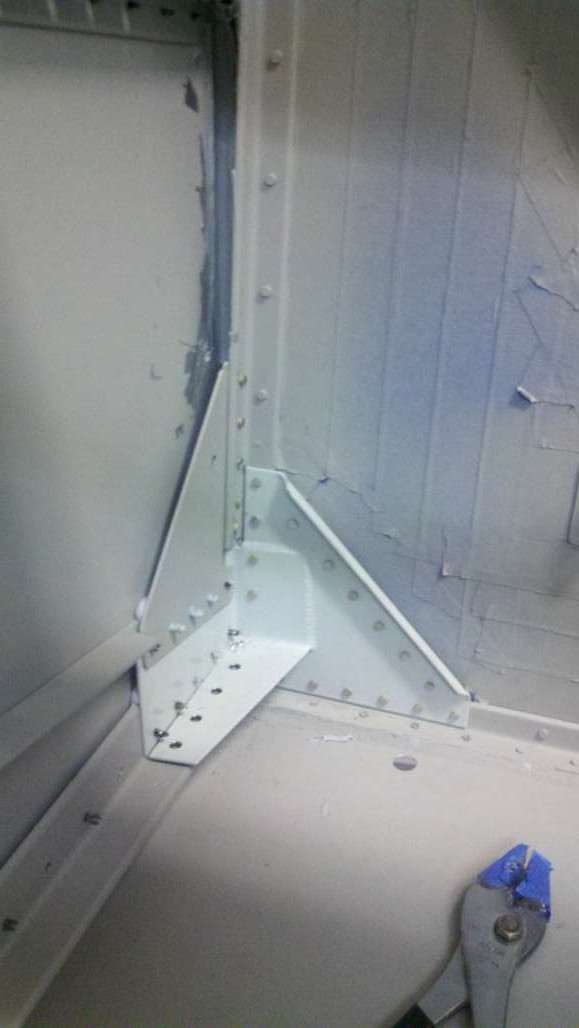
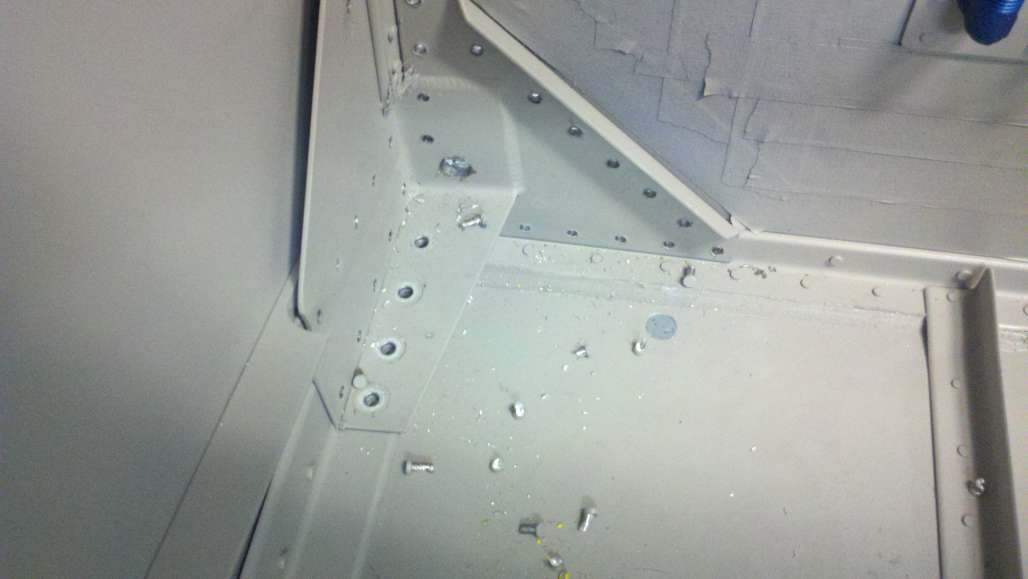
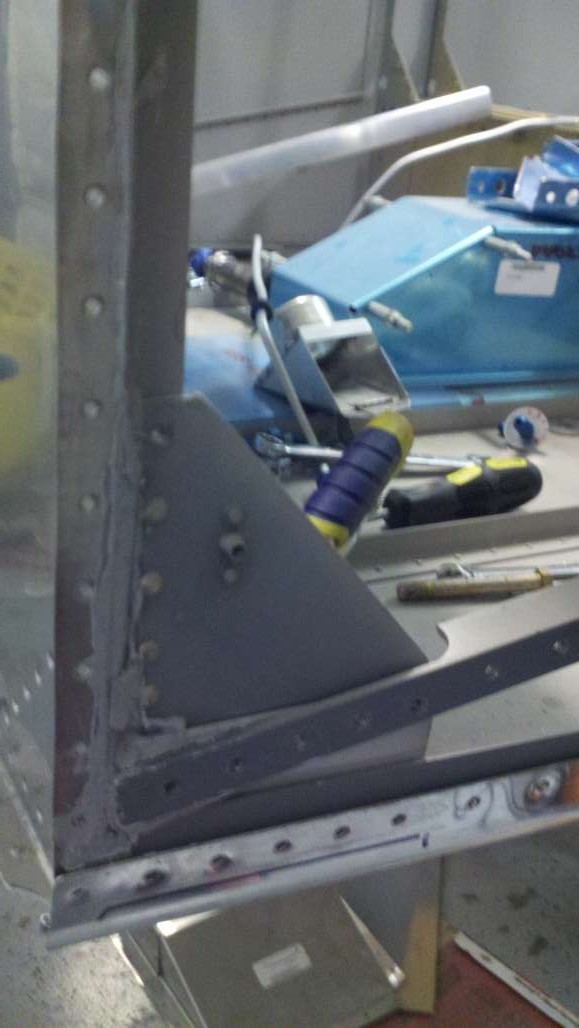
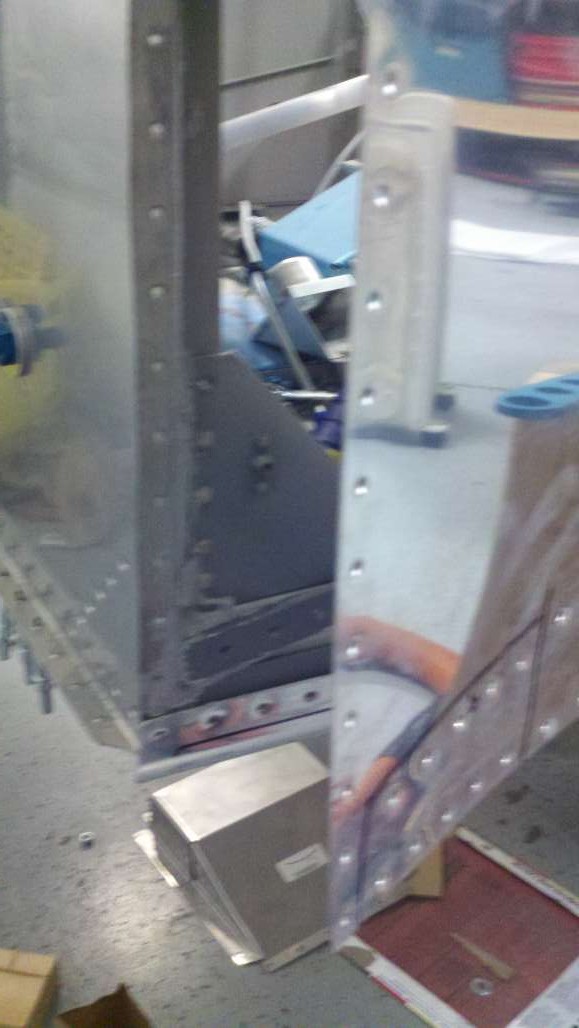
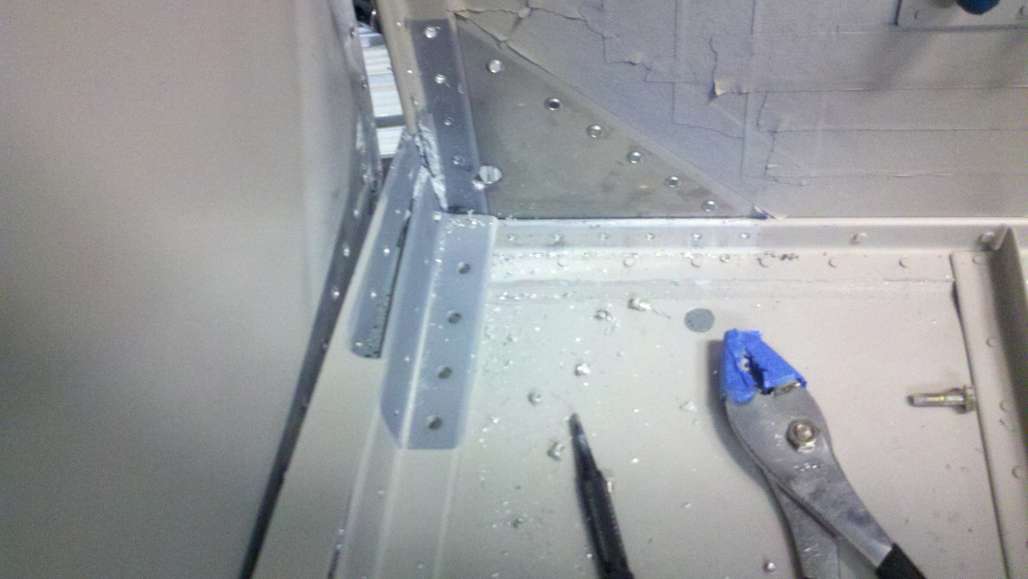
enlarging the hole with the reamer yielded an oblonged hole, the rest of the holes are just fine- for some reason this one was the culprit, and of course it's the lower weldment, any ideas/thoughts? I've consulted with a few experts and I think I am going to drill out the weldment and replace it

left_lower_engine_mount1028.jpg


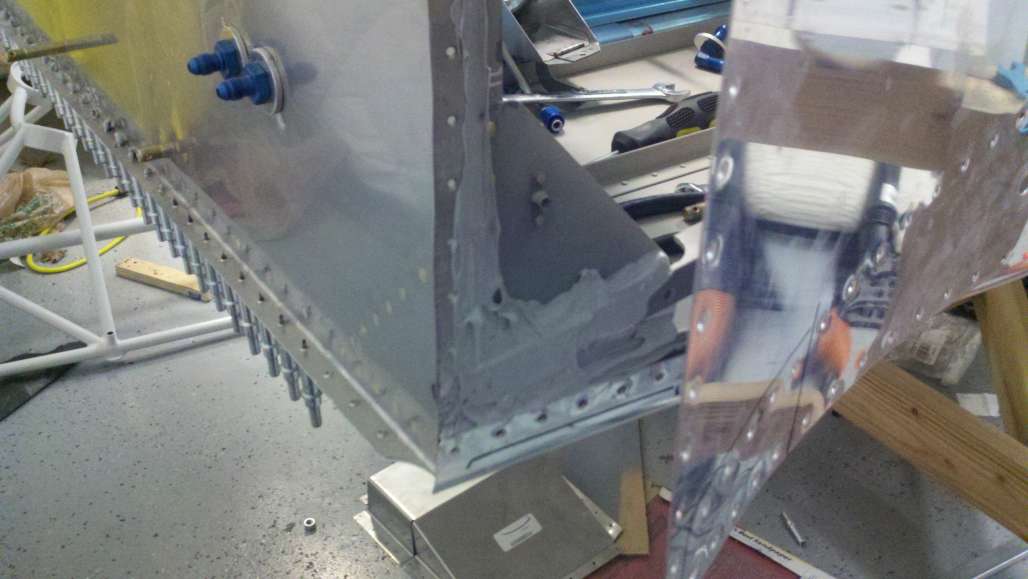
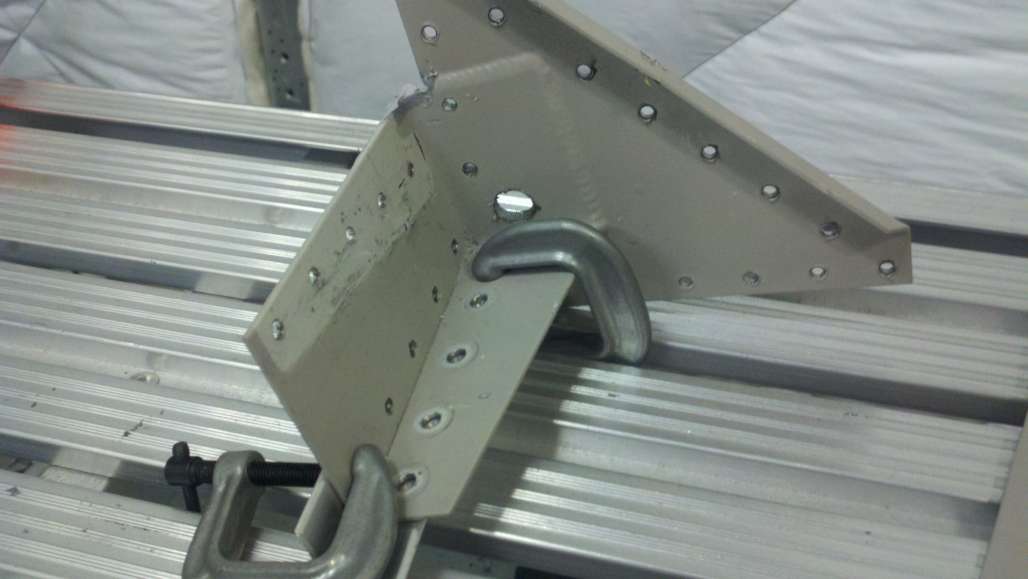
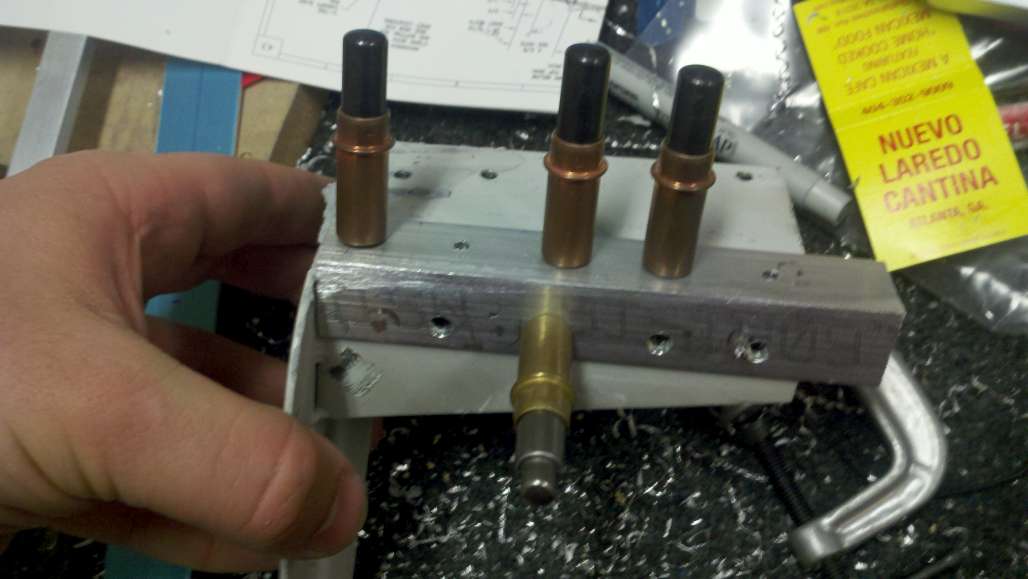
another view to show the opposite side (bolt reversed on purpose to show diameter)


left_lower_mount_view21028.jpg


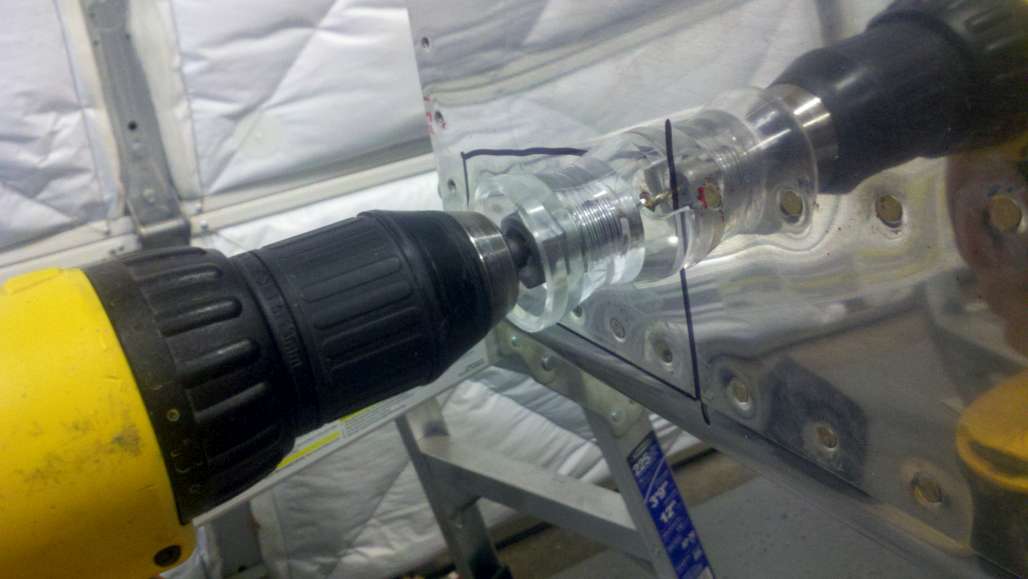
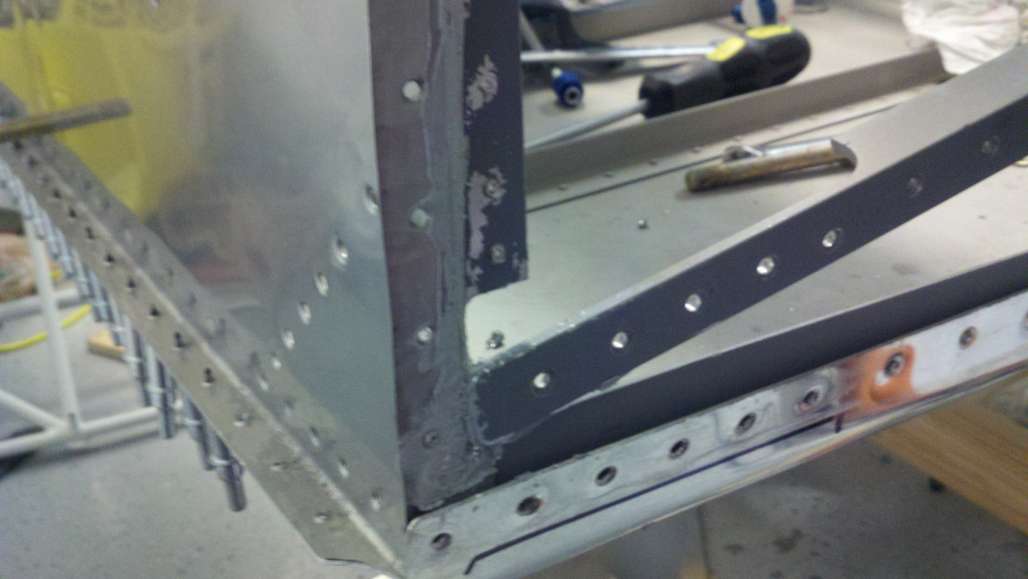
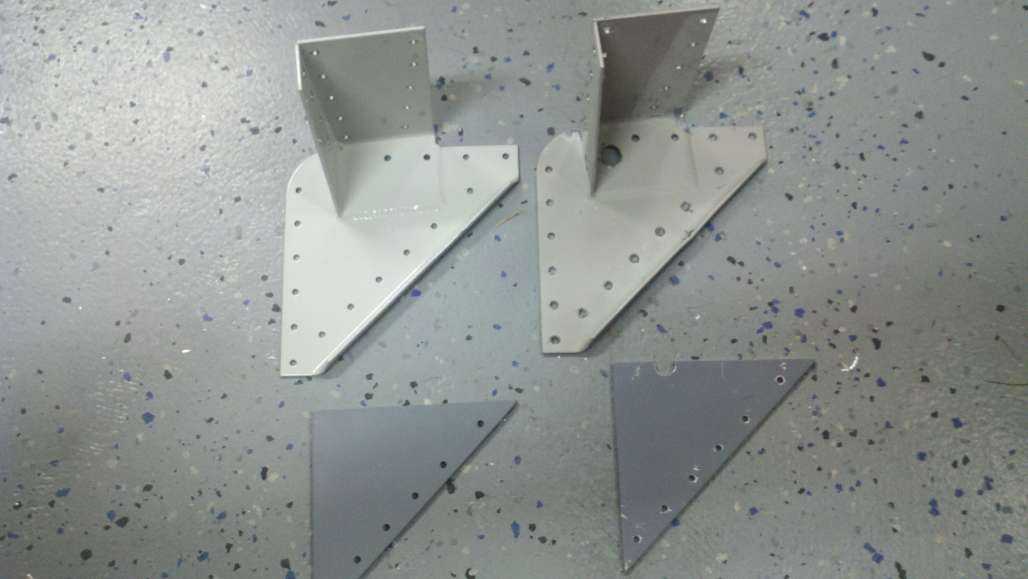
take your time on this part!
 
Putting flame suit on . . . JB Weld to the rescue!

I know I'm going to get flamed for this, but if it were me . . .

1. I'd open it a smidge all around, cut a slug of aluminum, drill it, then fit it to the oblong hole so that it was snug, essentially bushing it. Start to finish, and hour of quality file time.

2. Or, and here's where the flames will come from - I'd fill the whole thing with metal powder epoxy and redrill/ream, creating a form in place bushing. Sure, the tensile of the mix will be half that of aluminum, but you're only trying to keep the bolt from moving in the hole, there is plenty of load bearing material. Lots of little details on this (preload during set, etc), but this is a fairly common process/practice for heavy machinery. Maybe double washers on the inside.

I'd consider making that bolt an R&R on first and some incremental(2-5 year) conditional, until you're comfortable.

I would not R&R the weldment. More risk of damage than doing nothing, IMO.

Call Vans.

Rick 90432
 
More potential flames

Another alternative would be to obtain a specialty bolt that has a thicker shoulder between the head and threads. Then drill (carefully and keeping it round) the hole to match the diameter of the shoulder on the new bolt. Upon installation, you should use washers under the head to ensure that the shoulder of the bolt does not protrude past the bulkhead and prevent getting the proper tightness.

Ken
 
I admire your integrity for making this public and not just covering it up! If it were me... I'd just bite the bullet and repace the weldment. Make sure you're good at drilling out rivets before you start so as not to make things worse! It really won't be that bad once you get started.
 
I am not for covering up bad workmanship but this is not that bad and not likely to cause problems down the road.

I would debur the hole, slap me a washer on there torque it down, hang the engine and fly the poo out of it.

Your way more likely to cause more damage/risk drilling all that out than what you have now will cause.
 
Last edited:
I admire your integrity for making this public and not just covering it up! If it were me... I'd just bite the bullet and repace the weldment. Make sure you're good at drilling out rivets before you start so as not to make things worse! It really won't be that bad once you get started.

I ordered a drill cup set to make sure these are drilled out perfectly, as of now I'm planning on replacing the weldment. I'm still staring at it and waiting on Van's to reply

I'd rather discuss this on here publicly than have an NTSB report discussed without me!
 
Boy, that photo brings up a bad memory. I somehow misdrilled these holes on my 8A, both lower sides. The holes were reamed nice and round but slightly off, putting a sideload on the mount which was unacceptable to me.

I replaced both lower weldments. It's not a horrible job but it took a weekend to do. The new parts came with no pilot holes so I had to make a fixture to transfer the 1/8 and 3/16 holes to the new weldments. I kept the fixture around for the rest of the build as a reminder to slow down and RTFM!

Good Luck

Paul Danclovic
Jamewtown NC
RV-8A N181SB
 
holes

The Beech model 58 Baron has the holes in the firewall structure 1/16" oversize. I presume this is to allow for variations in the welded steel mount due to welding. I was rather shocked when I first saw this. The bolts are a snug fit in the engine mount.
If the hole in the firewall is 1/16 or less egg shaped I would leave it alone. On final assembly torque the bolts to the upper torque limit.
 
I had a similar issue on mine. I thought I had oblonged the hole, only to realize I hadn't. I only chewed up the stainless a bit and that made it look much worse than it was.

I was planning to replace the weldment. It's MUCH easier to fix now. A future repair could involve pulling engines, or exhaust, or crawling under the panel, or any host of things. It just depends on what's out front of the firewall and how difficult it would be to access. One thing is certain, it wouldn't be an easy fix and it would involve a whole lot of cussing.

Right now, you're pretty much down to the bare bones and only have to drill a few rivets. Sure you'll cuss it now, but it won't be nearly as much cussing as the alternative.

Phil
 
build -on

If the hole in the firewall is 1/16 or less egg shaped I would leave it alone. On final assembly torque the bolts to the upper torque limit.
I agree, I would move on. I don't think this is near as critical as a spar bolt fit or a -6/7 landing gear bolt. Also agree with #1 from Rick, the bushing fix. This standard OPs on wood spars to increase the diameter area and structure. Though the bushing here should be steel. This fix would be as strong (if not stronger) as a perfect hole since the bushing takes up a large diameter within the weldament and firewall-I think it would be better than drill out and replacing the structure- FWIW
 
Square washer ?

BK, a steel piece drilled for the bolt and carfully ground to fit against the side and bottom of the weldment will be as strong as the weldment with a reamed hole that fits the bolt. Just my 2c.
 
Washer

Hi

The last thing I would do is replace the weldment. You will end up ith a lot of enlarged rivet holes possibly making them oval.....

Another option is to weld a washer to the inside of the weldment in the correct position.
 
Don't weld on the part while it's attached to the airframe!

Dave

yeah it's backed by an aluminum gusset which would surely melt, as would the surrounding rivets

I can't get input from Van's today as they're closed, I'll update tomorrow with the final verdict
 
Weld

It goes without saying that the welding option should only be considered with copious quantities of cooling on the surrounding parts, using a Tig welder.

We had to carry out a similar repair on our Tailwind. There the engine mount bolts feed through the end of a tube longeron. A very thick washer hat the end of the tube holds the bolt in place. The floor by there is aluminium which had to be kept cool.

On another occasion when modifying the Tailwind landing gear to Vans gear we were able to weld a tube to carry the rear spring to the longerons cutting back only about a foot of fabric but cooling the surrounding tubes all the time. I am really pleased with the result as the previous gear had caused lots of problems.

The Vans gear has been in place for 15 plus years.

For this I used a specialist tig welder who is a real craftsman.

I suspect Van will say either build on or fill as advised by other inputters and build on.

Good luck with your build whatever you decide to do.
 
Well I just spoke with Gus at Van's, and he said that if it's just this one hole, it's okay- it will have the clamping force to the weldment and when properly torqued it will not be an issue.

If more than one hole had been this way, then it would be a different story he said. So it's up to me if I want to replace it, or he also said you could drill out a few rivets and make a square or triangular piece of steel that goes in that weldment slot, rivet it in place, then drill through it....hmmm
 
Ok thanks for that, but I dont think the Yard ships overseas, I'll have to see if anybody else has them, good tool:)
 
all gooped up with firewall sealant and ready to cleco back while the sealant dries

RvUYl.jpg


here's a shot of how many clecos i had to put in to hold the skin back on, which represents how many rivets i had to drill out today....****

C7Coj.jpg


and here's one from inside with all of the forward firewall rivets in place

Va8fo.jpg


when this dries, i'll have a friend help me rivet all of this back together, i'm going to have a glass of scotch
 
I just saw this post, but the same thing happen to me a few years ago, same place and everything. I too replaced the weldment and re-riveted everything back together. I think you made a good decision.
 
Back
Top