This is obviously a complicated subject, considering the significant amount of discussion here about it. Definitely read up.
Quickly: I chose to prime, as my RV-10 will spend a lot of time visiting the beach.
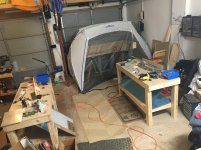
1. Priming will add time, expense, complexity, required tooling, and space to your project. Until you get comfortable and quick with your paint rig, you will add quite a bit of time and eat up days to prep and prime parts. If you don't have a dedicated paint booth or space, you will spend a lot of time setting up and tearing down. I made the choice that it's worth it for me, but consider what you think you'll really need.
2. You will find yourself jumping around in the plans a bit in order to get enough parts to make a painting session worthwhile, while not gathering so many that you have to make multiple batches of paint. The surface prep that needs to be done to get a good paint-metal bond takes a lot of time right before the paint session, so consider that in your planning as well.
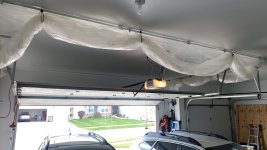
3. I am using the Sherwin Williams strontium chromate primer (CM0724400) in the bright yellow color. I chose it for its corrosion protection properties, and the color is bright enough that it should make inspections easier. The downside is that it is pretty toxic and needs to be handled with respect. That means I use a half face respirator with P100 filters and VOC cartridges under a supplied air hood (Breathecool II) when painting. I use the half face/VOC cartridges alone when mixing the paint and handling cleanup. My paint booth is well ventilated to the outside and I still get enough VOC in the other parts of the building that I generally paint as the last item of the day so I can leave it all to air out overnight.
4. For priming I am using a decent HVLP gun from Harbor Freight (the mid-to-upper grade one they sell) and it works well enough for internal part priming. I use the DeVilbiss DeKups system and it really helps with prep and cleanup of the gun. The disposable cups and filters make it really easy to mix paint and clean the gun up. For spot work I use the little Preval sprayers. I have a laboratory magnetic stir bar hot plate that I use for mixing the paint (heat turned off)--the stir bar gets filtered out in the DeKups system and I just retrieve it at the end of the paint cup.
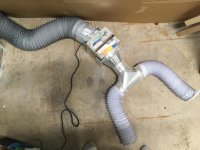
5. Use a coalescing filter on the air supply, and dedicate separate hoses for painting only (you don't want oil or water in them). I also have an auto-blowdown on my compressor to keep the moisture down, and the coalescing filter removes water droplets as well as oil. I use dessicator filters available cheap from Harbor Freight as a final drying step right at the regulator before the hose to my gun. One has lasted me quite a while (all of my painting sessions so far--nearly 2 gallons of primer/adduct mix) and still has no color change in the indicating beads.
6. If you are painting at home and don't have a detached garage or shop, think carefully about how you are going to keep the fumes and paint dust out of the rest of the house.
Just some thoughts. There are very good reasons to prime, but be aware it will probably add a lot of complexity to your building process.


")