

Built a custom cowl part this weekend and thought it might be a good time for a tip. I've had several recent PM's and emails asking how to form shapes, about mold release, etc. As usual the former canard builders among us should probably click out now or risk being bored to death") .
.
Generate the desired male shape using any material that works; clay, block foam, balsa, sheet metal, gypsum....whatever. This one is pour in place two-part urethane. Slap up some cardboard dams, pour the foam, wait 15 minutes and carve away everything that doesn't look like the part.
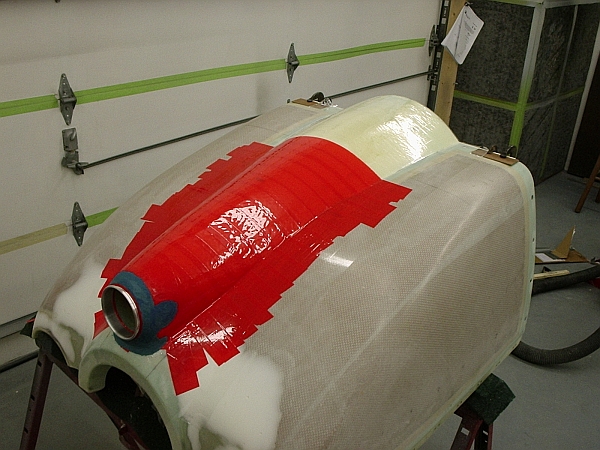
The Prime Directive with male form "moldless" parts is to spend as much time as necessary to make the form perfect. It won't be perfect of course, but getting real close pays a huge time and weight dividend later when you get into surface filling and finishing.
Chipping out or dissolving foam afterward, then sanding, is a PITA. Cover your form with any thin, slick tape. I use ordinary clear box packing tape for most parts. However, note the red tape on the forward end of this form; there's a reason. The forward end has some severe curves and a tight angle down by the flange where the finished part will attach to the cowl. Curvature, in particular 90 degree bends, tends to result in air bubbles between the plies as you add layers. No big deal, just stipple or use a roller to remove them after all the plies are in place. However, you must be able to see them to find them. Using a colored tape makes them very, very obvious; great color contrast.
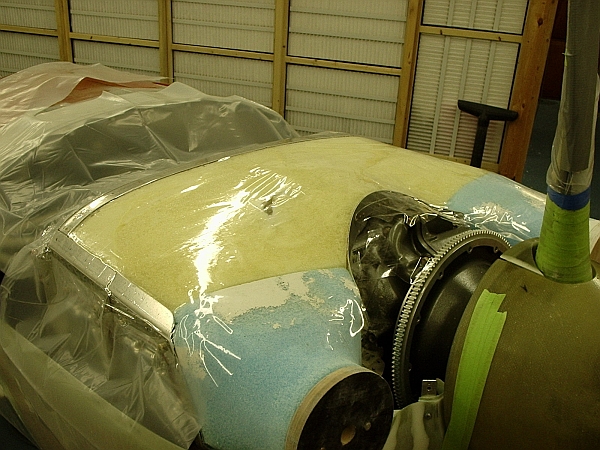
This is sort of a big part and doesn't have much draft angle at the forward end to make release easy. So, with the tape in place, fire up your cheap HF minigun and spray a coat of PVA mold release. Later when the part is cured, pry up an edge and blast under it with a squirt of air. It will pop right off the slick tape. The backside of the part will be smooth and slick, but it will have some tape lines. Leave 'em or sand them out as you please. Don't forget to rinse off the PVA.
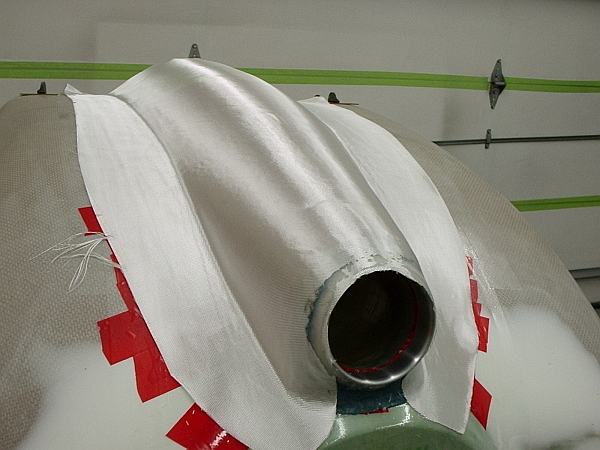
The aluminum ring at the inlet was set in place with flox. The blue clay just formed a transition between the foam and the location where the flox started. The flox was placed and then the glass fabric was immediately laid over it while it was wet.
Speaking of cloth, in the past I've mentioned my favorite general use "keep in the shop" cloth is 8.9 oz 8-harness satin. Builds thickness fast, but more important, the 8-harness weave lets it drape around compound curves without fighting wrinkles and bubbles.
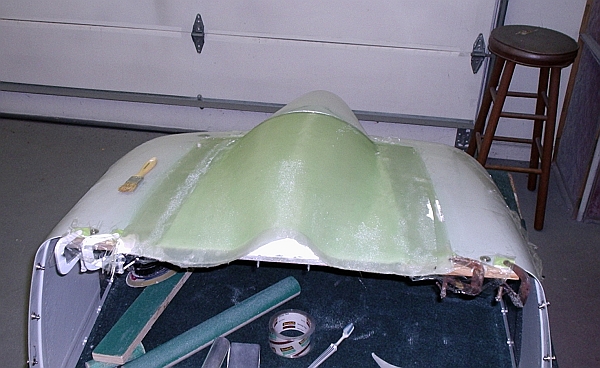
Full layup, with peel ply.
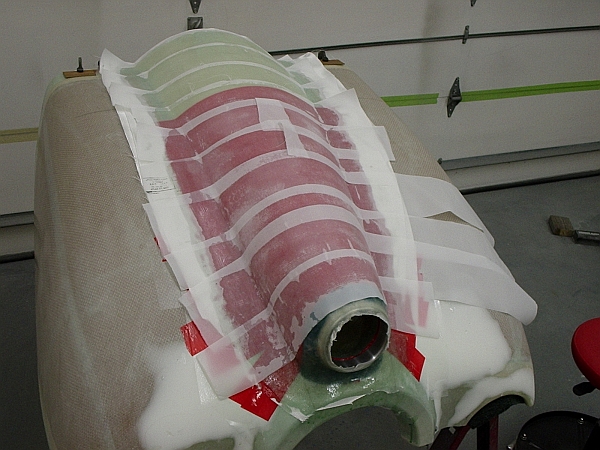
When ripped off after cure, the peel ply will leave a "fractured" surface, ready for subsequent bonding or filling. The alternative is heavy sanding with a coarse grit before a subsequent bond. Only light sanding is needed here, just to eliminate any ridges and bumps.
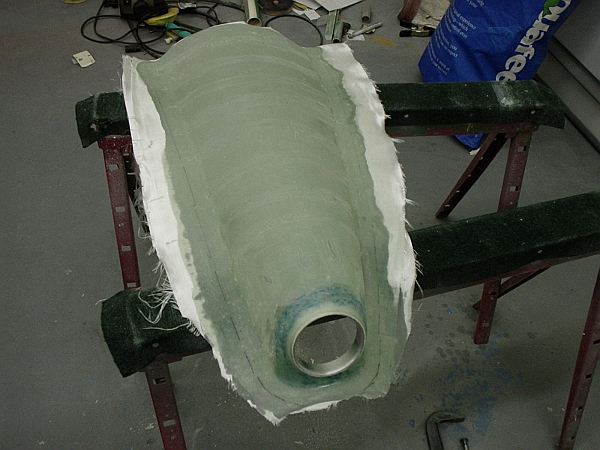
Trimmed part, ready for surface filling with micro.
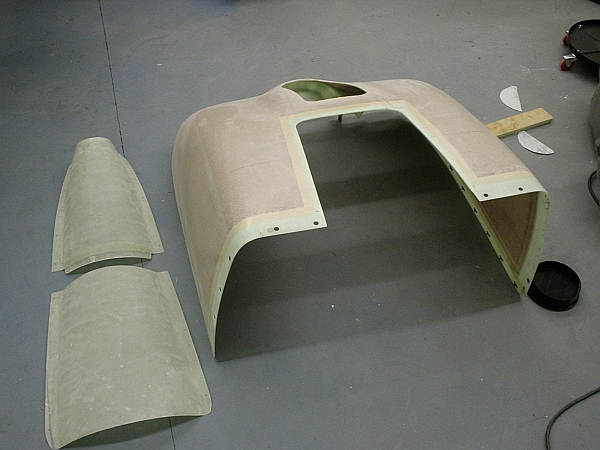
Same basic technique works for all kinds of parts.
.Generate the desired male shape using any material that works; clay, block foam, balsa, sheet metal, gypsum....whatever. This one is pour in place two-part urethane. Slap up some cardboard dams, pour the foam, wait 15 minutes and carve away everything that doesn't look like the part.
The Prime Directive with male form "moldless" parts is to spend as much time as necessary to make the form perfect. It won't be perfect of course, but getting real close pays a huge time and weight dividend later when you get into surface filling and finishing.
Chipping out or dissolving foam afterward, then sanding, is a PITA. Cover your form with any thin, slick tape. I use ordinary clear box packing tape for most parts. However, note the red tape on the forward end of this form; there's a reason. The forward end has some severe curves and a tight angle down by the flange where the finished part will attach to the cowl. Curvature, in particular 90 degree bends, tends to result in air bubbles between the plies as you add layers. No big deal, just stipple or use a roller to remove them after all the plies are in place. However, you must be able to see them to find them. Using a colored tape makes them very, very obvious; great color contrast.
This is sort of a big part and doesn't have much draft angle at the forward end to make release easy. So, with the tape in place, fire up your cheap HF minigun and spray a coat of PVA mold release. Later when the part is cured, pry up an edge and blast under it with a squirt of air. It will pop right off the slick tape. The backside of the part will be smooth and slick, but it will have some tape lines. Leave 'em or sand them out as you please. Don't forget to rinse off the PVA.
The aluminum ring at the inlet was set in place with flox. The blue clay just formed a transition between the foam and the location where the flox started. The flox was placed and then the glass fabric was immediately laid over it while it was wet.
Speaking of cloth, in the past I've mentioned my favorite general use "keep in the shop" cloth is 8.9 oz 8-harness satin. Builds thickness fast, but more important, the 8-harness weave lets it drape around compound curves without fighting wrinkles and bubbles.
Full layup, with peel ply.
When ripped off after cure, the peel ply will leave a "fractured" surface, ready for subsequent bonding or filling. The alternative is heavy sanding with a coarse grit before a subsequent bond. Only light sanding is needed here, just to eliminate any ridges and bumps.
Trimmed part, ready for surface filling with micro.
Same basic technique works for all kinds of parts.
Last edited:

