LettersFromFlyoverCountry
Well Known Member
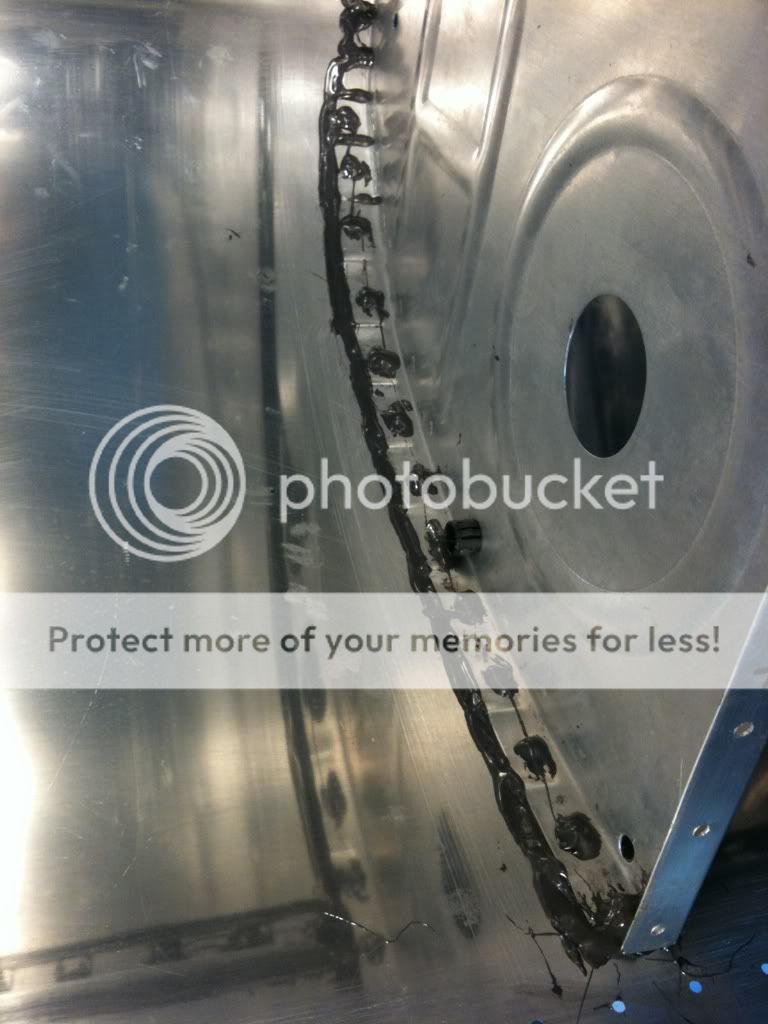
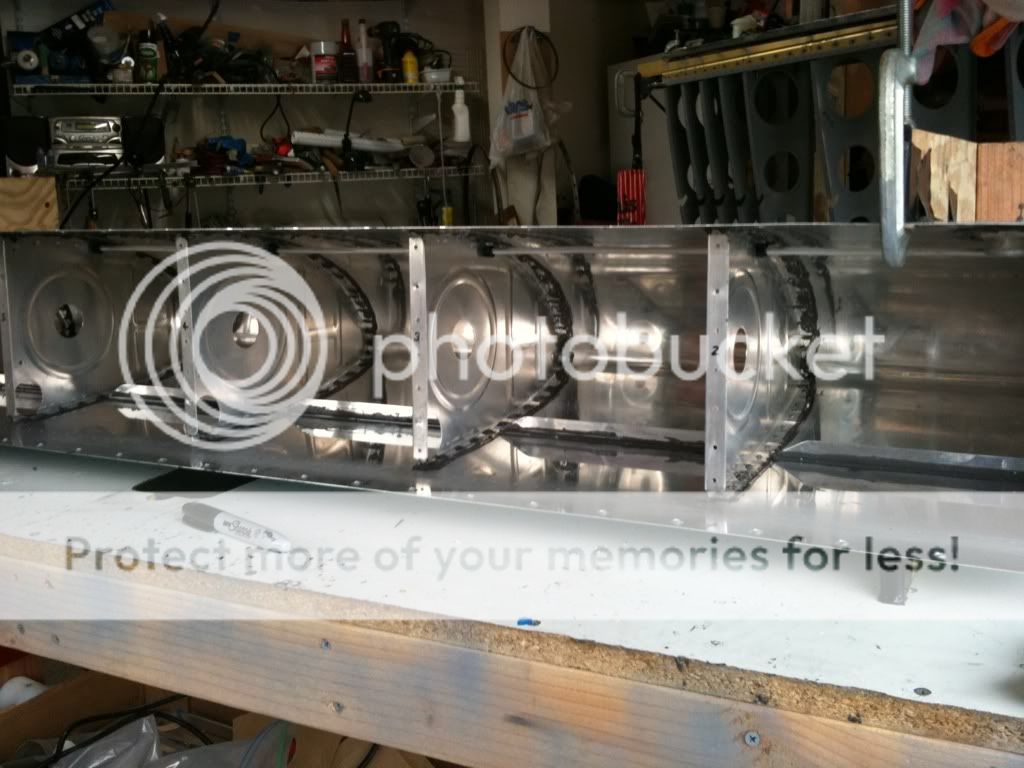
A big glob of Prosealover the shop head...a generous filet along one side of the rib, and then along the flange/skin on the other... can't leak. Buy extra proseal.


Jim,.....I installed the rivets dry. Very easy this way.
Any potential for problems with the dry rivet installation? I understand the the shop head is self sealing.....
Jim,
No doubt it is easier to install the rivets dry but many, many field reports of weeping rivets and blistering paint suggest to me that the shops heads of the rivets are not necessarily self sealing when bucked into a thin dimpled stackup. In addition to any given builder's level of workmanship, there are other variables that determine overall quality such as rivet length...the callout is 3.5 and I prefer a 4....hole preparation...usually reamed with a #40 and I prefer a #41 to produce a slightly snugger fit...the quality of the shop head after bucking...some people leave bad rivets in place reasoning that they will cause more damage by replacing than leaving alone.....All the more reason to dab a touch of sealer around the countersink prior to seating the manufactured head, and then fully encapsulate the shop head after setting the rivet. Extra work...sure...but I'd rather pay now than pay later.
Bill,Rick,
I'll start sealing this weekend and plan to use your suggested 100% cleco process and post-semi-cured rivets. Two questions: is it easier to just do the ribs that way but not the stiffeners, and 2) would it be a good idea to thin the pro-seal a little for wet installing the rivets?


... and 2) would it be a good idea to thin the pro-seal a little for wet installing the rivets?
) with straight sealer.......Any comments would be appreciated.....

Don,....It will be much easier doing one big batch, verses small batchces that I've been doing....

Mark,.....curious as to why you wouldn't do the end ribs at the same time.....Also, on the internal ribs is there a good reason to seal up the nose past the last rivet?.....

Rick's original post in this thread refers to "handy device, essentially a caulking gun" but the tiny url link is broken. Would someone please post/describe which caulking gun device he was recommending?
Forgive my inexperience, but why would one not back rivet ribs to one side of the skin from the inside, before wrapping the skin? It seems that this would be easier and faster.
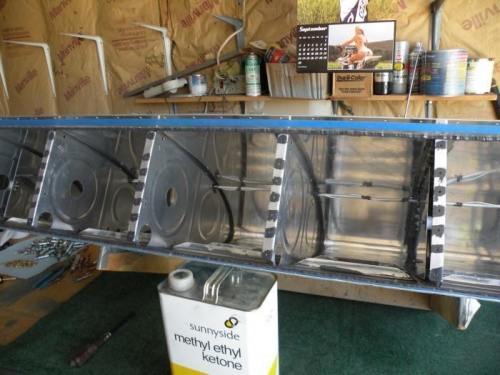
I used Ricks method for the first half (ribs to skins) and I must say...all my fears of ProSeal really were for nothing. This is pretty clean way to get the bulk of the sealant done on the tanks.
I hope to have both tanks riveted during this week sometime. Wish I had done it sooner! Thanks Rick!
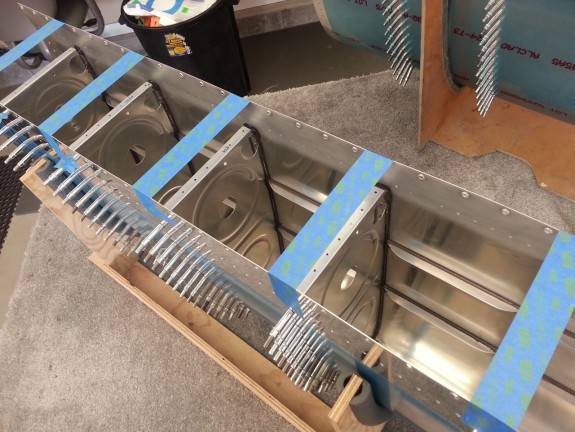
How many clecoes did you need to do that? I'd like to lay all the ribs in at once but I don't know if I have enough clecoes to be able to fill every hole on the interior ribs...
340 total will take care of both RV-7 tanks!
The only thing I don't like about proseal is that it resembles my work as a pastry chef.
I just finished the third leakfree tank.
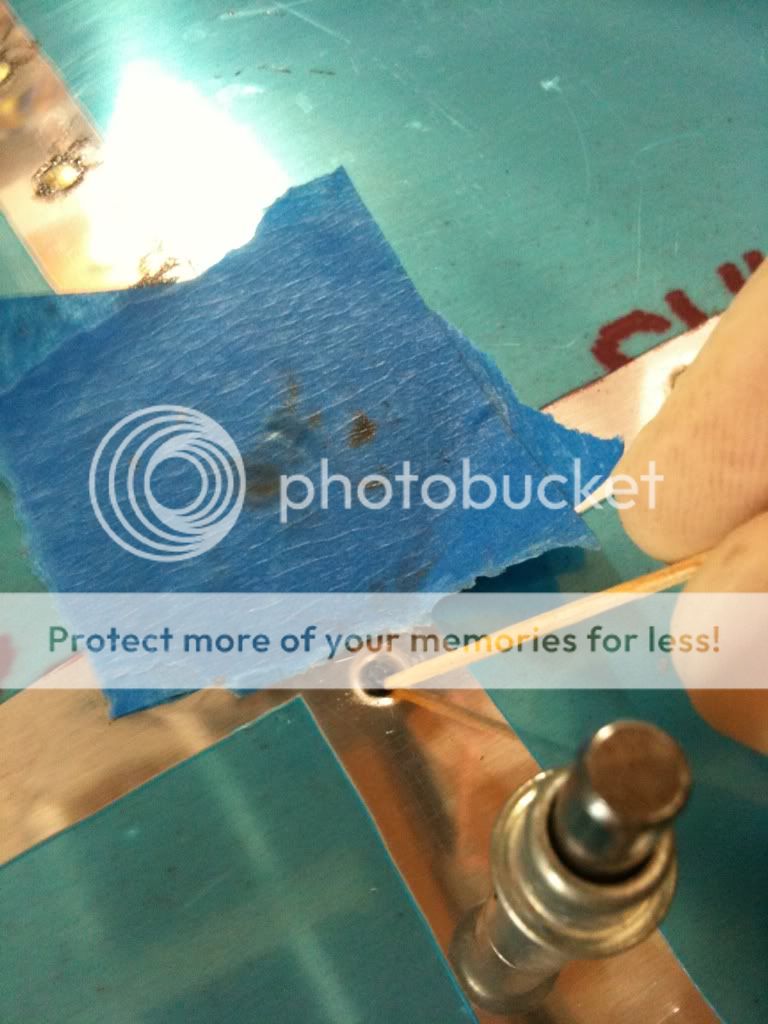
I use parchment paper to make a nice little tube,wrap some tape around it and it is ready to go.Cut the tip as much or as little as you want to get a very small amount in the right place.Best of all when your done with it throw it away.
http://img79.imageshack.us/img79/4938/tankseal1ge6.jpg
http://img79.imageshack.us/img79/9384/tankseal2gi1.jpg
I have the same question. I have half a can of 5 year old and 8 year old flamemaster (proseal). The 8 year is a little thicker and would be harder to mix up. Both have been in the shop fridge for years and occasionally used lately. I take it out of the fridge the day before to allow it to come up to room temp and soften. So far I have only used this "old stuff" as a non critical adhesive and I kept the leftovers to see how well it cures. Turns out it cures just like I remember it did when it was new. SO...other than being a little stiffer to mix up, why the relatively short expiry date on the can? Can this 5 year old stuff be used to seal the inboard tank covers, or do I need to order another can? If it cures, it cures. Or is there something I'm missing here? Remember is has been in the fridge all this time.
Bevan
I have half a quart of Proseal left, that has been kept in the refrigerator and is almost 3 year old now. It looks good. Any thought about using it, or do I need a new batch to a small tank job?
Has anyone tried thinning proseal??
Just seems right that a thread about porseal be sticky
Having trouble shooting rivets wet. Should i just be putting a dab in the hole and keeping the tail of the rivet clean until after bucking? Right now i have the stuff all over the rivet and the bucking bar goes bizerk! Also, what bucking bar works best in a tank?
Thank you to all who have added to this thread. i would be lost without it.
I too used this thread as my guide to sealing my tanks. It is slow tedious work, but mine came out leak free. I dabbed the dimple full of proseal and then inserted a rivet. I didn't have any trouble bucking the wet rivets. I used a tungsten bucking bar. Maybe your gun pressure is too high?
I too used this thread as my guide to sealing my tanks. It is slow tedious work, but mine came out leak free. I dabbed the dimple full of proseal and then inserted a rivet. I didn't have any trouble bucking the wet rivets. I used a tungsten bucking bar. Maybe your gun pressure is too high?

