Van's Air Force
You are using an out of date browser. It may not display this or other websites correctly.
You should upgrade or use an alternative browser.
You should upgrade or use an alternative browser.
RV-9a: Cal’s build
- Thread starter cgeyman
- Start date

cgeyman
Well Known Member
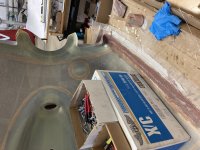
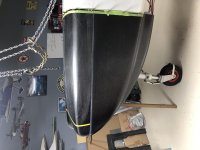
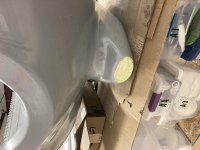
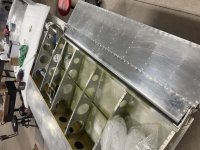
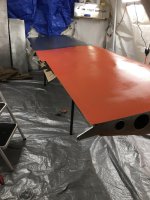
3m 471 fine line tape
Thanks DanH for his past expert posts on finishing. Put down double layer of 1/4 inch fine line tape, then broader tape. The plain masking tape is actually over the original vinyl wrap so it is fine. Now what color to paint?
https://www.flickr.com/photos/192383868@N06/shares/4b44vA
Thanks DanH for his past expert posts on finishing. Put down double layer of 1/4 inch fine line tape, then broader tape. The plain masking tape is actually over the original vinyl wrap so it is fine. Now what color to paint?
https://www.flickr.com/photos/192383868@N06/shares/4b44vA
cgeyman
Well Known Member
cgeyman
Well Known Member
2 month hiatus
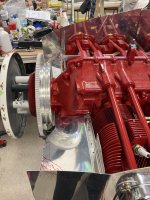
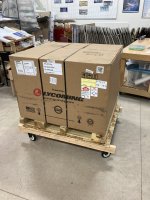
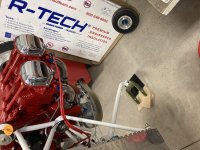
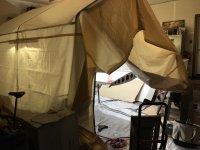
Engine got delayed from Covid et Al. But Lycoming thunderbolt did finally make it through- hurray. Now a whole new ball of wax to learn about.
Engine got delayed from Covid et Al. But Lycoming thunderbolt did finally make it through- hurray. Now a whole new ball of wax to learn about.
Attachments
cgeyman
Well Known Member
Engine on
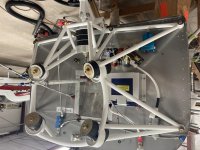
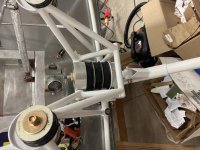
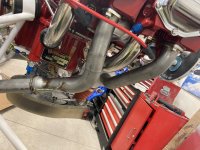
How exciting- needed to do bottom mounts first for to issues with new elastomer nose gear mount and my fuel pump bumping into each other. Quite exciting- did have to grind a 5/8 wrench to tighten the upper Barry mounts!
How exciting- needed to do bottom mounts first for to issues with new elastomer nose gear mount and my fuel pump bumping into each other. Quite exciting- did have to grind a 5/8 wrench to tighten the upper Barry mounts!
Attachments
cgeyman
Well Known Member
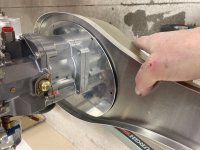
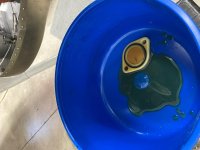
Super sticky preservation oil
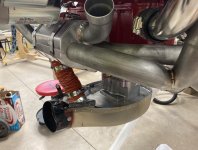
Scary removing bottom plate on sump to attach the carburetor and see all this oil pour out. Apparently they spray the super sticky preservation oil in the cylinders prior to shipping and some gets through an open intake valve and drains into the intake pipe and carb induction side of things. Initially I thought my cast oil sump was broken inside it was only a cup worth, but I should have had a bucket ready. I did the second time when letting it drain out completely (most of the cup of oil ended up on the floor)
Scary removing bottom plate on sump to attach the carburetor and see all this oil pour out. Apparently they spray the super sticky preservation oil in the cylinders prior to shipping and some gets through an open intake valve and drains into the intake pipe and carb induction side of things. Initially I thought my cast oil sump was broken inside
it was only a cup worth, but I should have had a bucket ready. I did the second time when letting it drain out completely (most of the cup of oil ended up on the floor)Attachments
cgeyman
Well Known Member
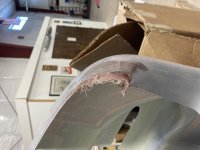
Oops cowling
I was trying to be careful but I still managed to over trim one side of the cowling. Now trying to undo the damage. Ugh. Like fitting an old fashioned victorian dress I imagine.
All so my inlet duct areas didn’t fully close the gap.
I was trying to be careful but I still managed to over trim one side of the cowling. Now trying to undo the damage. Ugh. Like fitting an old fashioned victorian dress I imagine.
All so my inlet duct areas didn’t fully close the gap.
Attachments
cgeyman
Well Known Member
Thanks Vlad
Trying not to just build a “farm tractor” as vans support occasionally will say.
It happens you are not alone. I managed to overtrim the back of the top cowling")
Trying not to just build a “farm tractor” as vans support occasionally will say.
cgeyman
Well Known Member
Wish I was DanH
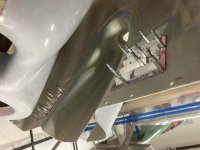
Man, my adventures in fiberglass are from the underworld- wish I had trimmed to a better tape line, than having to add back edge to my lower cowl. Still lots of sanding to do. My fault of course. A teaching moment- try to avoid all fiberglass
Man, my adventures in fiberglass are from the underworld- wish I had trimmed to a better tape line, than having to add back edge to my lower cowl. Still lots of sanding to do. My fault of course. A teaching moment- try to avoid all fiberglass
Attachments
Last edited:
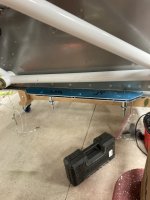
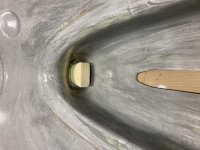
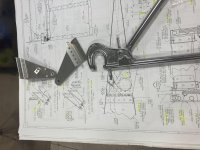
I’ve found 1/4” striping tape to get my trim lines set is useful. I’ll trim 1/8” short of my goal & use 80 grit permagrit sanding bar for very clean edges to take down last 1/8”. With CF you want to make dust as little as possible. Carbon rash is real. The striping tape can be bought at auto paint supply places.
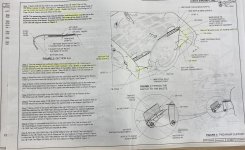
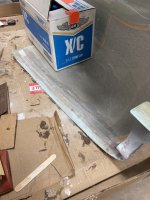
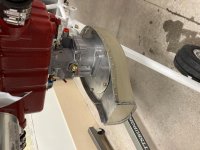
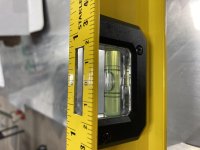
Attached pic of aluminum bent 90 as a depth gage. Put your cowl on, slide depth gage under to find edge of fuselage & mark with sharpie or tape on depth gage. That defines how & where you Lay-out the striping tape for excess cowl length. In other words after extracting depth gage, lay it on cowl & mark cut. Connect striping tape along marks. Only takes a couple of in/offs to nail it.
Attached pic of aluminum bent 90 as a depth gage. Put your cowl on, slide depth gage under to find edge of fuselage & mark with sharpie or tape on depth gage. That defines how & where you Lay-out the striping tape for excess cowl length. In other words after extracting depth gage, lay it on cowl & mark cut. Connect striping tape along marks. Only takes a couple of in/offs to nail it.
Attachments

Last edited:
cgeyman
Well Known Member
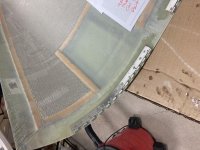
Hi Dan
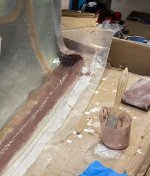
Hi to both friends commenting on my fiberglass mishap. I realized to make the repair I should have clecoed on a thin waxed or PVA-covered aluminum strip, scarfed the edge 30:1 and done my straight fiberglass and epoxy strips to build up a nice edge (over trimmed by 1/8 to 1/4”). What I did instead was build up outer mold of west system fairing material (filler 407) which is phenolic microballons that’s is easy to sand. I then layered glass/epoxy on the inside of this to build up the edge. I ended up sanding all the outer layer/fairing epoxy off to make things flush again. Wish I had thought of the waxed aluminum plate as a smooth and flush backer board. (I dont have PVA to spray or paint). It is going to end up strong and ok for attaching the hinge. I have been reading a lot of Dans old post on fiberglass magic, but as a noobie I have to make my own mistakes. ��
Hi to both friends commenting on my fiberglass mishap. I realized to make the repair I should have clecoed on a thin waxed or PVA-covered aluminum strip, scarfed the edge 30:1 and done my straight fiberglass and epoxy strips to build up a nice edge (over trimmed by 1/8 to 1/4”). What I did instead was build up outer mold of west system fairing material (filler 407) which is phenolic microballons that’s is easy to sand. I then layered glass/epoxy on the inside of this to build up the edge. I ended up sanding all the outer layer/fairing epoxy off to make things flush again. Wish I had thought of the waxed aluminum plate as a smooth and flush backer board. (I dont have PVA to spray or paint). It is going to end up strong and ok for attaching the hinge. I have been reading a lot of Dans old post on fiberglass magic, but as a noobie I have to make my own mistakes. ��
Attachments
Last edited:
cgeyman
Well Known Member
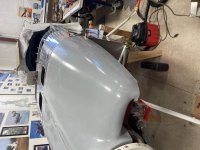
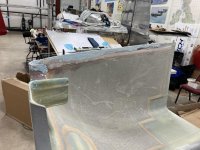
First cowling full hinge hanging
Hurray- after my fiberglass trimming fiasco, things are settling down and I am not going to buy anew lower cowl. Patience and learning the basics of fiberglass helps. It is far from perfect, but plenty flyable.
Hurray- after my fiberglass trimming fiasco, things are settling down and I am not going to buy anew lower cowl. Patience and learning the basics of fiberglass helps. It is far from perfect, but plenty flyable.
Attachments

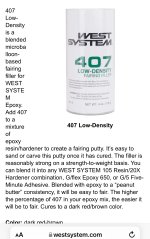
You’re doing good. Don’t you like west 407? DanH it’s a really useful product. It sands beautifully.
cgeyman
Well Known Member
Hi Rhodes
Dan is right, of course. I just had this on hand, but should have used the West 407. I am a total novice, and make mistakes. Sorry to suggest what I did was right. It was wrong. I follow DanH's post's and he really is a fiberglass wizard. I have read some composite texts since, and it is mind-boggling. Very amazing actually. Just wear good face masks and nitrile gloves. It can be messy.
Cal
Thanks for the comments.
West 407 is a very good product. In the world of composite aircraft (where I live now it is well thought of. You’re not “wrong” ! Have fun!!
it is well thought of. You’re not “wrong” ! Have fun!!cgeyman
Well Known Member
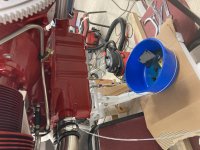
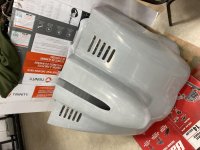
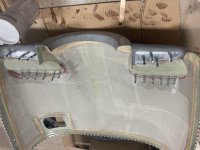
Upper cowl inlet ducts
Fun installing the well-designed cowl inlet ramps
Also starting air box install- pretty awesome.
Fun installing the well-designed cowl inlet ramps
Also starting air box install- pretty awesome.
Attachments
Last edited:
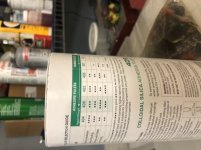
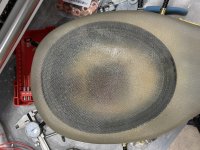
Put the selection grid for West products. 407 is good for fairing & is semi structural. Sands smoother than glass beads as shown in wing root fairing aft end picture. I use 406 for bonding, kinda a cross between glass beads & flox but smoother. One more tool for the box.
Attachments

Last edited:
cgeyman
Well Known Member
Thanks Rhodes
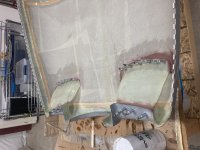
Yeah, I should have ordered many more West options for the tool kit. The wonderful world of fiberglass. Got the air box almost done; still need to fabricate the fiberglass snorkel and baffle gap.
Yeah, I should have ordered many more West options for the tool kit. The wonderful world of fiberglass
. Got the air box almost done; still need to fabricate the fiberglass snorkel and baffle gap.Attachments
acroboy
Member
Laying up the short snorkel connect the air scoop to the air box
I've been doing a lot of forum research on cooling due to teething problem on my just flying RV4. You might consider closing off the ends of the eyebrow cooling ramps. While not applicable to my case there was considerable discussion on the benefits and/or necessity for proper cooling.

Jerry Fischer
Well Known Member
FAB
Looks great, don't forget the 2 drain holes in the bottom; ask me how I know...
Looks great, don't forget the 2 drain holes in the bottom; ask me how I know...
cgeyman
Well Known Member
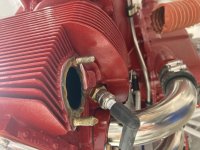
Lycoming doesn’t fool around
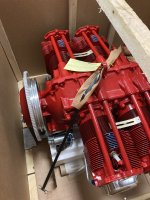
This time I expected plenty of preservation oil in opening up the exhaust port covers- had the drain pan ready this time (I made a mess when taking off the carburetor sump cover).
This time I expected plenty of preservation oil in opening up the exhaust port covers- had the drain pan ready this time (I made a mess when taking off the carburetor sump cover).
Attachments
Jerry Fischer
Well Known Member
reply
easy forget...Two holes drilled; easy to overlook (now I need to remember to safety wire the mounting plate to carburetor before final install)- I keep a to-do list
cgeyman
Well Known Member
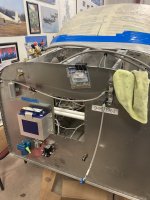
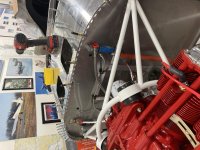
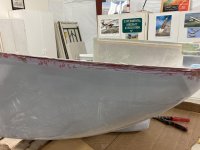
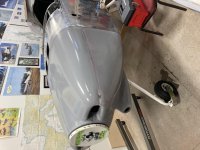
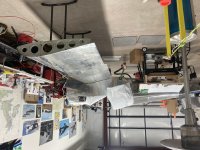
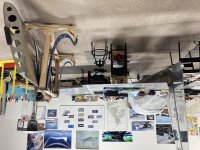
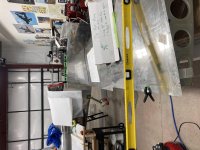
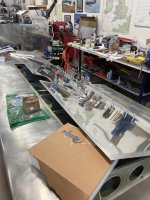
Wing fitting
Wow. This is totally awesome- bolts not in yet- just planning still. not sure why photos upside down. Sorry.
Wow. This is totally awesome- bolts not in yet- just planning still.
not sure why photos upside down. Sorry.Attachments
cgeyman
Well Known Member
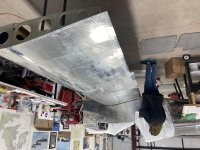
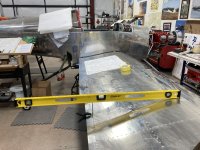
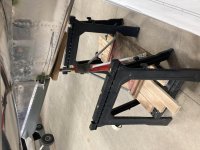
Dry run on setting wing incidence
With new compression disc nose gear my longerons were not level. Even taking nosewheel off didn’t correct all the way. Had to jack up tail several inches to level the fuselage as the starting point.
With new compression disc nose gear my longerons were not level. Even taking nosewheel off didn’t correct all the way. Had to jack up tail several inches to level the fuselage as the starting point.
Attachments
cgeyman
Well Known Member
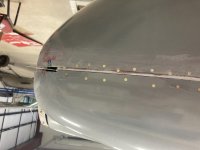
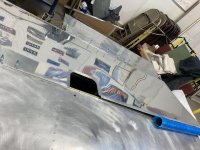
Aft bottom wing rivets
Ughh- back bottom wing skin rivets are might hard on the arms. Even two person is tough. Wish I had mighty chimpanzee arms. At least my tank pressure test stayed afloat overnight.
Ughh- back bottom wing skin rivets are might hard on the arms. Even two person is tough. Wish I had mighty chimpanzee arms. At least my tank pressure test stayed afloat overnight.
Attachments

cgeyman
Well Known Member
cgeyman
Well Known Member
Thanks Vlad
You are the true expert in wringing out problem areas in your plane (I.e. get lots of mileage).
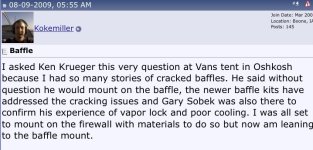
I was going to install the angle but it seems that the 2008 cowl plans beefed up the baffle with an upper brace that my 2003 rv-9 doesn’t have. But I will read again the angle reinforcement threads (I know Vic Syracuse’s book show lots of cracked baffles in the oil cooler area. See you at Oshkosh I hope. Thanks for the tip.
Cal
You are the true expert in wringing out problem areas in your plane (I.e. get lots of mileage).
I was going to install the angle but it seems that the 2008 cowl plans beefed up the baffle with an upper brace that my 2003 rv-9 doesn’t have. But I will read again the angle reinforcement threads (I know Vic Syracuse’s book show lots of cracked baffles in the oil cooler area. See you at Oshkosh I hope. Thanks for the tip.
Cal
cgeyman
Well Known Member
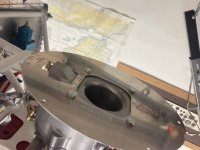
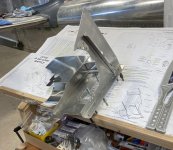
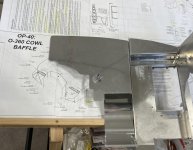
New cooler mount design
To Vlad’s concern, it looks like they beefed up the design in late 2008, hurray
(See beefed up upper brace and thicker outer mount):
To Vlad’s concern, it looks like they beefed up the design in late 2008, hurray
(See beefed up upper brace and thicker outer mount):
Attachments
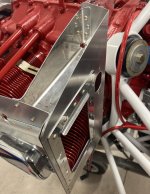
Cman, been a long time since build for me, but I recall my RV-7 baffle with cooler has a BEEFY angle on the outside of the rear baffle flange and side baffle. I dont see that in your pic. I also dont see the angle on Sheet OP-27A.
But I got it from somewhere, and it works. No cracks in mine after 550+ hours.
But I got it from somewhere, and it works. No cracks in mine after 550+ hours.
cgeyman
Well Known Member
Thanks Bruce
I agree, the beefy angle isn’t there, but I think the engineers added the upper “box” brace to reduce vibration cracking. It seems pretty hefty to me. I am going to run a lightweight composite prop, so I am
not too worried about it right now (but will keep track of it- my old design never cracked).
I agree, the beefy angle isn’t there, but I think the engineers added the upper “box” brace to reduce vibration cracking. It seems pretty hefty to me. I am going to run a lightweight composite prop, so I am
not too worried about it right now (but will keep track of it- my old design never cracked).