I thought I would properly restart my build thread with the right title.
On this day, Friday the 16th of 2020, I am reporting that I have had my empennage kit since Monday.
Inventory is done, the aft spar is assembled along with the other skeletal parts for the VS.
My firsts: countersinking, match drilling, cleco-ing, deburring, and I gotta say......having nothing but fun!
Thanks for all the input from those who have gone before!
Andy
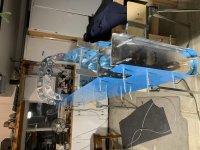
")