VansAirForceForums  
Home > VansAirForceForums

-POSTING RULES
-Advertise in here!
- Today's Posts | Insert Pics

Keep VAF Going
w/a Donation


VAF on Twitter:
@VansAirForceNet

  #1  
Old 03-09-2023, 02:31 AM
Richard Connell Richard Connell is online now
 
Join Date: Aug 2006
Location: Sydney Australia
Posts: 564
Default RV10 ER Tanks

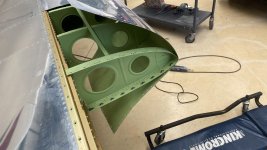
Today VHXRK officially graduated from RV10 to RV10ER.
I had approximately 100h on her before I started this project in late Jan.
It took 90h to build the new tanks and around 50h to complete the modifications on the airframe.
As others have mentioned, the quality of the parts, jigs and instructions are top notch.
I opted to put in two SW senders in each tank, modifying the inboard sender to place both senders in series.
I calibrated each tank for both flight and ground attitudes in 5L (1.25gal) increments.
This resulted in a nice smooth sensible calibration curve that calibrated all the way from empty to full. A big improvement from the stock single sender RV10 setup.
As Ken sez, the fun factor goes down a bit on a flying 10. Make sure you have a comfortable crawler and some goggles. You’ll spend a lot of time under the wing making metal on top of yourself! You may also learn some new words removing and installing the tanks.
All that said this is a very achievable modification to a flying 10. I’m very glad I made the effort.
It would be trivial on wings under construction.
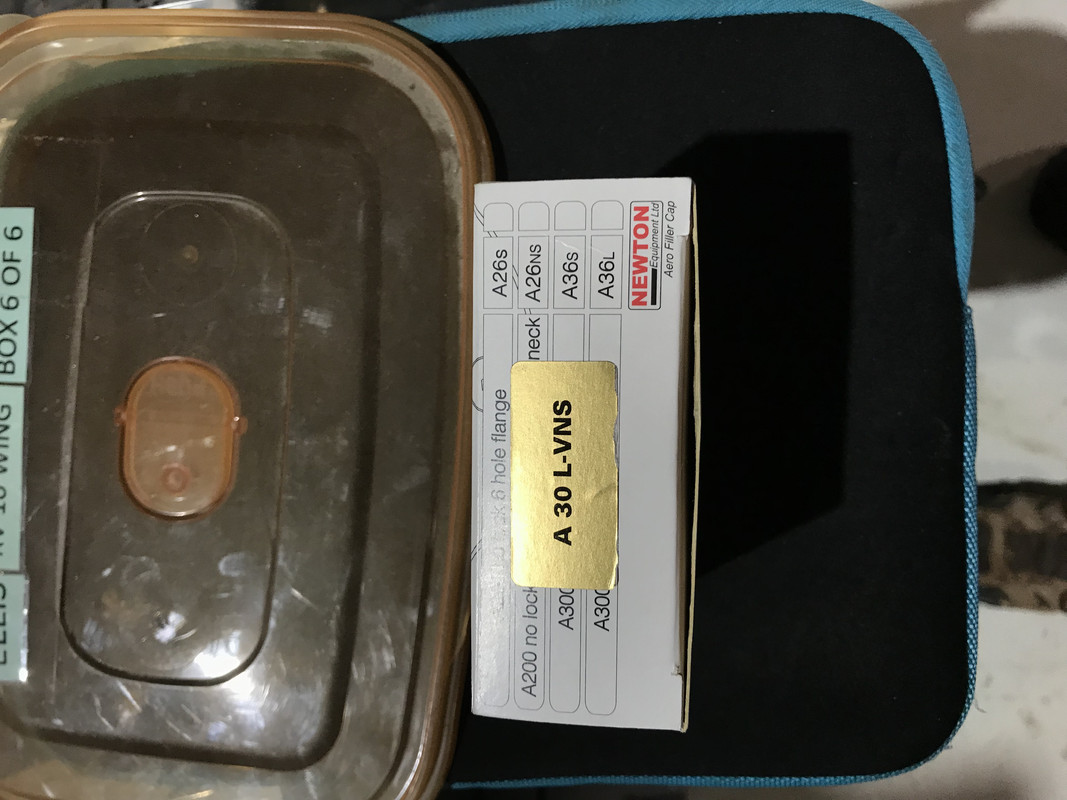
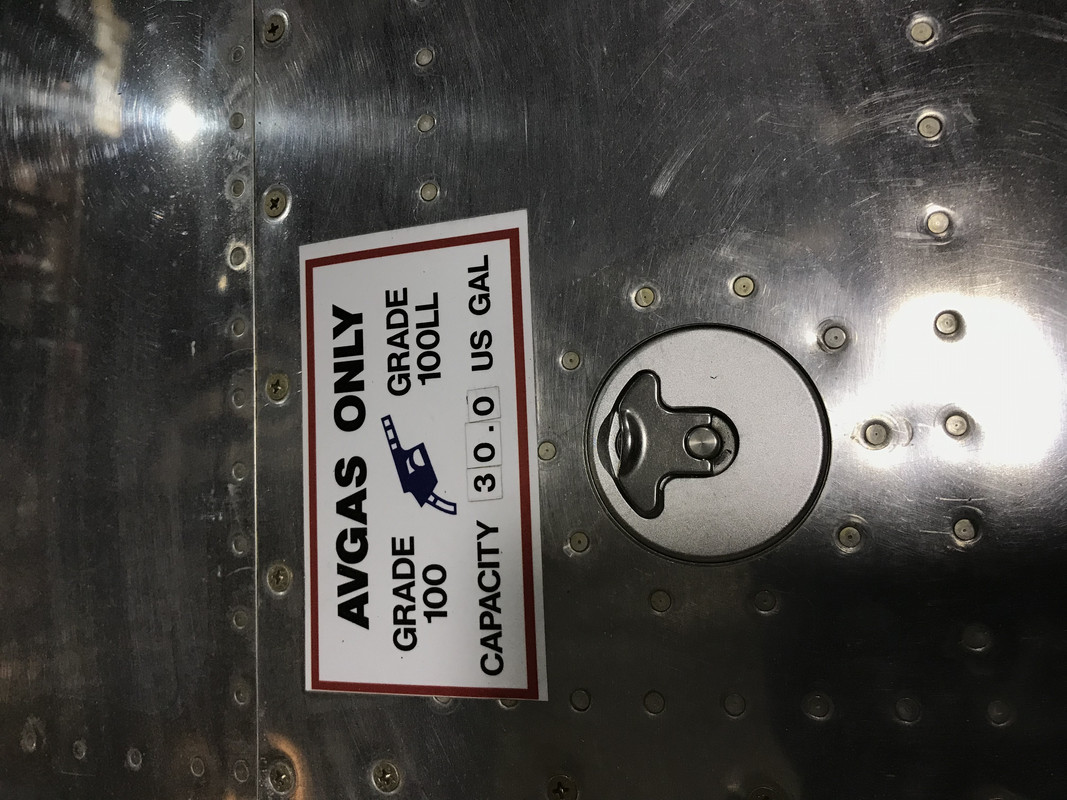
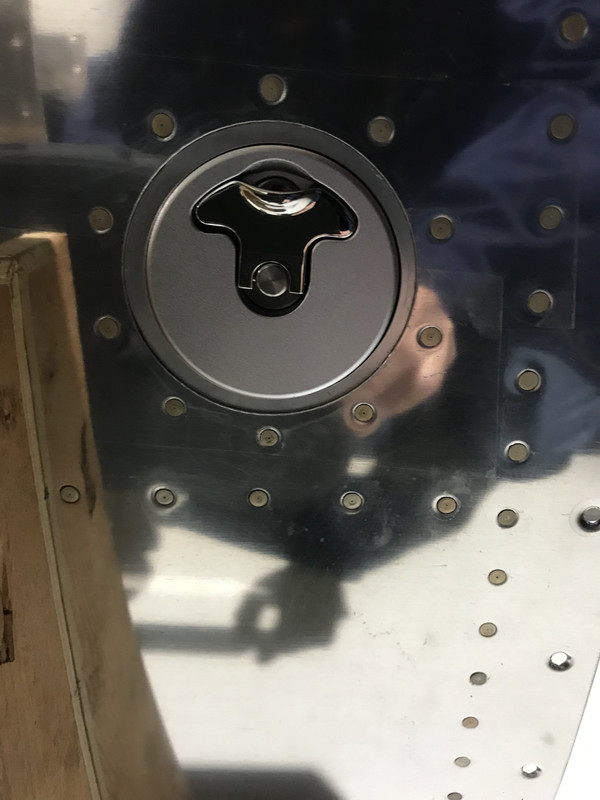
Here’s some random pics.


Click image for larger version

Name:	89E4153E-BF85-45B2-B2EC-33CFAAA08A0A.jpg
Views:	137
Size:	270.5 KB
ID:	39415

Click image for larger version

Name:	32A339C7-26D8-45FC-99A1-74080194FAEC.jpg
Views:	197
Size:	239.4 KB
ID:	39416

Click image for larger version

Name:	A52F9672-20F0-43EC-8E31-D4B2E5E6738A.jpg
Views:	179
Size:	191.6 KB
ID:	39417

Click image for larger version

Name:	D1C33FF3-D7FC-40ED-90C7-834BF5917A8C.jpg
Views:	166
Size:	198.6 KB
ID:	39418

Click image for larger version

Name:	03F9658D-2B61-4F82-9B25-DC9D10304305.jpg
Views:	179
Size:	233.1 KB
ID:	39419
Attached Thumbnails
Click image for larger version

Name:	2AF32B58-B4F8-46B0-8D09-557C7B8B4186.jpg
Views:	177
Size:	257.4 KB
ID:	39420  
__________________
Richard
RV7 VH-XRC Sold :-(
RV10 VH-XRK
Sydney, AUS
Reply With Quote
  #2  
Old 03-09-2023, 03:59 AM
KatanaPilot's Avatar
KatanaPilot KatanaPilot is offline
 
Join Date: Feb 2015
Location: Locust Grove, GA
Posts: 1,025
Default

Very nice job!

Although I am using the CiES senders in my ER tanks, I am interested in specific details as to how you modified the SW senders. If you can provide more information, I believe that will be useful to others building ER tanks that don't want to spend the big bucks for the CiES senders.

As you mentioned, building and installing these tanks on SB 10 or 14 wings would be incredibly easy. It's also easy to install better fuel caps (like the Newton Aero 300's) at the same time.

Ken did an outstanding job designing and fabricating these kits.
__________________
Krea Ellis

Locust Grove, GA
DA20-A1 "Princess Amelia" - gone home to Amelia Island
RV-7A Phase 2 (Honored to be Van's "Miss July" 2021) - now at her new home in Lakeville, MN
RV-10ER officially an airplane as of 4/5/22! Headed to Evoke 7/17/23
EAA Technical Counselor
Reply With Quote
  #3  
Old 03-09-2023, 07:33 AM
RVFan671 RVFan671 is offline
 
Join Date: May 2020
Location: Seattle
Posts: 177
Default

Interested to see if you have any dimensions or more pictures of where you drilled on the SW senders to install the terminal post. Did you get it so close to the sending unit you had to grind down the insulator pieces or no?
__________________
Bought an O-360 RV4 to fly while building a -10.
Started March 2020
Emp completed September 2020
Fuse started October 2020
Mated the tailcone January 2021
Reply With Quote
  #4  
Old 03-09-2023, 08:20 AM
TShort TShort is offline
 
Join Date: Jan 2005
Location: Indianapolis, IN (KUMP)
Posts: 1,105
Default

Richard-

Thanks for the writeup and pictures. I am about to embark on this project on my flying (and painted!) RV-10.

Krea-

Do you have any more info on the Newton 300 caps - is a new flange needed, etc?

Thanks,
Thomas
__________________
Thomas Short
KUMP - Indianapolis, IN / KAEJ - Buena Vista, CO
RV-10 N410TS bought / flying
RV-8 wings / fuse in progress ... still
1948 Cessna 170 N3949V
Reply With Quote
  #5  
Old 03-09-2023, 10:15 AM
Sky Designs's Avatar
Sky Designs Sky Designs is offline
 
Join Date: Dec 2018
Location: Anacortes, Washington
Posts: 55
Cool

Great job Richard! Congratulations. You've set a new speed record for ER tank installation. If you're not careful, you'll have people lining-up to have you modify their planes :-)

Thanks for sharing your experience and the photos are super helpful as well.
__________________
Ken Krueger - Aircraft Designer
Sky Designs Engineering
skydesigns.aero
Reply With Quote
  #6  
Old 03-09-2023, 01:50 PM
Richard Connell Richard Connell is online now
 
Join Date: Aug 2006
Location: Sydney Australia
Posts: 564
Default

Quote:
Originally Posted by Sky Designs View Post
Great job Richard! Congratulations. You've set a new speed record for ER tank installation. If you're not careful, you'll have people lining-up to have you modify their planes :-)

Thanks for sharing your experience and the photos are super helpful as well.
Haha Thanks Ken.
I think I'm cured of the desire to build anymore tanks for now!
I marvel at your ability to provide parts of such accuracy that one can undertake such a project. It really is amazing.

Krea and Thomas:

The tank skins are punched for the Newton SPRL flange
T-00007B. Vans provides this standard flange with a plastic cap. I ordered the flange only and then ordered the metal locking cap from Spruce:
https://www.aircraftspruce.com/catal...ewton_sprl.php

Ill post again later some more details about the sender modification for everyone.
__________________
Richard
RV7 VH-XRC Sold :-(
RV10 VH-XRK
Sydney, AUS
Reply With Quote
  #7  
Old 03-09-2023, 07:33 PM
Richard Connell Richard Connell is online now
 
Join Date: Aug 2006
Location: Sydney Australia
Posts: 564
Default Dual Tank Senders In Series.

I used the standard SW senders.
the outboard one is per plans.
The inboard one has an electrical bulkhead terminal installed into the sender plate.
Access is tight so I found the smallest one I could.
The stud is around 3/16, the hole in the plate is 1/4 an the OD of the delrin bushing halves is probably 1/2 or maybe 9/16 - I didn't measure it.
It didn't come with any specs or instructions so I had to work my way up with drill bits slowly on the first one until I had the right size.
The bushings have a step to keep them centred and a Viton Oring on each side.

I had to neaten up the phenolic insulator on the inside of the sender to push the passthrough as close to the centre of the plate as possible.
Then I bolted it up, crimped some AWG14 onto a ring and prosealed it throughly. Don't trust the thread leak path.

The other end of my AWG14 is soldered onto the sender where the chassis ground used to be. I removed the original black wire grounding the sender.
So the signal wire from the outboard sender effectively becomes the new ground for the inboard sender. Its important obviously that this doesn't touch any part of the airframe and that you remove entirely the ground side wiring of the original inboard sender.

The access hole had to be dremeled out a touch to make room for the passthrough. you don't want to overdo this. There's still about 1/4 of prose gasket there.

Calibration was straight forward. I opted to calibrate in 32x5L increments out of curiosity to see what the curve would look like. I forgot to take a photo of the curve. ill update this thread with a photo next time I get a chance.

One thing I noticed is that you need to be patient with waiting for the fuel to drain inboard, and you need to give the wings a wiggle up and down to make sure the sender wipers move. I suspect they need some wearing in and/or stationary on the ground there can be just a smidge of friction. In flight I'm sure motion/vibration would negate this.

Ive flown 2h and had the tanks sit full for 3 days with no leaks so I'm calling it good. In flight, the totals remaining on the tanks + Fuel flow used have been within 1/2 Gal of total useable so I'm pretty happy. ill see how it is further through the range as I've only burnt 70L (15gal) so far.

Ive scribbled a diagram at the bottom as well. sorry the photos aren't in order.

Hope this is useful!


Click image for larger version

Name:	IMG_7021.jpg
Views:	90
Size:	230.0 KB
ID:	39456
Click image for larger version

Name:	IMG_7018.jpg
Views:	69
Size:	198.4 KB
ID:	39457
Click image for larger version

Name:	IMG_7011.jpg
Views:	52
Size:	231.7 KB
ID:	39458
Click image for larger version

Name:	IMG_6996.jpg
Views:	55
Size:	227.3 KB
ID:	39459
Click image for larger version

Name:	IMG_6995.jpg
Views:	57
Size:	243.9 KB
ID:	39460
Click image for larger version

Name:	IMG_6994.jpg
Views:	45
Size:	263.0 KB
ID:	39461
Click image for larger version

Name:	403-047.jpeg
Views:	32
Size:	107.4 KB
ID:	39462
Name:  403-047 (1).jpeg
Views: 832
Size:  8.7 KB
Click image for larger version

Name:	IMG_6997.jpg
Views:	70
Size:	237.7 KB
ID:	39464
__________________
Richard
RV7 VH-XRC Sold :-(
RV10 VH-XRK
Sydney, AUS

Last edited by Richard Connell : 03-09-2023 at 11:27 PM.
Reply With Quote
  #8  
Old 03-10-2023, 07:50 AM
1001001's Avatar
1001001 1001001 is offline
 
Join Date: Dec 2014
Location: Just Minutes from KBVI!
Posts: 1,479
Default

Quote:
Originally Posted by TShort View Post
Richard-

Thanks for the writeup and pictures. I am about to embark on this project on my flying (and painted!) RV-10.

Krea-

Do you have any more info on the Newton 300 caps - is a new flange needed, etc?

Thanks,
Thomas
On my standard tanks, I installed the Newton caps that Van's used to sell. Their flanges had a lot of curvature and took significant effort to shape to the curve of the RV-10 skin.

I've bought a set of Newton caps for the ER tanks (on Spruce they have a model that is specifically recommended for the RV-10) and the new caps are much flatter and look like they will fit a lot better. I haven't started fitting them yet, though.
Reply With Quote
  #9  
Old 03-10-2023, 09:18 AM
Dad's RV-10 Dad's RV-10 is offline
 
Join Date: Jan 2005
Location: FL Gulf Coast
Posts: 486
Default

Quote:
Originally Posted by 1001001 View Post
On my standard tanks, I installed the Newton caps that Van's used to sell. Their flanges had a lot of curvature and took significant effort to shape to the curve of the RV-10 skin.

I've bought a set of Newton caps for the ER tanks (on Spruce they have a model that is specifically recommended for the RV-10) and the new caps are much flatter and look like they will fit a lot better. I haven't started fitting them yet, though.
I bought the AERO 300 NON LOCKING FUEL CAP. Is this the set you bought?

I was steered to that part after reading a note in the "Reviews" section posted by "Robin V" (formerly of Newton) on the "AERO 300 - A30 LOCKING AND NON-LOCKING FUEL CAP" product page.

Click image for larger version

Name:	Cap Review.jpg
Views:	57
Size:	31.2 KB
ID:	39481
Reply With Quote
  #10  
Old 03-10-2023, 09:21 AM
KatanaPilot's Avatar
KatanaPilot KatanaPilot is offline
 
Join Date: Feb 2015
Location: Locust Grove, GA
Posts: 1,025
Default

I think Richard covered pretty much everything, but I wanted to provide a little additional detail (and thanks Richard for the explanation of the SW sender series mod).

I installed the Newton Aero 300 caps in my original slow build tanks. They were the smaller opening version and the Newton provided Vans flange worked well.


As Richard mentioned, the new ER tanks for the 10 (and I assume the 14) have the larger opening designed for the Newton SPRL plastic cap. At the time we built our ER tanks, either I was unaware, or Newton had not offered an all metal locking SPRL replacement cap - so we installed the smaller diameter flange and cap. The downside of this is a small reveal around the flange which can be a benefit to reduce paint chipping, but also requires additional effort to ensure the flange is centered on the opening. (Ours is centered, it just looks off center in this picture).

__________________
Krea Ellis

Locust Grove, GA
DA20-A1 "Princess Amelia" - gone home to Amelia Island
RV-7A Phase 2 (Honored to be Van's "Miss July" 2021) - now at her new home in Lakeville, MN
RV-10ER officially an airplane as of 4/5/22! Headed to Evoke 7/17/23
EAA Technical Counselor
Reply With Quote
Reply


Thread Tools Search this Thread
Search this Thread:

Advanced Search
Display Modes

Posting Rules
You may not post new threads
You may not post replies
You may not post attachments
You may not edit your posts

vB code is On
Smilies are On
[IMG] code is On
HTML code is Off
Forum Jump


All times are GMT -6. The time now is 07:39 PM.


The VAFForums come to you courtesy Delta Romeo, LLC. By viewing and participating in them you agree to build your plane using standardized methods and practices and to fly it safely and in accordance with the laws governing the country you are located in.