KatieB
Well Known Member
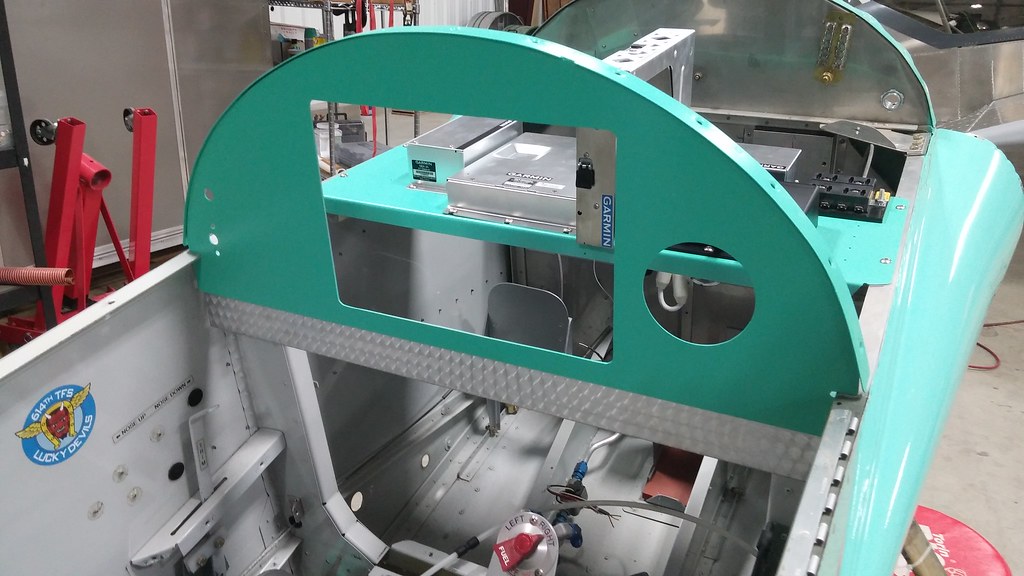
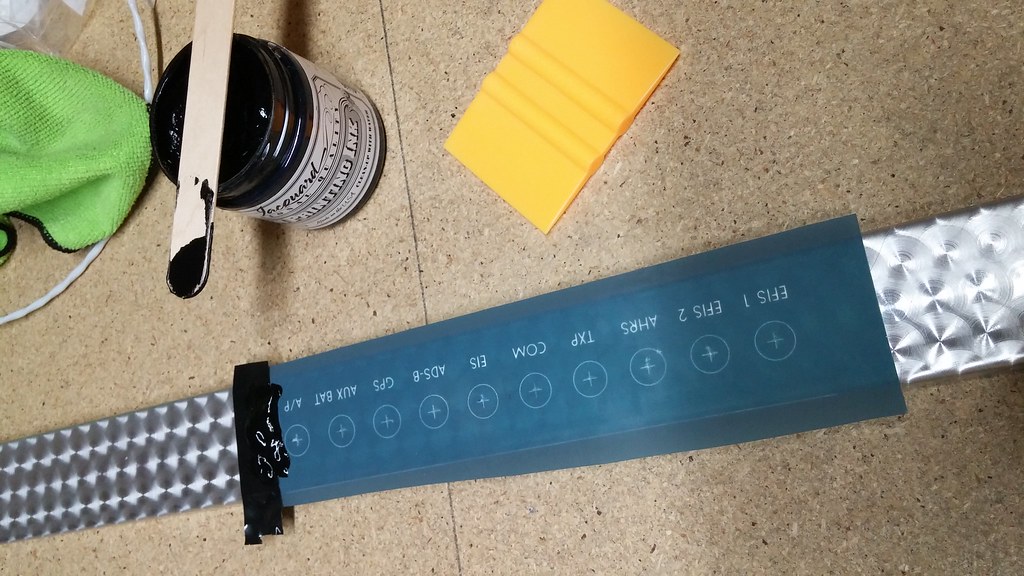
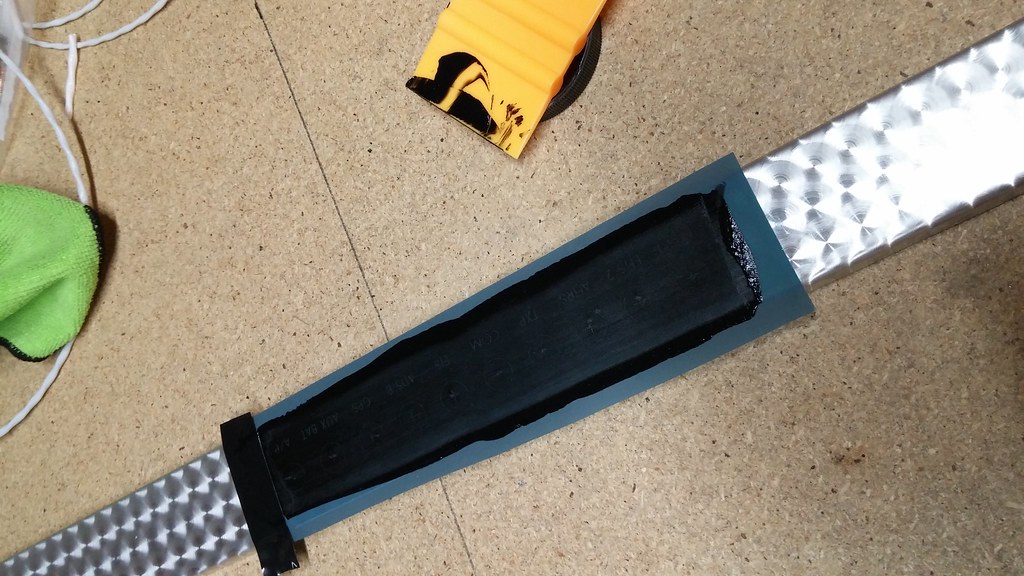
So after years of poking around with pipe dreams, drawings, lists, budgets, and mission evaluations, I?ve begun installing the brains of my -3. It was a long and arduous road, but I?ve decided to go with Big G. Yeah, Garmin. ?But you?re the GRT chick! What happened?? Well? it?s a long story.
The bones of my plane as it sat in the junk yard came with a Dynon D180. I sold that to a fellow VAF'er with another RV-3 and paid off my car loan. Sure, I could?ve kept it all as Tony had it, but I had way too many hours flying behind GRT Sport systems, which blew the D180 away in features. SO that was a no-brainer, even though it would add many months and a few grand to the budget requirements. (Every decision with this plane has added many months, so why not!)
I assumed for a very long time that I would put a GRT system in here. It was by far the most reliable of any system I?d had experience with, and we knew the ins and outs of how to install and operate them. The question was really, Sport or HXr? And besides, I worked there. But in 2014 we left GRT to go back to my father-in-law?s Jabiru airplane business. He had used GRT stuff since the very beginning, with most of the 120-ish Jabiru airplanes built in the USA since about 2002. We tried the G3X system in 2010, but back then it was difficult to install and we had some trouble getting the engine monitor sensors to play nicely with the Jabiru. But now, in 2015, LSA shoppers were asking pretty loudly for the new Touch system, so we decided to give it a try.
Sometime between 2010 and 2015, Garmin must have realized that amateur avionics installers needed more guidance and easier tasks than the professionals they were used to dealing with in the certified world. The new Touch system was much easier to install and the instruction manuals were more thorough. The best part about the system, however, is how fun it is to fly. Our fears and former sales pitches against the touch screens turned out to be mostly wrong assumptions. The touch screen is not any more difficult to use in turbulence than buttons. It is not prone to glare unless you wear white on a sunny day (ask me how I know...) You can?t see fingerprints unless it?s turned off. Its user interface was intelligently designed from the ground up to be intuitive and easy. It?s like using a tablet. The depth of information displayed and the ease with which you can access it is mind-blowing.
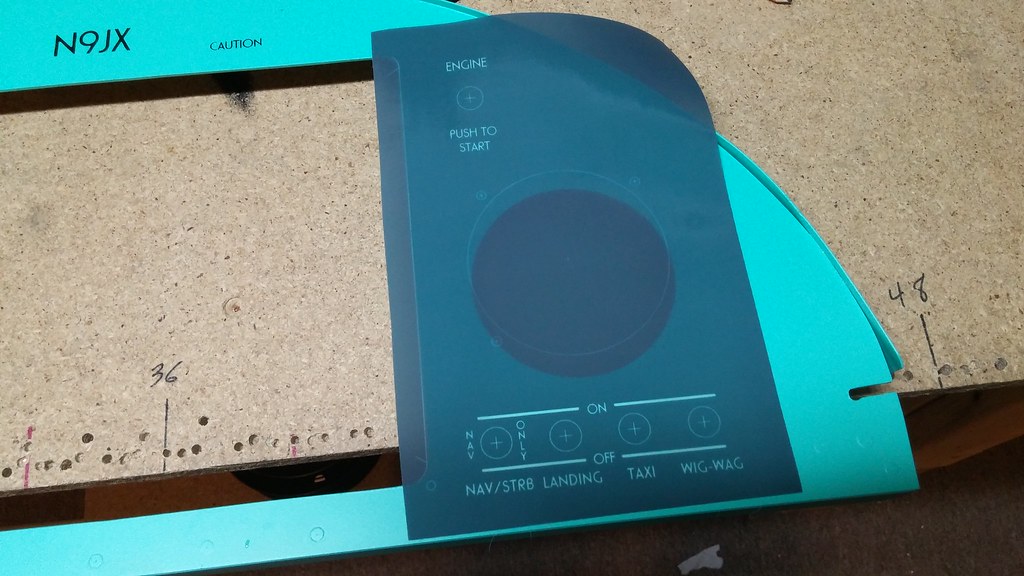
I didn?t truly appreciate its capabilities until I flew our first Garmin Touch airplane, a Jabiru J230-D with about 15 hours on it, from Tennessee to Oshkosh for ?the convention? in 2015. It was a giddy trip anyway, because I was going early to prepare for our wedding, which would feature that very same airplane. You might have read about it in AirVenture Today. Anyway, by the time I got past Kentucky, I was giggling like a 5-year-old in Toys R Us. I think my favorite screen was the waypoint information page. While my old standby GRT Sport system had most of the same information, it was displayed on a black screen with white text that blocked out all reference to map and PFD. The 10? Garmin Touch, in contrast, displays an information page for the chosen airport on the map side of the screen with a simple knob twist or two touches of the map, and you never lose your primary instruments. The airport is shown on a static map with big colorful touch tabs along one side for Runways, Frequencies, Weather, NOTAMs, AOPA Airport Directory? everything you could possibly want to know, and so easily accessible! And you could just touch the map to quickly get this information for anything.
In the year and a half since then, I?ve put a few dozen hours on the system, mostly flying cross-country. I spent many enjoyable days last summer navigating around storm systems, using ADS-B METARs and cautiously using NEXRAD radar with ATC flight following to maintain VFR and stay out of trouble. There were a few times I climbed into a GRT equipped airplane with a system that used to be my favorite thing ever, and found myself frustrated at having to punch a bunch of buttons to find what I needed. Not to mention the fact that I forgot where to find things in the menus. I got a little pissed at GRT because my friends have so much talent in that little building, but they've just fallen behind the times.
So after a long period of deliberation, I decided that personal friendships and an old brand allegiance, no matter how strong, were just simply bad reasons to pick a certain system for my airplane. Ultimately, it came down to one fact. I have FUN when I fly a G3X Touch? so that?s what I picked. Oh, and by the way, size does matter? I don?t really care for the layout of the little 7? EFIS, and besides, 10? of glass on this tiny panel is JUST SO **** COOL!
 [/url]0507161959 by jabiruchick, on Flickr[/IMG]
The bones of my plane as it sat in the junk yard came with a Dynon D180. I sold that to a fellow VAF'er with another RV-3 and paid off my car loan. Sure, I could?ve kept it all as Tony had it, but I had way too many hours flying behind GRT Sport systems, which blew the D180 away in features. SO that was a no-brainer, even though it would add many months and a few grand to the budget requirements. (Every decision with this plane has added many months, so why not!)
I assumed for a very long time that I would put a GRT system in here. It was by far the most reliable of any system I?d had experience with, and we knew the ins and outs of how to install and operate them. The question was really, Sport or HXr? And besides, I worked there. But in 2014 we left GRT to go back to my father-in-law?s Jabiru airplane business. He had used GRT stuff since the very beginning, with most of the 120-ish Jabiru airplanes built in the USA since about 2002. We tried the G3X system in 2010, but back then it was difficult to install and we had some trouble getting the engine monitor sensors to play nicely with the Jabiru. But now, in 2015, LSA shoppers were asking pretty loudly for the new Touch system, so we decided to give it a try.
Sometime between 2010 and 2015, Garmin must have realized that amateur avionics installers needed more guidance and easier tasks than the professionals they were used to dealing with in the certified world. The new Touch system was much easier to install and the instruction manuals were more thorough. The best part about the system, however, is how fun it is to fly. Our fears and former sales pitches against the touch screens turned out to be mostly wrong assumptions. The touch screen is not any more difficult to use in turbulence than buttons. It is not prone to glare unless you wear white on a sunny day (ask me how I know...) You can?t see fingerprints unless it?s turned off. Its user interface was intelligently designed from the ground up to be intuitive and easy. It?s like using a tablet. The depth of information displayed and the ease with which you can access it is mind-blowing.
I didn?t truly appreciate its capabilities until I flew our first Garmin Touch airplane, a Jabiru J230-D with about 15 hours on it, from Tennessee to Oshkosh for ?the convention? in 2015. It was a giddy trip anyway, because I was going early to prepare for our wedding, which would feature that very same airplane. You might have read about it in AirVenture Today. Anyway, by the time I got past Kentucky, I was giggling like a 5-year-old in Toys R Us. I think my favorite screen was the waypoint information page. While my old standby GRT Sport system had most of the same information, it was displayed on a black screen with white text that blocked out all reference to map and PFD. The 10? Garmin Touch, in contrast, displays an information page for the chosen airport on the map side of the screen with a simple knob twist or two touches of the map, and you never lose your primary instruments. The airport is shown on a static map with big colorful touch tabs along one side for Runways, Frequencies, Weather, NOTAMs, AOPA Airport Directory? everything you could possibly want to know, and so easily accessible! And you could just touch the map to quickly get this information for anything.
In the year and a half since then, I?ve put a few dozen hours on the system, mostly flying cross-country. I spent many enjoyable days last summer navigating around storm systems, using ADS-B METARs and cautiously using NEXRAD radar with ATC flight following to maintain VFR and stay out of trouble. There were a few times I climbed into a GRT equipped airplane with a system that used to be my favorite thing ever, and found myself frustrated at having to punch a bunch of buttons to find what I needed. Not to mention the fact that I forgot where to find things in the menus. I got a little pissed at GRT because my friends have so much talent in that little building, but they've just fallen behind the times.
So after a long period of deliberation, I decided that personal friendships and an old brand allegiance, no matter how strong, were just simply bad reasons to pick a certain system for my airplane. Ultimately, it came down to one fact. I have FUN when I fly a G3X Touch? so that?s what I picked. Oh, and by the way, size does matter? I don?t really care for the layout of the little 7? EFIS, and besides, 10? of glass on this tiny panel is JUST SO **** COOL!