Hi,
Has anyone had the same experience as me.
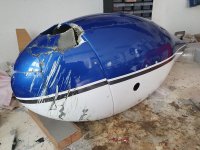
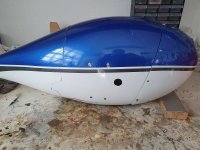
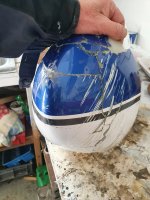
RV14 Nose Wheel Fairing Detachment on Landing.
I am in the process of flight testing covering the test schedules of the LAA (light Aircraft Association) in the UK and on landing after only 6 hours of flying the nose wheel fairing detached.
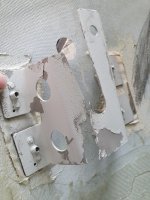
I have attached photos of the damage. I have re-assembled the parts with one layer of glass fibre on the fractured edges to try to establish the cause of the problem.
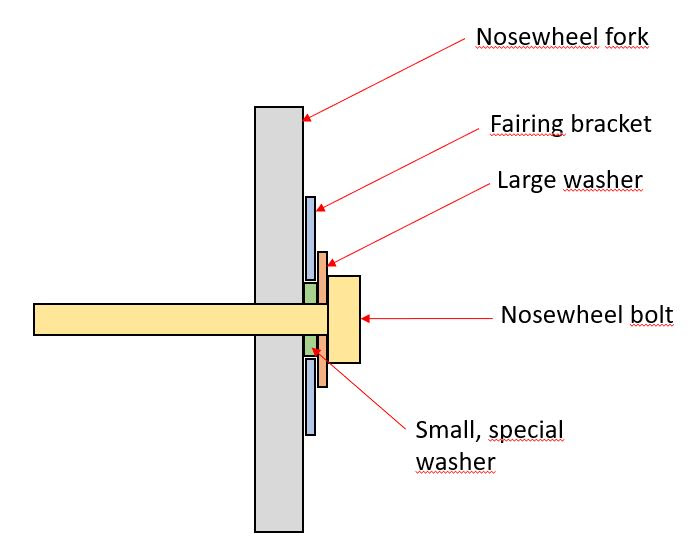
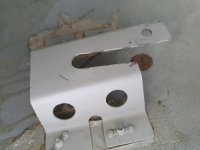
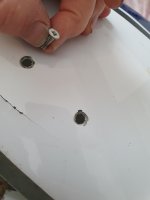
An idea is that the 8 countersunk screws are not sufficient to hold the Fairing to the Fairing Bracket. Also the large OD diameter of the washer within the Fork Nose axle bolt assembly (Washer 062 25783054) (Page 40A-07) the OD is too small.
Any suggestions of possible causes would be welcome.
Regards John
Has anyone had the same experience as me.
RV14 Nose Wheel Fairing Detachment on Landing.
I am in the process of flight testing covering the test schedules of the LAA (light Aircraft Association) in the UK and on landing after only 6 hours of flying the nose wheel fairing detached.
I have attached photos of the damage. I have re-assembled the parts with one layer of glass fibre on the fractured edges to try to establish the cause of the problem.
An idea is that the 8 countersunk screws are not sufficient to hold the Fairing to the Fairing Bracket. Also the large OD diameter of the washer within the Fork Nose axle bolt assembly (Washer 062 25783054) (Page 40A-07) the OD is too small.
Any suggestions of possible causes would be welcome.
Regards John
Attachments
-
 Van's RV14A Nose Fairing 72.jpg574.2 KB · Views: 440
 -
 Van's RV14A Nose Fairing 62.jpg207.4 KB · Views: 370
 -
 Van's RV14A Nose Fairing 52.jpg198.9 KB · Views: 338
 -
 Van's RV14A Nose Fairing 42.jpg319 KB · Views: 414
 -
 Van's RV14A Nose Fairing 32.jpg298.7 KB · Views: 364
 -
 Van's RV14A Nose Fairing 22.jpg474.7 KB · Views: 354
 -
 Van's RV14A Nose Fairing 11.jpg431.7 KB · Views: 366