What's new
Van's Air Force

Don't miss anything! Register now for full access to the definitive RV support community.

Leading edge-/tank rib fitting?

Pilottonny

Well Known Member
Hello fellow builders,

You have not heard from me before on this forum. But, because I came across a problem that I could not find an answer for via the "search"-option, I have subscribed and are posting my first question:

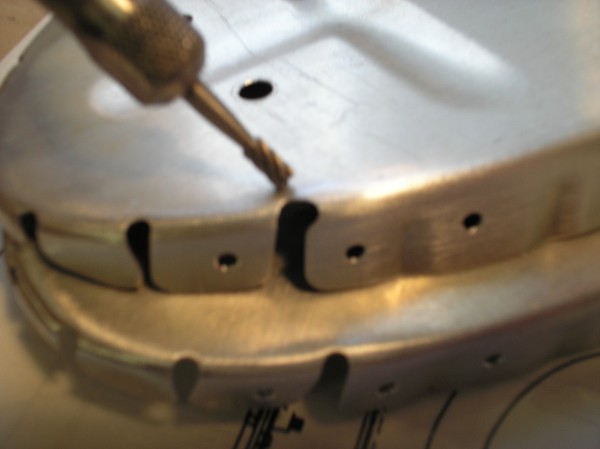
I am currently fitting the leading edge-ribs and tank-ribs to the leading edge-skins and tank-skins and found it is merely impossible to cleco them in. I measured the distance between the most forward holes in the ribs and the skins and found there was a 3 to 4 mm?s difference between them. (so, when you get your wife?s measuring tape out of the sewing kit and lay it inside the skin, there is a difference of 3-4 mm?s between the distance of the most forward hole at the top of the skin and the most forward hole at the bottom of the skin and the distance of the same holes in the rib flanges, measured on the outside of the ribs). Even after bending the "rib-tabs" (the little flanges at the leading edge, without any holes in them) more inward, so the leading edge radius gets smaller, it is still very difficult, if not impossible to fit them in the skins. This is "dry"-fitting for match-drilling, imagine the final installation of the tank ribs with "Pro-seal"!

Has anybody come across this problem before? And how did you solve it?

Looking forward to receiving some fast answers from across the Atlantic,

Regards,
 
Tank Ribs

This is a very common problem. When I built my tanks I played with the initial ribs at the LE quite a bit. IIRC what I ended up doing is clecoing the upper skin first - with the skin NOT in the LE jig, then push the skin/rib down into the jig until the lower skin was about 1/4" from the rib. Then I stuck a couple of clecos through the skin on an angle to grab their holes in the rib. Then I pushed the skin/rib all the way into the cradle, wiggling the clecos a bit to get them to align the parts. Then I clecoed every hole. I think I did two ribs (the second one from each end) at the same time. After you do that, the rest get a bit easier. You'll still need to use the clecos to pull the ribs into place.

After you drill and dimple, the second assembly with Proseal is easier, but following the same process as above helps again. The proseal acts as a bit of a lubricant, and the dimples help align the parts. Don't be in a big rush, because proseal sets up very slowly (good thing :)

Dennis Glaeser
7A - waiting for my fuselage to be delivered
 
Yah, to nutshell it a bit... it gets easier to fit the ribs into the skins once they have been drilled and dimpled. Prior to that, it is a real wrestling match!

You will win, but be persistent!

;) CJ
 
They are a pain. I remember wearing a pair of leather work gloves because the ribs were cutting into my hands.

I worked the rib in as far as I could and then used a cleco in the aft most hole on the bottom of the skin to try and lever it in. Once I got that cleco in pretty well, I then went to the leading edge and inserted that cleco. I found that putting a shop light inside the skin made it easier to see when I had the rib/skin holes aligned. After I got the first two clecos in the leading edge, I removed the one in the aft most hole and went back to clecoing from the leading edge aft (as the instructions suggest).

Take heart... they are MUCH easier to cleco in the second, third, fourth, ... times. Once dimpled, the dimples help, too. I am currently in the process of riveting these ribs in. I find that it takes me 3 hours to do one rib. That includes setup, prosealing, riveting, and cleanup. I am working alone and generally work more slowly than most, I think. I have all ribs on the right tank except the inboard most rib done and only one done on the left tank. I should have done one yesterday and one today, but I just couldn't take another one right now. I hope to do a couple more sometime this week.

I find that by the time I finish riveting, the proseal is starting to get difficult to work with. I have been working in temps of around 60 degrees F. and the proseal is still workable after about one and a quarter hours. BTW, as far as mixing goes, I am using a postal scale and using 50 grams of the white stuff and 5 grams of the black stuff and that seems about right for one rib. Although, I suspect I am going a little overboard with the goo. Smaller amounts might work for those that are more frugal.

Keep at it!!!
 
Solution

So far I've only heard everybody advocating "wrestling" with the sucker or using clecos to "pry" them in. Yes, that will work, but it will also potentially enlarge the holes.

Here is another solution...

Round off all the corners on the rib flanges. Instead of having a series of "flats" trying to conform to a rounded skin contour (and vice versa), make it a nice smoothly contoured flange. Take the flange corners to the scotch brite wheel, use a file, whatever.

Rounding off the corners makes it waaay easier to get it in that last 1/2" or so.

Here's my 2 cents for the day -- just because your kit came "pre punched" doesn't always mean you can just cleco the parts together as-is. Transform yourself into an old hardened before-match-drilling builder...and try to picture the things they had to do before drilling their structures. Fluting, flanging, rounding off corners like this, etc. Sometimes the "luxury" of match drilled components lulls us into a sense of ease with the kit that really isn't warranted 100% of the time.

)_( Dan
RV-7 N714D (756 hours)
http://www.rvproject.com
 
Last edited:
Yep, I did something like what Dan is talking about and used a belt sander around the flange face, and not just like as if you were deburring an edge either, more like beveling the flange forward and aft edges. But don't over do it and remove too much material :). Even with all that work though, I still had to do the wrestling match. 50-5 g proseal sounds like more than twice what I used per rib. No leaks.

Keep after it with patience. Things get easier but the little potentially frustrating things never go away.
 
Well, yes... smarter, not harder. Dan is right once again.

I left out that minor detail. Here is a pic of what he is talking about:

PB270286.jpg


I had to do this too. This is a pic of the little "flangettes" on the nose rib from my project. Sometimes they get so thin, you will need to radius them with the dremel tool, like I did.

Hope this helps!

;) CJ
 
I too spent time with the bench belt sander and scotch brite wheel to round off the rib nose. Working aft, alternate between bottom and top clecos. It does get easier with subsequent fittings. That lap joint between the tank and LE is a piece of work, too.

Steve
 
I simply went around the nose flange with a flat file to make the shape more smooth and it helped a lot. Make sure the ribs are as flat as you can get them and also square up the flanges. The first wing was tough but I just finished the second leading edge and was amazed how much easier it was than the first. I started with a rib in the center of the leading edge and worked both directions. I took an awl and gently lined the first forward hole on the top side and stuck a cleco in the second hole. I then put a cleco in the first forward hole. After that simply start with the third hole and work aft on the top side. Then do the bottom side starting with the forward hole and working aft. That seemed to work the best for me. One more thing that helped was to keep the nose rib fixture close to the rib you are installing to keep the skin as close to the rib as possible. What Dan said about filing the nose is important. As they say your mileage may vary. I wish I was close enough to give you a hand. I know how frustrating that can be.

Good Luck and remember Be Happy, have a cold beer, relax and if that doesn't work cuss like a sailor.
 
I also smoothed the nose flanges, using a scotchbrite wheel, and highly recommend doing it. I put Boelube on the nose flanges where they contacted the skin, which may have helped a bit.

Here's how I clecoed the ribs in (after wondering how the heck it is possible):

Cleco the end ribs first as these are easiest. Start with the top
side most forward hole and work back. Then do the bottom side
starting at the rear. Poke the cleco through the skin hole, hook the
rib hole with the end and let the spring draw them closer. Do the
2nd hole and work the first cleco a little bit to close it up. The rest are
easier.

Cleco all remaining ribs on the top side only. Not sure if this
helps but is convenient anyway.

Cleco all remaining ribs on the bottom side, starting beside an end
rib. It is easier to cleco a rib beside one already done. They get
easier as you go and the last is easiest.

Regards,
Conor
RV-9A 90990 wings
 
Don't lube the tank

ronoc74 said:
I put Boelube on the nose flanges where they contacted the skin, which may have helped a bit.

Ahhh! Hope you mean on the leading edge and not the fuel tank. I'm sure that must be what you meant. I wouldn't use any lube of any sort in the fuel tank. Sure, you could clean it off, but I wouldn't risk anything compromising the integrity of the proseal's ability to bond. Last thing you want is proseal coming loose a year or 5 down the line.

Keep your tanks CLEAN.

)_( Dan
RV-7 N714D
http://www.rvproject.com
 
Oh they were clean! What with the finger grease etc. that gets on there, I washed thoroughly with strong detergent before scotchbrite and acetone. Not that I put any boelube where the rivets go though; only at the very front.
 
Thanks!

Thanks for all your input, I am glad that I am not alone with this problem. I will certainly work some more on the shape of the leading edge of the ribs, to try to get them in. I really wondered why they did not fit as nice as the ribs of the empennage, no problem what so ever with them!

I think I will be addressing you "seen that, been there, done that - folks" more often, after receiving such a bunch of reactions.

Happy building,

 
I'm not sure if anyone has said this yet but this is one of those tasks that also can be improved by making absolustely sure the rib is absolutely flat and the flanges are 90 degrees.

I recall this task also being an area where blood can be easily shed so patience is definitely a virtue here as well.

Be one with your tank.
 
Even after bending the "rib-tabs" (the little flanges at the leading edge said:
Lay the rib on a your bench top with the flange up. Use a small hammer to tap the "rib tabs" to tighten up the bend radius a little bit. This moves the whole tab back not just the end of the tab. This was recommended to me by Vans and it worked great. Just a few little taps does the job.

Good luck.

Roger Ping
 
Leading edge

Like most, I've had similar difficulty. After knocking the sharp edges off the ribs (like most of the the other posts indicate), I also discovered that it helped to unbend the skins a bit. It seems (at least in my case) that some of the problem resulted from the factory bend in the skin being a little too sharp. I placed a wide board on the inside bottom of each skin, kneeled on it, and then prized open the angle with another board held lengthwise on the upper inner surface of the skin. This increased the angle between the upper and lower skins from about 60 degrees to about 85. The ribs seemed to go in easier after that, and didn't leave the pronounced bumps in the skin that were there before the treatment. I can't promise anything, but it seemed to help me to get the fit I wanted.
 
Last edited:
Just got the left leading edge skin clecoed to the ribs after struggling for a couple of evenings. The suggestions to radius the rib corners a bit with a file / hammer helped.

The method I tried this morning worked really well, making it quite easy. First I cleco'ed the top side to all the ribs, just like Van's suggests. I started in the front and cleco'ed each hole as I worked towards the back.

Then I skipped the jig altogether and instead laid a couple of 2x4's down side by side on the ground and then put the assembly on top of it nose pointing up. The rib flanges rest on the 2x4's and the skins can overhang each side.

With the assembly down low, now I could press along the top of the skin with one hand to the point the first holes on the bottom side pretty well aligned with the holes in the ribs. It was then pretty easy to get the clecos in. It would have been a little easier had I had a second person to insert the cleco, but otherwise this worked pretty well.
 
I saw on a video where the builder clecoed the top trailing edge of the skin in place and used straps to pull the skins down onto the bottom. Wooden spacers were cut to proper length to go between the ribs so they would line up at their proper places with the holes in the skin. This is used for both the leading edge of the outboard wing and the tanks. Be careful not to pull the straps against the sheetmetal around the lower corners - use blocks of wood there to keep from bending the metal. Also, the straps that are used are the ratchet type and the skins on the wing had to be protected from being scratched by the ratchets.

Hope this helps.
 
I clecoed the ribs into the tank skin by starting at the leading edge and working my way back. I used duct tape to slowly pull the tanks skins together as I went along. Then dropped the tank skin into the jig after the skin was pulled together by the tape and finished the last of the clecoes. It was actually quite easy. I have some pics here:

http://smittysrv.com/more_stuff.asp?ID=339
 
dan said:
Ahhh! Hope you mean on the leading edge and not the fuel tank. I'm sure that must be what you meant. I wouldn't use any lube of any sort in the fuel tank. Sure, you could clean it off, but I wouldn't risk anything compromising the integrity of the proseal's ability to bond. Last thing you want is proseal coming loose a year or 5 down the line.

Keep your tanks CLEAN.

)_( Dan
RV-7 N714D
http://www.rvproject.com
I sort of reasoned that same way and decided to use dawn dishwashing liquid as a lube. It helped for initial fitting and didn't hurt in the cleanup before prosealing.
-mike
 
Deburring those little spots

A tip given me by Brad @RV7factory was to use 400 grit aluminum oxide on cloth (available in rolls from woodcrafters). Tear into 1/4 inch wide strips. You then use them sort of like floss to deburr all those little grooves between the tip flanges. Really saved a lot of time and energy.

Michael Wynn
RV 8 Wings
San Ramon
 
Back
Top