

Hartstoc
Well Known Member
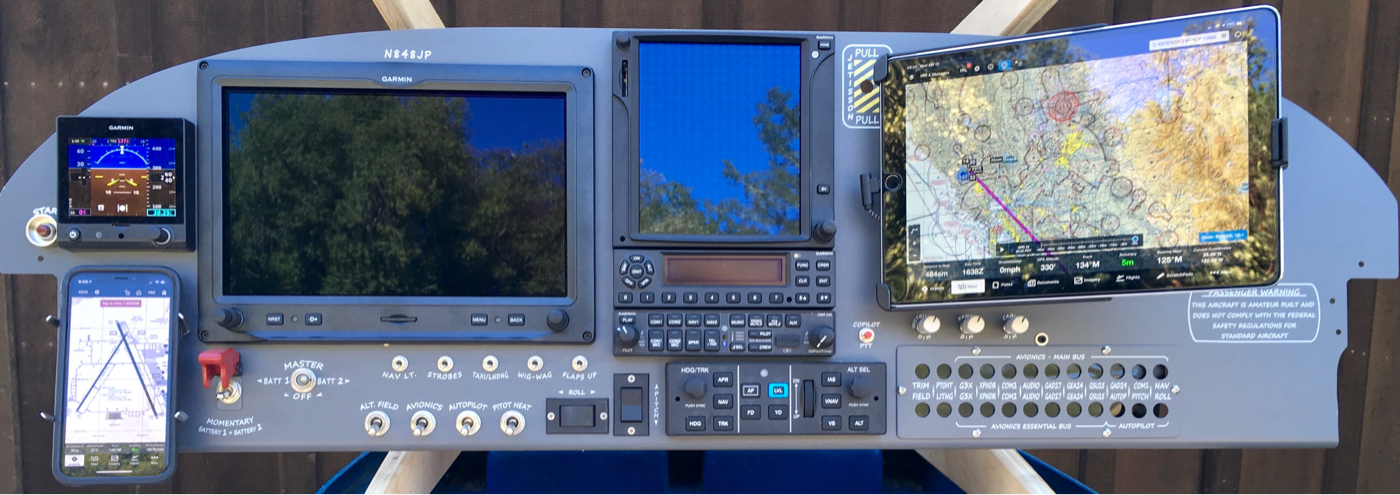
When Searching VAF for panel labeling ideas I was intrigued by a suggestion to look into dry-transfer graphics. After comparing several options online, I settled on one company, https://imagetransfers.com , that seemed oriented toward professionalism and quality. It turned out to be a good choice, mainly thanks to Luann, a partner in the company, who was incredibly patient and generous with answers to my neophyte questions along the way. I?m quite happy with the final results but found myself struggling with a very steep learning curve, and the whole process took a couple of weeks of full time effort and concentration. Before describing the experience, here are a few shots of the final results, starting with the first full-dress rehearsal of the whole panel:
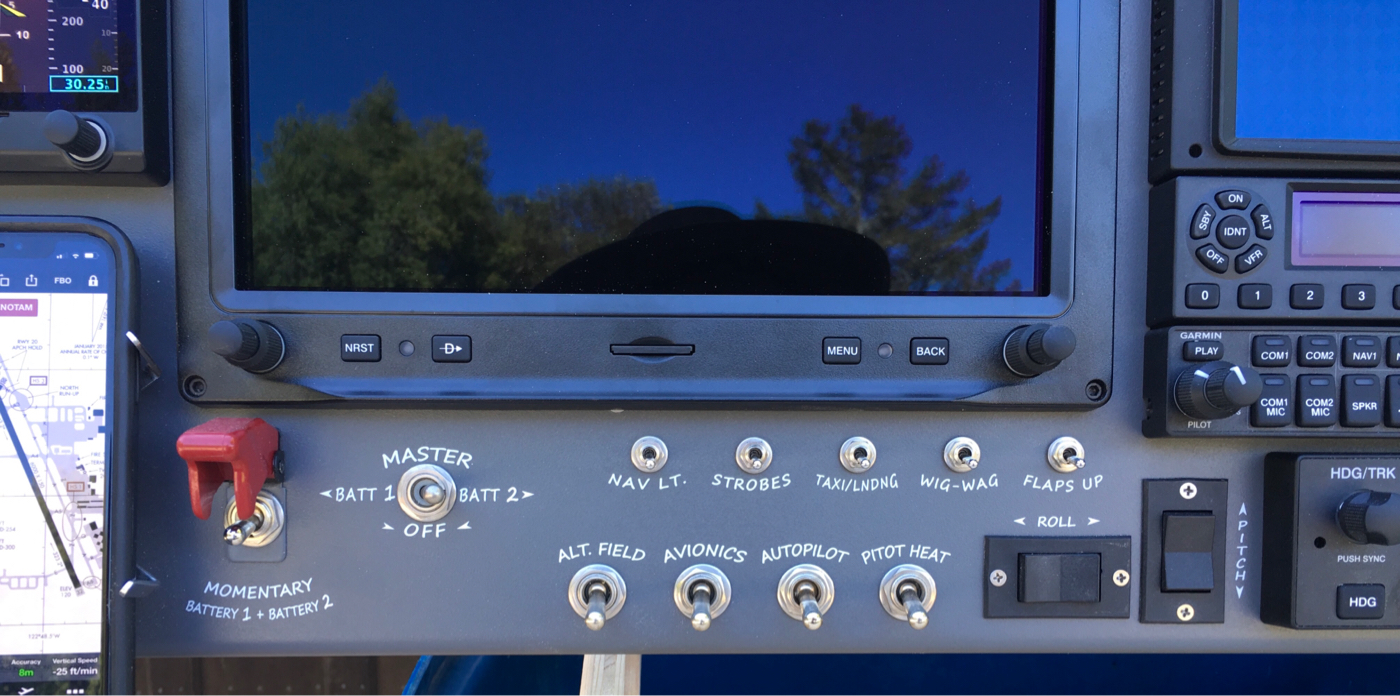
This detail shows the fine quality of the lettering, which is printed in lacquer inks in reverse on a clear plastic sheet, with a pressure sensitive, precision-printed adhesive as the final layer. The lettering is very delicate and thinner than hand-painted lettering would be, and the sheet is shipped taped loosely to an anti-stick backing material. (Off-topic: Note the little ?bezels? I made from 3/16? and 5/16? stainless steel washers for the switches by enlarging their holes with a die-grinder.)
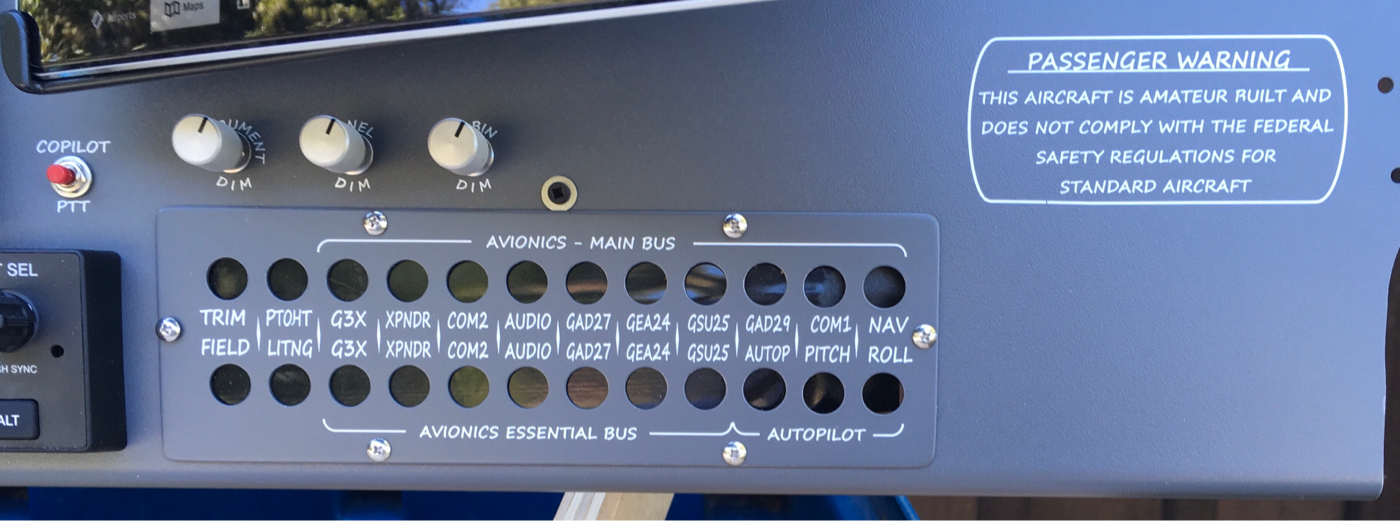
The graphics for the breaker block, which I made removable for easy access to the wiring, took several hours because the spacing was so critical. Fortunately, Adobe Illustrator, the program I ultimately had to obtain and learn to use, provides for incredibly detailed alteration of individual letter heights and widths, and spaces themselves can be altered individually or in selected groups.
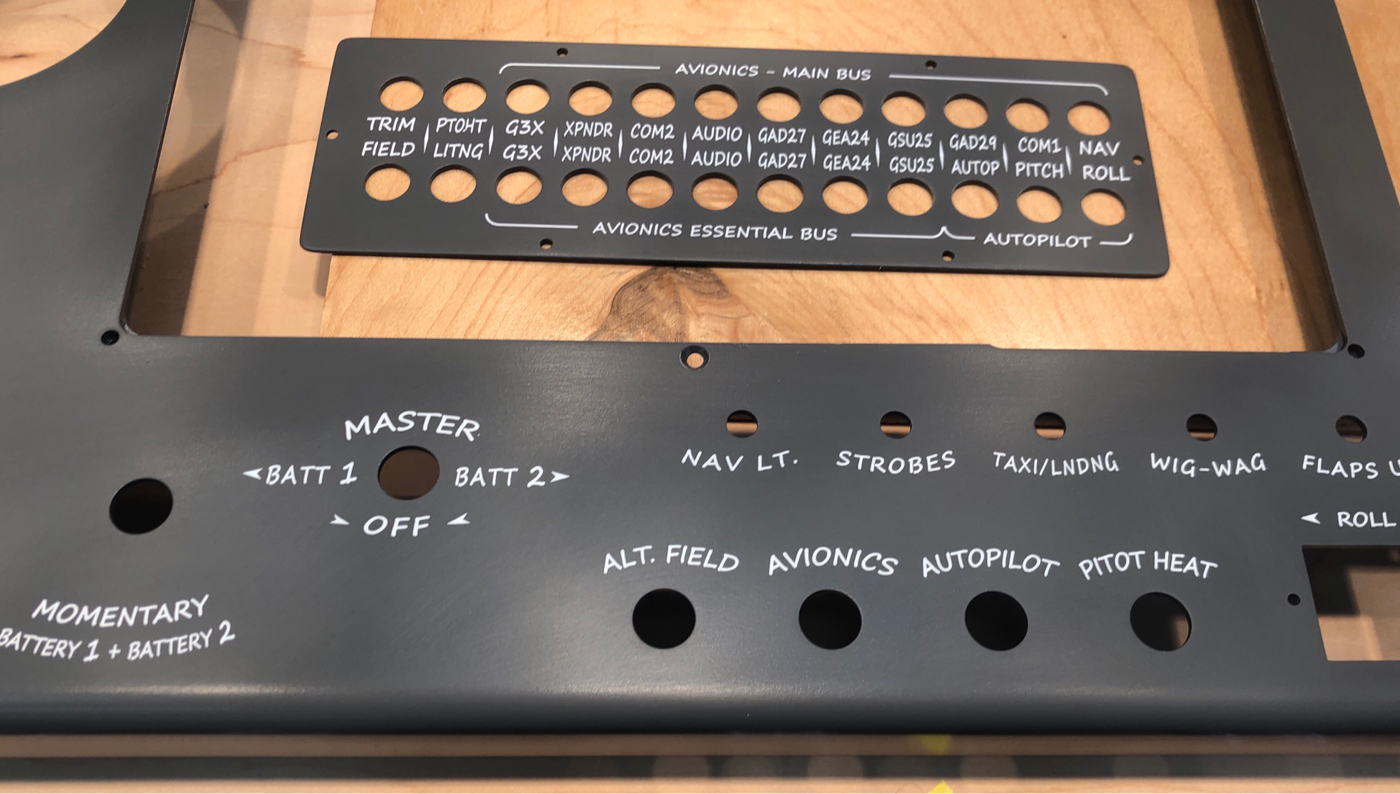
This photo shows how I fitted the lettering and grouped labels where possible for easy application by repeatedly printing and test-fitting samples. Regardless of the final color used, the graphics are done in black and the color is specified when ordering. I chose white on a dark gray base thinking it would ?pop? under my red panel flood light. The label groups were cutout of the full sheet and ultimately applied as shown here.
I?m not a graphics artist(if you know one, ask for help!) and so faced a steep learning curve. The graphics must be in an all-vector, Adobe Illustrator ( .ai) file format, which tracks the edges of the artwork rather than using pixels. I made the mistake of assuming that files generated from my trusty photo-processing app could be converted to .ai and put a lot of time into creating graphics that could not be used. Ultimately, I subscribed to Adobe Illustrator, paid a local graphics artist to give me a couple of hour?s training, and started over. In the end, that was a good thing as AI has some incredible abilities for curve-following text and detailed editing that proved indispensable.
This is what my final graphics submitted for printing looked like. You pay by the page, $175 for 8.5 x 11?, but just $20 more for 11x14?(in single color), which I chose to do. You can pack the page full so I made duplicates to allow for goofs(boy, I?m glad I did that!) and added anything I thought I might use anywhere on the airplane. I wish I?d given a little more thought to placement as you need to cut the sheet to free up each group, and it is incredibly delicate. Fine, sharp, high-quality scissors worked better than razor blades.

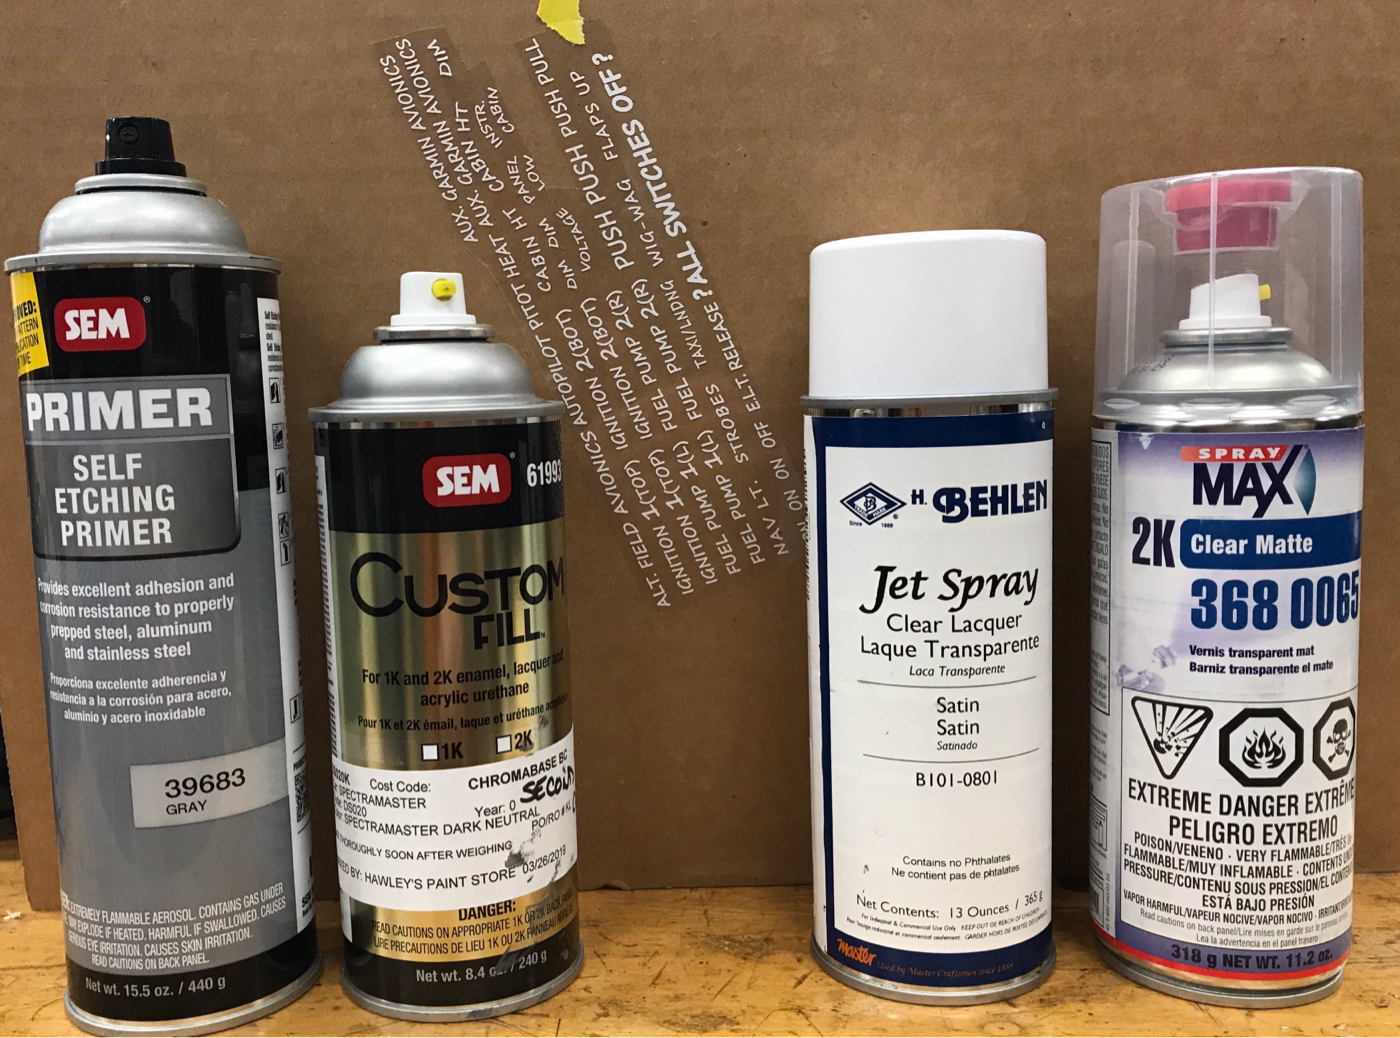
I had originally planned to use Alodine and powder-coat the base, but after quite a bit of experimentation with samples provided by Luann, I ended up using a five-step, rattle-can process whose components are pictured below. First, I applied a high-quality self-etching primer, followed by a flat, custom-mixed urethane base coat. After evenly buffing the surface with fine, wet scotch-bright, the graphics were carefully applied. The lettering adheres well but is delicate, so requires a protective clear coat. The local automotive paint shop recommended the two-part matte-finish clear on the right. You use the red plastic plug in the lid to pop a valve on the bottom of the can, releasing the hardener from a second chamber inside the spray can, and you then have 48 hours to use the product before it becomes solid inside the can. Unfortunately, testing proved that this product could cause the lettering to lift and wrinkle. At luann?s suggestion, I first sprayed a coat of satin lacquer to protect the lettering and seal the edges against intrusion of the epoxy clear coat. I later learned that the clear coat is also available in satin, but ended up liking the grainy texture of the matte surface, which is very low-glare and resistant to fingerprints.
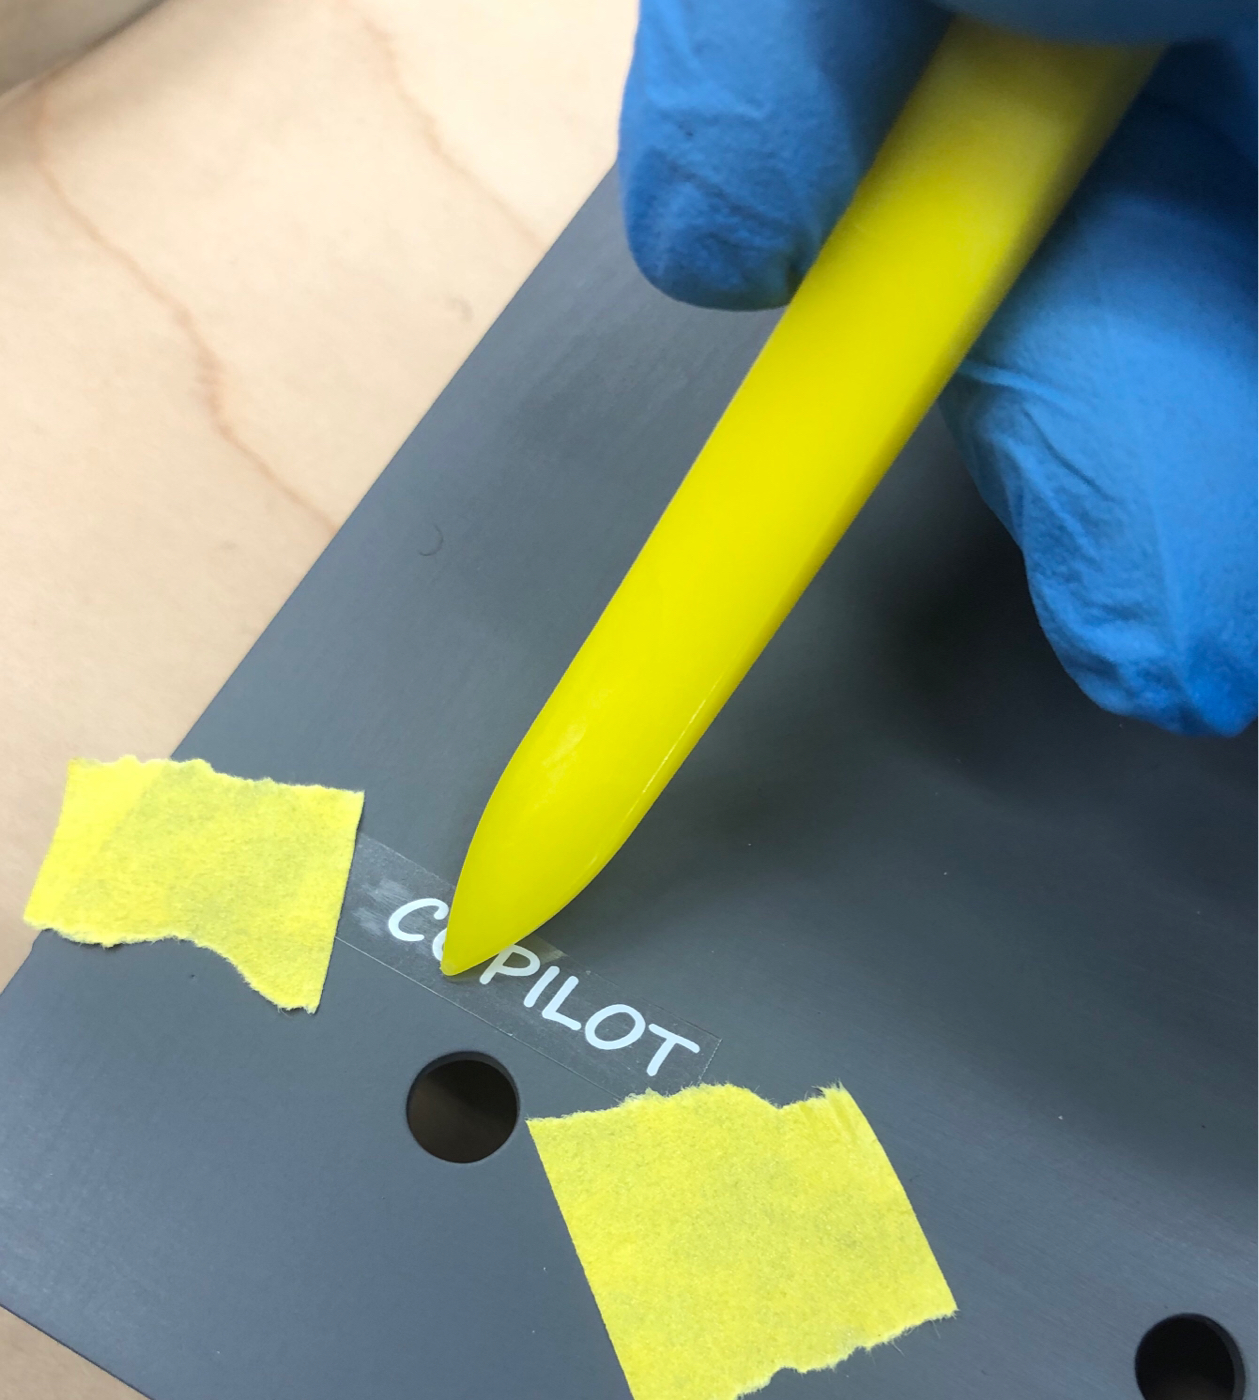
This photo shows a label being applied. After careful positioning secured with bits of masking tape, the plastic stylus provided with the graphics is used to rub down the lettering through the protective plastic on which it was printed. Positioning should be done quickly, as I had several larger groups lose letters if left sitting on the painted surface too long, possibly due to static attraction. This made me grateful to have backup copies, as the group had to be discarded and the errant letters tweezered off.
This shows some of the graphics after application of the lacquer clear coat. I was concerned that lacquer might not hold up well as the final surface coat.
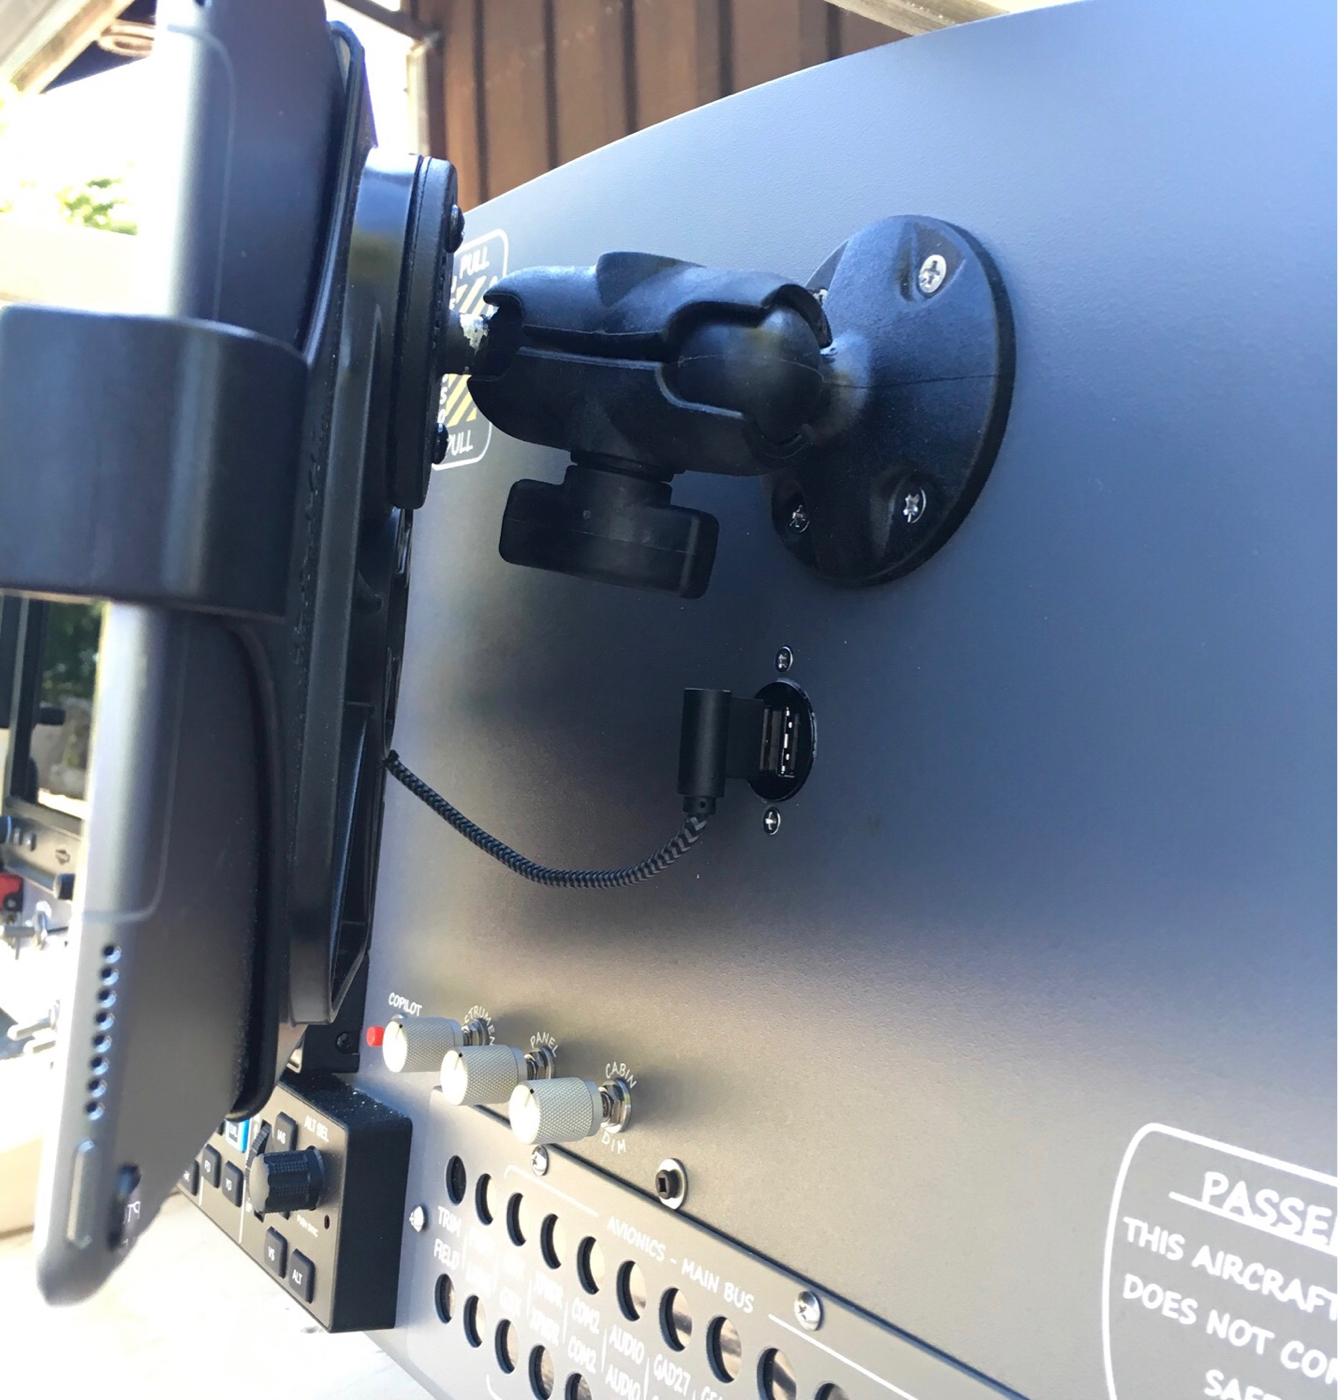
This shot gives an idea of the surface texture from the epoxy clear coat. (Off topic: Note the aviation grade dual USB outlet and the tidy angled charge cord I found to keep the iPad happpy. Second socket is available to passengers.)
Below (entirely off-topic)- the stand mimics aircraft structure and can be stood in four positions for harness wiring with remote LRU?s installed where they will be located on the aircraft.

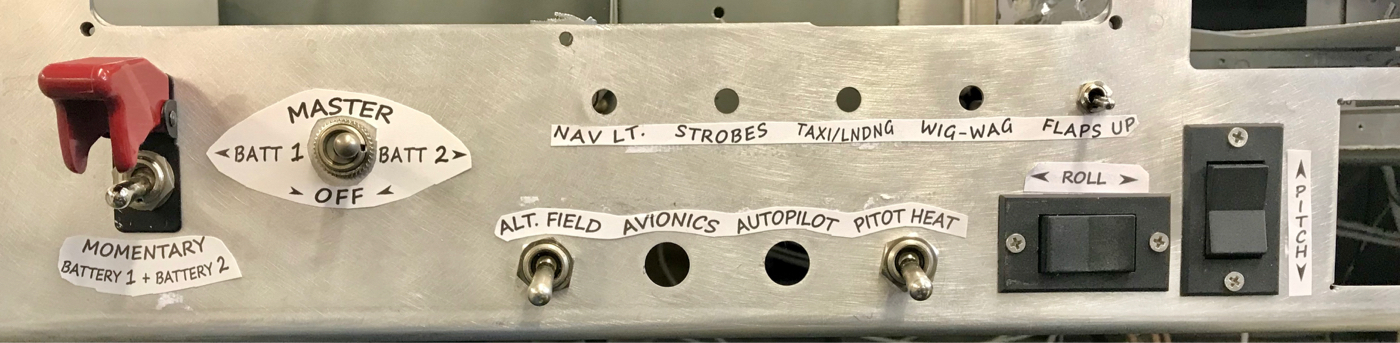
If anyone is curious about the unusual master switch and guarded momentary, see : http://www.vansairforce.com/community/showthread.php?t=170109&highlight=Redundancy
This detail shows the fine quality of the lettering, which is printed in lacquer inks in reverse on a clear plastic sheet, with a pressure sensitive, precision-printed adhesive as the final layer. The lettering is very delicate and thinner than hand-painted lettering would be, and the sheet is shipped taped loosely to an anti-stick backing material. (Off-topic: Note the little ?bezels? I made from 3/16? and 5/16? stainless steel washers for the switches by enlarging their holes with a die-grinder.)
The graphics for the breaker block, which I made removable for easy access to the wiring, took several hours because the spacing was so critical. Fortunately, Adobe Illustrator, the program I ultimately had to obtain and learn to use, provides for incredibly detailed alteration of individual letter heights and widths, and spaces themselves can be altered individually or in selected groups.
This photo shows how I fitted the lettering and grouped labels where possible for easy application by repeatedly printing and test-fitting samples. Regardless of the final color used, the graphics are done in black and the color is specified when ordering. I chose white on a dark gray base thinking it would ?pop? under my red panel flood light. The label groups were cutout of the full sheet and ultimately applied as shown here.
I?m not a graphics artist(if you know one, ask for help!) and so faced a steep learning curve. The graphics must be in an all-vector, Adobe Illustrator ( .ai) file format, which tracks the edges of the artwork rather than using pixels. I made the mistake of assuming that files generated from my trusty photo-processing app could be converted to .ai and put a lot of time into creating graphics that could not be used. Ultimately, I subscribed to Adobe Illustrator, paid a local graphics artist to give me a couple of hour?s training, and started over. In the end, that was a good thing as AI has some incredible abilities for curve-following text and detailed editing that proved indispensable.
This is what my final graphics submitted for printing looked like. You pay by the page, $175 for 8.5 x 11?, but just $20 more for 11x14?(in single color), which I chose to do. You can pack the page full so I made duplicates to allow for goofs(boy, I?m glad I did that!) and added anything I thought I might use anywhere on the airplane. I wish I?d given a little more thought to placement as you need to cut the sheet to free up each group, and it is incredibly delicate. Fine, sharp, high-quality scissors worked better than razor blades.
I had originally planned to use Alodine and powder-coat the base, but after quite a bit of experimentation with samples provided by Luann, I ended up using a five-step, rattle-can process whose components are pictured below. First, I applied a high-quality self-etching primer, followed by a flat, custom-mixed urethane base coat. After evenly buffing the surface with fine, wet scotch-bright, the graphics were carefully applied. The lettering adheres well but is delicate, so requires a protective clear coat. The local automotive paint shop recommended the two-part matte-finish clear on the right. You use the red plastic plug in the lid to pop a valve on the bottom of the can, releasing the hardener from a second chamber inside the spray can, and you then have 48 hours to use the product before it becomes solid inside the can. Unfortunately, testing proved that this product could cause the lettering to lift and wrinkle. At luann?s suggestion, I first sprayed a coat of satin lacquer to protect the lettering and seal the edges against intrusion of the epoxy clear coat. I later learned that the clear coat is also available in satin, but ended up liking the grainy texture of the matte surface, which is very low-glare and resistant to fingerprints.
This photo shows a label being applied. After careful positioning secured with bits of masking tape, the plastic stylus provided with the graphics is used to rub down the lettering through the protective plastic on which it was printed. Positioning should be done quickly, as I had several larger groups lose letters if left sitting on the painted surface too long, possibly due to static attraction. This made me grateful to have backup copies, as the group had to be discarded and the errant letters tweezered off.
This shows some of the graphics after application of the lacquer clear coat. I was concerned that lacquer might not hold up well as the final surface coat.
This shot gives an idea of the surface texture from the epoxy clear coat. (Off topic: Note the aviation grade dual USB outlet and the tidy angled charge cord I found to keep the iPad happpy. Second socket is available to passengers.)
Below (entirely off-topic)- the stand mimics aircraft structure and can be stood in four positions for harness wiring with remote LRU?s installed where they will be located on the aircraft.
If anyone is curious about the unusual master switch and guarded momentary, see : http://www.vansairforce.com/community/showthread.php?t=170109&highlight=Redundancy

