All the comments here are great and should help you to get good results. I can add a few additional tidbits and other ideas.
Vacuum pumps: A diaphragm airbrush compressor can be configured to be a vacuum pump for small projects. It won't pull a great vacuum, but its good enough for many applications.
In our shop we have two vacuum pumps. One is a cheap surplus medical vacuum pump that I got on ebay for less than $50 a long time ago. It is just one step up from the airbrush compressor approach. It is fitted with a vacuum gauge and a needle valve bleed port to allow us to regulate vacuum, and a small surplus tank (it was a Freon tank for charging air conditioners) to act as a reservoir.
A vacuum regulator (needle valve) is needed if you make simple molds from beaded polystyrene foam, or expanded polystyrene foam, since those foams have compression strength low enough that too much vacuum will compress/distort the mold. We regulate the vacuum to about 12--14 in. hg.
The reservoir is optional, but it allows you to get small to medium sized bags sucked down fast, which can be helpful to keep all the layup in proper position, to find leaks quicker, etc.
Our other vacuum pump is a large high-capacity pump plumbed into a 30 gallon tank for a reservoir. We use this system for big layups like wing skins, fuselage skins, etc.
Consumables:
Peel ply: If you get polyester interfacing material from a yardage store, try and select a cloth that has a good sheen to it. fabrics with a dull finish are much harder to peel off.
Perf-ply: at one time we made our own perf ply by getting ultra-light drop-cloth material (1/2 mil polyethylene) and drilling 1/16" holes in it when it was all folded up into a small patch so just a few dozen holes would cover a whole sheet. But this is a ridiculous waste of time -- real perf ply is not THAT expensive, and we often can re-use it.
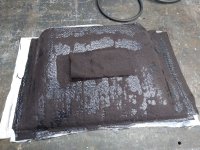
Bleeder: polyester quilt batting works pretty well. polyester flannel will work fine, you probably want to use several layers.
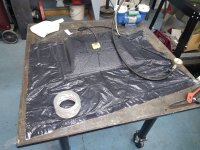
Bags: It is helpful to use clear bags so you can see what's going on inside. For small parts, we have 18" square bags that are easily closed with a special bag-closing clamp, not sure what else to call it. It has a nylon rod about 1/4" diameter, and a mating sheath that goes about 3/4 the way around the circumference of the rod. you sandwich the open end of the bag between the rod and the sheath and snap them together.
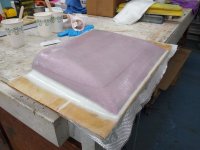
For big layups you have to seal a sheet of plastic down to a table. There is special stretchy vacuum bagging film for this if you have compound curves, its called Stretchalon. It is kind of pricey, so you may just want to stick to polyethylene drop cloths, 1 or 2 mil thick. To get a good seal around the perimeter of the bag, taping it down with packing tape or 2-sided tape will give mediocre results but may get you by. Or, buy the special sealant tape. It is about 3/8" wide, 1/8" thick, super-sticky urethane rubbery material that comes as a roll with a paper backing like 2-sided tape. We have found it best to put the sealant tape on the bag first (do this in advance of doing the layup), and then seal it down to the table. Warning, it won't stick where there is any wet epoxy, so mask off the area of the table where you plan to stick the bag down. When you are ready to stick the bag down, clean the perimeter area with acetone, peel up the masking tape and stick the sealant tape down. It is also handy to build in some "darts", like expansion joints to help keep the bag "baggy" as you work around the perimeter. If it starts getting too tight, just put in another dart. (hope that makes sense)
To easily connect the vacuum hose to the bag, you can buy a special re-usable tap. It has a portion that you put inside the bag, then cut a small slit and put the external piece through the slit and it seals against a gasket when you turn it a 1/4 turn, locking it together with the part that went inside.
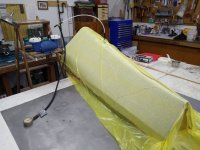
Lay-up tricks: If you have inside corners that you want really crisp and sharp, start with a thickened resin paste in the corners. Depending on application, this might be mostly microballoons, or cotton-flock and Cabosil, or even something like bondo. Then lay up your cloth over that. The vacuum can push the cloth down pretty well into the corner, but probably not all the way into a sharp edge, so the filler paste will form that for you.
For external corners, vacuum bagging should give you nice crisp edges. Depending on the details of the shape, there can sometimes be a problem where the bag will actually pull the cloth up off the mold surface at a corner and form a kind of tag of cloth. This can be really frustrating and the solution is very case-dependent.